Advertisement
Quick Links
PA-455-5G
1
Before You Begin
Use this document to install and begin setting up your Palo Alto Networks PA-455-5G Next-Generation firewall. Refer to the
PA-400 Series Next-Gen Firewall Hardware Reference at
specifications, and more detailed procedures for installing the firewall.
◼
Verify that the installation site has adequate air circulation and AC power.
◼
Have a #1 Phillips-head screwdriver available.
◼
Unpack the equipment and verify that you received the following items:
Qty
Description
1
PA-455-5G Next-Generation Firewall.
1
AC/DC Power Adapter.
1
Power Cord, AC, North America, 10A/125V, 75C, 1.8M, St., SVT, NEMA-5-15P (YP-12) to IEC-C13 (YC-12).
1
Shielded RJ-45 CAT6 Ethernet cable for management (MGT) port access.
1
USB to Micro USB Console Cable.
1
8AWG Dual-hole Ground Lug.
1
SIM Card Tweezer.
1
Limited Warranty.
1
End User Agreement (EULA).
1
China RoHS declaration.
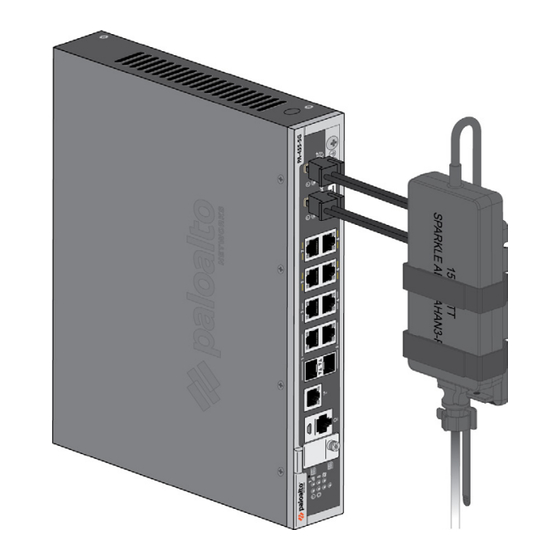
2
Install the Firewall Antennas
The PA-455-5G supports four multi-band antennas that must be installed before you install the firewall in an equipment rack.
Before installation, it is recommended that you conduct a cellular location assessment of the installation site to receive the best signal
strength.
1
Remove the SMA connector covers located on the back panel of the device.
2
Secure the antennas to the SMA connectors.
3
Rotate the antennas at 180-degree movement about the SMA connectors. Tighten the antennas by hand.
4
Adjust the antenna orientation to receive the optimal signal strength in your environment.
If installing the firewall on a flat surface, it is recommended that you orient the antennas upright and slanted slightly outwards, not
exceeding 45-degrees, to improve the signal quality.
Ensure that power cables do not cross over the antennas as this can cause signal quality distortion and antenna performance degradation.
docs.paloaltonetworks.com
https://docs.paloaltonetworks.com/hardware
for safety information,
1)
(Figure
2)
(Figure
Figure 1
3
Install the Firewall
There are three ways to install the PA-455-5G firewall:
◼
On a flat surface
◼
On a wall
◼
In a 19" equipment rack
Install the Firewall on a Flat Surface
The PA-455-5G firewall ships with rubber "feet" attached to the bottom of the device. The firewall can be set horizontally
upon a flat surface.
Page 1 of 4
Quick Start Guide
Figure 2
Advertisement

Related Manuals for PaloAlto Networks PA-455-5G


Summary of Contents for PaloAlto Networks PA-455-5G
- Page 1 ◼ In a 19” equipment rack Install the Firewall on a Flat Surface The PA-455-5G firewall ships with rubber “feet” attached to the bottom of the device. The firewall can be set horizontally upon a flat surface. docs.paloaltonetworks.com Page 1 of 4...
- Page 2 PA-455-5G QUICK START GUIDE (CONTINUED) Install the Firewall on a Wall Temporarily secure the Wall Mount Template (on this page) to the wall where you intend to mount the firewall and use it to mark the location 3) Use a pointed object to punch through the paper and visibly mark the wall; then remove the for each of the four wall-mount screws.
- Page 3 The rack kit (PAN-1RU-SMALL-RACK4) is not included with the firewall and must be purchased separately. The mounting equipment takes up 1RU of space. One rack kit holds a single PA-455-5G. Slide one of the adjustable mounting brackets into one of the fixed mounting brackets to create a mounting rail. Repeat for the second mounting rail.
- Page 4 (12-digit number identified as S/N) and claim key (8-digit number). These numbers are on stickers attached to the back of the device. (Optional) Repeat Steps 1 and 2 for a second power adapter. The PA-455-5G can use an optional second power adapter for redundancy.
Need help?
Do you have a question about the PA-455-5G and is the answer not in the manual?
Questions and answers