
Related Manuals for Lumber Jack BS200P


Summary of Contents for Lumber Jack BS200P
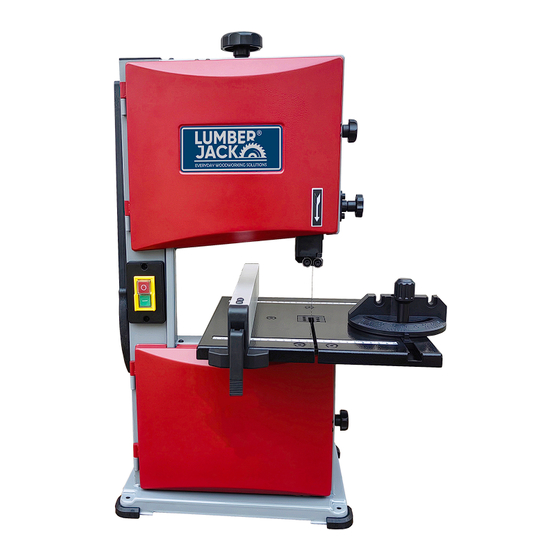
- Page 1 SAFETY AND OPERATING MANUAL 8" Professional Bench Top Bandsaw BS200P O RIGINAL INSTRUCTIONS BS200P...
-
Page 2: Product Specifications
PRODUCT SPECIFICATIONS Attention: Please choose proper power source, voltage and frequency that are shown in the label for your bandsaw. BS200P Motor Power 300W Throat Width 200mm Cutting Capacity 85mm 50Hz 980 m/min Cutting Speed 60Hz 1180m/min Blade Size 1400 mm(Length) x 3-10mm(Width) -
Page 3: Additional Safety Rules For Tool
11. Do not abuse the cord. Never carry the tool by the cord or yank it to disconnect it from the socket, Keep the cord away from heat, oil and sharp edges. 12. Use a push stick. Use a push stick to feed the workpieces. It is safer than using your hand. 13. -
Page 4: Electrical Requirements
Do not use saw blades manufactured from high speed steel. To reduce the emitted noise, always make sure that the blade is sharp and clean. 10. Do not cut metals such as nails and screws. Inspect for and remove all nails, screws and other foreign matter from the workpiece before operation. -
Page 5: Accessories And Attachments
GUIDELINES FOR EXTENSION CORDS USE PROPER EXTENSION CORD. Make sure your extension cord is in good condition. When using an extension cord, be sure to use one heavy enough to carry the current your product will draw. An undersized cord will cause a drop in line voltage, resulting in loss of power and cause overheating. - Page 6 TABLE OF LOOSE PARTS Unpack carton; check your machine to see parts listed below: Bandsaw Table assembly Fence Push stick Mitre gauge Clamp plate Lock handle 2pcs Feet 4pcs Hex wrench (3mm, 4mm) 2pcs...
-
Page 7: Installation
INSTALLATION 1. Attach the foot to bandsaw Attach four feet to the corners of bandsaw base. Place the bandsaw on a workbench for next assembly. Foot 2. Mounting table assembly Remove the two flat head screws, U plate and wing nuts on the saw table. ... - Page 8 3. Fix the bandsaw to a workbench by using four self-tapping screws (not provided). Place the fence and mitre gauge onto the table. Place push stick onto the screw fixed side of the bandsaw frame. Push stick Mitre gauge Fence Self-tapping screw ADJUSTING WARNING: Always be sure that the tool is switched off and unplugged before any adjustments.
- Page 9 Aligning the saw blade_ If the saw blade does not run in the center of the rubber tyre, the tracking needs to be corrected by adjusting the tilt of the upper bandsaw wheel. Turn the cover locking knob counterclockwise until its end position, open the upper and lower cover. Loosen the tracking lock knob, manually rotate the upper wheel, taking care not to touch the blade.
-
Page 10: Saw Blade
Upper blade guide adjustment The height of blade guide needs to be adjusted: prior to every cutting/operation, to accommodate the height of work piece (the upper blade guide should be set approx. 3mm above the workpiece). Set upper blade guide with the adjusting knob to the desired height by loosening the locking knob. After ... - Page 11 (A). Changing the bandsaw blade. Warning: Saw blade is dangerous. Be sure to wear gloves when handing the saw blade in situations such as removing from packaging, mounting or replacing blade. Remove the two flat head screws, U plate and wing nuts on the saw table. ...
-
Page 12: Mitre Gauge
OPERATIONS Warning: to reduce the risk of personal injury, the following safety recommendations should be observed when operating the saw. Do not touch the saw blade when cutting. During saw operation, wear safety glasses, but do not wear gloves. ... -
Page 13: Maintenance
Sawing Set upper blade guide 3mm above the workpiece. Place workpiece on the table. Plug in. Start saw. Cut workpiece in a single pass. Switch off if no further cutting is to be done immediately afterwards. ... -
Page 14: Assembly Diagram
Assembly Diagram... - Page 15 Description QTY. Description QTY. Blade tension knob Cover locking bracket Bushing Self threading screw Spring Cover locking knob Pulling plate 6mm Flat washer M10 Hex nut M6 Lock nut Bevel support block Locking plate Upper wheel shaft Pinion Support bracket Bushing 8mm Retaining ring M4X6 Set screw...
- Page 16 Description QTY. Description QTY. M6 Hex nut 6mm Lock washer M4X8 Pan head screw 6mm Flat washer Lower guard 5X5X15mm Key M6X8 Socket head screw Left threading screw 6mm Flat washer 6mm Flat washer Lower guide base Lower wheel Bearing support block Lower cover Shaft Upper cover...
-
Page 17: Declaration Of Conformity
TOOLSA VE LTD Unit C, Manders Ind. Est., Old Heat h Road, Wolverhampton, WV1 2RP. Declare that the product: Designation: 8" Professional Bandsaw Model: BS200P Standards & technical specifications referred to: EN 61029-1:2009+A11 EN 61029-2-5:2011+A11 Authorised Technical File Holder: Bill Evans...
Need help?
Do you have a question about the BS200P and is the answer not in the manual?
Questions and answers