3Com OfficeConnect 3CRWE454A72 User Manual
Wireless 11a/b/g access point
Hide thumbs
Also See for OfficeConnect 3CRWE454A72:
- Installation manual (2 pages) ,
- Technical brief (6 pages)

Related Manuals for 3Com OfficeConnect 3CRWE454A72


Summary of Contents for 3Com OfficeConnect 3CRWE454A72
-
Page 1: User Guide
OfficeConnect ® Wireless 11a/b/g Access Point User Guide 3CRWE454A72 http://www.3com.com/ Part No. DUA0045-4AAA02 Rev. 01 Published November 2003... - Page 2 Software is delivered as “Commercial Computer Software” as defined in DFARS 252.227-7014 (June 1995) or as a “commercial item” as defined in FAR 2.101(a) and as such is provided with only such rights as are provided in 3Com’s standard commercial license for the Software. Technical data is provided with limited rights only as provided in DFAR 252.227-7015 (Nov 1995) or FAR 52.227-14 (June 1987), whichever is applicable.
-
Page 3: Table Of Contents
Safety Information Positioning the Access Point Using the Rubber Feet Wall Mounting Powering Up the Access Point Connecting the Access Point UNNING THE ETUP IZARD Accessing the Wizard LAN Settings CCESS OINT ONFIGURATION Navigating Through the Access Point Configuration Pages... - Page 4 WDS (Wireless Distributed System) Password System Tools Reboot Configuration Tools Firmware Upgrade ROUBLESHOOTING Basic Connection Checks Browsing to the Access Point Configuration Screens Forgotten Password and Reset to Factory Defaults Wireless Networking Alert LED Recovering from Corrupted Software Frequently Asked Questions SING ISCOVERY...
- Page 5 IP Addresses and Subnet Masks How does a Device Obtain an IP Address and Subnet Mask? DHCP Addressing Static Addressing Auto-IP Addressing ECHNICAL PECIFICATIONS Standards AFETY NFORMATION OFTWARE ICENSE GREEMENT LOSSARY NDEX EGULATORY OTICES FOR THE IRELESS CCESS OINT...
-
Page 7: About This Guide
Category 3 and Category 5 Twisted Pair Cables are referred to as Twisted Pair Cables throughout this guide. The PC used to configure the Access Point is referred to as the “admin computer”. 3Com recommends that during the initial configuration that... -
Page 8: Conventions
Press Ctrl+Alt+Del Words in italics Italics are used to: Emphasize a point. Denote a new term at the place where it is defined in the text. Identify menu names, menu commands, and software button names. Examples: From the Help menu, select Contents. -
Page 9: Related Documentation
In addition to this guide, each Access Point document set includes one Documentation Installation Guide. This guide contains the instructions you need to install and configure your Access Point. Product Registration You can now register your Access Point on the 3Com web site and receive up-to-date information on your product: http://esupport.3com.com... - Page 10 BOUT UIDE...
-
Page 11: Introducing The Access Point
Welcome to the world of networking with 3Com . In the modern business environment, communication and sharing information is crucial. Computer networks have proved to be one of the fastest modes of communication but, until recently, only large businesses could afford the networking advantage. The OfficeConnect ®... -
Page 12: Officeconnect Wireless 11G Access Point
A single Access Point makes the Internet, e-mail and network resources, such as printers, available to dozens of wireless clients. Because the Access Point is a WI-FI certified device, you can be sure it will work reliably with certified equipment from other manufacturers. -
Page 13: Access Point Advantages
Four rubber feet One Ethernet cable One CD-ROM containing the Access Point Discovery program and this User Guide Installation Guide One Support and Safety Information Sheet One Warranty Flyer If any of these items are missing or damaged, please contact your retailer. -
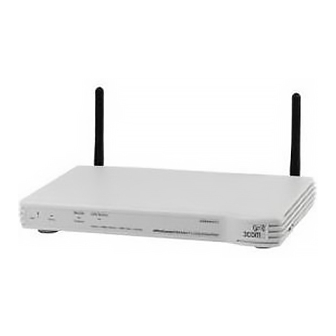
Page 14: Minimum System And Component Requirements
4.7 or higher, Internet Explorer 5.0 or higher, or Mozilla 1.2.1 or higher. Front Panel The front panel of the Access Point contains a series of indicator lights (LEDs) that help describe the state of various networking and connection operations. - Page 15 3 Wireless LAN (WLAN) Status LEDs Yellow There are two LEDs, one for 11a and one for 11g. If an LED is flashing it indicates that wireless networking is enabled. The LED is flashing shows that data is being transmitted or received. If the LED is off, the Wireless LAN has been disabled in the Access Point, or there is a problem.
-
Page 16: Rear Panel
7 Power Adapter OK LED Green Indicates that the power adapter is supplying Power to the Access Point. If the LED is off, there may be a problem with the power adapter or adapter cable. 8 Ethernet Port Use the supplied patch cable to connect the Access Point to the LAN. The port will automatically adjust to the correct speed and duplex. -
Page 17: Hardware Installation
Access Point. A suitable location might be on top of a high shelf or similar furniture to optimize wireless connections to computers in... -
Page 18: Using The Rubber Feet
You will need two suitable screws to wall mount the unit. To do this: 1 Ensure that the wall you use is smooth, flat, dry and sturdy and make two screw holes which are 150 mm (5.9 in.) apart. -
Page 19: Powering Up The Access Point
1 Insert one end of the supplied Ethernet (RJ-45 Category 5) cable into the LAN port on the rear panel of the Access Point. 2 Insert the other end of the cable into the RJ-45 port on switch or hub. Check that the LAN status LED lights on the Access Point. - Page 20 2: H HAPTER ARDWARE NSTALLATION...
-
Page 21: Running The Setup Wizard
If, however, you do configure the Access Point from a wireless admin computer DO NOT change the wireless configuration, or you risk losing contact with the Access Point. Yout wireless NIC should be set as follows: Encryption — none Service Area Name/SSID — 3Com... - Page 22 IZARD Figure 5 Discovery Welcome Screen 3 When the Welcome screen is displayed, select the NIC from which the Access Point will be discovered. Then click on Next and wait until the application discovers the Access Points connected to your LAN.
- Page 23 Accessing the Wizard Figure 7 Discovery Finish Screen 5 Click on Finish to launch a web browser and display the login page for the Access Point as shown in Figure 6 To log in, enter the password (the default setting is admin) in the System...
- Page 24 UNNING THE ETUP IZARD 7 If the password is correct, the Country & Mode Selection screen appears. (Figure 8 Select the country in which the Access Point is to operate. The Country Selection screen is only displayed on initial configuration of the Access Point.
- Page 25 Accessing the Wizard Figure 10 Welcome Screen Figure 11 Setup Wizard...
- Page 26 UNNING THE ETUP IZARD 1 Select channels for the Access Point to use or Auto if you want the Access Point to choose an unused channel on start-up. 2 Enter a Service Area Name/SSID. The Service Area Name default for 3Com products is “3Com”. Up to 32 (case sensitive) characters can be entered for the Service Area Name.
-
Page 27: Lan Settings
IP address of the Access Point. This screen displays a suggested LAN IP address, subnet mask and default gateway of the Access Point. It also allows you to change the IP address, subnet mask and default gateway. 3Com recommends that you manually assign your Access Point a static IP... - Page 28 3: R HAPTER UNNING THE ETUP IZARD...
-
Page 29: Point Configuration
30. When you click on a topic from the main menu, that page will appear in the main part of the screen. If there are more option for the menu selection then these will appear under the original menu option. -
Page 30: Status Page
4: A HAPTER CCESS OINT ONFIGURATION Status Page Figure 13 Access Point Status Screen The Status section allows you to view the IP address of the unit, firmware version, wireless clients and security log. -
Page 31: Wizard
Status Page Wizard Figure 14 Wizard Screen Click WIZARD... to launch the configuration wizard. Refer to Chapter 3 for information on how to run the wizard. -
Page 32: Lan Settings
LAN Settings The LAN Settings menu provides the following options: The LAN Settings screen is used to determine how the LAN IP address of your Access Point is obtained. It can be obtained automatically (dynamic IP) or you can manually configure the IP address (static IP). -
Page 33: Wireless Settings
Wireless Settings Manually setting the IP address 3Com recommends that you assign your Access Point a static IP address. 1 Select LAN and then select Static IP Address (to be specified manually). The screen shown in Figure 16 is displayed. - Page 34 Point will transmit and receive on. If another Access Point nearby is using the same channels as you, there will be a reduction in the performance of your network. If this seems to be the case, you should select a different channel number.
-
Page 35: Encryption
SSID and attempting to connect to your network. If you have a wireless client that can detect all the available SSIDs in your area, your client will not list the Access Point SSID when this feature is enabled. -
Page 36: Configuring Encryption
CCESS OINT ONFIGURATION WEP — Wireless Equivalent Privacy (WEP) is a 64 bit or 128 bit encryption method with user configurable fixed keys. WPA provides a higher level of security, provided by its longer key and dynamic changes made to the key over time. 3Com recommends that you use WPA with any clients which support it. -
Page 37: Configuring Wpa Encryption
The only configuration that is needed for WPA is to enter the pre-shared Encryption key. This key is used to start the dialog between the Access Point and the client. During this dialog, a new key is agreed, making it more difficult to eavesdrop on wireless networks encrypted using WPA, than those encrypted using WEP. -
Page 38: Configuring Wep Encryption
A Key is a hexadecimal (0-9, A-F) number used to encrypt and decrypt the data. There can be up to 4 keys and each key can be as long as 26 digits. The Access Point also offers a method for converting plain text into hex keys. -
Page 39: Access Control
Some wireless adapters have only one key available on their WEP configuration page. If this is the case ensure it is the same as Key 1 on the Access Point and that it is selected as the active transmit key. - Page 40 2 Select Allow for the Access Rule. 3 Enter upto 32 MAC addresses that you want to allow access to the network. This list can also be used as a deny list. If this is the required function select Deny as the Access Rule.
-
Page 41: 802.1X Authentication
802.1X Figure 22 802.1X Authentication In order to use the 802.1X feature you need to have a RADIUS server on your LAN. To set this up you will need to enter details of your RADIUS server into the fields. -
Page 42: Wds (Wireless Distributed System)
The SSIDs and security settings also need to be the same. The option is also given to choose if you wish to use 11a or 11g channels to connect access points. -
Page 43: Password
3 Enter the new password again in the Re-Enter Password field 4 Click Apply to save the new password The password is case sensitive. If you have forgotten your password you need to reset the Access Point. “Forgotten Password and Reset to Factory Defaults” page 50... -
Page 44: System Tools
Access Point by selecting Reboot the Access Point and then clicking Apply, simulating the effect of power cycling the unit. No configuration information will be lost but the log files will be erased. Any network users who are currently connected to the Access Point will have their access... -
Page 45: Configuration Tools
Select Restore from Store Configuration File. Reset to Factory Default If you want to reset the settings on your Access Point to those that were loaded at the factory, select Restore OfficeConnect to Factory Defaults. You will lose all your configuration changes. The Access Point reverts to a DHCP client and will therefore restart requiring a new IP address. -
Page 46: Firmware Upgrade
3Com may make available. To install new software, you first need to download the software from the 3Com support web site to a folder on your computer. Once you have done this, select Browse to tell your web browser where this file is on your computer, and then click Apply. -
Page 47: Troubleshooting
System Tools upgrade procedure; if you do, the software may be corrupted and the Access Point may not start up properly afterwards. If the Alert LED comes on continuously after a failed upgrade, refer to Chapter “Troubleshooting”. - Page 48 4: A HAPTER CCESS OINT ONFIGURATION...
-
Page 49: Basic Connection Checks
Some network interfaces may not be correctly initialised until the start-up procedure has completed. If the link status LED does not illuminate for the LAN port, check that you do not have a faulty cable. Try a different cable. Check also that the Uplink/Normal switch on the hub or switch is in the correct position. -
Page 50: Forgotten Password And Reset To Factory Defaults
IP address it has been allocated from the DHCP server. If there is no DHCP server on your network, the DISCOVERY software changes the IP address of the Access Point so that it is in the same subnet as your admin computer. - Page 51 If you have a wired and wireless NIC in the same computer, ensure that the wired NIC is disabled. Check the status of the Access Point Wireless LED, it should be lit if wireless is enabled and will flash when there is wireless activity. If not lit go to “Wireless Settings”...
-
Page 52: Alert Led
Corrupted Software that the system software has become corrupted. In this condition, the Access Point will enter a “recovery” state. Follow the instructions below to upload a new copy of the system software to a Access Point unit in this state. -
Page 53: Frequently Asked Questions
Frequently Asked Questions Ensure that one of your computers has a copy of the new software image file stored on its hard disk or available on CD-ROM. The latest software is available on 3Com’s Web site at: www.3com.com. 1 Remove power from the Access Point and connect the admin computer to the LAN port. - Page 54 What other online resources are there? The 3Com Knowledgebase at: http://knowledgebase.3com.com is a database of technical information covering all 3Com products. It is updated daily with information from 3Com technical support services, and it is available 24 hours a day, 7 days a week.
-
Page 55: Using
Access Point on the network. Application If you are unable to use the Discovery application, the Access Point on initial power-up will attempt to obtain an IP address from your local DHCP server. Consult your DHCP Server log to obtain the IP address that was allocated to your Access Point. - Page 56 Discovered Devices screen. Highlight the Wireless 11g Access Point by clicking on it, and press Next. Figure 15 Discovery Finish Screen 4 Click on Finish to launch a web browser and display the login page for the Access Point.
-
Page 57: Ip Addressing
However, an IP Address alone is not enough to make your device operate. In addition to the IP address, you need to set a subnet mask. All networks are divided into smaller sub-networks and a subnet mask is a number that enables a device to identify the sub-network to which it is connected. - Page 58 B: IP A PPENDIX DDRESSING For your network to work correctly, all devices on the network must have: The same sub-network address. The same subnet mask. The only value that will be different is the specific host device number. This value must always be unique.
-
Page 59: How Does A Device Obtain An Ip Address And Subnet Mask
Mask? Static Addressing Automatic Addressing (Auto-IP Addressing) DHCP Addressing The Acces Point can obtain an address from a DHCP server on the current network.. Static Addressing You must enter an IP Address and the subnet mask manually on every device. Using a static IP and subnet mask means the address is permanently fixed. - Page 60 B: IP A PPENDIX DDRESSING...
-
Page 61: T Echnical S Pecifications
LAN connection - 10Mbps/100Mbps dual speed Ethernet port (10BASE-T/100BASE-TX) WLAN Interfaces Standard IEEE 802.11a, Orthogonal Frequency Division Multiplexing (OFDM) Transmission rate: 54Mbps, automatic fallback to 48, 36, 24, 18, 12, or 6 Mbps Maximum channels: 20 Range up to 304.8m (1000ft) Frequency: (US/Canada/Europe) 5.150-5.825 GHz Sensitivity: 6, 12, 18, 24, 36, 48 Mbps: -85 dBm;... -
Page 62: Standards
Maximum channels: 14 Range up to 304.8m (1000ft) Frequency: (US/Canada/Europe) 2.400-2.4835 GHz Sensitivity: 1, 2, 5.5 Mbps: -85 dBm; 11 Mbps -82 dBm typical Modulation: CCK, BPSK, QPSK Encryption: 40/64 bit WEP, 128 bit WEP, 256 bit WPA Maximum clients: 128... - Page 63 Windows 2000 Windows XP Mac OS 8.5 or higher Unix Ethernet Performance The Access Point complies to the IEEE 802.3i, u and x specifications. Wireless Performance The Access Point has been designed to conform to the Wi-Fi interoperability test standard.
- Page 64 Cable Specifications The Access Point supports the following cable types and maximum lengths: Category 3 (Ethernet) or Category 5 (Fast Ethernet or Dual Speed Ethernet) Twisted Pair — shielded and unshielded cable types. Maximum cable length of 100m (327.86 ft).
- Page 65 WARNING: The Access Point generates and uses radio frequency (rf) energy. In some environments, the use of rf energy is not permitted. The user should seek local advice on whether or not rf energy is permitted within the area of intended use.
- Page 66 Verwendung von Funkfrequenz in dem Bereich, in dem der Bluetooth Access Point eingesetzt werden soll, erlaubt ist. VORSICHT: Bei der Installation und beim Ausbau des Geräts ist mit höchster Vorsicht vorzugehen. VORTSICHT: Stapeln Sie das Geräts nur mit anderen OfficeConnect Gerätes zusammen.
- Page 67 électrique remis avec cet appareil. AVERTISSEMENT: La prise secteur doit se trouver à proximité de l’appareil et son accès doit être facile. Vous ne pouvez mettre l’appareil hors circuit qu'en débranchant son cordon électrique au niveau de cette prise.
- Page 68 AVERTISSEMENT: Il n’y a pas de parties remplaceables par les utilisateurs ou entretenues par les utilisateurs à l’intérieur du moyeu. Si vous avez un problème physique avec le moyeu qui ne peut pas être résolu avec les actions de la résolution des problèmes dans ce guide, contacter votre fournisseur.
- Page 69 Technical Data. In addition to the above, the Product may not be used, exported or re-exported (i) into or to a national or resident of any country to which the U.S. has embargoed; or (ii) to any one on the U.S. Commerce Department's Table of Denial Orders or the U.S. Treasury Department's list of Specially Designated Nationals.
- Page 70 The Software is delivered as "Commercial Computer Software" as defined in DFARS 252.227-7014 (June 1995) or as a commercial item as defined in FAR 2.101(a) and as such is provided with only such rights as are provided in this Agreement, which is 3Com's standard commercial license for the Software.
- Page 71 802.11a The IEEE specification for wireless Ethernet which allows speeds of up to 54 Mbps in the 5GHz range. The standard provides for 6, 12, 24, 36, 48 and 54 Mbps data rates. The rates will switch automatically depending on range and environment 802.11b...
- Page 72 The order of preference (best first) is: 100BASE-TX full duplex, 100BASE-TX half duplex, 10BASE-T full duplex, and 10BASE-T half duplex. Auto-negotiation is defined in the IEEE 802.3 standard for Ethernet and is an operation that takes place in a few milliseconds. Bandwidth The information capacity, measured in bits per second, that a channel can transmit.
- Page 73 IP addresses, so that when a domain name is requested (as in typing “3com.com” into your Internet browser), the user is sent to the proper IP address. The DNS server address used by the computers on your home network is the location of the DNS server your ISP has assigned.
- Page 74 Infra-structure mode Infra-Structure mode is the 802.11g configuration supported by the Access Point. You will need to ensure all of your clients are set up to use infra-structure mode in order for them to communicate with the Access Point. (see also Ad Hoc mode) Internet Protocol.
- Page 75 A subnet mask, which may be a part of the TCP/IP information provided by your ISP, is a set of four numbers configured like an IP address. It is used to create IP address numbers used only within a particular network (as opposed to valid IP address numbers recognized by the Internet, which must assigned by InterNIC).
- Page 76 TCP relates to the content of the data travelling through a network — ensuring that the information sent arrives in one piece when it reaches its destination. IP relates to the address of the end station to which data is being sent, as well as the address of the destination network.
- Page 77 WLAN Wireless Local Area Network. A WLAN is a group of computers and devices connected together by wireless in a relatively small area (such as a house or office). Wi-Fi Protected Access. A dynamically changing encryption mechanism for wireless networking. Encryption strength is 256 bit.
- Page 78 LOSSARY...
- Page 79 Cable Specifications 64 Channels 81 Configuration backup 45 Password 23, 43 restore 45 Conventions notice icons, About This Guide 8 text, About This Guide 8 Reset to Factory Defaults 45, 50 Country Selection 24 Restart 44 DHCP 59 Setup Wizard 21, 31...
- Page 80 NDEX authorised PCs 40 channel selection 34 configuration 33 connection control 39 encryption 35 LED 15 networking 50 NIC 14 service area name 34 settings 33...
- Page 81 1–14 Japan FCC Statement This equipment has been tested and found to comply with the limits for a Class B digital device, pursuant to Part 15 of the FCC Rules, and the Canadian Department of Communications Equipment Standards entitled, “Digital Apparatus,” ICES-003. These limits are designed to provide reasonable protection against harmful interference in a residential installation.
- Page 82 If this equipment does cause interference to radio or television reception, User which can be determined by turning the equipment off and on, the user is encouraged to try to correct the interference by one or more of the following measures: Reorient the receiving antenna.
- Page 83 3Com OfficeConnect Wireless 11g Access Point is far below the FCC radio frequency exposure limits. Nevertheless, the 3Com OfficeConnect Wireless 11g Access Point shall be used in such manner that the potential for human contact during normal operation is minimized. The distance between the antennas and the user should not be less than 20 cm.
- Page 84 RF Exposure CAUTION: The 3Com OfficeConnect Wireless 11g Access Point has been Compliance certified as a mobile computing device as per FCC Section 2.1091. In Statement (U.S.) order to comply with the FCC RF exposure requirements, the 3Com OfficeConnect Wireless Cable/DSL Gateway must only be installed with approved antennas and a minimum separation distance of 20 cm (8 in) must be maintained from the antenna to any nearby persons.
- Page 86 3Com Corporation, Corporate Headquarters, Copyright © 2003 3Com Corporation. All rights reserved. 5500 Great America Parkway, Santa Clara, 3Com and OfficeConnect are registered trademarks of CA 95052-8145, USA. 3Com Corporation. All other company and product names may be trademarks of their respective companies.
Need help?
Do you have a question about the OfficeConnect 3CRWE454A72 and is the answer not in the manual?
Questions and answers