
Related Manuals for Diono LiteClik 30 XT SafePlus


Summary of Contents for Diono LiteClik 30 XT SafePlus
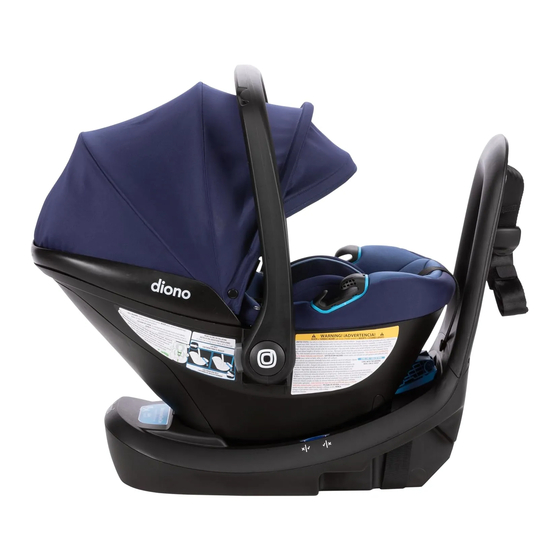
- Page 1 LiteClik ® 30 XT SafePlus ™ Infant Car Seat and Base Instruction Manual 4 - 30 lb (1.8 - 13.6 kg) Up to 30 in (76.2 cm) READ INSTRUCTION MANUAL before using this child restraint.
-
Page 2: Table Of Contents
Hello there, welcome to the Diono® family! We’ve created this lovingly engineered car seat to help gimmicks. We look forward to lending a helping hand keep your child comfortable and safe with all of the goods and none of the gimmicks. - Page 3 CONTENTS BEFORE YOU INSTALL 17-30 Vehicle Seating Locations LATCH/UAS Top Tether Vehicle Seat Belt Types 80/20 Overhang Guidance Handle Canopy Base Installation 31-41 Installation with LATCH/UAS Installation with Vehicle Seat Belt Securing and Removal of Child Restraint to Base Securing Child 42-54 Buckle Strap Adjustment J-Routing Method...
- Page 4 CONTENTS Aircraft Installation Care & Maintenance 60-67 Harness and Buckle Strap Removal Harness and Buckle Strap Installation Cover Removal and Installation Cleaning Warranty 68-70...
- Page 5 Our dedication to world-class engineering and technical innovation means that whether you’re on the road, out for a walk, or on-the-go with Diono, you can trust us to keep your family safe. We are honored that parents have been trusting us with their most precious cargo for over 25 years.
-
Page 6: Registration
Child restraints could be recalled for safety reasons. You must register this restraint to be reached in a recall. Send your name, address, e-mail address if available, and the restraint’s model number and manufacturing date to: Diono U.S., PO Box 77129, Seattle, WA 98177 or call 1-855-463-4666 or register online at: http://www.diono.com/product-registration/ For recall information, call the U.S. -
Page 7: Warning
Before installing this child restraint in a vehicle, be sure to also check the vehicle owner’s manual for information on proper installation. ▶ Check all installation configurations before discarding the box. Diono® cannot guarantee proper fit in all vehicles. ▶... -
Page 8: Expiration
For any questions or concerns or to find out if the damaged part or parts can be replaced contact Diono® at: Diono® U.S.: 1-855-463-4666 or online at www.Diono.com... -
Page 9: Certification
Diono® and the US Federal Aviation Administration (FAA) strongly urge you to secure your child in a child restraint system (CRS) or other approved devise for the entirety of your flight. Please contact the airline for their specific policies. - Page 10 !WARNING! !DEATH OR SERIOUS INJURY CAN OCCUR! • ALWAYS use the top tether when installing this child restraint with the child restraint base. If a seating location does not have a top tether anchor, you must change seating positions when installing •...
- Page 11 • DO NOT use any accessories, inserts or products not included with this child restraint, unless approved by Diono®. Items not tested with this child restraint could injure your child. • NEVER remove harness from child restraint without following the proper removal and installation instructions.
-
Page 12: Use After A Collision
CAR SEAT USE AFTER A COLLISION UNITED STATES The U.S. National Highway Traffic Safety Administration (NHTSA) recommends that car seats be replaced following a MODERATE or SEVERE collision in order to ensure a continued high level of collision protection for child passengers. - Page 13 • DO NOT USE THIS CHILD RESTRAINT SYSTEM IF IT HAS BEEN IN A VEHICLE ACCIDENT. • Diono® designates that you MUST replace this child restraint system IF IT HAS BEEN INVOLVED IN A COLLISION. • You must dispose of your child seat or base if the child restraint system was in a vehicle during a crash.
-
Page 14: Infant Car Seat Parts
INFANT CAR SEAT PARTS LiteClik®30 XT / RXT SitRite™ Comfort Insert Headrest LiteClik®30 XT / RXT SitRite™ Comfort Insert Harness Pads Chest Clip Harness Straps Buckle Buckle Pad Harness Strap Release Button Harness Tightening Strap Vehicle Seat Belt Guide Stroller Release Button Canopy Handle Adjustment Button Handle... - Page 15 INFANT CAR SEAT PARTS...
-
Page 16: Base Parts
BASE PARTS Top Tether EasyPath™ Belt Lock-Off Base Belt Guide LiteClik®30 XT/RXT SafePlus™ Attachment Hooks Bubble Level Indicators LiteClik®30 XT/RXT SafePlus™ Release Lever LATCH/UAS Strap LATCH/UAS Red Release Straps LATCH/UAS Connector 2-Position Leveling Foot... -
Page 17: Vehicle Seating Locations
The American Academy of Pediatrics (AAP), NHTSA, Transport Canada and Diono® RECOMMEND that children be rear-facing until they reach the maximum rear-facing height or weight of their car seat. This child restraint is designed for use only with children who weigh 4 - 30 lb (1.8 - 13.6 kg) and whose height is 30 in (76.2 cm) or less. -
Page 18: Latch/Uas
LATCH / UAS WHAT IS LATCH/UAS? Most vehicles manufactured after September 1, 2002, are equipped with: U.S.: LATCH (Lower Anchors and Tethers for CHildren) Canada: UAS (Universal Anchorage System) Check your vehicle owner’s manual to determine LATCH/UAS compatible seating positions. Some vehicle manuals use the term “ISOFIX”... - Page 19 LATCH / UAS VEHICLE LATCH/UAS ANCHORS The safest seating position is one that works best for your specific child restraint, family and vehicle model. Before installing this child restraint, you must determine the method of installation and the best vehicle seating position for that method.
- Page 20 LATCH / UAS ATTACH When attaching the LATCH/UAS connector to the vehicle LATCH/UAS anchors, Make sure there is only ONE connector per vehicle anchor • • Each LATCH/UAS connector strap is lying flat and not twisted. • You will hear an audible “click” to confirm engagement. REMOVE Remove the LATCH/UAS connectors from vehicle anchors by •...
-
Page 21: Top Tether
TOP TETHER ▶ Use of the top tether is required when installing this child restraint with the child restraint base. ▶ A top tether is designed to reduce movement of a child restraint in a collision. Vehicle tether anchors can be found in many locations within the vehicle. In sedans, these are usually located above/behind the vehicle’s back seat on the rear shelf. -
Page 22: Vehicle Seat Belt Types
VEHICLE SEAT BELT TYPES The following types of vehicle belts CANNOT BE USED with your child restraint. If any of the belt types listed below are in the chosen seating position, you MUST choose another seating position or use LATCH/UAS if available. Motorized (Automatic) Vehicle Belts Dual Retractor Lap/Shoulder Belts Non-Locking (ELR) Lap Belts... - Page 23 VEHICLE SEAT BELT TYPES TYPES OF SEAT BELT LATCH PLATES SAFE TO USE WHILE SECURING YOUR CAR SEAT Lap Belt with Locking Latch Plate. • Once buckled, the vehicle belt is tightened by pulling on the free end of the strap until the belt is tight.
- Page 24 VEHICLE SEAT BELT TYPES Lap/Shoulder Belt with Locking Latch Plate. The lap portion of this belt does not loosen once the belt is buckled. • The vehicle belt is tightened by pulling up hard on shoulder belt and feeding the extra webbing into the retractor.
- Page 25 VEHICLE SEAT BELT TYPES TYPES OF RETRACTORS Emergency Locking Retractor (ELR) • Only locks with sudden stops, accelerations, turns or if involved in an accident. • You MUST use LATCH/UAS or a locking clip if your vehicle is only equipped with ELR retractors. Automatic Locking Retractor (ALR) •...
- Page 26 VEHICLE SEAT BELT TYPES HOW TO SWITCH YOUR SWITCHABLE RETRACTOR FROM (ELR) TO (ALR) MODE WHEN INSTALLING WITHOUT THE BASE Feed the latch plate and seat belt into the belt path. Be sure the seat belt is flat and not twisted. Click the latch plate into the vehicle’s seat belt buckle.
-
Page 27: 80/20 Overhang Guidance
80/20 OVERHANG GUIDANCE To follow 80/20 overhang guidance, ensure that no more than 20% of the car seat base extends beyond the front edge of the vehicle seat cushion. ESTIMATING METHOD Estimate the halfway point of the car seat base. Then halve the outer half (the half farthest from the seat bight) to mark the spot that would be about 75%. -
Page 28: Handle
HANDLE ADJUSTING HANDLE When using the child restraint with a child, it is important to always ensure that the handle is securely locked in one of the designated positions. • To adjust the handle, press both of the handle release buttons and rotate the handle. - Page 29 HANDLE HANDLE POSITIONS The handle has three positions. Stationary Position • Stabilizes the child restraint while sitting in a stationary position. DO NOT place child restraint on an elevated surface. Carry Position • Easy to grip carry handle. Anti-Rebound Position ▶...
-
Page 30: Canopy
CANOPY ▶ Make sure to install the canopy before securing a child in the child restraint. ▶ Remove the canopy from the canopy frame before washing. ATTACH Insert both sides of the canopy frame into the canopy hinge bracket. Snap canopy to the side of the child restraint and tuck the cover into the plastic gutter located around the back of the seat. -
Page 31: Base Installation
BASE INSTALLATION ▶ Before installing this child restraint base, make sure your vehicle is on level ground. Place the child restraint base on the selected vehicle seat. Make sure it does not block the vehicle seat belt buckle or LATCH/UAS anchors. Locate the bubble level indicator on either side of the base. -
Page 32: Installation With Latch/Uas
BASE INSTALLATION INSTALLATION WITH LATCH/UAS ▶ Use of the top tether is required when installing this child restraint with the child restraint base. ▶ Only use this base with the LiteClik®30 XT and RXT SafePlus™ Infant Car Seats. ▶ Make sure you check installation before every use! ▶... - Page 33 BASE INSTALLATION Attach the top tether to the designated top tether anchor. ▶ Do not tighten strap. Attach each LATCH/UAS connector to the vehicle LATCH/UAS anchors, • Only ONE LATCH/UAS connector per LATCH/UAS vehicle anchor. • Make sure each LATCH/UAS connector strap is lying flat and not twisted.
- Page 34 BASE INSTALLATION Tighten the LATCH/UAS adjustment strap by pulling up on the strap with one hand while pushing down on the base with the other hand to compress it into the vehicle seat. Make sure the adjustment strap does not interfere with the child restraint attachment to base and is not routed through the belt lock-off.
- Page 35 BASE INSTALLATION Test for tightness, • Grab the base at the belt path only and try to move it side-to-side and front-to-back with the force of a firm handshake. If the base moves less than 1 in (2.5 cm), it is tight enough. •...
-
Page 36: Installation With Vehicle Seat Belt
BASE INSTALLATION INSTALLATION WITH VEHICLE SEAT BELT ▶ Use of the top tether is required when installing this child restraint with the child restraint base. ▶ Only use this base with the LiteClik®30 XT and RXT SafePlus™ Infant Car Seats. EasyPath ™... - Page 37 BASE INSTALLATION Thread the vehicle seat belt up and through the belt path on the side of the base. • Lay the vehicle seat belt over the open EasyPath™ Belt Lock-Off, making sure the vehicle belt is flat and not twisted. •...
- Page 38 BASE INSTALLATION Tighten Belt, LAP/SHOULDER BELT 4 A A Press down firmly in the center of the seat while pulling on the shoulder belt nearest to the buckle. Keep tension on the shoulder belt while feeding the slack back into the retractor. LAP BELT To tighten, press down firmly in the center of 4 4 B B...
- Page 39 BASE INSTALLATION Lock the vehicle seat belt inside the EasyPath™ Belt Lock-Off by sliding the bar into the hook on the bottom half of the EasyPath™ Belt Lock-Off then by pressing down on the top half of the lock-off. Confirm lock-off is locked by pulling up on the mechanism.
- Page 40 BASE INSTALLATION Test for tightness, • Hold the base at the belt path only and try to move it side-to-side and front-to-back with the force of a firm handshake. If the base moves less than 1 in (2.5 cm), it is tight enough. •...
- Page 41 BASE INSTALLATION SECURING CHILD RESTRAINT TO BASE Only use this base with the LiteClik®30 XT and RXT SafePlus™ Infant Car Seats. First, make sure your base is securely attached to the vehicle. Secure the child restraint rear-facing onto the base, by firmly pushing the child restraint onto the attachment hooks located on the base.
-
Page 42: Securing Child
The American Academy of Pediatrics (AAP), NHTSA, Transport Canada and Diono® RECOMMEND that children be rear-facing until they reach the maximum rear-facing height or weight of their car seat. This car seat is rear- facing only and can be used for children up to 30 lb (13.6 kg) or 30 in (76.2 cm) tall. -
Page 43: Buckle Strap Adjustment
SECURING CHILD BUCKLE STRAP ADJUSTMENT ▶ Make sure the child is NOT sitting directly on top of the buckle. ▶ There should not be a gap between the child and the buckle strap. ▶ Ensure the harness is not too high on the hips and adjust the buckle strap height as needed. Refer to the J-Routing Method to shorten buckle strap height. -
Page 44: J-Routing Method
SECURING CHILD J-ROUTING METHOD If the buckle strap is too long to achieve the proper fit for your child, you can shorten the buckle strap by using the J-Routing method. There are two different ways to shorten the buckle strap using the J-Routing Method: ▶... -
Page 45: Harness Strap Adjustment
SECURING CHILD HARNESS STRAP ADJUSTMENT Before removal or installation, have your phone handy to take photos of the process for future reference. To loosen the harness, push down on the harness strap release button and pull the shoulder straps forward. Locate the metal plate on the back of the seat and remove the straps from the metal plate. - Page 46 SECURING CHILD Relocate the harness straps to the appropriate harness slot that fits your child and push straps through to the back of the child restraint. • The harness needs to be snugly positioned at or below the child’s shoulders. The top of the head must be at least 1 in (2.5 cm) below the top of the car seat shell.
- Page 47 SECURING CHILD LITECLIK®30 XT / RXT SITRITE™ COMFORT INSERT To ensure a better fit for smaller infants, we recommend using the infant head and body support cushions included with your car seat. The LiteClik®30 XT / RXT SitRite™ Comfort Insert includes a removable newborn support insert and travel high wedge insert for better positioning of infants.
- Page 48 SECURING CHILD For smaller infants: ▶ To ensure a newborn or smaller infant is secured properly with the harness at or below the child’s shoulders, the complete LiteClik®30 XT / RXT SitRite™ Comfort Insert is recommended for use. • Confirm that the buckle strap is in the correct slot and the harness strap is in the appropriate slot to properly position the child.
- Page 49 SECURING CHILD SECURING THE CHILD ▶ The harness must be snugly positioned at or below the child’s shoulders. The top of head must be at least 1 in (2.5 cm) below the top of the car seat shell. • Confirm that the buckle strap is in the correct slot and the harness strap is in the appropriate slot to properly position the child.
- Page 50 SECURING CHILD Loosen harness: • Push down on the harness strap release button and pull shoulder straps forward. • Unfasten chest clip and harness buckle and move harness straps to the sides.
- Page 51 SECURING CHILD Properly position child in child restraint, so they are seated against the back and bottom of the seat and not slouched front to back or side to side: • Adjust the headrest so that the harness is snugly positioned at or below the shoulders.
- Page 52 SECURING CHILD Slowly pull harness adjuster strap to tighten harness for a comfortable and snug fit around the child: • Confirm harness is not twisted and lays flat against child’s chest. Properly position the chest clip level with child’s armpits then fasten chest clip. Push harness pads up to the child’s shoulders.
- Page 53 SECURING CHILD Finally, do the PINCH TEST. Take the thumb and index finger and ‘glide’ your fingers along the harness at the collar bone. If you are able to pinch any of the webbing of the harness strap, tighten it again. If you can’t pinch the harness, then it’s properly tightened.
- Page 54 AT A GLANCE CHECKLIST Make sure the harness straps Did you perform the Pinch Test? are at or just below the child’s shoulders. Chest clip at ARMPIT level. Harness straps MUST be at or just below the child’s shoulders. The child is not sitting on the buckle Make sure straps are lying flat and there is no gap...
-
Page 55: Infant Car Seat Installation Without Base
INFANT CAR SEAT INSTALLATION WITHOUT THE BASE This child restraint is designed for use only with children who weigh 4 - 30 lb (1.8 - 13.6 kg) and whose height is 30 in (76.2 cm) or less. Consult a doctor before use, especially with premature infants as they could have difficulty breathing in a seated position. - Page 56 INFANT CAR SEAT INSTALLATION WITHOUT THE BASE ▶ Make sure the level line is level with ground. ▶ Never install child restraint using a non-locking retractor without a belt locking clip. It will not be secure and may endanger the safety of your child in the case of a vehicle accident.
- Page 57 INFANT CAR SEAT INSTALLATION WITHOUT THE BASE Tighten Belt, 2 A A LAP/SHOULDER BELT Lock your vehicle seat belt retractor. Once the retractor is locked, press down firmly with your forearm placed on top of the car seat while pulling on the shoulder belt nearest to the buckle.
- Page 58 INFANT CAR SEAT INSTALLATION WITHOUT THE BASE Test for tightness, • Hold the car seat at the belt path only and try to move it side-to-side and front-to-back with the force of a firm handshake. If the it moves less than 1 in (2.5 cm), it is tight enough.
- Page 59 This child restraint is certified for use in aircraft only when installed without the base. Diono® and the US Federal Aviation Administration (FAA) strongly urge you to secure your child in a child restraint system (CRS) or device for the duration of your flight. Please contact the airline for their specific policies.
- Page 60 CARE & MAINTENANCE ▶ Before removal or installation, have your phone handy and take photos of the process for future reference. HARNESS STRAP REMOVAL To loosen harness, push down on the harness strap release button and pull shoulder straps forward. Locate metal plate on the back of the seat and remove straps from metal plate.
- Page 61 CARE & MAINTENANCE Gently pull the straps out of the front of the child restraint. Remove harness buckle tongues, harness pads and the chest clip. Locate the metal retainers on the sides of the back of the child restraint. Slide the metal retainers up and out of their holding slot and pull strap out from the back of the child restraint.
- Page 62 CARE & MAINTENANCE BUCKLE STRAP REMOVAL Remove buckle pad. Locate the buckle’s metal retainer from the back of the seat and push it up and out of the buckle’s belt slot. ▶ Rotate the metal retainer vertically while pushing it up and out of the center of the buckle’s belt slot while simultaneously pulling up on the buckle.
- Page 63 CARE & MAINTENANCE HARNESS STRAP INSTALLATION Feed the harness strap through the backside of the child restraint until the metal retainer reaches the slot. Secure the metal retainer in the slots provided on the sides of the child restraint located on the back. Repeat on the other side with the other strap.
- Page 64 CARE & MAINTENANCE Feed harness straps under metal bar. Secure the shoulder straps to the metal plate. Make sure you place the left strap on first and the right strap second. Once all harness straps are safely secure, attach the infant harness pads.
- Page 65 CARE & MAINTENANCE BUCKLE STRAP INSTALLATION Make sure the red release button faces towards the front of the car seat and the buckle strap is not twisted. Slide the buckle’s metal retainer down through the correct buckle slot that best fits your child, taking care to keep strap flat and not twisted.
- Page 66 CARE & MAINTENANCE COVER REMOVAL Remove harness system and buckle pad. Remove the cover from the outer grooves of the child restraint shell and working your way inwards. Pull cover over the belt guides by pulling out from under the bracket. Pull cover over the harness adjustment button and stroller release buttons.
- Page 67 CARE & MAINTENANCE CLEANING FABRICS: Seat cover, LiteClik®30 XT / RXT SitRite™ Comfort Insert, center buckle pad and harness pads. Machine wash separately in cold water on gentle cycle with mild detergent or hand wash fabrics in cold water. Dry flat and away from direct sunlight before re-use or storage. DO NOT bleach, iron or dry clean. CLEANING HARNESS AND BUCKLE STRAPS: Clean with damp cloth only.
- Page 68 2.1 General U.S. Warranty Period. Diono U.S.A. warrants to Purchasers that its Products will be free from defects in material and workmanship for one (1) year from the date of original purchase (the U.S. Warranty Period). During the U.S. Warranty Period, Diono U.S.A. will, at its option, repair or replace a Product if it is found by Diono U.S.A.
- Page 69 The use of covers, inserts, toys, accessories, or tightening devices produced by parties other than Diono or its authorized manufacturers (collectively, Outside Products) in any Product is not approved by Diono. The use of any Outside Product in conjunction with a Product could cause the Product to fail U.S., Canadian, U.K., and/or European safety standards.
- Page 70 7. SHIPPING CHARGES Shipping charges for the replacement of any Product pursuant to a warranty granted under this Policy will be Purchaser’s sole responsibility. Diono will not be responsible for any delays or damage caused by the shipment of a replacement Product. More information about Diono’s shipping policies can be found in the Diono Shipping Policy.
- Page 72 #MadeOfSeattle © 2024 Diono® LLC | 14810 Puyallup Street E | Suite 200 Sumner WA 98390 | United States United States: Diono®.com | 1-855-463-4666 Canada: Diono®.ca | 1-866-954-9786 Made in China | Fabriqué en Chine | Fabricado en China All rights reserved | Tous droits réservés | Reservados todos los derechos...
Need help?
Do you have a question about the LiteClik 30 XT SafePlus and is the answer not in the manual?
Questions and answers