
Related Manuals for Diono Radian 3QX


Summary of Contents for Diono Radian 3QX
- Page 1 Radian 3QX ® ® Car Seat Instructional Manual All-In-One Convertible 4-120 lb (1.8-54 kg) READ INSTRUCTION MANUAL before using this car seat diono.com...
-
Page 2: Table Of Contents
CONTENTS WE LOVE TO HELP Hello there, Welcome to the Diono family! We’ve created this lovingly engineered car seat to help keep your child comfortable and safe with all of the goods and none of the gimmicks. We look forward to lending a helping hand each and every day. - Page 3 Seat Bights Anti Rebound Bar (ARB) Infant Support LATCH/UAS Installation Lap/Shoulder Belt Installation Lap Belt Installation 56-71 FORWARD-FACING INSTALLATION Top Tether Safe Stop Adjustable Bottom 80/20 Overhang Guidance LATCH/UAS Installation Lap/Shoulder Belt Installation Lap Belt Installation Lap Belt Cushion diono.com...
- Page 4 CONTENTS BOOSTER MODE INSTALLATION 72-75 Aircraft Installation Comfort Features Cup Holder Expandable Side WIngs Harness Strap Removal 78-79 Harness Strap Replacement 80-81 Folding Car Seat 82-83 Seat Cover Removal 84-87 Care and maintenance 88-89 Warranty 90-92...
- Page 5 NOTES diono.com...
-
Page 6: Register This Car Seat
PO Box 77129, Seattle, WA 98177 or call 1-855-463-4666 or register online at: http://diono.com/product- registration/ Diono Canada ULC, 2160 S. Service Rd. W.,Oakville, ON L6L 9Z9 Canada or call 1-866-954-9786 or register online at: http://diono.ca/ product-registration/ For future reference, in the case of a change of address, please take a... - Page 7 People who own Diono products can be found in all four corners of the big, blue, green ball we all call home. Some are fans &...
-
Page 8: Certification
Diono and the US Federal Aviation Administration (FAA) strongly urge you to secure your child in a child restraint system (CRS) or device for the duration of your flight. Please... -
Page 9: Safe Use Guide
Choose the correct mode of use for your child, depending on their weight and height. This child restraint is designed for use only with children who weigh 4–120 lb (1.8–54 kg) and whose height is 57 in (144 cm) or less in the following modes. diono.com... - Page 10 SAFE USE GUIDE Rear-facing: 4–50 lb (1.8–22.7 kg) and whose height is 18-44 in (46-112 cm). Forward-facing: 22–65 lb (10–29.5 kg) and whose height is 30-57 in (76-145 cm). Booster: 40–120 lb (18–54 kg) and whose height is 40-57 in (101-145 cm). DO NOT place this car seat rear-facing in a vehicle seating location with an active front air bag.
- Page 11 SAFE USE GUIDE CAR SEAT WEIGHT GUIDE 120 lb (54 kg) 65 lb (29.5 kg) 50 lb (22.7 kg) 40 lb (18 kg) 22 lb (10 kg) 4 lb (1.8 kg) diono.com...
- Page 12 Check all installation configurations before discarding the box. Diono cannot guarantee proper fit in all vehicles. According to accident statistics, children are safer when properly restrained in the vehicle's rear seating positions...
- Page 13 The back seat is the safest place for children 12 and under. NEVER leave car seat unsecured in your vehicle even when it is unoccupied. It could injure other occupants in a sudden stop or collision. diono.com...
-
Page 14: Warnings
It does not press on the child’s skin or push the child’s body into an unnatural position. For any questions or concerns please contact diono at: Diono U.S.: 1-855-463-4666 or online at www.diono.com Diono Canada: 1-866-954-9786 or online at www.diono.ca... - Page 15 LATCH/UAS system to attach this child restraint rear-facing when restraining a child weighing more than 35 lb (15.8 kg) or forward-facing when restraining a child weighing more than 40 lb (18 kg). • ALWAYS use the top tether strap when installed forward-facing. diono.com...
- Page 16 !WARNING! • DO NOT use any accessories, inserts or products not included with this child restraint, unless approved by Diono. Items not tested with this child restraint could injure your child. • NEVER remove harness from child restraint without following the proper removal and installation instructions (see pg 80).
- Page 17 (over ten years from date of purchase), missing instructions, missing parts, or if the straps are cut, frayed, or damaged in any way. Call to find out if the damaged part or parts can be replaced. Diono U.S.: 1-855-463-4666 Diono Canada: 1-866-954-9786 SAFE PRACTICES •...
-
Page 18: Car Seat Use After Collision
CAR SEAT USE AFTER A COLLISION UNITED STATES The U.S. National Highway Traffic Safety Administration (NHTSA) recommends that car seats be replaced following a MODERATE or SEVERE collision in order to ensure a continued high level of collision protection for child passengers. In the U.S., car seats do not automatically need to be replaced following a MINOR collision. - Page 19 You must dispose of your child seat or booster seat • if the shell is cracked or the webbing of the child car seat is frayed, torn or discolored. diono.com...
-
Page 21: Parts
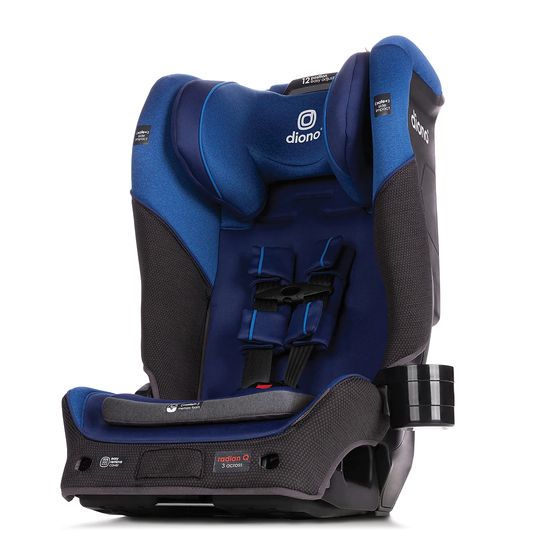
Cup Holder Harness Strap Hook Infant Support Forward-Facing Belt Path Anti-Rebound Bar (ARB) Rear-Facing Belt Path Rear-Facing Base Chest Clip Lap Belt Cushion U.S. Only Harness Pads Buckle Buckle Pad Memory Foam Cushion Harness Adjust Strap & Silver Release Button diono.com... -
Page 22: Vehicle Seating Locations
VEHICLE SEATING LOCATIONS INSTALL CHILD RESTRAINT CORRECTLY NEVER place this child restraint rear-facing in a vehicle seating location with an active frontal air bag. If the airbag inflates, it can cause serious injury or death to your child. For vehicles with side air bags, refer to your vehicle owner’s manual for information on your child restraint installation. - Page 23 If the child restraint does not install best in the rear center seating location, it is recommended to move to one of the outboard seating positions. Vehicle LATCH/UAS anchors diono.com...
-
Page 24: Vehicle Seat Belt Types
VEHICLE SEAT BELT TYPES The following types of vehicle belts CANNOT BE USED with your child restraint. If any of the belt types listed below are in the chosen seating position, you MUST choose another seating position or use LATCH/UAS if available. 1. - Page 25 Locking Retractor (ALR). The automatic locking retractor does not allow the lap belt to get longer once it is buckled and retractor is locked. The vehicle belt is tightened by feeding seat belt webbing into retractor after it has been locked. diono.com...
- Page 26 VEHICLE SEAT BELT TYPES 3. Lap/Shoulder Belt with Locking Latch Plate. The lap portion of this belt does not loosen once the belt is buckled. The vehicle belt is tightened by pulling up hard on shoulder belt and feeding the extra webbing into the retractor. 4.
- Page 27 MUST use LATCH/UAS or a locking clip if your vehicle is only equipped with ELR retractors. 2. Automatic Locking Retractor (ALR) • Found in older vehicles and MUST be used to secure Rear-Facing Forward-Facing your child in installations only. diono.com...
- Page 28 VEHICLE SEAT BELT TYPES 3. Switchable Retractor Most common type of retractor and is switchable from (ELR) to (ALR). • MUST switch to (ALR) mode for Rear-Facing Forward-Facing installations only. • Leave in (ELR) mode for Booster use only. HOW TO SWITCH YOUR SWITCHABLE RETRACTOR FROM (ELR) TO (ALR) MODE Feed latch plate into the proper belt path.
- Page 29 Lap belts without a retractor will always have a latch plate the provides the locking feature necessay to secure your car seat properly. Review your vehicle owner’s manual for specific instructions on what type of seat belt system your vehicle is equipped with. diono.com...
-
Page 30: Latch/Uas
LATCH/UAS WHAT IS LATCH/UAS? Most vehicles manufactured after September 1, 2002 are equipped with: U.S.: LATCH (Lower Anchors and Tethers for CHildren) Canada: UAS (Universal Anchorage System) Check your vehicle owner’s manual to determine LATCH/ UAS lower anchor compatible seating positions. Some vehicle manuals use the term “ISOFIX”... -
Page 31: First Setup
Be sure the harness adjuster strap moves freely and is not locked within the bottom of the seat. Remove cup holder if present. 2. Rotate bottom OPEN until your hear it “click”. This confirms the car seat is locked for use. diono.com... - Page 32 FIRST SETUP 3. Pull harness adjusting strap until harness begins to tighten. If it does not tighten freely, check the belt path on the back of the seat bottom is clear from obstruction. 4. Fasten both of the fabric side panels on the inside of the cover.
-
Page 33: Harness Strap Placement
Forward-Facing: • 22–30 lb (10–13.6 kg) MUST use the middle buckle slot ONLY! FORWARD-FACING • Above 30 lb (13.6 kg) MUST use the forward most buckle slot ONLY! diono.com... -
Page 34: Changing Harness Positon
FIRST SETUP D. CHANGING HARNESS POSITON 1. Unbuckle the chest clip and harness buckle. 2. To loosen harness, push down on silver lever and pull shoulder straps forward. 3. Detach harness straps from metal plate on back of seat. 4. Pull each harness through to the front of the seat. -
Page 35: Buckle Strap Slot Change
2. To create slack locate buckle and push buckle strap into the bottom of the car seat base. 3. Partially fold seat (see pg 82). 4. Reach into the bottom of the seat. You will feel the buckle strap metal retainer. diono.com... - Page 36 FIRST SETUP 5. Rotate metal retainer vertical and insert it up through the shell and pad. From the top of the car seat, pull the buckle strap out. Buckle Strap Insert 1. Find appropriate buckle slot. 2. Make sure the red release button faces towards the front of the car seat and the buckle strap is not twisted.
-
Page 37: Harness Tightening
4. Position harness straps around the child and fasten buckle with harness pad positioned between the buckle and the child. Gently tug on harness strap to make sure straps are securly buckled. Continued on the next page. diono.com... - Page 38 FIRST SETUP 5. Genlty pull harness straps upwards to snugly fit lap portion of harness across the body and low on the childs hips. 6. Slowly pull harness adjuster strap downwards (forward- facing) or straight up (rear- facing), using a pull-tug motion, to tighten harness for a comfortable and snug fit around child.
- Page 39 If you can’t pinch the harness then it’s properly tightened. NOTE: If harness pads are used, you may need to unfasten the top harness pad to access strap to successfully administer the pinch test. diono.com...
-
Page 40: Adjusting Headrest
FIRST SETUP G. ADJUSTING HEADREST 1. Press lever on headrest and slide up or down to adjust. 2. Listen for audible "click" to confirm headrest is in locked position. IMPORTANT! When using the bottom harness slot, position headrest level with the top of the seat. - Page 41 NOTES diono.com...
-
Page 42: Rear-Facing Installation
REAR-FACING REAR-FACING Installation Instructions 4–50 lb (1.8–22.7 kg) 18-44 in (46-112 cm) LATCH/UAS Strap Vehicle Lap/Shoulder Belt Vehicle Lap Belt... - Page 43 Place the chest clip at armpit level. The American Academy of Pediatrics (AAP), NHTSA and Diono RECOMMEND that children be rear-facing until two years of age or they reach the maximum rear-facing height or weight of their car seat. This car seat can remain rear-facing up to 50 lb (22.7 kg) or 44 in (112 cm) tall.
-
Page 44: Detachable Rear-Facing Base
REAR-FACING DETACHABLE REAR-FACING BASE INSTRUCTIONS ONLY use rear-facing base on rear-facing installs. 1. Confirm car seat is locked in its unfolded position. 2. Insert hooks into the aligned slots and rotate the base until hearing an audible “click”. Confirm base is locked and does not move. -
Page 45: Seat Bights
With an elevated seat bight it is acceptable if the front of the car seat does not touch the vehicle seat back. DO NOT push the feet of the rear- facing base into the elevated seat bight as this will change the recline angle. diono.com... -
Page 46: Anti Rebound Bar (Arb)
REAR-FACING ANTI-REBOUND BAR (ARB) Diono RECOMENDS using the anti-rebound bar with rear-facing installs. 1. Place the ARB into the slots on the front of the car seat until hearing an audible "click". Pull bars outwards to confirm it is locked. -
Page 47: Infant Support
Use of these cushions and wedge is optional and does not affect the safety of the seat. To use, slide the buckle through the buckle slot on the infant body cushion that matches the slot chosen on the seat then adjust harness. diono.com... -
Page 48: Latch/Uas Installation
REAR-FACING INSTALL USING: LATCH/UAS 4–35 lb (1.8–15.8 kg) DO NOT install by this method for a child weighing more than 35 lb (15.8 kg). Reinstall with vehicle seat belt for a child weighing between 35–50 lb (15.8–22.7 kg). 1. Install detachable rear-facing base (see pg 44) and ARB (see pg 46). - Page 49 The LATCH strap should lie flat and not be twisted. The red release loops on the connectors should be facing up and tightening mechanism should be on the child’s right side of seat. diono.com...
- Page 50 REAR-FACING 6. Attach LATCH/UAS connectors to vehicle LATCH/UAS anchors and listen for audible "click" to confirm engagement. 7. Tighten the LATCH/UAS strap. With one hand press down firmly in the center of the car seat while tightening the LATCH/UAS strap with the other hand.
- Page 51 REAR-FACING 9. To remove LATCH/UAS strap from vehicle use the LATCH/ UAS red release straps on the LATCH/UAS connectors and pull them off the anchor bars. diono.com...
-
Page 52: Lap/Shoulder Belt Installation
REAR-FACING INSTALLATION WITH: LAP/SHOULDER BELT 4–50 lb (1.8–22.7 kg) LAP BELT 4–50 lb (1.8–22.7 kg) 1. Install detachable rear-facing base (see pg 44) and ARB (see pg 46). 2. Place car seat rear- facing in back seat of the vehicle with detachable rear-facing base and ARP installed. - Page 53 LAP BELT To tighten, press down firmly in the center of the car seat with one hand while tightening the lap belt strap with the other hand. You may need to tighten further by pulling in-line with the belt path. diono.com...
- Page 54 REAR-FACING 5. Test for tightness. Grab the seat at the bottom of the rear-facing belt path. Try to move the car seat side-to-side and front-to- back with the force of a firm handshake. If the seat moves less than 1 in (2.5 cm), it is DO NOT test tight enough.
- Page 55 REAR-FACING diono.com...
-
Page 56: Forward-Facing Installation
FOWARD-FACING FORWARD-FACING Installation instructions 22–65 lb (10–29.5 kg) 30-57 in (76-145 cm) LATCH/UAS Strap Vehicle Lap/Shoulder Belt Vehicle Lap Belt... - Page 57 FORWARD-FACING The American Academy of Pediatrics (AAP), NHTSA and Diono recommend that children be rear-facing until they reach the maximum rear-facing height or weight. This car seat can remain rear-facing up to 50 lb (22.7 kg). • When checked at forward-facing belt path, this car seat should not move more than 1 in (2.5 cm)
-
Page 58: Top Tether
FOWARD-FACING TOP TETHER ALWAYS Use the top tether. A tether is designed to reduce movement of a forward-facing child restraint in a collision. Vehicle tether anchors can be found in many locations within the vehicle. Some of the typical locations are shown here. -
Page 59: Safe Stop
Thread bottom of Safe Stop onto the harness strap onto the harness strap hook. hook. Check to ensure proper engagement to the metal plate. Take care to ensure harness straps are not twisted and are clear from any obstructions. diono.com... -
Page 60: Adjustable Bottom
FOWARD-FACING ADJUSTABLE BOTTOM WARNING! Use adjustable bottom for forward-facing installs only. DO NOT use rear-facing. DO NOT use in booster mode. IMPORTANT: If the child is OVER 25 LB (11.3 KG), lower the adjustable bottom. 1. Lift the bottom bar up and grasp the upper bar toward the seat bottom to release. -
Page 61: 80/20 Overhang Guidance
Add a bit more to the footprint that is supported by the seat cushion. This will be around 80% and that would be meeting the 80/20 overhang guidance. If results are unclear using the estimating method, use a tape measure and do the math. diono.com... -
Page 62: Latch/Uas Installation
FOWARD-FACING INSTALL USING: LATCH/UAS 22–40 lb (10–18 kg) DO NOT install by this method for a child weighing more than 40 lb (18 kg). Reinstall with lap/shoulder belt for weights between 40–65 lb (18–29.5 kg). 1. Remove LATCH/UAS strap from storage location on back of seat. - Page 63 The red release loops on the connectors should be facing up and tightening mechanism should be on the child’s right side of seat. Top Tether diono.com...
- Page 64 FOWARD-FACING 5. Place car seat forward-facing in back seat of the vehicle. Center the car seat between the vehicle LATCH/UAS anchors. The entire seat bottom should sit flat on the vehicle seat. If overhang is present refer to page 61. 6.
- Page 65 If the seat moves less than 1 in (2.5 cm), it is DO NOT test tight enough. by grasping the top or back of the car seat. Only check by grabbing forward-facing belt path opening. Continued on the next page diono.com...
- Page 66 FOWARD-FACING 10. Tighten the top tether strap to remove the slack. There should not be any extra tension on the top tether. Do not push on the car seat back while tightening. Compressing the car seat into the vehicle seat might reslult in a top tether that is too tight.
-
Page 67: Lap/Shoulder Belt Installation
2. Place car seat forward-facing in back seat of the vehicle. The entire seat bottom should sit as flat as possible on the vehicle seat. If overhang is present refer to page 61. diono.com... - Page 68 FOWARD-FACING 3. Loosely attach top tether strap. Do not tighten. Consult your vehicle owner’s manual for specific location. 4. Unfasten fabric side panels and reach behind cover for easy access to belt path. 5. Slide the vehicle seat belt forward-facing through the belt path and out the other side.
- Page 69 LAP BELT To tighten, press down firmly in the center of the car seat with one hand while tightening the lap belt strap with the other hand. You may need to tighten further by pulling in-line with the belt path. diono.com...
- Page 70 FOWARD-FACING 7. Tighten the top tether strap to remove all the slack. There should not any extra tension on the top tether. Do not push on the car seat back while tightening. Compressing the car seat into the vehicle seat might reslult in a top teather that is too tight.
-
Page 71: Lap Belt Cushion
4. Guide buckle through seat cover bottom and memory foam cushion. Reattach cover to seat bottom. 5. Reinstall the center buckle pad. Should you need a longer buckle, these are available by calling customer care. diono.com... -
Page 72: Booster Mode Installation
BOOSTER BOOSTER MODE Installation instructions 40–120 lb (18–54 kg) 40-57 in (101-145 cm) ALWAYS use ONLY the vehicle lap/shoulder belt system when restraining the child in this booster seat. • DO NOT use a lap belt only! • DO NOT use with detachable base. - Page 73 Squeeze the head support adjustment lever on the back of the booster seat to adjust it’s height up or down to fit the child. Continued on the next page diono.com...
- Page 74 BOOSTER 4. Feed the shoulder belt through the upper belt guide and over booster seat. IMPORTANT! When the shoulder belt is routed through the upper belt guide, pull some webbing out of the retractor. Slowly release it to make sure the belt property feeds back into the retractor.
- Page 75 The shoulder belt should NOT hover over the shoulder or touch the child’s neck. Make sure shoulder belt is under the lower belt guide and closest to the buckle. diono.com...
-
Page 76: Aircraft Installation
1. Adjust the seat belt buckle to its shortest length to ensure the buckle is not in the belt path and accessible for release. 2. Ask the flight attendant for a “seat belt extender” and then use this extender to adjust the seat belt length. -
Page 77: Comfort Features
EXPANDABLE SIDE WINGS The side wings can be adjusted for comfort. These will not impact the safety of the car seat in any manner. Simply push the side wings outward as shown to extend. diono.com... - Page 78 HINT: Before removal have your phone handy and take photos of the process for future reference. 1. Remove harness straps from the metal hook on back of seat. 2. From the front of the seat pull the harness straps through and out of the harness slots.
- Page 79 diono.com...
-
Page 80: Harness Strap Replacement
HINT: Before replacement of harness strap have your phone handy and take photos of the process for future reference. 1. Insert new harness strap through the harness panel slot and pull the strap up. 2. Once the strap is pulled up until the metal “D”... - Page 81 4. Re-secure the harness straps to the metal plate. Make sure to secure the left strap onto the metal hook first then secure 2 nd the second strap onto the metal hook. 5. Tighten the harness (see pg 37). diono.com...
-
Page 82: Folding Car Seat
FOLDING CAR SEAT 1. Unbuckle harness and take out the red carry strap from behind the cover. 2. Unfasten both fabric panels and open fully. 3. Adjust both expandable side to their inward position. 4. Press down on silver harness release button to loosen harness straps, pads and chest clip. - Page 83 6. Fasten red carry strap on the first metal bar on the bottom of the seat. IMPORTANT: Make sure car seat is correctly secured by carry strap. Injury could occur if unproperly secured. diono.com...
-
Page 84: Seat Cover Removal
SEAT COVER REMOVAL HINT: Before removal have your phone handy and take photos of the process for future reference. 1. Remove harness straps from the harness hook on back of seat. Pull harness straps out through front of cover. 2. Remove headrest cover by pulling on tabs located on at the center of the headrest along the top and bottom. - Page 85 5. Gently pull up on flap of cover to detach plastic fasteners from seat shell. 6. Unhook loops from seat shell. Pull headrest up to highest point and gently pull fasteners away from seat shell. Remove cover behind headrest. Continued on the next page diono.com...
- Page 86 SEAT COVER REMOVAL 8. To remove elastic strap from the hook on left and right sides of seat, pull elastic strap down with your fingers and with the other hand push the elastic over the plastic hook with a flat head screwdriver. 9.
- Page 87 11. Remove buckle from memory foam cushion and seat cover bottom and pull seat cover free from seat shell. To install cover repeat steps backward starting at step 11. diono.com...
-
Page 88: Care And Maintenance
CARE & MAINTENANCE CLEANING FABRICS: Seat cover, infant support, center buckle pad and harness pads. REMOVE memory foam insert from seat pad prior to washing. DO NOT wash memory foam. REMOVE infant support wedge from infant support cushion before washing. DO NOT wash support wedge. - Page 89 Gently rinse ONLY the buckle mechanism in mildly DO NOT hot water, or soak overnight. get the buckle strap wet. Towel dry center buckle. Make sure buckle is working correctly before reconnecting center strap to car seat. use detergents or lubricants. diono.com...
-
Page 90: Warranty
(1) year from the date of original purchase (the Canadian Warranty Period). During the Canadian Warranty Period, Diono Canada will, at its option, repair or replace a Product if it is found by Diono Canada to be defective in material or workmanship. - Page 91 Extended Warranty applies only in the U.S.A., the U.K. and Germany. During the Extended Warranty Period, Diono will, at its option, repair or replace a qualifying Extended Warranty Product if it is found by Diono to be defective in material or workmanship.
- Page 92 Diono or its authorized manufacturers (collectively, Outside Products) in any Product is not approved by Diono. The use of any Outside Product in conjunction with a Product could cause the Product to fail U.S., Canadian, U.K., and/or European safety standards. As a result, use of any Outside Product with a Product automatically voids any warranties granted under this Policy.
- Page 93 NOTES diono.com...
- Page 94 #MadeOfSeattle © 2022 Diono LLC | 14810 Puyallup Street E | Suite 200 Sumner WA 98390 | United States United States: diono.com | 1-855-463-4666 Canada: diono.ca | 1-866-954-9786 Made in China | All rights reserved revised/revisado 20230113...
Need help?
Do you have a question about the Radian 3QX and is the answer not in the manual?
Questions and answers