
Subscribe to Our Youtube Channel
Related Manuals for Diono Radian 3QX


Summary of Contents for Diono Radian 3QX
- Page 1 radian ® all-in-one convertible from birth up to 120 lb / 54 kg car seat instruction manual READ INSTRUCTION MANUAL before using this child restraint...
-
Page 2: Table Of Contents
WE LOVE TO HELP REAR-FACING INSTALLATION 27–39 Rear-Facing Checklist 28–29 Anti-Rebound Bar, Rear-Facing Base & Infant Support 30–32 Hello there, Welcome to the Diono family! LATCH installation 33–35 Lap/Shoulder Belt installation 36–37 We’ve created this lovingly engineered car seat Lap Belt Installation 38–39... -
Page 3: Register This Car Seat
People who own Diono products can be found in all four corners of the big blue green ball, we all call home. Some are For future reference, in the case of a change of address. -
Page 4: Certification
Choose the correct mode of use for your child, depending on their weight. Diono and the US Federal Aviation Administration (FAA) strongly urge you to secure your child in a child restraint This child restraint is designed for use only with children system (CRS) or device for the duration of your flight. - Page 5 40–65 lb (18–29.5 kg) WITHOUT SafeStop information on proper installation. Booster Mode with Lap/Shoulder ONLY 40–120 lb (18–54 kg) Check all installation configurations before discarding the box. Diono cannot guarantee proper fit in all vehicles. radian 3QX diono.com...
- Page 6 It could injure other properly seated for the entire ride. occupants in a sudden stop or collision. If needed, adjust the headrest by positioning it accordingly by sliding it up or down. radian 3QX diono.com...
- Page 7 DO NOT use any accessories, inserts or products shown in the instructions. not included with this child restraint, unless approved by Diono. Items not tested with this child restraint • DO NOT modify your child restraint. could injure your child.
- Page 8 Call to find out if the damaged part or • Contact us by visiting the Diono website at parts can be replaced. diono.com or call : Diono U.S.: 1-855-463-4666 Diono U.S.: 1-855-463-4666...
-
Page 9: Car Seat Use After A Collision
No vehicle occupants were injured; AND There is no visible damage to the car seat; AND • • The airbags (if present) did not deploy. NEVER use a car seat that has been involved in a MODERATE or SEVERE collision. radian 3QX diono.com... -
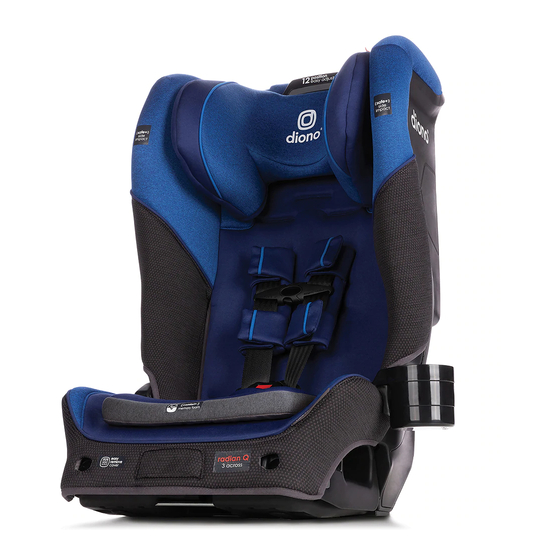
Page 10: Parts Listing
Rear-Facing Belt Path 10. Chest Clip 11. Harness Pads 12. Buckle 13. Buckle Pad 14. Memory Foam Cushion 15. Harness Adjust & Release 16. Anti-Rebound Bar Slots 17. Anti-Rebound Bar Release 18. Expandable Side Wings 19. Adjustable Headrest radian 3QX diono.com... -
Page 11: Vehicle Seating Locations
FRONTAL AIR BAG. If the airbag inflates, it can cause to one of the outboard serious injury or death to your child. For vehicles with seating positions. side air bags, refer to your vehicle owner’s manual for information on your child restraint installation. Vehicle LATCH/UAS Anchors radian 3QX diono.com... - Page 12 No other DO NOT install using both LATCH/UAS connectors inflatable seat belts have been tested and the vehicle seat belt at the same time. with this child restraint. radian 3QX diono.com...
- Page 13 4. Tuck the red strap through the harness slot and store behind the cover. 5. To fold, push lever shown and secure with red strap. US & CA EN Rear-Facing (harness AT or just below shoulders) radian 3QX diono.com...
- Page 14 Forward-Facing (Harness just above shoulders) REAR-FACING installation instructions FORWARD-FACING Children 22–30 lb Children above 30 lb (10–13.6 kg) (13.6 kg) MUST use the MUST use the middle forward most buckle buckle slot ONLY! slot ONLY! radian 3QX diono.com...
-
Page 15: Latch
Place the chest clip at armpit level. The American Academy of Pediatrics (AAP) and NHTSA recommend that children be rear-facing until they reach the maximum rear-facing height and weight. This car seat can remain rear-facing up to 50 lb (22.7 kg). radian 3QX diono.com... - Page 16 Gently pull the anti-rebound bar out. detach base lower hooks from seat NOTE: You may need to release bottom. one side at a time. radian 3QX diono.com...
- Page 17 Unhook strap from back of seat shell. 2. Extend the LATCH/UAS strap. For easier installation, extend the LATCH/UAS strap to its maximum length by pressing the grey button and pulling on the strap. radian 3QX diono.com...
- Page 18 5. Attach LATCH/UAS connectors 8. To remove LATCH/UAS strap to vehicle LATCH/UAS anchors from vehicle — Use LATCH/ and listen for audible "click" to UAS release on the LATCH/ confirm engagement. UAS connectors and pull them off the anchor bars. radian 3QX diono.com...
- Page 19 2. Slide the vehicle seat belt the seat. through the rear-facing belt path and out the other side. Buckle it. The seat belt should lie flat and not be twisted. radian 3QX diono.com...
- Page 20 2. Slide the vehicle seat belt by grasping the top or back of through the rear-facing belt the seat. path and out the other side. Buckle it. The seat belt should lie flat and not be twisted. radian 3QX diono.com...
- Page 21 Use the top tether. DO NOT place infant in forward-facing restraint until they are at least 1 year old and weigh 22 lb (10 kg). Diono recommends keeping children rear-facing until they are at least 2 years old. FORWARD-FACING installation instructions...
- Page 22 This car seat can remain rear-facing up to 50 lb (22.7 kg). To store adjustable bottom, lift the lower bar up while grasping the top bar and push the bottom back into the seat base. radian 3QX diono.com...
- Page 23 Check to ensure proper engagement to BACK OF the metal plate. Take care to SEAT FLOOR ensure harness straps are not OF VEHICLE twisted and are clear from any obstructions. radian 3QX diono.com...
- Page 24 For easier installation, extend the LATCH/UAS strap to its 6. Loosely attach tether strap. maximum length by pressing Do not tighten. Consult the grey button and pulling on vehicle’s owner manual for the strap. specific location. radian 3QX diono.com...
- Page 25 UAS strap is and slide the car the top tether. seat side-to-side and front- to-back. If the seat moves less than 1 in. (2.5 cm), it is tight enough. Do not test by grasping the top or front of the seat. radian 3QX diono.com...
- Page 26 3. Loosely attach top tether the side nearest to the buckle strap. Do not tighten. Consult while feeding the slack back vehicle’s owner manual for Top Tether into the retractor. specific location. radian 3QX diono.com...
- Page 27 If the seat moves less than 1 in. (2.5 cm), it is tight enough. Do not test by grasping the top or front of the seat. radian 3QX diono.com...
- Page 28 4. Flip down memory foam pad and slide buckle through the slot being used on the seat. Reinstall the center buckle pad. Should you need a longer buckle, these are available by calling Customer Care. radian 3QX diono.com...
- Page 29 ONLY with NO top tether anchor lap belt to tighten it. point available, you MUST install the Diono Lap Belt Cushion. 6. Tighten the top tether strap. Push the car seat back while 1. Unhook and remove top...
-
Page 30: Booster Mode
Be sure the lap/shoulder belt lies across your child’s shoulders, between the neck and edge of the shoulder. Be sure the lap portion of the vehicle seat belt goes under the side nubs and the belt lies low across your child’s hips. radian 3QX diono.com... - Page 31 NOTE: The addition or removal of clothing will change the fit of the harness, especially bulky winter jackets. Diono recommends harnessing your child first and placing a blanket over them or putting their jacket on backwards. Rear-Facing...
- Page 32 4. Buckle the chest clip. You will hear a “click” when seat cover clips. Reach into the rear-facing belt the chest clip is securely buckled. path. You will feel the buckle strap metal retainer. 5. Place the chest clip at armpit level. radian 3QX diono.com...
-
Page 33: Rear-Facing Installation
3. Attach locking clip to lap/ shoulder belt as shown. Rebuckle belt. Check that lap belt does not move by pulling hard. If belt loosens or lengthens, repeat procedure. radian 3QX diono.com... - Page 34 6. Slide the new harness straps through the buckle tongues, re-attach the chest clip and reinstall the harness pads. Slide the harness straps through to the back of the seat and re-install them to the metal hook in Step 1. radian 3QX diono.com...
- Page 35 ADJUSTING EXPANDABLE SIDE WINGS The side wings can be adjusted for comfort as shown. These will not impact the safety of the car seat in any manner. Simply push the side wings outward as shown to extend. radian 3QX diono.com...
- Page 36 8. Remove buckle from memory foam cushion and seat cover bottom and pull seat cover free from seat shell. 9. Wash per instructions on page 78. radian 3QX diono.com...
- Page 37 Make sure the seat shell. harness straps lay flat against the seat cover and are not twisted. radian 3QX diono.com...
- Page 38 ANCHOR CONNECTOR HARDWARE warm water. Use mild completely before NOTE: Buckle should fasten with a “click” if not, rinse detergent re-use under warm running water. Towel dry completely before re-use or storage. DO NOT use detergents or lubricants. radian 3QX diono.com...
- Page 39 NON INFRINGEMENT. retailer or authorized online retailer to purchase Diono products. A list of Diono authorized retailers can be found on our website. Not all products are available at all retailers. Diono products purchased from unauthorized retailers, online auction sites, or as second-hand items, are not covered under warranty.
- Page 40 Proof of purchase is required. The exclusive remedy LIMITATION OF LIABILITY TO THE MAXIMUM EXTENT PERMITTED for this Warranty is that Diono will, at its sole option, provide repair BY LAW, IN NO EVENT SHALL DIONO BE LIABLE FOR ANY PRE- or replacement components for this product or refund the original TRIAL PECUNIARY LOSS (IN THE PROVINCE OF QUÉBEC), SPECIAL...
- Page 41 © 2019 Diono LLC © 2019 Diono Canada LLC 14810 Puyallup Street E 50 Northland Rd Suite 200 Suite 400 Sumner WA 98390 Waterloo Ontario N2V 1N3 United States Canada 1-855-463-4666 1-866-954-9786 Made in China | diono.com | All Rights Reserved revised 20191127...
Need help?
Do you have a question about the Radian 3QX and is the answer not in the manual?
Questions and answers