
Related Manuals for Numatic NX 1K CRL8072/50T


Summary of Contents for Numatic NX 1K CRL8072/50T
- Page 1 CRL8055/50T CRL8072/50T CRL8055/100T CRL8072/100T R I D E - O N S C R U B B E R D RY E R Original Instructions CAUTION, Read instructions before using the machine Keep for future reference numatic.com...
-
Page 2: Table Of Contents
.........Page 21 Battery Information ........ Page 22-25 In the event of a breakdown contact Warranty ......... Page 26 your Numatic dealer or the EU Declaration Document ........ Page 27 Numatic Technical help line +44 (0)1460 269268 Company Address .........Page 28... -
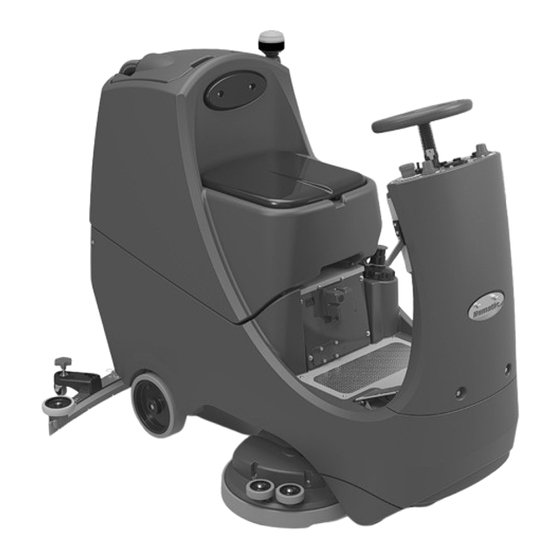
Page 3: Machine Overview
Machine Overview CRL8055/50T = 1x battery CRL8055/100T = 2x batteries CRL8072/50T = 1x battery CRL8072/100T = 2x batteries... -
Page 4: Control Panel Overview
Control Panel Overview... -
Page 5: Machine Set Up Guide
LEDs should illuminate on the top of all the batteries. Insert Key into ignition located on the control panel (See (Fig. A) Numatic International Ltd recommends ONLY using 911948 NX1K LFP battery 4 Amp type Lithium Batteries provided with this machine. -
Page 6: Fitting The Hose Guide
Machine Set-up Guide Fitting the Hose Guide The U-bend in the hose prevents water spillage when the vacuum is switched off. Refit vacuum hose to the floor tool when finished. Refit vacuum hose to the Note: DO NOT push the vacuum hose Floor tool when finished. -
Page 7: Raise / Lower Brush Deck
Machine Set-up Guide Always ensure that the machine is switched off Raise Brush Deck/ Fitting the Brush/ before making any Lower Brush Deck adjustments. CRL 8072 Twin Brush Raise brush deck. Brush deck raised position. Slide brush under machine. Brush in place. Lower brush deck. -
Page 8: Filling The Clean Water Tank
Machine Set-up Guide Always ensure that the machine is switched off before making any adjustments. Filling the Clean Water Tank The CRL 8055/8072 is equipped with a large capacity 80 litre clean water tank, allowing for large areas to be covered in a single fill. To fill clean water tank, extend fill hose. -
Page 9: Machine Operation
Machine Operation IMPORTANT Do not operate machine unless the operator manual has been read and fully understood. Drive the machine to the cleaning site. Before cleaning operation, place out appropriate warning signs and sweep or dust-mop the floor. When ready for cleaning lower the floor tool (page 6) and the brush deck (page 7). Setting the Cleaning Controls High Switch machine on. -
Page 10: Emergency Stop Button/ Horn
Machine Operation Emergency Stop Button/ Horn n an emergency, strike the emergency Horn button - for sounding a warning stop to disable the machine. signal Note: After the Emergency Stop button has been pressed the Traction LED will flash 7 times, pause and repeat until the Emergency Stop button has been reset and the machine switched off / on. -
Page 11: Machine In Use
Machine Operation Do not operate the machine on inclines that exceed 11%. Machine in Use To operate, select forward and depress the accelerator pedal. Note: The machine will not operate in reverse with the floor tool lowered. Vacuum pick-up and water flow will turn on if selected and providing the brush and floor tool are in the lowered position, the machine will move forward. -
Page 12: Machine Cleaning
Machine Cleaning Always ensure that the machine is switched off prior to any maintenance. After use, empty waste water tank using emptying hose and flush-out with clean water. Remove floor tool vacuum hose ensuring you remove the U-bend clip and flush out with clean water. -
Page 13: Free Wheel Function
Machine Cleaning Always ensure that the machine is switched off prior to any maintenance. Located in your waste water top tank is a vacuum shut off system, this prevents suction when the waste water tank is full. It also prevents foam created by high-foaming detergents from entering the motor. Sometimes the float vents get clogged and blocked, clean to ensure correct operation. -
Page 14: Changing Floor Tool Blades
Changing the Floor Tool Blades Always ensure that the machine is switched off prior to maintenance. Lower the floor tool then unscrew the retaining knobs and slide it off the holding bracket. Rinse the floor tool assembly with clean water and refit. Remove floor tool. -
Page 15: Machine Charging
Machine Charging Always ensure that the machine is switched off prior to charging. As the machine is used and the batteries are discharged, the meter lights will go out from right to left. If the battery-charge level is allowed to discharge to the point The battery meter displays the charge level of the batteries;... -
Page 16: Charging Lights Sequence
Charging Light Sequence Signal (LED) Meaning Red LED on First Phase (Constant Current Mode). Orange LED on Second Phase (Constant Voltage Mode). Third Phase (Constant Voltage Mode) Charge Complete. Green LED on However, after full re-charge, leaving the charger connected moves to float- charge mode to help to maintain a healthy balance between batteries. -
Page 17: Trouble Shooting
Contact Service Agent... -
Page 18: Rating Label / Personal Protective Equipment / Recycling
About the Machine Rating Label Company Name & Address Machine Description Supply Current / Voltage / Alternating Current / Frequency Charger Output Battery Voltage Noise Rating Hand Arm Vibration Weight (ready to use) Ingress Protection Rating Max Gradient QR Code WEEE Logo / Approvals Mark SKU / Part Machine yr/wk Serial number... -
Page 19: Information For Scrubber Dryer
• Regularly examine the power cord for damage, such as cracking or ageing. If damage is found, replace the cord before further use. • Only replace the power cord with the correct Numatic approved replacement parts. • Ensure that the work area is clear of obstructions and / or people. - Page 20 Undo battery terminals and remove. Remove batteries. The batteries are to be disposed of safely, as according to local government guidelines. 10. Only use genuine Numatic replacement batteries. 11. Do not allow the batteries to become fully discharged; it may not be possible to re-charge them.
-
Page 21: Recommended Spare Parts
Splash Skirt CRL 8055 903696 Filler Stretch Hose 204068 Deck Buffer Wheel CRL 8072 For optimum performance Numatic International Ltd recommend the use of the following batteries in the Twintec machines. 903437 Splash Skirt CRL 8072 NX1K LFP battery type (Li-ion) -
Page 22: Battery Information
518054, P.R. China Tel: 0086-755-83283710 0044-146-068600 www.numatic.co.uk | www.numatic.de | www.numatic.ch | www.numatic.fr www.numatic.nl | www.numatic.co.za | www.numatic.pt | www.numatic.es 1. DEFECTIVE BATTERIES If a customer wishes to return a battery to a supplier after removing from product, then collection of the battery must be arranged by the supplier; however, Faulty batteries must not be returned through the postal system or by courier. - Page 23 • Do not use defective or deformed batteries. • Use only original Numatic specific appliances to charge and discharge batteries. STORAGE: • Good batteries should be stored in a protected area away from sources of direct heat and sunlight and should be kept dry.
- Page 24 Numatic specific chargers. Warning: The battery must only be charged by the Numatic Charger supplied with the product and under NO circumstances should an alternative non Numatic charger be used as there is a risk of severe damage and fire could result.
-
Page 25: 12. Warranty
Check the mains cord regularly for any sign of damage. • Do not use damaged devices. • If the mains cord of the charger is damaged, it must be replaced by an original NUMATIC mains cord available from the manufacturer or service agent. 12. WARRANTY Lithium-Ion Battery Warranty Warranty: Commercial Use a. -
Page 28: Company Address
Floor Tool Charging Lead Battery Fuse Pack Signed numatic.com Numatic International Limited (Head Offi ce) Chard, Somerset TA20 2GB, UNITED KINGDOM Tel: 01460 68600 numatic.com Numatic International GmbH Fränkische Straße 15-19, 30455 Hannover, DEUTSCHLAND Tel: +49 (0) 511 984 2160 numatic.de...
Need help?
Do you have a question about the NX 1K CRL8072/50T and is the answer not in the manual?
Questions and answers