
Related Manuals for Teac SR-L50


Summary of Contents for Teac SR-L50
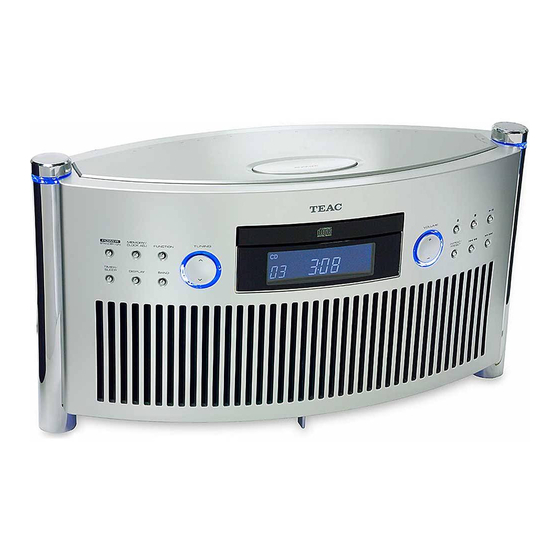
- Page 1 9A09897100 SR-L50 CD Receiver OWNER’S MANUAL MANUEL DU PROPRIÉTAIRE MANUAL DEL USUARIO...
-
Page 2: Important Safety Instructions
CAUTION: TO REDUCE THE RISK OF ELECTRIC The exclamation point within an equilateral triangle SHOCK, DO NOT REMOVE COVER (OR BACK). is intended to alert the user to the presence of NO USER-SERVICEABLE PARTS INSIDE. important operating and maintenance (servicing) - Page 3 HAZARD, DO NOT EXPOSE THIS subchapter J, based on the Radiation Control for Health APPLIANCE TO RAIN OR MOISTURE. and Safety Act of 1968“, and is classified as class 1 laser product. There is not hazardous invisible laser radiation during operation because invisible laser radiation emitted inside of this product is completely confined in the protective housings.
-
Page 4: Table Of Contents
Before Use ........ -
Page 5: Before Use
Before Use Beware of condensation Read this before operation When the unit (or a disc) is moved from a cold to a < As the unit may become warm during operation, warm place, or used after a sudden temperature always leave sufficient space around the unit for change, there is a danger of condensation;... -
Page 6: Compact Disc
CDs of this sort can damage the unit. How to remove the disc < If you are in any doubt as to the care and handling of a CD-R disc, read the precautions supplied with the disc, or contact the disc manufacturer directly. -
Page 7: Connection
FM antenna (3 elements or < Make sure to connect: more) is recommended. white white white white < Be sure to insert each plug securely. To prevent hum and noise, do not bundle the connection cords with the power cord or speaker cord. -
Page 8: Names Of Each Control
Names of Each Control SIDE FRONT REMOTE CONTROL C D E F REAR... - Page 9 FM feeder antenna (with EUROPE model) SKIP/SEARCH buttons (. m / , /) Tune in an FM station and extend the lead to find the Press these buttons to skip tracks. best position for the reception. Then fix it to the wall Hold down these buttons to search for a part of a with thumb tacks or the like.
-
Page 10: Remote Control Unit
Refer to the precautions on their labels. effective range, remote control operation may be < When the remote control unit is not to be used for a impossible if there are any obstacles between the long time (more than a month), remove the batteries unit and the remote control. -
Page 11: Playing A Cd
Press the FUNCTION button repeatedly to select Press the PLAY/PAUSE button (y /J ) to start “CD”. playback. < When no disc is in the unit, “no dISC” will be Playback starts from the first track. displayed. When playback of all the tracks has finished, the unit stops automatically. - Page 12 Search for a part of a track Press the STOP button (H) to stop playback. During playback, hold down the SKIP/SEARCH button (. m or , /) and release it when the part you want to listen to is found. To suspend playback temporarily (pause mode) Press the PLAY/PAUSE button (y/J).
-
Page 13: Intro Check
< To return to the normal playback, press the INTRO seconds and returns to original display. button again. < In the stop mode, remaining time of the disc cannot < To stop the Intro Check function, press the STOP be selected. -
Page 14: Repeat Playback
POWER switch FUNCTION button It is also possible to select a track to be repeated in the stop mode. Press the REPEAT/PRESET button and then select the track number by pressing the SKIP/SEARCH button (.m or ,/) or the numeric buttons. -
Page 15: Programmed Playback
< You can program up to 20 tracks. the display. < You can also use the front panel buttons to select a track number. In this case, press the SKIP/SEARCH button to select a track number and then press the MEMORY/CLOCK ADJ button while “MEMORY”... - Page 16 To clear program buttons, and then press the MEMORY/CLOCK ADJ button. In the stop mode, do either of the following to clear The track is added to the end of the program. the program: Press the OPEN/CLOSE button (L) and open it.
-
Page 17: Tuner
If the reception is poor Select the station you want to listen to (auto AM broadcast selection). Turn around the unit to find the best position for AM stations. Press the TUNING button up or down until the FM broadcast frequency display begins to change. -
Page 18: How To Preset Stations
How to Preset Stations In each band, up to 10 stations can be stored in preset Within 10 seconds, press the MEMORY/CLOCK ADJ memories. button. Press the BAND button to select FM or AM. < If you press the numeric buttons (1–0) of the remote control unit, you can store the station directly. -
Page 19: Aux
Listening to the External Sources TIMER/SLEEP You can connect external sources such as VCR deck The power can be switched off at the specified time. or TV to the AUX input jacks. When the power is on, press the TIMER/SLEEP (or the SLEEP button of the remote control unit) button Press the POWER switch to turn the unit ON. -
Page 20: Clock Adjustment
“:” blinks in the clock display. < In the TUNER mode, use the TUNING button. < If the AUX is selected or the unit is off, press and Press the MEMORY/CLOCK ADJ button. hold the MEMORY/CLOCK ADJ button for 2 or more seconds, and continue the procedure from step <... -
Page 21: Timer
Press the MEMORY/CLOCK ADJ button. Setting the timer Press the DISPLAY button to change the timer mode. (In the CD mode or the TUNER mode, press the button twice.) The minute blinks on the display. The “TIMER” indicator blinks on the display. - Page 22 FUNCTION button to select “CD”, insert a disc and adjust the volume before turning the unit off. For the timer to start the radio, tune in a station and adjust the volume before turning the unit off. The “SNOOZE” indicator appears on the display Don’t forget to turn the unit off, or the timer won’t...
-
Page 23: Troubleshooting
If muting is on, press the MUTING button. (Europe Model) The sound is noisy. CD PLAYER Section e The unit is too close to a TV set or similar appliances. Install the unit further from them, or Frequency Response: turn them off. - Page 24 Minuterie ........41...
-
Page 25: Avant Utilisation
< Lors du débranchement du cordon d’alimentation de la prise murale, toujours tirer sur la fiche et non sur le cordon. < Pour garder le capteur laser propre, ne pas y toucher et ne pas oublier de fermer le tiroir du disque. -
Page 26: Disques Compacts
< Ranger les disques dans leur étui après utilisation afin d’éviter de les rayer ou que de la poussière ne • Disques CD-R correctement finalisés se dépose, ceci pouvant compromettre la lecture par la tête laser. -
Page 27: Connexions
Branchement de l’antenne FM (modèle Etats-Unis/Canada et modèle général d’exportation uniquement) Branchez le fil de l’antenne FM sur le connecteur FM, ensuite le fixer dans la position qui donne la meilleure réçeption. LINE OUT LECTEUR DVD, VCR, ETC. -
Page 28: Nomenclature
Nomenclature DESSUS CÔTÉ DEVANT TÉLÉCOMMANDE C D E F DERRIÈRE... - Page 29 AUX. Touche INTRO Touche TUNING Utiliser cette touche pour débuter la vérification Appuyer sur cette touche vers le haut ou vers le bas Intro. pour rechercher une station. Touche MUTING Capteur de télécommande Pour couper le son provisoirement, appuyer sur la Tiroir de disque touche MUTING.
-
Page 30: Boîtier De Télécomande
< Ne pas chauffer ou démonter les piles et ne jamais lecteur, le lecteur peut de ne pas bien fonctionner. jeter les anciennes piles dans un feu. -
Page 31: Lecture Du Cd
Appuyer sur la touche PLAY/PAUSE (y/J) pour pour choisir “CD”. débuter la lecture. < Si il n’y a pas de disque dans l’appareil “no dISC”. La lecture débute à la première piste. Quand toute les pistes ont jouées, l’appareil s’arrête Appuyer sur la touche OPEN/CLOSE (L) pour ouvrir automatiquement. - Page 32 Appuyer sur la touche PLAY/PAUSE (y /J ). La < Quand la touche . m est appuyée une fois lecture s’arrête à la position courante. durant la lecture, la piste qui joue sera rejouée à...
-
Page 33: Function De Contrôle D'introductions
Durée de la lecture de la piste courante Temps qui reste sur le disque Affichage de l’horloge Affichage de la minuterie < Affichage de l’horloge et minuterie apparaissent pour 4 secondes seulement. < En mode d’arrêt, le temps qui reste du disque ne peut pas être choisi. -
Page 34: Lecture Répétitive
< Si vous appuyez sur la touche SKIP/SEARCH répétition de toute les pistes ( , / ) durant la lecture aléatoire, la piste suivante sera choisir aléatoirement et jouée. (éteint) Si vous appuyez sur la touche SKIP/SEARCH (. -
Page 35: Lecture Programmée
PLAY/PAUSE (y/J) pour commencer la lecture prorammée. La programmation est retenue en mémoire même si < Si les touches numériques ne sont pas pressées en la touche FUNCTION est appuyée ou l’appareil est moins de 10 secondes, le mode programmation est éteint. - Page 36 MEMORY/CLOCK ADJ répététivement, pour voir les numéros de pistes entreposés en mémoire. Le témoin ”MEMORY” s’allume, mais le contenu de Pour ajouter une piste à la fin du programme la programmation n’est pas perdu. En mode d’arrêt, appuyer sur la touche Pour retourner en mode programmation, appuyer MEMORY/CLOCK ADJ répététivement jusqu’à...
-
Page 37: Ecoute Radio
(réglage manuel). Appuyer plusieurs fois sur la touche TUNING vers le haut ou vers le bas jusqu’à obtention de la station souhaitée. Appuyer sur la touche FUNCTION répététivement pour choisir “TUNER”. Appuyer sur la touche BAND pour sélectionner FM ou AM. -
Page 38: Comment Préréglé Une Station
Comment préréglé une station Pour chaque bande, jusqu’à 10 stations peuvent être Dans les 10 secondes qui suivent, appuyer sur la entreposer en mémoire. touche MEMORY/CLOCK ADJ. Appuyer sur la touche BAND pour sélectionner FM ou AM. < Si vous appuyez sur les touches numériques (1–0) de la télécommande, vous pouvez entreposer la... -
Page 39: Aux
TIMER/SLEEP Il est possible de connecter des appareils externes L’appareil peut être éteint à une heure choisie. tels qu’une VCR ou un téléviseur aux prises d’entrée AUX. Quand l’appareil est allumé, appuyer sur la touche TIMER/SLEEP (ou la touche SLEEP de la télécommande) répététivement jusqu’à... -
Page 40: Réglage De L'horloge
“:” clignote dans l’afficheur de l’horloge. < En mode de TUNER, utiliser la touche TUNING. < En cas de sélection de AUX ou si l’unité est éteinte, maintenir pressée la touche MEMORY/CLOCK ADJ Appuyer sur la touche MEMORY/CLOCK ADJ. -
Page 41: Minuterie
Appuyer sur la touche MEMORY/CLOCK ADJ. Réglage de la minuterie Appuyer sur la touche DISPLAY pour changer le mode de minuterie. (En mode de CD ou de TUNER, appuyer sur la touche deux fois.) Le témoin “TIMER” clignote. Les minutes clignotent. - Page 42 Appuyer sur la touche POWER pour éteindre l’appareil. Comment utiliser la fonction sommeil Une fois que l’heure de mise en marche est atteinte, appuyer sur la touche SNOOZE et l’appareil s’éteindra pour 5 minutes pour ensuite revenir en marche.
-
Page 43: Guide De Dépannage
520 kHz à 1710 kHz (étape 10 kHz) Aucun son ne sort des enceintes. (Modèle Etats-Unis/Canada, Modèle général e Réglez le volume. d’exportation) e Si la fonction “Silence” est active, appuyez sur la 522 kHz à 1620 kHz (étape 9 kHz) touche MUTING. (Modèle Europe) Bruits parasites. - Page 44 Conexión ........47...
-
Page 45: Antes De Usar
Cuidado con la condensación Leer antes de la operación Cuando la unidad (o un disco) se mueve de un lugar < Debido a que la unidad puede calentarse durante la frío a un lugar cálido o cuando está en uso después operación, siempre deje espacio suficiente encima... -
Page 46: Disco Compacto
“salte” el sensor óptico. • Discos CD-R debidamente grabados (con cierre de sesión) < No exponga los discos a la luz directa del sol o a humedad y temperatura alta por periodos Nota: prolongados. Una exposición prolongada a altas <... -
Page 47: Conexión
< Lea las instrucciones de cada componente que pretenda utilizar con esta unidad. En una zona en las que las señales de FM sean débiles, se recomienda el uso de una antena de FM de exterior < Asegúrese de conectar: no equilibrada (3 elementos o más) de 75 ohmios. -
Page 48: Nombres De Cada Control
Nombres de cada control VISTA SPERIOR VISTA LATERAL VISTA FRONTAL MANDO A DISTANCIA C D E F VISTA TRASERA... - Page 49 Botón SNOOZE Botón DISPLAY Después de que se llega a la hora, utilice este botón Utilice este botón para cambiar el modo de para apagarla durante 5 minutos. desplegado. Perilla BASS CONTROL Botón TIMER/SLEEP Utilice este mando para ajustar el nivel de los bajos.
-
Page 50: Unidad De Control Remoto
< Si no va a utilizar el control remoto por mucho tiempo (más de un mes), retire las pilas para evitar < Si se utiliza la unidad cerca de otros aparatos que pérdidas. -
Page 51: Reproducción De Cd
Coloque un disco con la etiqueta hacia arriba. < Nunca coloque más de un disco en la unidad. < Se despliega en pantalla el número total de pistas y el tiempo total de reproducción del disco. < Toma algunos segundos para que la unidad lea el contenido del disco. - Page 52 Reproducción de CD (2) Para detener la reproducción Para saltar a la siguiente o a una pista previa Oprima el botón STOP (H ) para detener la Durante la reproducción, oprima el botón (. m , / ) reproducción. SKIP/SEARCH repetidamente hasta que se encuentre la pista deseada.
-
Page 53: Comprobación De Introducción
10 segundos. Ejemplo 1: Para reproducir a partir de la 5° canción: < Esta función opera tanto en el modo de parada y durante la reproducción normal. Presione el botón INTRO. Se enciende el indicador INTRO en la pantalla y se inicia Ejemplo 2: la verificación de introducción. -
Page 54: Reproducción Repetida
Cada vez que se oprime el botón REPEAT/PRESET, el Las pistas pueden reproducirse aleatoriamente. indicador REPEAT se enciende o parpadea y el modo Oprima el botón SHUFFLE en el modo de paro o de se cambia de la manera siguiente: reproducción. -
Page 55: Reproducción Programada
Reproducción programada (1) Se pueden programar hasta 20 pistas en el orden Dentro de un lapso de 10 segundos, oprima el botón deseado. MEMORY/CLOCK ADJ. La pista se programa y se despliega “P-02”. < La reproducción aleatoria, no funciona durante la reproducción programada. - Page 56 Para borrar el programa botones numéricos, y después oprima el botón MEMORY/CLOCK ADJ. En el modo de paro, realice alguna de las siguientes La pista se agrega al final del programa. acciones para borrar el programa: Oprima el botón OPEN/CLOSE (L) y ábralo.
-
Page 57: Cómo Escuchar La Radio
Oprima el interruptor POWER para ENCENDER la unidad. pueden sintonizar automáticamente (selección manual). Oprima el botón TUNING hacia arriba o abajo varias veces hasta que encuentre la emisora que desea sintonizar. Oprima el botón FUNCTION de manera repetida para seleccionar “TUNER”. -
Page 58: Cómo Preestablecer Estaciones
Cómo preestablecer estaciones En cada banda, se pueden almacenar hasta 10 Dentro de un lapso de 10 segundos, oprima el botón estaciones en memorias preestablecidas. MEMORY/CLOCK ADJ. Oprima el botón BAND para seleccionar FM o AM. < Si oprime los botones numéricos (1–0) de la unidad de control remoto, puede almacenar la estación... -
Page 59: Cómo Escuchar Fuentes Externas
AUX. Cuando la energía está activada, oprima el botón TIMER/SLEEP (o el botón SLEEP de la unidad de control Oprima el interruptor POWER para ENCENDER la remoto) repetidamente hasta que aparezca la hora unidad. -
Page 60: Ajuste De Reloj
Ajuste de reloj MEMORY/CLOCK ADJ .m ,/ DISPLAY En el modo CD o en el modo TUNER, oprima el Oprima el botón .m o ,/ para ajustar botón DISPLAY para seleccionar el desplegado de la hora actual. reloj. Empieza a parpadear “:” en el desplegado de reloj. -
Page 61: Despertador
Oprima el botón MEMORY/CLOCK ADJ. Ajuste del despertador Oprima el botón DISPLAY para cambiar el modo del despertador. (En el modo CD o en el modo TUNER, oprima el botón dos veces.) El indicador “TIMER” empieza a parpadear en la Los minutos parpadean en la pantalla. - Page 62 Oprima el botón POWER para apagar la unidad. Cómo utilizar la función Snooze (Zumbador) Después de que se llegue a la hora, oprima el botón SNOOZE y la unidad se apagará durante 5 minutos y después se volverá a encender.
-
Page 63: Mando A Distancia
Sección del SINTONIZADOR vea si puede resolver el problema usted mismo antes Rango de frecuencia (FM): de llamar a su distribuidor o al Centro de servicio TEAC. 87,50 MHz a 108,00 MHz (paso de 100 kHz) (Modelos de exportación EE.UU./Canadá y... - Page 64 Campesinos N°184, Colonia Granjas Esmeralda, Delegacion Iztapalapa, CP 09810 México DF Phone: (525) 581-5500 TEAC UK LIMITED 5 Marlin House, Croxley Business Park, Watford, Hertfordshire, WD18 8TE, U.K. Phone: 01923-819699 TEAC DEUTSCHLAND GmbH Bahnstrasse 12, 65205 Wiesbaden-Erbenheim, Germany Phone: 0611-71580 TEAC FRANCE S.A.
Need help?
Do you have a question about the SR-L50 and is the answer not in the manual?
Questions and answers