Advertisement
Quick Links
Technical Support and E-Warranty Certificate www.vevor.com/support
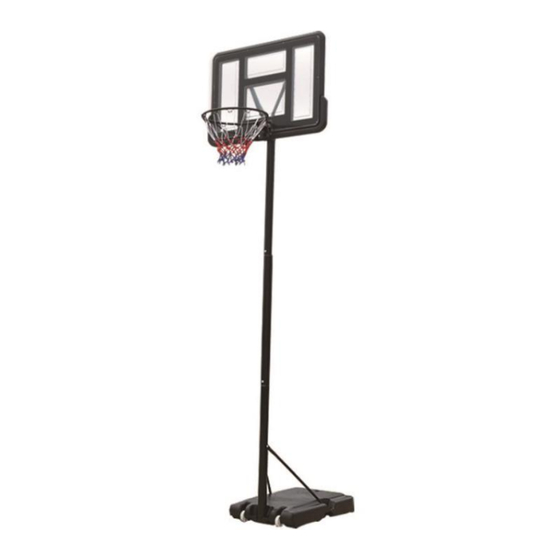
BASKETBALL HOOP STAND
MODEL:M021A-2
We continue to be committed to provide you tools with competitive price.
"Save Half", "Half Price" or any other similar expressions used by us only represents an
estimate of savings you might benefit from buying certain tools with us compared to the major
top brands and dose not necessarily mean to cover all categories of tools offered by us. You
are kindly reminded to verify carefully when you are placing an order with us if you are
actually saving half in comparison with the top major brands.
Advertisement

Related Manuals for VEVOR M021A-2


Summary of Contents for VEVOR M021A-2
- Page 1 Technical Support and E-Warranty Certificate www.vevor.com/support BASKETBALL HOOP STAND MODEL:M021A-2 We continue to be committed to provide you tools with competitive price. "Save Half", "Half Price" or any other similar expressions used by us only represents an estimate of savings you might benefit from buying certain tools with us compared to the major top brands and dose not necessarily mean to cover all categories of tools offered by us.
- Page 2 This is the original instruction, please read all manual instructions carefully before operating. VEVOR reserves a clear interpretation of our user manual. The appearance of the product shall be subject to the product you received. Please forgive us that we won't inform you again if there are any technology or software updates on our product.
-
Page 3: Assembly Precautions
INSTRUCTIONS Thank you very much for choosing this Basketball Hoop Stand. Please read all of the instructions before using it.The information will help you achieve the best possible results. WARNING: Please read this manual carefully before using the product. Failure to do so may result in serious injury. -
Page 4: Use Precautions
USE PRECAUTIONS WARNING: TO PREVENT SERIOUS INJURY AND DEATH FROM TIPPING: 1. Use as intended only. Do not sit or stand on the product. 2. Inspect before every use. Do not use it if parts are loose or damaged. 3. Use on flat, level, and hard surfaces only. 4.If any parts are missing, broken, damaged, or worn, stop using this item until repairs are made and factory replacement parts are installed. - Page 5 Parts list Parts Remark B1,B2,B3 Screw M8x35mm connect board,ring and board bracket B4,B5,B6, Screw with spring connect board,ring and board bracket M8x110mm C1,C2 Screw M8x16mm fix the top of the bracket and the board D1,D2,D3 Screw M8x20mm connect base and pole brace E1,E2,E3 Screw M8x90mm connect bottom pole and pole brace...
- Page 6 - 5 -...
- Page 7 Assembly Steps 1.Open the carton, find out all the parts listed on page 4,two adults are req uired for assembly. 2.Insert the top necked part of bottom pole Y into the bottom of the middle pole X; When there are burrs or deformation at the pole connection,a piece of cardboard or wooden board can be placed at the bottom of the bottom pole to knock the necked part of the pole into place.
- Page 8 4.Connect pole brace U1 U2 and base S by screw D; connect pole brace U1 U2 and bottom pole Y by screw E. Note the difference between the top and bottom of the pole brace. 5.Connect ring J,board M and board bracket K by screw B. Note that the screw with spring B4-7 must be connected to the two holes on the top of ring.
- Page 9 6.Fix tighten it. the top of board bracket K behind the board M by screw C and 7.Fix the top of top pole W in the middle of board bracket K by screw F. Insert the installed top pole W into the middle pole X, fix them by screw F. - 8 -...
- Page 10 Adjust the product height with screw F. 8.Install Nets 9.For safety reason, sand instead of water is recommended to fill up the base during the sub-freezing weather. Please note that sand will not be poured out once filled in the base - 9 -...
- Page 11 Address:Baoshanqu Shuangchenglu 803long 11hao 1602A-1609shi Shanghai Imported to AUS: SIHAO PTY LTD, 1 ROKEVA STREETEASTWOOD NSW 2122 Australia Imported to USA: Sanven Technology Ltd., Suite 250, 9166 Anaheim Place, Rancho Cucamonga, CA 91730 Pooledas Group Ltd Unit 5 Albert Edward House, The Pavilions Preston, United Kingdom SHUNSHUN GmbH Römeräcker 9 Z2021, 76351...
- Page 12 Technical Support and E-Warranty Certificate www.vevor.com/support Made In China...
Need help?
Do you have a question about the M021A-2 and is the answer not in the manual?
Questions and answers