Advertisement
Quick Links
2650-2033-77 Rev. C
What is Included:
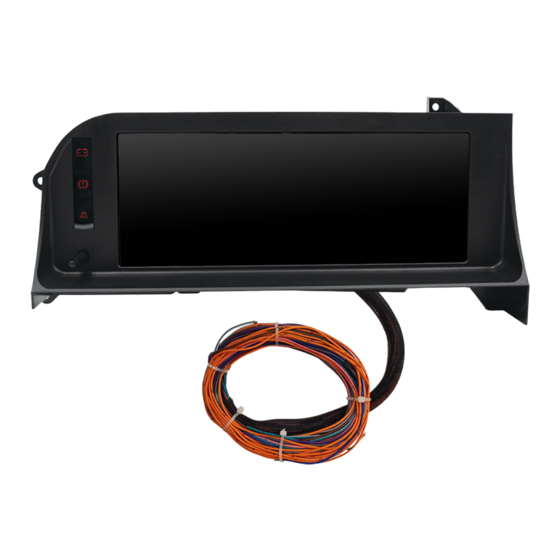
(1) Preassembled Panel Mount Digital Gauge Display &
Universal Wire Harness
(1) Oil pressure Sending Unit
(1) Temperature Sending Unit
(4) Light Sockets
(4) 194 Bulbs
(1) 510 OHM Resistor
(2) Inline Fuse Holders
(1) 3A Fuse
(1) 5A Fuse
NOTE: It is highly recommended that the main 12v
key on power wire (longer red wire) be
protected with a standard automotive 5A inline
fuse. Not doing so, may lead to damage not
covered under warranty.
Step 1, Removal
Begin by removing the steering column covers (upper & lower). Next, remove the lower dash plastic cover (requires 8mm socket), followed
by removing the metal knee plate which is behind the lower dash plastic (those also require an 8mm socket). While you are down there, go
ahead and remove the two lower bezel screws, as well as the right, lower bezel bracket screw (image 2 below). This requires a 7mm socket.
Image 1
Now, you will want to remove the switches from the dash bezel. You will find release tabs visible under the buttons that you press, to be able
to pull the switches from the bezel (see image 3 on next page). Once removed, use a screwdriver, and carefully pry against the wire harness
locking tab, to push it away from the switch. Be careful not to bend the tab away from the harness connector, as you don't want to break the
locking tabs (see image 4 on next page).
®
InVision
87-93 MUSTANG DIRECT FIT
DIGITAL DASH
Recommended Tools & Supplies:
Screwdriver set (including both flathead & Phillips)
1/4" drive standard & metric socket set
3/8" drive standard & metric socket set
Standard & Metric open end wrenches
Wire strippers
Wire crimpers
Wire splice connectors for connecting wires to your vehicle harness.
Wire coverings or zip ties for neatly organizing or bundling wires.
Wire diagram of your vehicle 3A & 5A fuse & fuse holders
Soldering iron, solder & various sizes of heat shrink tubing
Digital volt/ohm meter
Oil Pressure Socket
Image 2
Advertisement

Related Manuals for AutoMeter INVISION LCD DASH KIT

Summary of Contents for AutoMeter INVISION LCD DASH KIT
- Page 1 ® InVision 87-93 MUSTANG DIRECT FIT DIGITAL DASH 2650-2033-77 Rev. C What is Included: Recommended Tools & Supplies: Screwdriver set (including both flathead & Phillips) (1) Preassembled Panel Mount Digital Gauge Display & 1/4" drive standard & metric socket set Universal Wire Harness 3/8"...
- Page 2 Image 3 Image 4 After removal of the switches, you can use a T20 Torx bit, with a short ¼" drive ratchet to remove the top of the bezel screws. With all of this removed, you should be able to carefully remove the instrument cluster bezel from the vehicle. Now, you may remove the instrument cluster screws (which are 7mm).
- Page 3 This wire also may not be used for your particular installation. w/ white stripe: Temperature sender wire. Run this out to the engine bay, to where you will install the AutoMeter temperature sender. Green Violet: Speed signal.
- Page 4 If they do NOT flash, then you will need to wire in a light socket, with an incandescent bulb (such as a 194) in parallel. For example, for the left turn signal, we wired as recommended, but also used an AutoMeter model 3220 light bulb, and wired the white wire of this light socket to the same light green w/white trace factory turn signal wire, and we then grounded the black wire of the new light socket.
- Page 5 You will need AutoMeter model number 2268 adapter. Another popular option is to modify the cover plate located just above the oil filter, and drill & tap a 1/8"NPT hole and install the sender there. Some choose to run braided line, such as AutoMeter model number 3227, in order to remotely mount the sender away from the exhaust when using this location/method.
- Page 6 Step 4, Setup The InVision Digital Dash comes equipped with a button/knob referred to as the "Selector Knob". To enter the InVision Digital Dash Main ® ® Menu, push in & release the Selector Knob one time. The Main Menu will appear. The Selector Knob also turns slightly left or right. Use the left or right motion to scroll through the menu.
- Page 7 Tachometer Scaling: The standard scale is 0-10,000 RPM. You can adjust the tachometer scale to be 0-8,000 RPM if desired. To adjust the scaling, enter the Main Menu. Scroll to Tachometer, and press Enter. Next, scroll to RPM and press Enter. Scroll to the desired scale, and press Enter.
- Page 8 Time: You can choose to display the time in either 12 hour (standard) or 24 hour mode. To adjust the time, enter the Main Menu, scroll to Time, and press Enter. Select either 12 or 24 hour mode, and press Enter. You can also adjust the time here.
- Page 9 Display Two Display Three...
- Page 10 Display 4 Displays One, Two, and Four do not have any colors options. If you choose Display Three, you will have a choice of colors. To change the color, when Display Three is displayed, press Enter to access the Main Menu, scroll to Display and press Enter. Scroll to Display Three (which will be in bold white) and press Enter again.
- Page 11 The odometer can be set to match the mileage on your vehicle. This can only be done ONE time only, and must be done within the first 500 miles. After being set, or 500 miles have been accumulated, this option will disappear and it cannot be set again. To set your odometer, enter the Main Menu, scroll to Speedometer, and push Enter.
- Page 12 AutoMeter Products, Inc. warrants to the consumer that all AutoMeter High Performance products purchased from an Authorized AutoMeter Reseller will be free from defects in material and workmanship for a period of twelve (12) months from date of the original purchase. Products that fail within this 12 month warranty period will be repaired or replaced at AutoMeter’s option, when determined by AutoMeter that the product failed due to defects in material or workmanship.
Need help?
Do you have a question about the INVISION LCD DASH KIT and is the answer not in the manual?
Questions and answers