
Related Manuals for Daewoo TORNADO UP-LIFT FLR00131


Summary of Contents for Daewoo TORNADO UP-LIFT FLR00131
- Page 1 Tornado Up-Lift Vacuum Model No. FLR00131 User Manual IMPORTANT – RETAIN THESE INSTRUCTIONS FOR FUTURE REFERENCE...
-
Page 2: Table Of Contents
Tornado Up-Lift Vacuum Model No. FLR00131 User Manual Contents Page No. Contents Reading and Storing the User Manual Important Safety Instructions for Proper Use Explanation of Symbols Description of Parts & Accessories Assembling Your Vacuum Cleaner Before First Use of Your Vacuum Cleaner Using Your Vacuum Cleaner Removing the Motor Unit for Handheld Use Attaching the Tools to the Motor Unit... -
Page 3: Reading And Storing The User Manual
Tornado Up-Lift Vacuum Model No. FLR00131 User Manual READING AND STORING THE USER MANUAL Before using this product, please read through this manual carefully paying particular attention to the safety instructions. Failure to do so may result in personal injury or damage to the product. - Page 4 Tornado Up-Lift Vacuum Model No. FLR00131 User Manual to the mains supply. DO NOT use this appliance outdoors. • It is imperative to unplug the power cord after the • appliance has been used, before it is cleaned and whilst being repaired.
- Page 5 Tornado Up-Lift Vacuum Model No. FLR00131 User Manual Ensure fingers and other objects are never placed in any • part of the vacuum cleaner. Clothing or hair may become trapped if the vacuum is used improperly. Keep hair, loose clothing, jewellery, fingers and all parts of •...
-
Page 6: Explanation Of Symbols
Tornado Up-Lift Vacuum Model No. FLR00131 User Manual Explanation of Symbols The following warning symbols or words are used in this instruction manual: Products labelled with UK Conformity Assessment identifies products conforming to UK statutory requirements. Products labelled with this symbol conform to applicable provisions of the European Economic Area. -
Page 7: Description Of Parts & Accessories
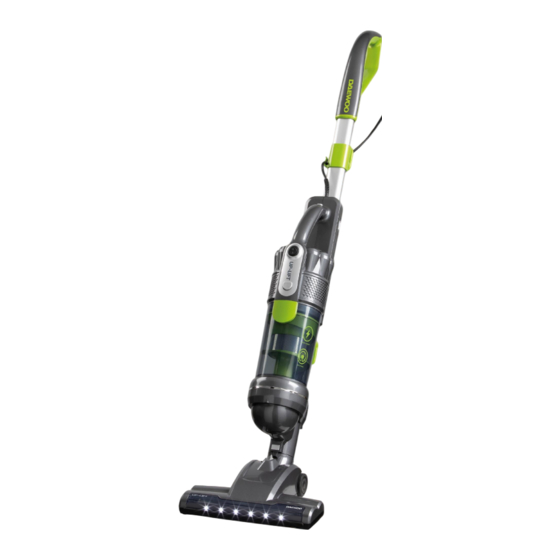
Tornado Up-Lift Vacuum Model No. FLR00131 User Manual Description of Parts & Accessories 1. Handle 2. Adjustable Cable Tidy (Rear) 3. Cable Hook 4. Mains Cable 5. Motor Unit Handle 6. Motor Unit 7. Motorised Floor Tool 8. Floor Tool Release Button 9. -
Page 8: Assembling Your Vacuum Cleaner
Tornado Up-Lift Vacuum Model No. FLR00131 User Manual Assembling Your Vacuum Cleaner Assemble your vacuum cleaner using the guide below: A. Insert the main body into the Motorised Floor Tool (7) as shown in ‘A’ above. B. Insert the Handle section (1) into the top of the main section as shown in ‘B’... -
Page 9: Before First Use Of Your Vacuum Cleaner
Tornado Up-Lift Vacuum Model No. FLR00131 User Manual Before first use of Your Vacuum Cleaner Remove all packing materials and discard responsibly. Ensure that all parts are present – See Description of Parts above and that there is no damage to any component or the mains cable. Using Your Vacuum Cleaner 1. - Page 10 Tornado Up-Lift Vacuum Model No. FLR00131 User Manual Using the Non Motorised Floor Tool (19) 4. Right: The Non Motorised Floor Tool (19) can be fitted as shown right as an alternative to the Motorised Floor Tool (7). To remove the Motorised Floor Tool (7) or Non Motorised Floor Tool (19), press the Floor Tool Release Button (8) and remove.
-
Page 11: Removing The Motor Unit For Handheld Use
Tornado Up-Lift Vacuum Model No. FLR00131 User Manual Removing the Motor Unit for Handheld Use To use your vacuum cleaner handheld, remove the Motor Unit (6) by holding the Motor Unit Handle (5) and pressing the Motor Unit Release Button (14). Press the Motor Unit Release Button (14) to remove the... - Page 12 Tornado Up-Lift Vacuum Model No. FLR00131 User Manual If the brush attachment is not required on the Upholstery Tool/Brush (19), press the catch on the top of the tool to release and remove the brush as shown right: 2. Attach the Crevice Tool (17) to the Motor Unit (6) to clean carpet edges, stairs and other hard to reach...
-
Page 13: Emptying And Cleaning Your Vacuum Cleaner
Tornado Up-Lift Vacuum Model No. FLR00131 User Manual 3. Reassemble the vacuum after use and wrap the Mains Cable (4) around the cable tidies as shown right and store in a cool, dry place away from direct sunlight. Emptying and Cleaning Your Vacuum Cleaner WARNING! Always disconnect the cleaner from the mains power supply before cleaning. -
Page 14: Cleaning The Filter Assembly
Tornado Up-Lift Vacuum Model No. FLR00131 User Manual 2. To empty the cleaner, release the Motor Unit (6) by pressing the Motor Unit Release Button (14). Hold the Motor Unit (6) over a waste bin. Prise the Dust Release Catch (9) downwards to allow the base of the Dust Compartment (10) to swing open and release the dust into the waste bin. - Page 15 Tornado Up-Lift Vacuum Model No. FLR00131 User Manual 4. Remove the Filter Assembly (11) as shown below: a. Lift the Filter Assembly (11) out of the Dust Compartment (10). b. & c. Separate the Hepa Filter from the Cyclonic Filter. 5.
- Page 16 Tornado Up-Lift Vacuum Model No. FLR00131 User Manual Inset 6. Reassemble the Filter Assembly (11) as shown above. Ensure that the two lugs on the Cyclonic Filter (see inset above arrowed) align with the two notches at the back of the Dust Compartment (10). Replace the Hepa Filter on top of the Cyclonic Filter.
-
Page 17: Cleaning The Outlet Filter
Tornado Up-Lift Vacuum Model No. FLR00131 User Manual Cleaning the Outlet Filter 8. Press the two Air Outlet Cover Release Buttons (15) and remove the Air Outlet Cover (16) as shown left: Remove the outlet filter from inside the Air Outlet Cover (16) and wash in warm running water until clean. -
Page 18: Removing And Replacing The Floor Brush
Tornado Up-Lift Vacuum Model No. FLR00131 User Manual Removing and Replacing the Floor Brush Remove the floor brush from the Motorised Floor Tool (7) using the guide below: A. Push the retaining clip catch towards the front of the Motorised Floor Tool (7). B. -
Page 19: Care And Maintenance Of Your Vacuum Cleaner
Tornado Up-Lift Vacuum Model No. FLR00131 User Manual Follow the reverse of the above procedure to replace the floor brush. At one end of the floor brush ensure the triangular lug in the Motorised Floor Tool (7) fits into the triangular recess in the floor brush as below: Whilst replacing the floor brush, ensure the triangular lug (shown... -
Page 20: Recommended Filter Cleaning Intervals
Tornado Up-Lift Vacuum Model No. FLR00131 User Manual WARNING! DO NOT continue to use your vacuum cleaner once the ‘MAX’ mark has been reached as permanent damage may occur to the appliance which may invalidate your warranty. Recommended Filter Cleaning Intervals Filter Type Recommended Cleaning Period •... -
Page 21: Troubleshooting Guide
Tornado Up-Lift Vacuum Model No. FLR00131 User Manual Troubleshooting Guide Problem Possible Cause Possible Solution Unit fails to turn on. The unit may not be Ensure the plug is fully properly plugged in. inserted into the socket and the socket is switched The fuse in the plug Check fuse by substitution. -
Page 22: Recycling Information
Tornado Up-Lift Vacuum Model No. FLR00131 User Manual Non-Rewireable Mains Plug If your appliance is supplied with a non-rewireable plug fitted to the mains lead and should the fuse need replacing, you must use an ASTA approved one (conforming to BS 1362 of the same rating). Never use a plug with the fuse cover missing. - Page 23 Tornado Up-Lift Vacuum Model No. FLR00131 User Manual IMPORTANT – RETAIN THESE INSTRUCTIONS FOR FUTURE REFERENCE...
- Page 24 Tornado Up-Lift Vacuum Model No. FLR00131 User Manual Notes IMPORTANT – RETAIN THESE INSTRUCTIONS FOR FUTURE REFERENCE...
- Page 25 As part of our commitment to quality, we are offering you an extra 2 years warranty in addition to your 1 year guarantee Your Daewoo vacuum product is guaranteed for 1 year from the date of original purchase, with proof of purchase or receipt. If any defect should occur due to faulty workmanship or material, your faulty vacuum should be returned to the place of purchase, replacement or refund is at the discretion of the retailer.
Need help?
Do you have a question about the TORNADO UP-LIFT FLR00131 and is the answer not in the manual?
Questions and answers