Table of Contents
Advertisement
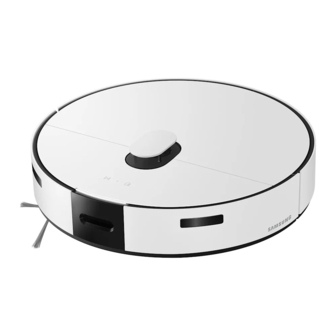
Jet Bot Combo
User manual
VR7MD97714* / VR7MD96514* Series
• Before operating this unit, please read the instructions carefully.
• For indoor use only
Wi-Fi MODEL
Connecting SmartThings
1. Launch the QR Code Reader app to scan the QR image attached to the product.
2. When the SmartThings app is running, tap 'Add' to connect the SmartThings app
to the product.
Registering the product / Reading the manual / Customer support
1. Launch the QR Code Reader app to scan the QR image attached to the product.
2. When the SmartThings app is running, press 'Product support' .
3. Select 'Product registration' , 'Manual' or 'Customer support' .
* Product registration may not be available in all countries.
NON Wi-Fi MODEL
Registering the product / Reading the manual / Customer support
1. Launch the QR Code Reader app to scan the QR image attached to the product.
2. Select 'Product registration' , 'Manual' or 'Customer support' .
* Product registration may not be available in all countries.
Advertisement
Table of Contents

Related Manuals for Samsung VR7MD96514 Series


Summary of Contents for Samsung VR7MD96514 Series
- Page 1 Jet Bot Combo User manual VR7MD97714* / VR7MD96514* Series • Before operating this unit, please read the instructions carefully. • For indoor use only Wi-Fi MODEL Connecting SmartThings 1. Launch the QR Code Reader app to scan the QR image attached to the product. 2.
-
Page 2: Table Of Contents
Contents Safety information Before you begin Product overview Installation Installing Operation Preparing Clean Water Tank Charging the Jet Bot Combo Using the Jet Bot Combo SmartThings App Before using SmartThings Using the SmartThings App Maintenance Cleaning and maintaining the Clean Station Descaling the Steamer Maintaining and cleaning the Jet Bot Combo Cleaning and maintaining the Sensor Window... -
Page 3: Safety Information
Safety information • Before operating the appliance, please read this manual thoroughly and retain it for your reference. • Because the following operating instructions cover various models, the characteristics of your vacuum cleaner may differ slightly from those described in this manual. Caution/Warning symbols used WARNING Indicates that a danger of death or serious injury exists. - Page 4 Safety information General 1. This appliance is not intended for use by persons (including children) with reduced physical, sensory or mental capabilities, or lack of experience and knowledge, unless they have been given supervision or instruction concerning use of the appliance by a person responsible for their safety.
- Page 5 Installation WARNING When installing the Clean Station, make sure the cord does not get damaged in any way. • There is a risk of fire or electric shock. CAUTION When installing the Clean Station, do not leave the cord carelessly on the floor since the Jet Bot Combo may get caught by it.
- Page 6 Safety information Before use WARNING Do not use the Jet Bot Combo near a heater or combustible materials. • Do not use the Jet Bot Combo near fire or flame such as a movable heater, a candlelight, a desk lamp, a fireplace, etc.
- Page 7 The Jet Bot Combo may bump into chairs or desk legs, therefore move them away for faster and efficient cleaning. When the Jet Bot Combo is operating, do not lift it up or carry it to another area. Do not hold by Driving Wheels of the Jet Bot Combo when carrying it to another area. Do not allow children to sit on the Jet Bot Combo and do not place an object on the Jet Bot Combo.
- Page 8 If water droplets fall, wipe it off before use. If you want to purchase an additional Mop, check the Mop’s model name (VCA-RPW97), then contact your nearest SAMSUNG Electronics retailer. • Mops are consumables therefore need to be replaced every 1 ~ 3 months.
- Page 9 Cleaning and maintenance If you washed the Dustbin and filter with water • Dustbin: Completely wipe out the water. • Filter: Completely dry it in the shade before use. CAUTION Watch your fingers when attaching or detaching the filter, since they may get stuck. To avoid blockages by foreign matter, do not let the Jet Bot Combo vacuum up toothpicks, cotton swabs, etc.
- Page 10 Please contact Customer Service when replacing batteries. • Using batteries from other products can cause malfunction. This battery is exclusively for the SAMSUNG Electronics Jet Bot Combo, do not use it for any other products or purposes. Do not disassemble or modify the battery.
-
Page 11: Before You Begin
Before you begin Product overview Accessories Extra Plate Washing Plate Clean Station Power Cord Cleaning Tool NOTE Accessories may differ depending on the models. English... - Page 12 Before you begin Parts diagram Jet Bot Combo Top(Front) (Model VR7MD97714*) (Model VR7MD96514*) Microphone Microphone Indicator Microphone Status Indicator 3D Sensor Signal Transmitter Obstacle Detect ToF Sensor Top(Back) Reset Button Reset 버튼 Start/Stop button 시작/정지 버튼 충전복귀 버튼 Dustbin 먼지통 Docking (Recharging) Button LiDAR 센서...
- Page 13 Clean Station Front Waste Water Tank Clean Water Tank Dustbin Status Indicator Charging Signal Washing Plate Transmitter Charging Signal Transmitter Extra Plate Rear Fine Dust 고성능 필터 Filter Filter Cover 필터 덮개 Lifting Handle 이동 손잡이 충전 신호 발신부 Charging Signal 전원...
-
Page 14: Installation
Installation Installation Installing Scan the QR code to see a video on how to use the product. Installing a Clean Station Approximately 0.5 m Approximately 1.0 m Approximately 0.5 m 1. Connect the provided power cord to the bottom of the Clean Station. - Page 15 3. Assemble the Washing Plate to the Clean Station. 4. Assemble the Extra plate to the Clean Station. 5. Place the Clean Station on an even floor and near an electrical outlet and plug it in. Protection • Remove the protection film on Charging Signal 보호비닐...
- Page 16 Installation Installing a Jet Bot Combo 1. Before using the Jet Bot Combo, lift the Spin Brush Cover in the direction of the arrow shown. 2. Detach the Spin Brush Cover. NOTE • Press the Driving Wheels and remove the Spin Brush Cover.
-
Page 17: Operation
Operation Preparing Clean Water Tank 1. Detach the Clean Water Tank from the Clean Station by pulling the handle on the top. 2. Open the lid and fill it with clean water up to the MAX water line. 3. Close the lid. 4. -
Page 18: Charging The Jet Bot Combo
Operation 5. Insert the Clean Water Tank into the Clean Station. Charging the Jet Bot Combo Before using the Jet Bot Combo for the first time, charge it completely. (For the charging time and usage time, refer to the ‘Product Specification’ . ) 1. - Page 19 Auto charging The Jet Bot Combo automatically returns to the Clean Station when it completes cleaning or when the battery is low to recharge. Docking (Recharging) You can return the Jet Bot Combo to the Clean Station while cleaning to recharge. •...
- Page 20 Operation Checking if recharging does not work Check the Clean Station’s installation status • Check whether the Clean Station has been installed in a place where the Clean Station cannot guide the Jet Bot Combo to return. • Check whether the distance between the Clean Station and the Jet Bot Combo is over 5 m. It may take a longer time for the Jet Bot Combo to return to the Clean Station.
-
Page 21: Using The Jet Bot Combo
Using the Jet Bot Combo For the normal use of the Jet Bot Combo’s functions, the SmartThings connection is required. • For downloading and installing the SmartThings App, refer to the ‘SmartThings App’ . Using the control panel Start cleaning Press the on the Jet Bot Combo to start cleaning in Auto Clean. - Page 22 Operation Operation status on the LED Status Indicator Classification Color Meaning Blinking with- An error occurs out moving While Blinking while operating Auto returning to the Clean Station due to low battery moving Operating stops due to low battery Jet Bot Combo Red, orange, or yellow (depending on charging...
- Page 23 Using additional functions Additional functions Operation When charging is complete, the Jet Bot Combo automatically enters the Power-Saving Mode. While the Jet Bot Combo is docked on the Clean Station, press and hold the 7 seconds to set it to the Power-Saving Mode, and to cancel the Power-Saving Mode, start cleaning or press the for 7 seconds.
-
Page 24: Smartthings App
Wi-Fi off or on to use again while the vacuum cleaner is on standby or charging. 2. Downloading the SmartThings App Download and install the SmartThings App from the markets (Google Play Store, Apple App Store, or SAMSUNG Galaxy Store). - Page 25 • To set up a SAMSUNG account, you can follow the directions provided by the SmartThings App. • If you have a SAMSUNG smartphone, you can add your SAMSUNG account in the setting app of your smartphone and it will automatically sign in to your SAMSUNG account and you can use the SmartThings App.
-
Page 26: Using The Smartthings App
Home monitoring (only compliant to SAMSUNG is not responsible for the usage of this function in other purposes. model VR7MD97714*) • The camera can be turned on via the SmartThings App when cleaning to get a stream of the activity. - Page 27 Functions Explanation • Set detailed driving options. Repeat: Clean repetitively until the battery is used out. Continue cleaning after charging: If the battery runs out while in the process of cleaning, the Jet Bot Combo recharges then continues to clean any areas left uncleaned.
- Page 28 (e.g. GPL, LGPL… etc), please visit http://opensource.samsung.com/ and search by model name. It is also possible to obtain the complete corresponding source code in a physical medium such as a CD-ROM; a minimal charge will be required.
-
Page 29: Maintenance
Maintenance Cleaning and maintaining the Clean Station • Be sure that the power code of the Clean Station is unplugged before handling with the Clean Station. • When cleaning the exterior, wipe with water only. - Do not use detergent. Cleaning the Waste Water Tank 1. - Page 30 Maintenance 4. Be sure that the hook is fixed by pressing the indicated area shown, you should hear it click. • If the lid is not fully closed, the product may malfunction or may result in problems with the product. 5.
- Page 31 Replacing the Dust Bag 1. Detach the lid by pulling the handle on the top. 2. Hold the Dust Bag guide handle and push it in the direction of the arrow shown. 3. Detach the Dust Bag from the product by pulling it upward.
- Page 32 Maintenance 5. Push the top of the Dust Bag guide holder in the direction of the arrow shown until you hear it click. 6. Close the lid. English...
- Page 33 Cleaning the Fine dust Filter 1. Grasp the grooves at the rear of the Clean Station and detach the Fine dust Filter cover. 2. Detach the Fine dust Filter and shake out the dust. 3. Assemble the Fine dust filter and the Filter cover until you hear them click.
- Page 34 Maintenance Cleaning the Washing Plate 1. Detach the Washing Plate by lifting the handle that says ‘PULL’ . 2. Clean the cover with water and dry it completely in the shade. 3. Assemble the Washing Plate back into the Clean Station.
- Page 35 Cleaning the bottom cover CAUTION • Be sure that both the Clean Water Tank and the Waste Water Tank are disassembled before lying the Clean Station on its side. • Detach both the Extra Plate and the Washing Plate. A risk of personal injury or material damage exists. •...
- Page 36 Maintenance 4. Attach the bottom cover to the Clean Station. 5. Turn the 7 fixed screws in the lock direction ( 6. Be sure to stand the Clean Station upright back to its position after cleaning. English...
-
Page 37: Descaling The Steamer
Descaling the Steamer Descaling 1. Press the buttons on the top of Jet Bot Combo simultaneously for 7 seconds. 2. Dilute 100g of citric acid into water (1L) in the Clean Water tank and insert it into the Clean Station. 3. -
Page 38: Maintaining And Cleaning The Jet Bot Combo
Maintenance Maintaining and cleaning the Jet Bot Combo Before maintenance work, you should set the Jet Bot Combo as Power-Saving Mode. Emptying and cleaning the Dustbin 1. Detach the Upper Cover by lifting the center of it. 2. Hold the Dustbin handle and lift the Dustbin up. 3. - Page 39 5. Remove the dust from both the Pre-motor Filter and the Dustbin, clean them with water and dry both completely in the shade. 6. Attach the Pre-motor Filter to the DustBin’s lid, then close the Cover. • Insert the Pre-motor Filter’s handles facing upward.
- Page 40 Maintenance 7. Insert the Dustbin into the Jet Bot Combo. • Hold the Dustbin’s handle and insert it into the Jet Bot Combo, then put the handle down. 8. Close the Upper lid. English...
- Page 41 Cleaning the brush 1. Push the Brush Cover Lock to the right to unlock. 2. Detach the brush and use the Cleaning tool to clean the brush. 3. Detach the brush cover and use the Cleaning tool to clean the brush. •...
- Page 42 Maintenance 5. Assemble the brush cover by aligning the 3 hooks attached to the rear of the brush cover with the grooves. • Be sure that the hooks are aligned with the grooves. 6. Push the Brush Cover Lock to the left to lock. English...
- Page 43 Cleaning the Roller 1. Use a flat-head screwdriver to lift the Roller’s set hook in the direction of the arrow shown. 2. Detach the Roller by lifting it upward. 3. Use the Cleaning tool to clean the Roller. 4. Assemble the Roller. English...
- Page 44 Maintenance 5. Fix the Roller’s set hook until you hear it click. Cleaning the Spin Brush Wrap around the Spin Brush with a steamed towel or such for around 10 seconds and clean it. When hair, threads, etc. are tangled in the Spin Brush, use a screwdriver to detach the Spin Brush then remove anything that is tangled.
- Page 45 Cleaning the Driving Wheel 1. Place a soft cloth down first, turn the Jet Bot Combo over, and place it gently on the cloth. 2. Clean the Driving Wheels using the Cleaning tool. Cleaning the Mops 1. Detach both Mops attached to the bottom of the Jet Bot Combo.
- Page 46 Maintenance 3. Clean the Mops and the Mop Spin boards. 4. Attach both Mop Spin boards. 5. Attach both Mops onto the product. • Attach the two Mops by aligning them with the groove in the center so that they do not overlap each other.
-
Page 47: Cleaning And Maintaining The Sensor Window
Cleaning and maintaining the Sensor Window If the Sensor Window gets contaminated, it may have a negative impact on the performance quality. To maximize the quality of performance, wipe the Sensor Window with a soft cloth regularly. Refer to the diagrams below for the locations of each Sensor. -
Page 48: Troubleshooting
Troubleshooting Voice Guidance Checklist 1. The Status Indicator turns red and blinks with a Voice guidance. 2. Press the Reset button and check the instructions below and take appropriate actions. 3. When pressing the Reset button of the Jet Bot Combo, the Status Indicator turns white. Voice Guidance Checklist The Jet Bot Combo is caught, stuck or trapped while moving... - Page 49 Voice Guidance Checklist Foreign matter accumulated on the Cliff Sensor Something’s wrong with the cliff sensor. Please clean the 4 small black windows • Set the Jet Bot Combo as Power-Saving Mode and clean the underneath with a soft cloth. 4 small black windows underneath with a soft cloth.
- Page 50 Troubleshooting Voice Guidance Checklist There’s no Waste Water Tank in the Clean Station, so the station can’t wash the robot • Insert the Waste Water Tank and restart the cleaning. vacuum’s Mop. Insert a Waste Water Tank and start again. There’s no washing plate in the Clean Station, so it can’t wash the robot vacuum’s mop.
-
Page 51: Corrective Measures Before Reporting A Problem
Corrective measures before reporting a problem If the product is not faulty, a service fee may be charged, therefore make sure to read the manual throughly. Symptom Checklist • Check if the Status Indicator is on. • Check if the Jet Bot Combo’s battery is depleted. •... - Page 52 Troubleshooting Symptom Checklist • Check if the Clean Station is installed along the grain of wooden floors or tiles. The Jet Bot Combo • The Jet Bot Combo may clean in a diagonal direction if it is moving to another suddenly cleans area using the shortest route.
- Page 53 • When the product registration fails repeatedly, restart the SmartThings App appears. and try the product registration. • The SAMSUNG account for both App log in and the product registration must be the same. • All users should use the SAMSUNG account issued by the country which launches the product.
- Page 54 Troubleshooting Symptom Checklist The ‘Offline’ message of the Jet Bot Combo appears • Close the SmartThings App and then run it again. on the SmartThings App though the Jet Bot • Check whether there is an internet connection problem of the wireless router. Combo’s registration Especially, a firewall may interrupt standard operation.
-
Page 55: Appendix
Appendix Product Specification Height Height Width Depth Width Depth Classification Items VR7MD97714* VR7MD96514* Jet Bot Combo : 4.8 kg Weight Clean Station : 14.0 kg Size (mm) Jet Bot Combo : 359 X 100 X 364 Mechanical (Width X Height X specifications Clean Station : 444 X 547 X 510 Depth) Cleaning Methods... - Page 56 Appendix Usage Time Suction Mode Suction Power Usage Time About 70 minutes Smart About 80 minutes Dust suction + Mopping Normal About 80 minutes Quiet About 150 minutes About 110 minutes Smart About 110 minutes Dust Suction Normal About 120 minutes Quiet About 180 minutes About 130 minutes NOTE Charging and usage time may differ depending on the conditions of use.
- Page 57 Memo English...
- Page 58 If you have any questions or comments relating to Samsung products, please contact the SAMSUNG customer care center. Country / Location Customer Care Center Web Site 1800 7267864 | 1800-SAMSUNG (Other) SINGAPORE www.samsung.com/sg/support 1800 4252997 | 1800-GALAXYS (HHP) 3698 4698 ( All Product) 3698 4688 ( B2B ) www.samsung.com/hk/support (Chinese)
Need help?
Do you have a question about the VR7MD96514 Series and is the answer not in the manual?
Questions and answers