Table of Contents
Advertisement
Quick Links
We advise you to read this manual carefully, which contains all the instructions for maintaining the
appliance's aesthetic and functional qualities. For further information on the product: www.smeg.com
PRECAUTIONS
General safety instructions
Risk of personal injury
• During use the appliance and
its accessible parts become
very hot. Keep children well
away from the appliance.
• The appliance becomes very
hot during use. Make sure that
you never touch the heating
elements inside the oven.
• Protect your hands by wearing
oven gloves when moving food
inside the oven.
• Never try to put out a fire or
flames with water: Turn off the
appliance and smother the
flames with a fire blanket or
32 - PRECAUTIONS
32
32
36
37
37
37
37
38
38
38
38
38
38
39
39
39
40
40
41
other appropriate cover.
• This appliance may only be
used by children aged 8 years
and over, and by people of
reduced physical, sensory or
mental capacity, or lacking in
experience in the use of
electrical appliances, provided
that they are supervised or
have been given instructions on
the safe use of the appliance
and of the hazards associated
with it.
• Children must not play with the
appliance.
• Keep children under the age of
eight at a safe distance unless
41
41
41
44
45
46
48
49
50
50
50
51
51
52
53
54
55
55
57
58
91477A824/C
Advertisement
Table of Contents

Related Manuals for Smeg CX91IMBL


Summary of Contents for Smeg CX91IMBL
-
Page 1: Table Of Contents
Electrical connection Instructions for the installer We advise you to read this manual carefully, which contains all the instructions for maintaining the appliance’s aesthetic and functional qualities. For further information on the product: www.smeg.com PRECAUTIONS General safety instructions other appropriate cover. - Page 2 they are constantly supervised. containers. • Keep children under the age of • Do not insert pointed metal 8 away from the appliance objects (cutlery or utensils) into when it is in use. the slots in the appliance. • Cleaning and maintenance •...
- Page 3 • Always wear personal when the residual heat protective equipment (PPE) indicator lights are still on. before carrying out any work • Activate the controls lock when on the appliance (installation, you have children or pets that maintenance, positioning or could reach the hob.
- Page 4 • Use wooden or plastic utensils. • Do not put sealed tins or • Do not use steam jets to clean containers in the oven. the appliance. • Remove all trays and racks • Do not use the appliance as a which are not required during support surface.
-
Page 5: Installation
substances that could melt or • Do not use the handle to lift or catch fire (paper, plastic or move this appliance. aluminium foil) on the • This appliance is not intended appliance while it is in use. to be operated by means of •... -
Page 6: Appliance Purpose
current standards. • This appliance can be used up • Have the electrical connection to a maximum altitude of 2,000 performed by authorised metres above sea level. technical personnel. Appliance purpose • The appliance must be This appliance is intended for connected to earth in cooking food in the home compliance with electrical... -
Page 7: Disposal
plate for any reason. product in question. Disposal To save energy This appliance conforms to the WEEE • Only preheat the appliance if the recipe European directive (2012/19/EU) and requires you to do so. must be disposed of separately from •... -
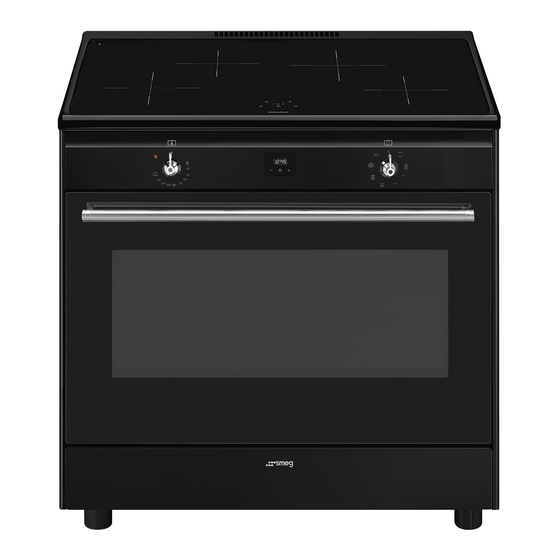
Page 8: Description
DESCRIPTION General description 1 Hob 5 Door 2 Control panel 6 Fans 3 Inside lights Frame shelf 4 Seal Dimensions H x L Zone Max. power draw (W)* Power draw in booster function (W) * (mm) 210 x 210 2300 3000 180 x 180 1300... -
Page 9: Control Panel
Advantages of induction cooking • Rapid heating speed. • Reduced danger of burns as the cooking The appliance is equipped with an surface is only heated under the base of the induction generator for each cooking pan; foods which overflow do not stick. zone. -
Page 10: Accessories
• When any function is selected, apart from the rack above and for cooking pies, pizzas, baked desserts, biscuits, etc. function. Tray rack When the door is open, it is not possible to turn off the interior lighting. Accessories • Not all accessories are available on some models. - Page 11 appears on the display, it means the pan is not the oven cavity. suitable. Gently insert racks and trays into the oven until they come to a stop. Use only cookware with a perfectly flat Clean the trays before using them for bottom which is suitable for induction the first time to remove any residues left hot plates.
- Page 12 with a rough base. hot, the symbol appears on the display. If hob and oven are being used at the Maximum cooking duration in Set power level same time, under certain conditions the hours maximum power limit that can be used by your electrical system might be exceeded.
-
Page 13: Using The Hob
3. Press the buttons to regulate 2. Press the button after the confirmation the power to the required level (3.0 kW or buzzer. 4.5 kW). The controls are now locked and will 4. Within 60 seconds, press and hold the 4 appear on the display. -
Page 14: Using The Oven
advance more quickly. Flashing dots will Switching on the main oven appear to indicate the count. To switch on the oven: 1. Select the cooking function using the Using the t imer does not switch the function knob. cooking zones off, but informs the user 2. -
Page 15: Digital Programmer
TURBO Setting the time Allows quick cooking on multiple If the time is not set, the oven will not shelves without mixing the aromas. switch on. Perfect for large volumes that call for intense cooking. On the first use, or after a power failure, the digits will be flashing on the appliance’s display. - Page 16 6. To turn the buzzer off, simply press one of symbol turns off, the symbol flashes and the programmer clock buttons. the buzzer sounds. 7. Press the clock button to reset the 10. Return the function and temperature knobs to programmer clock.
-
Page 17: Cooking Advice
Modifying the set data value to optimise cooking. 1. Press the clock key Advice for cooking desserts/pastries and biscuits 2. Use the increase and decrease • Use dark metal moulds: They help to absorb keys to set the required minutes. the heat better. -
Page 18: Cooking Information Table
Cooking information table Weight Temp. Time Food Function Shelf (Kg) (°C) (minutes) Lasagne 3 - 4 STATIC 220 - 230 45 - 50 Pasta bake 3 - 4 STATIC 220 - 230 45 - 50 Veal roast TURBO/CIRCULAIRE 180 - 190 90 - 100 Pork loin TURBO/CIRCULAIRE... -
Page 19: Cleaning And Maintenance
Weight Temp. Time Food Function Shelf (Kg) (°C) (minutes) Sponge CIRCULAIRE 150 - 160 55 - 60 cake Rice TURBO/CIRCULAIRE 55 - 60 pudding Brioches CIRCULAIRE 30 - 35 The times indicated in the table do not include preheating times and are provided only as a guide. CLEANING AND MAINTENANCE Cleaning the appliance is no detergent left on the cooking surface as it... -
Page 20: Knobs
Knobs that grooved sections A are resting completely in the slots. Do not use aggressive products containing alcohol or products for cleaning steel and glass when cleaning the knobs, as these products could cause permanent damage. The knobs should be cleaned with a soft cloth dampened with lukewarm water, then dried carefully. -
Page 21: Cleaning The Oven Cavity
4. Lift the intermediate glass unit upwards. 7. Reinsert the intermediate glass unit and reposition the inner glass. Note: In some models, the intermediate glass unit consists of two panes. The intermediate glass pane must be During this step, the grommets may come out of repositioned on the open door so that their seats. -
Page 22: Vapor Clean (On Some Models Only)
Vapor Clean (on some models only) Drying Cooking food generates moisture inside the appliance. This is a normal phenomenon and See General safety instructions. does not affect the appliance’s operation in any way. The Vapor Clean function is an assisted Each time you finish cooking: cleaning procedure that facilitates the 1. -
Page 23: Extraordinary Maintenance
3. Use a non-scratch sponge with brass Take care not to scratch the enamel of filaments on hard to remove deposits. the oven cavity wall. 4. In case of grease residues use specific oven cleaning products. 4. Slide out and remove the light bulb. 5. -
Page 24: Installation
INSTALLATION Appliance overall dimensions The appliance must be installed by a qualified technician and according to the regulations in force. Positioning See General safety instructions. Depending on the type of installation, this appliance belongs to classes: Class 1 Free-standing Class 2 - subclass 1 Built-in The appliance can be placed against walls that 900 mm... - Page 25 Levelling the appliance 3. Assemble the fastening bracket. See General safety instructions. The appliance must be level on the floor in order to ensure greater stability. After making the gas and electrical connections, screw on the four legs supplied with the appliance (1).
-
Page 26: Electrical Connection
7. Move the bracket onto the wall and mark 220-240 V 3~ the position of the holes to be drilled in the 4 x 4 mm ² wall. four-core cable 220-240 V 1N~ 3 x 10 mm ² three-core cable 380-415 V 2N~ 4 x 4 mm ²... -
Page 27: Instructions For The Installer
access the terminal board on the rear casing Instructions for the installer 1. Remove the screws fastening the plate to the • If you use a plug (if present) to connect to rear casing the power supply, the plug must be accessible after installation.
Need help?
Do you have a question about the CX91IMBL and is the answer not in the manual?
Questions and answers