Advertisement
Quick Links
OWNER'S MANUAL
Whole House Audio
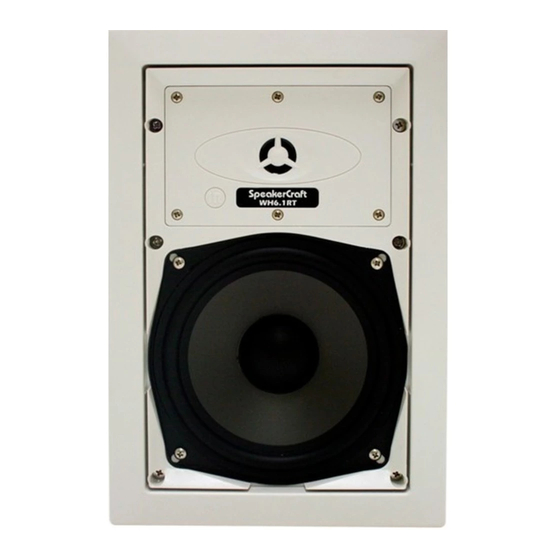
WH6.2RT / WH6.1RT / WH6.0RT
SPEAKER PLACEMENT
Before installing your speakers, you should consider the placement carefully, taking into
account the location of electrical, plumbing and other fixtures. Contact your dealer for
assistance if you are not sure of the best location in your particular room environment.
Placement in Ceiling: When placing your speakers in the ceiling, they should ideally
be located above the primary listening area. In a very large room with low ceilings, it
may be necessary to place additional speakers throughout the room spaciousness.
Contact your Authorized SpeakerCraft dealer for assistance.
Placement in Wall: When placing your speakers in the wall, optimal sound will be
achieved when your speakers are mounted at ear level or slightly higher on the wall
and the usual listening area is no closer to the wall than the distance between the
speakers themselves. (See Diagram 1)
MOUNTING SURFACE PREPARATION
New Construction - Unfinished Ceilings and Walls
A new construction bracket (available from your dealer) may be installed prior to drywall application across studs or
joists (up to 24" on-center) where a speaker will be located. Insulation material should be in place prior to installing dry-
wall. After the hole is cut and the drywall is installed, the speakers are then easily installed following the instructions for
mounting in "Finished Ceilings and Walls".
Finished Ceilings and Walls
Prior to the actual installation of the speakers, it will be necessary to run cables to the speaker locations. See your dealer
for more information on cable installation. After the cable has been properly installed, you are ready to mount the
speakers. Following the simple steps listed below will result in a professional looking installation:
1. Determine the best area to mount your speakers. This area of the ceiling or wall should be free of obstructions, such
as electrical conduit, HVAC ducts, or water lines. This can best be determined by noting the placement of fixtures
and gaining access to an attic or crawl space for further analysis of the location of such obstacles.
2. Find the studs/joists nearest the desired speaker mounting location. We highly recommend using a good stud-finder
tool for this procedure. If you are lining up the speakers to some other object or molding in the room, make sure
you consider the size of the baffle flange which extends beyond the mounting hole.
3. Mark the hole. A punch out template for setting the hole is provided in the box. Position the template in the desired
position and pencil an outline on the wall or ceiling.
4. Cutting the hole. CAUTION: This is the most important part of the entire installation. If you are not certain
whether any obstructions exist behind the desired mounting area, you should start by cutting a small hole in the
center of your penciled mounting hole with a drywall saw, cutting at a 45˚
angle towards the inside of the hole. (See Diagram 2) Cutting the small hole
at this angle will make dry wall repair much easier, using the piece cut out.
Once you have determined there are not obstructions in your desired mount-
ing location, start cutting the finished hole at a 90˚ angle to the wall surface.
5. Add insulation. If the area in the ceiling or wall is not already insulated, add
an adequate amount insulation material to loosely cover the back of the
speaker or to fill the wall cavity. If the insulation material used is faced with foil
or paper, position the foil or paper away from the speaker.
SPEAKER INSTALLATION
The unique mounting bar system incorporated into your WH6.2RT / WH6.1RT / WH6.0RT speaker allows for a quick
installation by following these easy steps:
1. Remove the grille by pushing the two mounting bars, located at the rear of the speaker, towards the front of the
speaker. The long screws attached to the mounting bars will force the grille out of its retaining groove.
2. Attach the speaker cable (observing the proper polarity with your amplifier, + to + and - to -). Make sure the left
channel of the amplifier is connected to the left speaker, and the right channel is connected to the right speaker.
™
Diagram 1
Diagram 2
Advertisement

Related Manuals for SpeakerCraft Whole House Audio WH6.2RT


Summary of Contents for SpeakerCraft Whole House Audio WH6.2RT
- Page 1 In a very large room with low ceilings, it may be necessary to place additional speakers throughout the room spaciousness. Contact your Authorized SpeakerCraft dealer for assistance. Placement in Wall: When placing your speakers in the wall, optimal sound will be...
- Page 2 Freight collect shipments will be refused. It is preferable to ship this product in the original shipping container to lessen the chance of transit damage. In any case, the risk or loss or damage in transit is to be borne by the purchaser. If, upon examination at the Factory or SpeakerCraft Authorized Dealer, it is determined that the unit was defective in materials or workmanship at any time during this warranty period, SpeakerCraft or the SpeakerCraft Authorized Dealer will, at its option, repair or replace this product at no additional charge, except as set forth below.
Need help?
Do you have a question about the Whole House Audio WH6.2RT and is the answer not in the manual?
Questions and answers