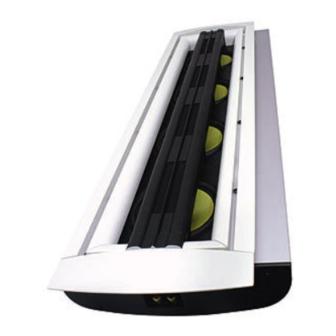
Summary of Contents for SpeakerCraft STARLET 4
- Page 1 OWNER’S MANUAL Starlet Series Starlet 4 / Starlet 6 / Starlet 9 Line Source In-Wall Speakers...
-
Page 3: Table Of Contents
New Construction ... 5 Finished Wall ... 5 SPEAKER INSTALLATION ...6-9 Wiring the Starlet 4 ... 6 Wiring the Starlets 6 and 9 ... 7 Installation in a 2x4 Stud Wall ... 7 Installation in a 2x6 or Deeper Wall ... 9 Grille Installation ... -
Page 4: Getting Started
• Pencil (for marking wall) Amplifier Requirements: • Starlet 4: Minimum 75 watts per channel stereo amplifier with low impedance capability (i.e. SpeakerCraft BB275) • Starlets 6 and 9: Two (2) minimum 75 watts per channel stereo amplifiers with low impedance capability and individual level controls on each channel •... -
Page 5: Speaker Placement
SPEAKER PLACEMENT SpeakerCraft highly recommends the use of a qualified custom installation specialist when installing your Starlet speakers. Please note that all Starlet models require a separate powered subwoofer. In addition, the Starlets 6 and 9 are bi-amplified and require precise electrical adjustment with a voltmeter and test CD. -
Page 6: Deciding Distance Apart
There are some specific recommendations for the Starlets: Starlet 4: It is very important to use the heaviest wire in the shortest length possible. 12 gauge or bigger in a length less than 25 feet is optimum. If possible double the cable, running two sets of 12 gauge to the Starlet 4. -
Page 7: Installation Preparation
Starlet Owner’ s Manual INSTALLATION PREPARATION NEW CONSTRUCTION Starlets are designed to be installed into a standing wall, therefore no new construction bracket is supplied. There are some considerations for new construction to create the best possible sound: 1. Double Thick Drywall: The clamp between the back box and front baffle is designed ⁄... -
Page 8: Speaker Installation
SPEAKER INSTALLATION All Starlet models install in the same way. The wiring for the Starlet 4 differs from the bi-amplified Starlets 6 and 9. There are different procedures for mounting in a standard stud depth (2x4 framed wall) and deeper walls (2x6 or deeper). The supplied foam support block is intended for deeper walls. -
Page 9: Wiring The Starlets 6 And 9
Thus both terminals are always used in the Starlets 6 and 9. The end plate bearing the SpeakerCraft logo and product name is the woofer terminal, and is marked “woofers”. The blank plate is the tweeter terminal, and is marked “tweeters”. - Page 10 Page 8 Starlet Owner’ s Manual Diagram 17: Exploded View of Installation...
-
Page 11: Installation In A 2X6 Or Deeper Wall
Before painting the grilles, remove the under grille material. Put this material back into place once the grille has been painted. SpeakerCraft recommends only light spray painting, using 5 parts thinning agent to 1 part paint. Do not paint grilles while they are attached to the speaker. -
Page 12: Speaker Adjustments
STARLETS 6 and 9 LEVEL ADJUSTMENTS Even experienced listeners have a difficult time adjusting the bi-amp levels for the Starlets 6 and 9 by ear, so SpeakerCraft has developed a simple procedure for setting the level of the high and low frequency sections. When adjusted in this way, the sound suddenly gains focus and resolution. -
Page 13: Subwoofer Adjustments
1. It is best to set these levels on recessed volume controls, such as those on the SpeakerCraft BB series of amplifiers, as this adjustment is a one time, “set and forget” procedure. 2. All pink noise should be identical, but it isn’t. The noise on SpeakerCraft’ s SCT-1.0 Test CD is known to work well in setting the levels. -
Page 14: Limited Lifetime Warranty
Dealer will, at its option, repair or replace this product at no additional charge, except as set forth below. If this model is no longer available and can not be repaired effectively, SpeakerCraft, at its sole option, may replace the unit with a current model of equal or greater value. In some cases where a new model is substituted, a modification to the mounting surface may be required. - Page 16 940 Columbia Avenue, Riverside, CA 92507 SpeakerCraft (800) 448-0976 Fax (951) 787-8747 ® www.speakercraft.com LIT89400(rev1)


Need help?
Do you have a question about the STARLET 4 and is the answer not in the manual?
Questions and answers