
Related Manuals for Axkid One+ 2


Summary of Contents for Axkid One+ 2
- Page 1 UN regulation no. 129 Instruction Manual Axkid One+ 2 car seat 0-23kg, 40-125 cm car seat 0-23kg, 61-125 cm Axkid One 2...
- Page 2 ISOFIX...
- Page 6 61-105 cm 106-125 cm 0-60 cm...
- Page 10 Sverige/Norge Suomi Axkid AB Lastentarvike www.axkid.com www.lastentarvike.fi info@axkid.com info@lastentarvike.fi Tel: (+46) 511 760 620 (+358) 09 852 05 100 UK/Ireland Malaysia Axkid Ltd SafenSound www.axkid.com www.safensound.com.my salesuk@axkid.com may@safensound.com.my Tel: (+46) 511 760 620 (+60) 358 70 22 84 France Greece ΕΕΕΕΕΕ...
- Page 11 12-21 22-31 32-41 42-51 52-61 62-71 72-81 82-91 92-101 102-111 112-121 122-131 132-141 142-151...
- Page 12 If in doubt, contact your retailer who can demonstrate a correct installation. • Keep this instruction manual for future reference. If manual is lost, you can find it online at www.axkid.com • Do not use Axkid One car seat in a seating position where an active frontal airbag is fitted. If you still wish to install Axkid One car seat in this location the airbag must be switched off according to the vehicle manufacturers instructions.
-
Page 13: Table Of Contents
Table of content Parts Allowed and disallowed positioning of Axkid One car seat Installing Axkid One car seat in the vehicle Restraining your child in Axkid One car seat Seat adjustments Adjusting Axkid One car seat Removing Axkid One car seat from the vehicle... -
Page 14: Parts
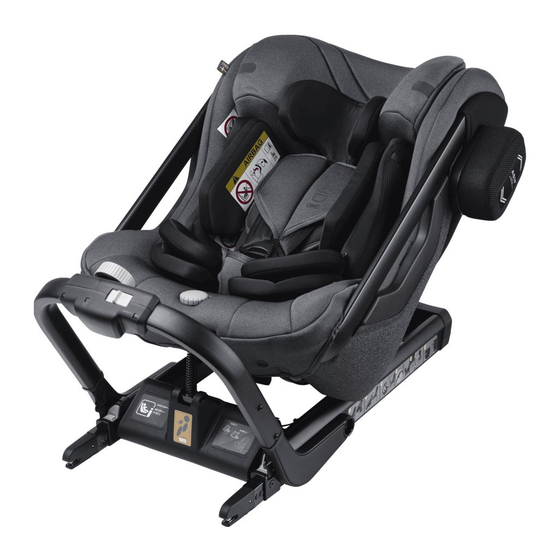
Parts... - Page 15 Shoulder straps (A) Headrest adjustment buttons (M) Buckle release button (B) Legroom adjustment button (N) Front brace release button (C) Back handle (O) Front brace (D) Support-leg position indicator (P) Headrest (E) Support-leg release strap (Q) Eye level indicator (F) Support-leg (R) ASIP pad (G) Sound indicator (S)
-
Page 16: Allowed And Disallowed Positioning Of Axkid One Car Seat
Allowed and disallowed positioning of Axkid One car seat Axkid One car seat can only be installed rear-facing using ISOFIX. It is approved for use in all i-Size approved seating positions but may also fit in other non i-Size-approved ISOFIX seating positions. Check your vehicle instruction manual to find suitable seating positions and check the vehicle list on www.axkid.com Front passenger seat with ISOFIX (no active airbag) YES/NO*... -
Page 17: Installing Axkid One Car Seat In The Vehicle
Release the front brace release button (C) and fold the front brace (D) towards the seat. Keep holding the front brace (D) with one hand and grab the back handle (O) with the other hand and lift the Axkid One car seat into your vehicle with the front brace (D) first and then turn it to a rear-facing position. -
Page 18: Restraining Your Child In Axkid One Car Seat
Restraining your child in Axkid One car seat Before restraining your child in the Axkid One car seat, make sure you have the correct insert installed in the seat. Axkid One is designed to grow with your child and to ensure a comfortable and safe fit for all children. Axkid recommends using the relevant insert until it is too tight for your child, but to a minimum length according to table... -
Page 19: Seat Adjustments
Seat adjustments After the Axkid One car seat has been installed in your vehicle you can easily adjust both the legroom and the recline position for your child. This can also be done while your child is restrained in the car seat. -
Page 20: Removing Axkid One Car Seat From The Vehicle
• Disconnect the ISOFIX connectors (Y) by pushing down on the ISOFIX buttons (X) and then slide them backwards, away from the vehicle seat. • Keep holding the front brace (D) with one hand and grab the back handle (O) with the other hand and lift Axkid One car seat out of your vehicle. -
Page 21: Warranty
Warranty Axkid One car seat is covered by a 24-month warranty from date of purchase. Ensure you save your receipt and bring it to your place of purchase if you have any warranty issues. The warranty does not cover: • Normal wear and tear •... - Page 22 Größe von 40-125cm und einem Maximalgewicht von 23kg zugelassen ist. Der Axkid One ist ein erweiterter i-Size Kindersitz. Er ist nach der UN R129 Richtlinie zur Nutzung auf i-Size kompartiblen Plätzen im Auto gemäß dem Handbuch des jeweiligen Autoherstellers zugelassen. Im Zweifel wenden Sie sich bitte an den Kindersitzhe steller (www.axkid.com) oder Ihren Händler.
- Page 23 Inhaltsverzeichnis Komponenten Erlaubte und unerlaubte Sitzpositionen des Axkid One Kindersitz Installation des Axkid One im Fahrzeug Neigungsverstellung des Axkid One Kindersitzes Sitzverstellungen Sitzanpassungen Ausbau des Axkid One aus Ihrem Fahrzeug Pflege und Wartung Garantie 23 23...
-
Page 24: Komponenten
Komponenten... - Page 25 Schultergurte (A) Kopfstützenverstellung (M) Gurtschloss (B) Beinfreiheitsverstellungsknopf (N) Überrollbügelauslöser (C) Rückseitiger Griff (O) Überrollbügel (D) Stützfußpositionsanzeiger (P) Kopfstütze (E) Stützfußlöseband (Q) Augenhöhe Markierung (F) Stützfuß (R) ASIP pad (G) Tonindikator (S) Neigungsverstellungsknopf (H) Gurtlöseknopf (T) Stützfußverstellknopf (I) Gurtstraffer (U) ASIP Konnektor (J) ISOFIX Verriegelungsindikator (V) Überrollbügelknopf (K) ISOFIX Knopf (X) Seitlicher Bezug (L)
-
Page 26: Erlaubte Und Unerlaubte Sitzpositionen Des Axkid One Kindersitz
Seitlich oder rückwärtsgerichtete Autositze mit ISOFIX NEIN Autositz ohne ISOFIX NEIN WICHTIG: Wenn Sie Ihren Axkid One auf einem Autositz installieren wollen, für den ein Frontalairbag installiert ist, muss der Airbag gemäß den Autoherstellerangaben deaktiviert werden. Bitte beachten Sie, dass manche Fahrzeuge dazu eine offizielle Werkstatt benötigen. * Die allgemeine Verkehrsregelung in Spanien sieht in ihrem Artikel 117 das Verbot vor, mit Kindern mit einer Körpergröße von höchstens 135 Zentimetern auf den Vordersitzen des Fahrzeugs zu fahren, mit Ausnahmen. -
Page 27: Installation Des Axkid One Im Fahrzeug
Kindersitz hoch, um den Stützfuß (R) weiter auszufahren bis Sie ein Klick hören. Der Stützfuß (R) sollte nun verriegelt sein und fest auf dem Fahrzeugboden stehen. Bemerkung: Der Axkid One Kindersitz ist mit einem Tonindikator (S) ausgestattet, der piept, bis der Stützfuß (R) fest auf dem Fahrzeugboden steht und damit die korrekte Installation anzeigt. -
Page 28: Neigungsverstellung Des Axkid One Kindersitzes
Augenhöhe Markierungen (F) sollen nicht beachtet werden, wenn der Babyeinsatz (nur beim Axkid One +) genutzt wird. Wenn Sie en Axkid One + für Babys mit dem Babyeinsatz nutzen, stellen Sie die Kopfstütze (E) immer in die niedrigste Position. -
Page 29: Sitzverstellungen
• Drücken Sie den Beinfreiheitsverstellungsknopf (N) und schieben Sie den Sitz vorwärts oder rückwärts. Halten Sie den Axkid One am rückseitigen Griff (O) fest, um zu vermeiden, dass der Kindersitz sich aus Versehen vorwärts bewegt, bevor Sie den Beinfreiheitsverstellungsknopf (N) drücken. -
Page 30: Ausbau Des Axkid One Aus Ihrem Fahrzeug
• Der Tonindikator (S) beinhaltet eine ersetzbare CR1632 Batterie. Bitte entfernen und recyclen Sie die Batterie gemäß der local geltenden Richtlinien, wenn Sie den Axkid One nicht mehr nutzen möchten. Schrauben Sie dazu die beiden Schrauben unten am Stützfuß (R) heraus und entfernen Sie en Deckel, um an die Batterien heranzukommen. -
Page 31: Garantie
Garantie Für den Axkid One wird eine 24-monatige Herstellergarantie ab Kaufdatum gewährt. Vergewissern Sie sich, dass Sie den Kaufbeleg aufheben und bringen Sie den Beleg zu Ihrem Händler mit, wenn Sie Garantieansprüche geltend machen wollen. Die Garantie beinhaltet nicht: • Normale Abnutzung •...
Need help?
Do you have a question about the One+ 2 and is the answer not in the manual?
Questions and answers