Table of Contents
Advertisement
Quick Links
Deluxe Series
Operator's Manual
Návod k obsluze
Betriebsanleitung
Lea el Manual del operador
Käyttäjän käsikirja
Manuel de l'opérateur
Kezelési útmutató
Manuale d'uso
Gebruikershandleiding
Brukerhåndbok
Instrukcja obsługi
Руководство оператора
Priročnik za uporabo
Návod na obsluhu
Instruktionsbok
Kullanıcı Kılavuzu
Sno-Thro
921330 – Deluxe 28 RapidTrak
E10
Models
921323 – Deluxe 24 CE
(SN 150000 +)
921324 – Deluxe 28 CE
(SN 150000 +)
(SN 000101 +)
®
•
09183915A
4/20
Printed in USA
Advertisement
Table of Contents

Related Manuals for Ariens 921330


Summary of Contents for Ariens 921330
- Page 1 921323 – Deluxe 24 CE Návod k obsluze (SN 150000 +) Betriebsanleitung 921324 – Deluxe 28 CE Lea el Manual del operador (SN 150000 +) 921330 – Deluxe 28 RapidTrak Käyttäjän käsikirja (SN 000101 +) Manuel de l'opérateur Kezelési útmutató Manuale d'uso Gebruikershandleiding Brukerhåndbok...
- Page 2 VYDANÉ VÝROBCOM – ÜRETİCİ TARAFINDAN DÜZENLENEN EC UYGUNLUK BEYANI We the undersigned, AriensCo, certify that: Ние, долуподписаните от фирма ARIENS, удостоверяваме, че: My, nížepodepsaní, AriensCo, prohlašujeme, že: Der Unterzeichnete, AriensCo, bescheinigt, dass: Nosotros, los abajo firmantes, AriensCo, certificamos que: Allekirjoittanut, AriensCo, vakuuttaa, että: Nous, soussignés AriensCo, certifions que:Alulírott, AriensCo, tanúsítja, hogy: La sottoscritta società...
- Page 3 921324: 6.3 @ 3650 giri/min.): Motor Vermogen (Kw @ RPM): Motoreffekt (Kw @ RPM): Moc silnika 921330: 6.3 @ 3650 (Kw przy obr./min): Putere motor (Kw la RPM): Мощность двигателя (кВт при об/мин): Moč motorja (Kw pri vrt./min.): Výkon motora (Kw @ RPM) (kW / ot./min.): Motoreffekt (Kw @ varvtal): Motor Gücü...
-
Page 4: Table Of Contents
TABLE OF CONTENTS WELCOME ..... . 1 Operate Unit ..... 12 Stop the Engine . -
Page 5: Welcome
WELCOME Original Instructions. Congratulations on your purchase and welcome to the Ariens family! Every machine in the Ariens lineup is designed for long-lasting and unsurpassed performance. We are confident your machine will be part of your family for many years to come. -
Page 6: Safety
• BECOME ALERT! penalties. Emission controls and components • OBEY THE MESSAGE! can only be adjusted by an Ariens dealer or an authorized engine manufacturer's service SIGNAL WORDS center. Contact your Ariens Equipment The safety alert symbol above and signal... -
Page 7: Safety Decals
4. Notice Safety Decal Descriptions NOTICE: Indicates information or procedures 1. CAUTION! that are considered important but not hazard related. If not followed, property damage could result. Danger! 5. Important IMPORTANT: Indicates general reference information worthy of special attention. SAFETY DECALS Only use clean-out tool to The safety decals on your machine are visual clear blockages. -
Page 8: Safety Rules
SAFETY RULES 2. DANGER! The following safety instructions are based on the B71.3 specifications of the American National Standards Institute in effect at the Danger! time of production. Training Read, understand and follow all instructions on the machine and in the manual(s) before operating this unit. - Page 9 Handle fuel with care; it is highly flammable. Thrown objects can cause injury. Check for weak spots on docks, ramps or floors. Avoid • Use an approved fuel container. uneven work areas and rough terrain and • Never add fuel to a running engine or hot stay alert for hidden hazards.
- Page 10 Disengage attachment when not in use and Maintenance and Storage when traveling from one work area to Secure unit so it will not tip over during another. maintenance. Disengage power to the auger / impeller Before cleaning, removing clogs or making when snow thrower is transported or not in any inspections, repairs, etc., disengage use.
- Page 11 Never fill or drain fuel tank indoors. Personal Protection Replace fuel cap securely and clean up Do not operate the equipment without spilled fuel. wearing adequate winter garments. Avoid loose fitting clothing that can get caught in Never fill fuel containers inside a vehicle or moving parts.
-
Page 12: Controls & Features
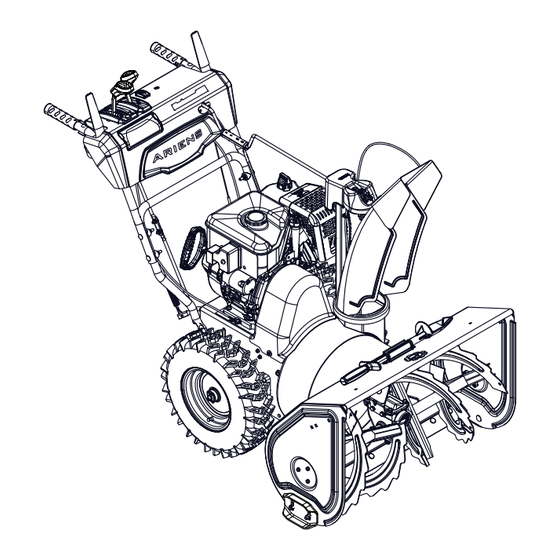
25. Discharge Chute 10. Oil Drain 26. Discharge Chute Deflector 11. Recoil Starter Handle 27. Belt Cover 12. Speed Selector Lever 28. Gearcase 13. Auger 29. Height Adjustment Lever (Model 921330) 14. Impeller 15. Shear Bolt (2) EN - 8... -
Page 13: Engine Key And Run / Stop Switch
CHOKE CONTROL KNOB WARNING: Read and See Figure 6. understand the Safety section Controls airflow to the engine. before proceeding. See Figure 3 for all controls and features locations. ENGINE KEY AND RUN / STOP SWITCH See Figure 4. Figure 6 The removable engine key and the run / stop switch are used together to start the engine. -
Page 14: Traction Drive Clutch Lever (Left Side)
TRACTION DRIVE CLUTCH DISCHARGE CHUTE ROTATION LEVER (LEFT SIDE) HANDLE See Figure 9. See Figure 11. Allows unit to travel forward and in reverse. Rotates discharge chute left or right to control snow discharge. Figure 9 SPEED SELECTOR LEVER See Figure 10. Figure 11 Controls the speed of forward and reverse travel. -
Page 15: Skid Shoe
87. DO NOT use E85 blended fuels; the engine is not E20 / E30 / E85 compatible. The maximum recommended ethanol content is 10%. Ariens Figure 13 recommends using a quality fuel stabilizer in all fuel. -
Page 16: Start The Engine
7. Electric Start: Press electric start button. Adjust Track Angle NOTICE: DO NOT run starter more than 10 Model 921330 times at intervals of 5 seconds on / 5 seconds off or overheating and damage may occur. See Figure 14. -
Page 17: Stop The Engine
Track Operation MAINTENANCE WARNING: Read and understand the Safety section before proceeding. Your Ariens dealer can provide service and adjustments to keep your unit operating at peak efficiency. Contact an authorized engine manufacturer’s service center for engine Digger Operation service. -
Page 18: Maintenance Schedule
• 414 ml (14 oz) cartridge (1) 00036700 Models 921323, 921324 Keep tires inflated to pressure listed on tire Ariens L3 Lube – 237 ml (8 oz) 00068800 sidewall. Shear Bolt and Nut 52100100 • Fuel Stabilizer – 118 ml 04730400 WARNING: AVOID INJURY. -
Page 19: Check Engine Oil
5. Remove six bolts retaining bottom cover IMPORTANT: Ariens recommends using only and remove cover. Rotate track carriage Ariens L3 synthetic severe duty gear lube as needed to remove cover. (see Service Parts on page 14). Using other lubricants will not automatically void unit... - Page 20 Figure 19 Auger Shaft 1. Height Adjuster Plate 1. Remove shear bolt nuts and bolts. See 2. Height Adjuster Stop Figure 20. Figure 17 Lubricate Unit Use the following key for all lubrication procedures. Grease = Lubricate on Both Sides Traction Drive 1.
-
Page 21: Adjustments
• Use two 22 mm (7/8") thick spacers for IMPORTANT: Ariens recommends using only uneven or gravel surfaces. Ariens OEM shear bolts when replacing 3. Loosen skid shoe hardware and lower shear bolts. See Service Parts on page 14. skid shoes to contact surface. Adjust both shoes equally. -
Page 22: Adjust Discharge Chute Deflector Lever
ADJUST DISCHARGE CHUTE ADJUST DISCHARGE CHUTE DEFLECTOR LEVER See Figure 26. See Figure 24. If discharge chute does not stay in selected position, tighten nut on carriage bolt. If deflector does not stay in selected position, tighten the nut under the control panel. Figure 26 Figure 24 ADJUST SPEED SELECTOR... -
Page 23: Adjust Attachment Clutch & Brake
1. Attachment Clutch Cable 2. Cable Adjustment Barrel 1. Shift Rod 3. Jam Nut 2. Adjustment Pivot Pin Figure 28 3. Speed Selector Arm 4. Hairpin 5. With attachment clutch disengaged, Figure 27 make sure auger idler arm lightly touches the frame. - Page 24 Check Attachment Brake With the attachment clutch disengaged, brake pad must contact attachment belt or pulley, whichever is closest. With attachment clutch engaged, brake pad must be a minimum of 1.6 mm (1/16") from belt or pulley. See Figure 32. Measure here.
-
Page 25: Adjust Traction Drive Clutch
4. With traction clutch disengaged, check that the drive plate touches the stop bolt. See Figure 35. Measure here. Figure 33 ADJUST TRACTION DRIVE CLUTCH See Figure 34. 1. Drive Plate 2. Stop Bolt If unit does not drive correctly, adjust traction Figure 35 clutch to compensate for friction disc wear. -
Page 26: Adjust Height Adjustment Cable
ADJUST HEIGHT ADJUSTMENT CABLE Model 921330 See Figure 36. NOTICE: Make sure height-adjuster lock finger is fully engaged before making adjustments. 1. Loosen jam nuts on cable adjustment barrel. 2. Tighten right jam nut to remove slack between adjustment barrel and cable eyelet. -
Page 27: Troubleshooting
Turn choke control knob to off position (flooded). and reattempt starting. See Start The Engine on page 12. Engine is faulty. See your Ariens dealer or authorized engine manufacturer’s service center. Spark plug is faulty, fouled or Clean and correctly set spark plug gap incorrectly gapped. - Page 28 TROUBLESHOOTING Problem Probable Cause Correction Friction disc is worn. Replace friction disc. Refer to the Service Manual for your unit. Traction drive cable is not Remove slack from cable. See Adjust Unit does not adjusted correctly. Traction Drive Clutch on page 21. drive forward or Traction belt is not functioning.
-
Page 29: Storage
For the best effectiveness, add See your Ariens dealer for a complete list of stabilizer to all fuel containers whenever compatible accessories and attachments for purchasing fuel. -
Page 30: Specifications
SPECIFICATIONS Model Number 921323 921324 921330 Deluxe 28 Description Deluxe 24 Deluxe 28 RapidTrak Engine Ariens AX Gross Torque* – N•m (lb-ft) 17.3 (12.8) 19.5 (14.4) 254.0 (15.5) 291.0 (17.8) Displacement – cm Maximum RPM – No Load 3600 ± 50... - Page 31 CE Sound (Ref. ISO 11201:2010) and Vibration (Ref. ISO 8437:2019) Operator Position Sound 90.0 93.0 Pressure (Lpa) in db(A) Uncertainty in db(A) Representative Measured Sound Power Level (Lwa) in db(A) Guaranteed Sound Power Level (Lwa) in db(A) Vibration Measure (m/s ) at Operator Hands Uncertainty in m/s...
-
Page 32: Warranty
“Commercial Use.” If any product is rented or leased, then the duration of these warranties shall be 90 days after the date of purchase. An authorized Ariens dealer will repair any defect in material or workmanship, and repair or replace any defective part, subject to the conditions, limitations and exclusions set forth herein. Such repair or replacement will be free of charge (labor and parts) to the original purchaser;... - Page 33 Exclusions – Items Not Covered by This Warranty • Parts that are not genuine Ariens service parts are not covered by this warranty and may void the war- ranty if the parts result in premature wear or damage to the product.
- Page 34 Parts and Accessories Service replacement parts and non-serialized accessories are warranted for 90 days from date of purchase. Parts and accessories must be installed by an authorized Ariens dealer to be covered. Labor is not included. Customer Responsibilities Register the product immediately at the time of sale. If the dealer does not register the product, the customer must register the unit on-line at www.ariens.com.
- Page 35 Disclaimer AriensCo may from time to time change the design of its products. Nothing contained in this warranty shall be construed as obligating the AriensCo to incorporate such design changes into previously manufactured products, nor shall such changes be construed as an admission that previous designs were defective. Limitation of Remedy and Damages AriensCo liability under this warranty, and under any implied warranty that may exist, is limited to repair of any defect in workmanship, and repair or replacement of any defective part.
- Page 36 655 West Ryan Street Brillion, WI 54110 www.ariens.com parts.ariens.com...
Need help?
Do you have a question about the 921330 and is the answer not in the manual?
Questions and answers