Table of Contents
Advertisement
Quick Links
Advertisement
Chapters
Table of Contents

Related Manuals for Yamaha RX-V2065BL


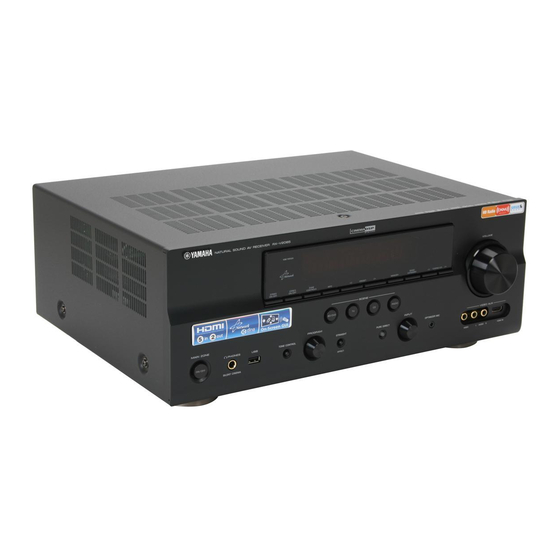
Summary of Contents for Yamaha RX-V2065BL
- Page 1 RX-V2065 AV Receiver OWNER’S MANUAL...
-
Page 2: Important Safety Instructions
If this product is This product, when installed as indicated in the instructions found to be the source of interference, which can be determined by contained in this manual, meets FCC requirements. Modifications turning the unit “OFF”... - Page 3 Allow ventilation space of at least power plug from the wall outlet in the main room. 30 cm on the top, 20 cm on the left and right, and 20 cm on 19 VOLTAGE SELECTOR (Asia and General models only) the back of this unit.
- Page 4 Yamaha and the Electronic Industries Association’s Consumer Electronics Group want you to get the most out of your equipment by playing it at a safe level. One that lets the sound come through loud and clear without annoying blaring or distortion –...
-
Page 5: Table Of Contents
(Option menu)........... 54 Playback..............24 Option menu items........... 54 Basic procedure............24 Selecting a video signal to be output during an Using the SCENE function ........24 audio reproduction..........56 Selecting a source on the GUI screen ...... 25 Operating various settings for this unit Muting audio output.......... -
Page 6: Introduction
• HD Radio digital broadcast reception capability (U.S.A. Input terminals model only) • HDMI input x 5 (rear x 4, front V-AUX x 1) • XM Satellite Radio tuning capability, using XM Mini- • Audio/Visual input Tuner and Home Dock, sold separately (U.S.A. model only) [Audio] Digital input (coaxial) x 2, digital input •... -
Page 7: About This Manual
About this manual • Some operations can be performed by using either the keys on the front panel or the ones on the remote control. In case the key names differ between the front panel and the remote control, the key name on the remote control is given in parentheses. -
Page 8: Part Names And Functions
(page 19) HDMI THROUGH TONE CONTROL Lights up in the following cases while this unit is on standby. • when the HDMI control function is on Adjusts high-frequency/low-frequency output of speakers • when the HDMI signal standby-through function is currently (page 25). -
Page 9: Rear Panel
HDMI 1-4 jacks ZONE2/3 OUT jacks For connecting external components for HDMI inputs 1-4 (page 16). Output sound of this unit to an external amplifier set in a different zone (page 69). ANTENNA terminals PRE OUT jacks For connecting supplied FM and AM antennas (page 20). -
Page 10: Front Panel Display
Lights up during receiving radio broadcast signals from an FM/ AM station (page 31). Remote control Note • Before installing batteries or using the remote control, make sure that you read “Notes on remote controls and batteries” in the “Caution” section. ■ ■ Installing batteries Operation range The remote control transmits a directional infrared ray. - Page 11 TV control keys Enables operations of a TV or a projector (page 72). TRANSMIT INPUT POWER Lights up when a signal is output from the remote control. TV VOL TV CH MUTE CODE SET Sets remote control codes for external component operations (page 72).
-
Page 12: Simplified Remote Control
(page 6). Note • Before using the simplified remote control or replacing the battery, make sure that you read “Notes on remote controls and batteries” in the “Caution” section. -
Page 13: Quick Start Guide
Quick start guide When you use this product for the first time, perform setup following the steps below. See the related pages for details on operations and settings. Step 1: Prepare items for setup Step 2: Set up your speakers... -
Page 14: Preparation
PREPARATION Connections Placing speakers This unit supports up to 7.1-channel surround. We recommend the following speaker layout in order to obtain the optimum surround effect. 7.1-channel speaker layout Speaker channels ■ Front left and right speakers (FL and FR) The front speakers are used for the front channel sounds (stereo sound) and effect sounds. -
Page 15: Connecting Speakers
7.1-channel speaker layout. • You can connect Zone2/3 speakers to the EXTRA SP (SP1/SP2) terminals (page 70). • You can connect up to two subwoofers. When two subwoofers are connected, the same sound is output from them. NETWORK... - Page 16 Connect one end of the colored/striped cable to the “+” (red) terminal of this unit and the other end to that of your speaker, and connect one end of the other cable to the “–” (black) terminal of this unit and the other end to that of your speaker.
-
Page 17: Information On Jacks And Cable Plugs
Connections Information on jacks and cable plugs This unit has the following input and output jacks. Use jacks and cables appropriate for components that you are connecting. ■ ■ Audio jacks Video/audio jacks Jack and cables Description Jack and cables... -
Page 18: Connecting A Tv Monitor Or Projector
Connecting a TV monitor or projector According to the types of video input jacks available on your video monitor (such as a TV or projector), choose one of the connection methods as shown below. When you connect video players such as a DVD player to this unit with an HDMI connection, connect your video monitor to this unit with an HDMI connection. - Page 19 If the TV supports an optical digital output, we recommend that you use the AV 1 jack. Connecting to the AV 1 jack allows you to switch an input source to the AV 1 jack with a just a single key operation using the SCENE function (page 24).
-
Page 20: Connecting Other Components
Connections Connecting other components This unit has input and output terminals for respective input and output sources. You can reproduce sound and movies from input sources selected with the front panel display or remote control. Note • Make sure that this unit and other components are unplugged from the AC wall outlets. -
Page 21: Audio Player
PHONO Analog audio • If your CD player has a coaxial digital output jack, connect it to the AV3 jack of this unit. In this case, you can use the SCENE function (page 24) with the initial factory settings. • When connecting a turntable with a low-output MC cartridge to the PHONO jacks, use an in-line boosting transformer or MC-head amplifier. -
Page 22: Connecting A Yamaha Ipod Universal Dock Or Bluetooth™ Wireless Audio Receiver
• When you select “MULTI CH” as the input source, the digital sound field processor is automatically disabled. • Since this unit does not redirect signals input at the MULTI CH INPUT jacks to accommodate for missing speakers, connect at least a 5.1-... -
Page 23: Connecting To The Network
To enjoy Internet Radio or music files saved on Note your PC, each device must be connected properly in the • When signals are input to the HDMI IN and analog input jacks (AUDIO network. L/R and VIDEO) at the same time, the HDMI connection has a priority. -
Page 24: Connecting The Fm And Am Antennas
Turning this unit on and off • Position the AM loop antenna away from this unit. • If you cannot get good reception, we recommend that you use an outdoor antenna. For details, consult the nearest authorized Yamaha dealer or service center. -
Page 25: Optimizing The Speaker Setting For Your Listening Room (Ypao)
We recommend that you first adjust the output characteristics with the YPAO when you use this unit. Connect the supplied optimizer microphone... - Page 26 • If “Error” appears on the GUI screen during “Auto Setup”, measurement characteristics. Select this if your speakers have is canceled and the type of error is displayed. For details, see “When an error message is displayed during measurement” (page 23).
-
Page 27: When An Error Message Is Displayed During Measurement
Check 2 warnings Cancel See details Select items • Optimization will not be performed while a warning message is displayed. We recommend that you solve the problem and perform “Auto Setup” again. Press jCursor n / k to select “Check xx warning(s)”... -
Page 28: Basic Operation
Bluetooth component, USB storage device or network contents using this unit, see the following. • When this unit is on standby, you can turn on this unit by pressing RSCENE (or hSCENE). • FM/AM radio tuning (page 31) •... -
Page 29: Selecting A Source On The Gui Screen
The GUI screen appears on the video monitor. automatically in few seconds. Note Select Scene • The tone control settings are not effective when this unit is in the Pure Direct mode or “MULTI CH” is selected as an input source. BD/DVD RADIO... -
Page 30: Using Your Headphones
Album • When multi-channel signals are processed, sounds in all channels are divided to left and right channels. When “MULTI CH” is selected as the (on GUI screen) input source, only front L/R sounds are output from the headphones. -
Page 31: Enjoying The Sound Field Programs
• Sound field programs are stored for each input source. When you change the input source, the sound field program previously selected for that input source is applied again. • When you play back DTS Express sources or audio signals with sampling frequency of higher than 96 kHz, the straight decode mode (page 30) is automatically selected. - Page 32 The Bottom Line This is the sound field at stage front in The Bottom Line, that was a famous New York jazz club once. The floor can seat 300 people to the left and right in a sound field offering real and vibrant sound.
- Page 33 The Neural Surround decoder is especially suitable for the XM HD Surround program of XM Satellite Radio. • An input source is played back in straight decode mode (page 30) when “MULTI CH” is selected as the input source.
-
Page 34: Enjoying Unprocessed Input Sources (Straight Decode Mode)
“None” (page 60), this unit operates in Virtual CINEMA DSP mode. Note • Virtual CINEMA DSP is not available in the following conditions even if you set “Surround Speaker” to “None” (page 60). – headphone plug is connected to the PHONES jack. -
Page 35: Fm/Am Tuning
• (U.S.A. model only) broadcasted is in stereo. If you register an FM HD Radio station with this feature, only the main audio program of the station (HD1) will be stored. To store other audio program, preset the station manually. -
Page 36: Clearing Preset Stations
/ h (or ePRESET k / n) prior to the operation. • (U.S.A. model only) or AM stations. This unit may take a little time to call a sub-audio program of an HD Radio station. Tune in to the desired station (page 31). -
Page 37: Using Hd Radio™ Features (U.s.a. Model Only)
Notes • The tuning method for HD Radio stations are same as analog FM/AM radio stations; however, you only tune into the analog part of a hybrid HD Radio station while this unit is in the monaural tuning mode (page 55). -
Page 38: Displaying Hd Radio™ Information
GUI screen. Frequency, audio program number (absolute), audio Note program number (relative/total) • If a status message or an error message appears on the front panel display or GUI screen, see “HD Radio Reception” (page 79). ■ Front panel display Back to “Call Sign”... -
Page 39: Xm ® Satellite Radio Tuning (U.s.a. Model Only)
Listening to Satellite Radio To listen to Satellite Radio, you’ll need to connect either a SIRIUS or XM Satellite Radio tuner (sold separately) to your satellite-ready receiver. Satellite Radio is available to residents of the US (except Alaska and Hawaii). -
Page 40: Xm Satellite Radio ® Operations
008 80's • If no key is pressed within a few seconds after you enter a one-digit or two-digit number, this unit automatically confirms the entered channel number. -
Page 41: Registering Xm Satellite Radio Channels
(1 to 40). For details, see “XM Satellite Radio operations” (page 36). • You can directly select a preset number by pressing a lNumeric key while calling a preset channel. 008 80's Clearing preset channels You can clear the assignments of preset XM Satellite Press GMEMORY (or eMEMORY). -
Page 42: Displaying The Xm Satellite Radio™ Information
The following information is displayed on the GUI screen. on the front panel display or on the GUI screen. Note • If a status message or an error message appears on the front panel display or GUI screen, see “XM Satellite Radio” (page 80). ■... -
Page 43: Sirius Satellite Radio™ Tuning (U.s.a. Model Only)
SiriusConnect tuner must be placed at or near a window SIRIUS Satellite Radio online information with no obstacles in the path to the sky. The orientation of the antenna for Contact for activation the best reception differs depending on the area. Refer to the instruction manuals supplied with the SiriusConnect tuner for the installation of the URL: https://activate.siriusradio.com/... - Page 44 Press ITUNING/CH l / h (or eTUN./CH k / • If no key is pressed within a few seconds after you enter a one-digit or two-digit number, this unit automatically confirms the entered channel n) repeatedly to search for a channel within all number.
-
Page 45: Registering Sirius Satellite Radio™ Channels
Prior to selecting a preset channel in the Preset Search You can use this feature to store up to 40 SIRIUS Satellite mode, you must preset SIRIUS channels. For details, see Radio channels. You can then recall any preset channel “Registering preset channels”... -
Page 46: Setting The Parental Lock
To cancel this operation, press number, “Wrong” appears and the screen returns to step 3. Enter the correct code number. lENT. • If you forget the Parental lock code or want to change it, reset it using “SR PIN” (page 73). SIRIUS PIN: Note •... -
Page 47: Displaying The Sirius Satellite Radio™ Information
• If the SIRIUS Satellite Radio information contains a character that Note cannot be recognized by this unit, the character will be displayed with a • If a status message or an error message appears on the front panel display space. or GUI screen, see “SIRIUS Satellite Radio” (page 81). -
Page 48: Using Ipod
• Some features may not be compatible depending on the model or the software version of your iPod. • Some features may not be available depending on the model of Yamaha iPod universal dock. The following sections describe the procedure when using the YDS-11. - Page 49 Elapsed time, progress bar, remaining time e Song title, artist name, album title • You can switch the information displayed on the front panel display by pressing EINFO (or fINFO). • Album arts are available only when the file contains image data.
-
Page 50: Using Bluetooth™ Components
Bluetooth components to connect to the Yamaha Bluetooth wireless audio receiver for playback. • Yamaha Bluetooth wireless audio receiver YBA-10 can be paired with up to eight Bluetooth components. If ninth pairing data is registered, the pairing data for the component least recently used is cleared. -
Page 51: Using Usb Storage Devices
• Some files may not be playable depending on models and types of USB storage devices. • For a complete list of status messages that appear on the front panel display and GUI screen, see “USB and network” (page 84). -
Page 52: Using Pc Servers
Using PC servers You can enjoy playback of audio files stored on PCs connected to this unit via your network. To play back audio files on your PC, you need to install Windows Media Player 11 on the PC and configure the media sharing setting of Windows Media Player 11. - Page 53 “Repeat”, press jENTER and then press jCursor l / h to select the desired playback style. Shuffle: • Select “Off” if you do not want to play back in random order. • Select “On” to play back music files in random order.
-
Page 54: Using The Internet Radio Feature
• If you do not use a DHCP server, configure the network parameters (IP address, etc) of this unit manually (page 64) • Some security devices (such as firewall) may block the access of this unit to Internet Radio stations. In such cases, configure the security settings appropriately. -
Page 55: Using The Rhapsody ® Service (U.s.a. Model Only)
® Rhapsody service through the internet. Because your account information and Rhapsody content are on servers instead of any individual computer, your music is infinitely portable. Much of what you see in the Display area comes ® ® from Rhapsody service. - Page 56 “Play” and then press jENTER. • To display the track list of the album that contains the currently selected • Select “Add Track to My Library” to add the track, press kPOP-UP MENU, press jCursor k / n to select currently selected track to “My Library”...
-
Page 57: Other Functions
OUT 1 jack of this unit. remote control of your TV. That is, if you connect an audio output jack of your TV to the AV 1 (OPTICAL) jack of this unit, you can • Turning on this unit or to the standby (conjunction with enjoy TV sounds with the specified sound field program soon. -
Page 58: Advanced Operation
The Option menu allows users to configure various settings for each input source and reflect corresponding settings automatically when an input source is switched. Also, you can view the signal information for certain input sources. The procedure for setting the Option menu items is described below. - Page 59 USB (USB/NET), PC (USB/NET), Rhapsody Notes (USB/NET): Off*, On • “No Signal” is displayed when no signals are input and “---” is displayed Changes the shuffle playback style. when signals that this unit cannot recognize are input. • The bit rate may vary during playback.
-
Page 60: Selecting A Video Signal To Be Output During An Audio Reproduction
Setting the option menu for each input source (Option menu) Refresh Input source: PC (USB/NET) Updates the PC server list displayed in the GUI screen (page 48). Connect / Disconnect Input source: BLUETOOTH (DOCK) Connects to or disconnects from a Bluetooth component (page 46). -
Page 61: Operating Various Settings For This Unit (Setup Menu)
Adjusts delay in output timing between video signals and audio signals. HDMI OUT1 Fine adjusts the delay time of automatic lipsync applied when only the HDMI OUT 1 jack is used or when both the HDMI OUT 1 and HDMI OUT 2 jacks are used. HDMI OUT2 Fine adjusts the delay time of automatic lipsync applied when only the HDMI OUT 2 jack is used. - Page 62 HDMI control function is connected to the HDMI OUT 1 jack of this unit. Standby Through Selects on or off of output of HDMI signals input from the HDMI 1-4 jacks or HDMI IN (VIDEO AUX) jack to the active HDMI OUT jack(s) when this unit is on standby.
-
Page 63: Basic Operation Of The Setup Menu
Note Press iON SCREEN on the remote control. • In case jCursor k / n / l / h or other keys do not work after The GUI screen appears on the video monitor. closing the Setup menu, press dInput selection key to select the current input source again. - Page 64 Selects the application for the EXTRA SP (SP1/SP2) Note terminals. • If “LFE / Bass Out” is set to “Front”, “Front Speaker” automatically switches to “Large” even when it is set to “Small”. Zone2 Assigns the SP1 terminals for Zone2 speakers and disables the SP2 terminals.
-
Page 65: Speaker Level
Operating various settings for this unit (Setup menu) FR.L / FR.R / CNTR / SUR.L / SUR.R / SBL / SBR / • When “Surround Back Speaker” is set to “None”, “PLIIx Movie”, SWFR / PR.L / PR.R “PLIIx Music” and “PLIIx Game” of the surround decode mode Adjustable range: 0.30m to 24.00m (1.0ft to 80.0ft) -
Page 66: Sound Setup
– when the HDMI signal standby-through function is currently working This unit automatically adjusts the delay (automatic • When “HDMI Control” is set to “On”, this unit consumes 1 to 3 watts of lipsync) when a TV that supports the automatic lipsync is... -
Page 67: Front Panel Display Scroll
Note Choices: Continuous*, Once • Signal formats of audio and visual signals output from this unit to the TV Selects the way to scroll the screen when a total number of vary depending on specifications of the monitor. characters exceed a display area of the front panel display. -
Page 68: Input Rename
The following characters are available for input. Default Gateway A to Z, 0 to 9, a to z, symbols (#, *, –, +, etc.) and space Use this parameter to specify the IP address of the default gateway. -
Page 69: Dsp Parameter
Sci-Fi Decode Type PLIIx Movie DSP Level P. Initial Delay 16ms • When “Network Standby” is set to “On”, the amount of power P. Room Size Sur. Initial Delay consumption in the standby mode increases. Sur. Room Size ■ Information Displays the network parameters (IP address, etc.) or... - Page 70 Initial Delay / P. Initial Delay / Sur. Initial Delay / Sur. Back Initial Delay Adjustable range: 1 to 99ms (Initial Delay / P. Initial Delay), 1 to The ideal dialogue 49ms (Sur. Initial Delay / Sur. Back Initial...
- Page 71 Adjusts the attenuation of reflected sound. You can create a lively sound field (with a high reverberant sound level) Sound source as you increase the value, and a dead sound field (with a low reverberant sound level) as you decrease the value. Small = 1.0s Large = 5.0s...
-
Page 72: Memory Guard
Note and the front sound gets stronger as you make the value • You cannot select a decoder for the following MOVIE sound field programs. more positive. – Mono Movie –... -
Page 73: Using Multi-Zone Configuration
Yamaha dealer or service center about the Zone2/3 connections that best meet your requirements. • Some Yamaha models can be directly connected to the REMOTE jacks of this unit. You may not need use an infrared signal emitter for these products. Up to 6 components can be connected using monaural analog mini cables or via an IR flashers. - Page 74 • You can use the speakers connected to EXTRA SP (SP1/SP2) terminals as the front speaker system of another zone. • When you use the internal amplifiers for the Zone2/3 speakers, you can adjust the volume level and set the initial volume and maximum volume of the...
-
Page 75: Controlling Zone2/3
Note (page 51) in the selected zone. • Complete each step while the zone indicator is flashing on the front panel Note display. Otherwise, the Zone2 or Zone3 operation mode is automatically canceled and this unit returns to the main zone operation mode. -
Page 76: Controlling Other Components With The Remote Control
Controlling other components with the remote control You can control external components for a selected input source with the remote control. The keys available for controlling external components are as follows: cSOURCE POWER Default Input source Category Manufacturer Turns on and off an external component. -
Page 77: Advanced Setup
Advanced setup MON.CHK - XXXX In the advanced setup menu, you can set basic operations of this unit, such as on and off of a bi-amp connection, or Choices: YES*, SKIP initialize user settings. Adds upscaling limitation on output signals to a video monitor connected to this unit via the HDMI OUT Set this unit to standby. - Page 78 ID for the main unit in the the advanced setup menu. • For details on how to set the remote control ID of the simplified remote control, see page 8. Press oCODE SET on the remote control using a pointed object such as the tip of a ballpoint pen.
-
Page 79: Appendix
Troubleshooting Refer to the table below when this unit does not function properly. If the problem you are experiencing is not listed below or if the instruction below does not help, turn off this unit, disconnect the power cable, and contact the nearest authorized Yamaha dealer or service center. - Page 80 HDMI 1-4 jacks or connect or HDMI IN (VIDEO AUX) jack while the video monitor to one of the HDMI OUT jacks or your video monitor is connected to the HDMI IN (VIDEO AUX) jack.
- Page 81 1) Change the input source to another one. 2) With the selected sound field program, sound is not output from that speaker. Select another sound field program. 3) “None” may have been selected for that speaker on this unit.
- Page 82 A DTS-CD is being played back. 1) When only noise is output 16, 54 If a DTS bitstream signal is not properly input to this unit, only noise is output. Connect the playback component to this unit by digital connection and play back the DTS-CD.
- Page 83 FM antenna. The desired station You are in an area far from a station or Replace an outdoor antenna with more — cannot be tuned into an input from the antenna is weak.
- Page 84 XM Satellite Radio (U.S.A. model only) If an operation takes longer than usual or an error occurs, one of the following messages may appear on the GUI screen. In this case, read the cause and follow the corresponding remedies.
- Page 85 SIRIUS Satellite Radio (U.S.A. model only) If an operation takes longer than usual or an error occurs, one of the following messages may appear on the GUI screen. In this case, read the cause and follow the corresponding remedies.
- Page 86 Wrong distance or angle. The remote control will function within a maximum does not work or range of 6 m (20 ft) and no more than 30 degrees function properly. offaxis from the front panel. Direct sunlight or lighting (from an Adjust the lighting angle or reposition this unit.
- Page 87 Troubleshooting iPod™ Note • In case of a transmission error without a status message appearing on the front panel display and GUI screen, check the connection of your iPod (page 18). Status message Cause Remedy page Loading... This unit is in the middle of recognizing the connection with your iPod.
-
Page 88: Usb And Network
8 levels or a directory device. with more than 500 files. This unit cannot recognize some Edit the file name or folder name using a PC and then — characters used in the file name or folder try again. - Page 89 ® items to “My Library”. Library”. Skip Limit Reached Skip forward works up to 30 times every 3 It will be resumed in 3 hours or after once you stop ® hours during playback of a Rhapsody the playback. channel.
-
Page 90: Auto Setup (Ypao)
Auto Setup (YPAO) Notes • If the an error or warning message appears, resolve the problem and then run “Auto Setup” again. • Warning message “W-2” or “W-3” indicates that the adjusted settings may not be optimal. • Depending on the speakers, warning message “W-1” may appears even if the speaker connections are correct. - Page 91 W-2:OVER 24m (80ft) The distance between the speaker and the Bring the speaker within 24 m (80 ft.) area around — listening position is over 24 m (80 ft). the listening position. W-3:LEVEL ERROR...
-
Page 92: Glossary
Deep Color There are three modes available: “Music mode” for music sources, Deep Color refers to the use of various color depths in displays, up “Movie mode” for movie sources (for 2-channel sources only) and from the 24-bit depths in previous versions of the HDMI specification. -
Page 93: Dts Digital Surround
This channel reproduces low-frequency signals. The frequency range DTS digital surround was developed to replace the analog soundtracks of this channel is from 20 Hz to 120 Hz. This channel is counted as of movies with a 5.1-channel digital sound track, and is now rapidly 0.1 because it only enforces a low-frequency range compared to the... - Page 94 The range of rates that can be played back is determined based on the sampling rate, while the dynamic range representing the sound level difference is determined by the number of quantized bits.
-
Page 95: Sound Field Program Information
Early reflections actually add clarity to the direct sound. compression artifact. As a result, flattened complexity due to the loss of high-frequency fidelity as well as lack of bass due to the loss of Reverberations low-frequency bass is compensated, providing improved performance These are caused by reflections from more than one of the overall sound system. -
Page 96: Information On Hdmi
Master Audio, DTS-HD High Resolution Audio, DTS Express • If the input source component can decode the bitstream audio signals of audio commentaries, you can play back the audio sources with the audio commentaries mixed down by using the following connections: –... -
Page 97: Specifications
• Filter Characteristics (fc=40/60/80/90/100/110/120/160/200 Hz) [General and Asia models]........... 680 W H.P.F. (Front, Center, Surround, Surround back: Small) • Dimensions (W x H x D) ........435 x 171 x 365 mm ..................12 dB/oct. (17-1/8 x 6-3/4 x 14-3/8 in) L.P.F. -
Page 98: Index
■ 7ch Stereo, sound field program ....29 Connecting external amplifier ......18 Connecting external decoder ......18 Hall in Munich, sound field program .... 28 ■ Hall in Vienna, sound field program ..... 28 Connecting FM antenna .........20 AC IN, rear panel ..........5 HD indicator, front panel display .... - Page 99 TAG indicator, front panel display ....6 Operation range, remote control ......6 SCENE function ..........24 Test Tone, Manual Setup, Speaker Setup ..61 OPTICAL jack ..........13 SCENE IR, advanced setup ......73 The Bottom Line, sound field program ..28 OPTIMIZER MIC jack, front panel ....4...
- Page 100 Zone3 Max Volume, Zone, Function Setup .......... 64 ZONE3 ON/OFF, front panel ......4 “LMAIN ZONE ON/OFF” or “dHDMI” (example) indicates the name of the parts on the front panel or the remote control. Refer to “Part names and functions” on page 4.
-
Page 101: Information About Software
THE SOFTWARE. THIS SOFTWARE IS PROVIDED BY THE CONTRIBUTORS “AS IS” AND ANY Except as contained in this notice, the name of a copyright holder shall not be used in EXPRESS OR IMPLIED WARRANTIES, INCLUDING, BUT NOT LIMITED TO, advertising or otherwise to promote the sale, use or other dealings in this Software THE IMPLIED WARRANTIES OF MERCHANTABILITY AND FITNESS FOR A without prior written authorization of the copyright holder. - Page 102 If this package is used in a product, Eric Young should be given This device uses WM-DRM software to play Secure Content (WM-DRM attribution as the author of the parts of the library used. This can be in the form of a Software).
-
Page 103: List Of Remote Control Codes
List of remote control codes Ausind 0249 Clatronic 0243, 0249, 0259, Durabrand 0077, 0097, 0133, Autovox 0249, 0257, 0259, 0260, 0261, 0262, 0225 A.R. Systems 0274 0260, 0328 0268, 0269, 0273, 0271 Acme 0260 Aventura 0097 0274, 0328 Dwin 0224... - Page 104 Fujitsu Siemens 0425, 0426, 0427, Hinari 0261, 0262, 0266, Kaisui 0260, 0261, 0262, Magnavox 0072, 0088, 0090, 0428, 0429 0268, 0271, 0273, 0270, 0273, 0274, 0091, 0095, 0096, Funai 0033, 0034, 0035, 0274 0327, 0328 0098, 0114, 0115, 0036, 0037, 0097,...
- Page 105 0259, 0264, 0265 0304, 0324, 0325, Nikko 0072, 0077, 0096 0409, 0414 0243, 0250, 0257 0340, 0358, 0362, Nobliko 0249, 0260, 0263, Philips Magnavox 0089, 0114, 0115 Rhapsody 0327 0369, 0386, 0392, 0327 Phoenix 0243, 0257, 0268, R-Line 0268, 0271, 0274...
- Page 106 Sylvania 0072, 0088, 0089, Triumph 0274 Adventura 1023 Dumont 1072, 1078 0090, 0091, 0095, Uher 0243, 0249, 0265, Adyson 1090 Durabrand 1032 0096, 0097, 0098, 0268, 0274 Aiwa 1023, 1072, 1073, Dynatech 1023 0175, 0177, 0210 Ultravox 0257, 0260, 0263,...
- Page 107 1018, 1019, 1073 Panasonic 1007, 1008, 1009, Sentra 1076, 1090 Kodak 1021, 1022 1022, 1026, 1042, Sentron 1079, 1090 United Quick Star 1075, 1091 Korpel 1079, 1090 1043, 1068, 1082, Sharp 1031, 1045, 1057, Universum 1072, 1077, 1078 Kyoto 1090...
- Page 108 ATACOM 2318 Enzer 2302 2080, 2107, 2115, 2252, 2256, 2260, Audiovox 2111, 2199 Epson 2165 2116, 2141, 2188, 2268, 2282, 2332, Avious 2317 2219 2211, 2215, 2237, 2333, 2343, 2344, 2313 Finlux 2304, 2312, 2317 2239, 2285, 2293, 2345, 2367, 2371,...
- Page 109 RX-V2065 The letters in circles and the numbers in squares correspond to those in the Owner's Manual. ■ Front panel A B C HDMI THROUGH VOLUME ZONE2 ZONE3 ZONE BAND ON/OFF ON/OFF CONTROLS INFO PRESET MEMORY CATEGORY TUNING/CH SCENE BD/DVD...
- Page 110 ■ Remote control ZONE 2 MAIN ZONE 3 TRANSMIT CODE SET POWER POWER SOURCE SLEEP HDMI AUDIO HDMI V-AUX PHONO MULTI DOCK USB/NET TUNER SIRIUS CATEGORY PRESET TUN./CH INFO MEMORY ENHANCER SUR. DECODE MUSIC STEREO HDMI OUT STRAIGHT PURE DIRECT...
-
Page 111: Dvd Recorder
2305 Yamaha 2018 Coolmax 3045 Proscan 3015, 3016 Starmedia 2308, 2318 3006 Pulsar 3040 Sungale 2158 Cryptovision 3060 PVP Stereo Visual Matrix Sunkai 2312 Bush 2060 Director 3006 3064 Superscan 2196 Panasonic 2037, 2038, 2039, Eastern 3025 Quasar 3040 2040, 2041, 2042... - Page 112 4139 4090, 4093, 4135, DStv 4140 Hughes Network Systems Metz 4093 4136, 4137 Dune 4074 4021 Micro electronic 4136, 4137, 4139 AudioTon 4086, 4098 Echostar 4011, 4019, 4039, Humax 4051, 4075, 4076, Micro Technology 4139 Aurora 4140 4064, 4092, 4139...
- Page 113 4101, 4103 4138, 4150, 4152, 4139 Viewsat 4048 4153, 4155, 4156 Skyvision 4098 Visiosat 4095, 4098, 4138, Phoenix 4096 SM Electronic 4134, 4139 4139 Smart 4133, 4139 Phonotrend 4084, 4087, 4098 Voom 4065 Pioneer 4124, 4135 Sony 4017, 4020, 4135...
- Page 114 © 2009 Yamaha Corporation All rights reserved. Printed in Malaysia WS30700...
Need help?
Do you have a question about the RX-V2065BL and is the answer not in the manual?
Questions and answers