Table of Contents
Advertisement
Quick Links
Advertisement
Table of Contents

Subscribe to Our Youtube Channel
Related Manuals for AAXA Technologies HP4


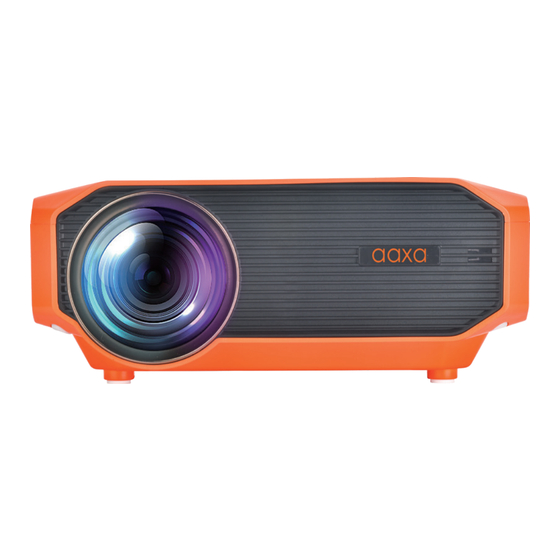
Summary of Contents for AAXA Technologies HP4
- Page 1 aaxa TECHNOLOGIES Halloween Projector User Guide...
- Page 3 CAUTION! WARNING: Please use this product as instructed. Misuse may cause injury or death. DO NOT use while driving ● DO NOT expose to water or wet surfaces. Electric shock may occur ● DO NOT expose the projected LED image to your eyes or the eyes of others ●...
-
Page 5: Table Of Contents
Table of Contents Chapter 1: HP4 at a Glance Chapter 4: Settings Menu HP4 Introduction Picture Menu Remote & Keypad Sound Menu Accessories Options Menu Bluetooth Menu Chapter 2: Getting Started Timer Menu Powering On / Off Focus Adjustment / Throw Distance... -
Page 7: Chapter 1: Hp4 At A Glance
Chapter 1: HP4 at a Glance Main Unit ➃ ➄ ➅ ➆ ➇ ➈➉ ➀ ➁ ➂ ➈ Composite AV ➀ Power Button ➄ Vent Fan ➉ Headphone Out ➁ Keystone Adjustment ➅ TF Card ➂ Focus Adjustment ➆ Standard USB 2.0 Compatible ➃... -
Page 8: Remote & Keypad
⑫ Volume Down ⑰ Left Confirm ⑬ Mute ⑱ Down Both the keypad and remote can be used to navigate through the menus. The Main Menu Navigation on the remote functions exactly the same as the directional pad on the HP4 unit. -
Page 9: Accessories
Accessories TF Card Power Adapter Remote Control User Manual *Under various circumstances, the actual accessories may be different from those shown in the pictures above. Additional accessories are available for purchase at www.aaxatech.com... -
Page 10: Chapter 2: Getting Started
Connect the other end of the power cord into the wall power source. ● Press the On/Off button at the top of the HP4 for about 3 seconds, wait shortly and the ● projector should automatically boot up and turn on. You can also press the Power On/Off... - Page 11 Powering OFF the projector 1. To turn off the projector, press the “On/Off” button on the navigation pad on top of the projector or the remote control.This will fully turn off the projector. 2. Unplug and disconnect the HP4 from the power source...
-
Page 12: Focus Adjustment / Throw Distance
Focus Adjusment / Throw Distance Focus Adjustment Spin the focus wheel until the image becomes clear. ● Throw Distance Chart Throw Distance Diagonal Screen Units: Inches Units: Inches DIAGONAL SCREEN SIZE 16:9 Aspect Ratio Throw Ratio: 1.33:1 Projection Angle: 0% Offset *minimum throw distance: 18 inches... -
Page 13: Connecting To Speakers / Headphones
Connecting Speakers / Headphones Step 1: Connect your speakers/headphones to the projector’s audio port. Step 2: Ensure that the projector and/or the headphones are powered on. Step 3: Place the headphones on and enjoy! *CAUTION: Prolonged use of headphones at a high volume may impair hearing. -
Page 14: Loading External Content
Loading External Content The HP4 Projector can read files directly from both a TF Card and USB Drive. Supported file types include: MP3 / WMA / OGG / WAV / AVI / MP4 / JPG / GIF / PDF / DOC / XLS / PPT... - Page 15 Loading External Content Cont. How to insert your TF Card Slide in your TF card into the TF card slot on the side of the HP4 ● Gently slide the TF card until it clicks into place. ● (Up to 64 GB)
- Page 16 Loading External Content Cont. How to insert your USB Drive Slide your USB Drive into the USB port. ● Gently slide the drive until it cannot go in any further ● (Up to 64 GB)
-
Page 17: Keystone Adjustment
Keystone Adjustment What is Keystoning? “Keystoning” occurs when a projector is aligned non-perpendicularly to a screen, or when the projection screen has an angled surface. The image that results from one of these misalignments will look trapezoidal rather than square. Keystone Adjustments By adding a special, selectable algorithm to the scaling, some new projectors are able to alter the image before it reaches the projection lens. - Page 18 How to Correct Keystone If the image looks trapezoidal with the base or the top larger, use the Keystone Adjustment wheel on the top of the HP4 projector to adjust the image until the projection screen is a squared image.
-
Page 19: Chapter 3: Menu Screens
Chapter 3: Menu Screens Main Menu The HP4 features an Onboard Media Player. To play videos, pictures, and music files directly from your connected devices, go to the “Projector Functions” in the Main Menu. Press the left and right directional buttons to choose an icon from the main menu. -
Page 20: Halloween Effects Menu
Halloween Effects Menu To play special Halloween effects: Select the “Halloween Video Player” icon in the Main Menu then choose ● the your preferred effects in the “Video Menu” . Select effect(s) you want to play and press the "Play Selected" icon, The ●... -
Page 21: Autoplay
AutoPlay What is the HP4 AutoPlay ™ feature? The AutoPlay function enables the HP4 projector to directly boot and play video(s) the user selects when the projector is turned on. This allows a specific video to be played directly upon projector startup without the user needing to select the video each time. - Page 22 AutoPlay Selecting a Single or some Videos for Playback: Turn on the “AutoPlay" function in the main menu ● Go to the Halloween Videos Menu ● Choose the video(s) that you want to play and select the "Play Selected" icon ●...
-
Page 23: Files Menu
Files Menu Opening A File: Select the “Projector Function” icon in the Main Menu ● In the “Functions Menu”, select the “Video” or “Photo” icon ●... - Page 24 Files Menu The HP4 will show all folders and files you have on your USB or TF Card drive. Use the navigation buttons on the navigation pad or the remote control to select folders or files.
-
Page 25: Connecting To Device Via Digital Input
The HP4’s digital input is compatible with HDMI interface. The connection type is “full sized”. *Some smartphones require video out capabilities to be displayed with the HP4. Check with your phone manufacturer. - Page 26 HP4’s Digital Input port. Step 3: In the Input Menu, select the “Digital Video” Icon. Your HP4 should now be mirroring the content from your device. Note: If you’re connecting to a computer or laptop and the projector does not automatically mirror it, read onto the next page for more information.
- Page 27 Connecting to a Computer via Digital Input Step 5: Press Windows+P to toggle through display settings. Select either “Duplicate” or “Extend” depending on your viewing option. *NOTE: Different operating systems may differ Step 6: Right click on computer desktop and select “Screen ●...
-
Page 28: Mirroring Menu
Mirroring Menu In the Main Menu, choose “Projector Functions” icon , In the Functions Menu, choose “Inputs” icon, then choose “Mirroring” icon. - Page 29 Windows PC. To screen mirror, your devices and the HP4 have to be connected to the same WiFi network. DMCA (copyright) content cannot be wirelessly mirrored. This includes content from streaming services such as Netflix, Hulu, Disney+, etc.
- Page 30 Mirroring Menu To screen mirror Android device After connecting the HP4 and your device to the same WiFi network, please use “Smart View” ● To screen mirror iOS device After connecting the HP4 and your device to the same WiFi network, please select “AAXA HP4”...
- Page 31 Mirroring Menu Wired Mirror Choose “Wired Mirror” icon, you can see the projector screen as below ●...
- Page 32 Mirroring Menu To screen mirror Android device Connect the smart-phone to projector by data cable ● Scan the code of Android device to install software, ● “elfcast" Then your mobile phone mirror to the projector ● To screen mirror iOS device Connect your iPhone to projector by data cable ●...
-
Page 33: Chapter 4: Settings Menu
Chapter 4: Settings Menu The Settings Menu can be accessed by selecting “Settings” icon in the “Fuctions Menu”. Options Picture OSD Language Picture Mode ● ● Restore Factory Default Color Temperature ● ● Slideshow Time Aspect Ratio ● ● Software Version Noise Reduction ●... -
Page 34: Picture Menu
Picture Menu In the Picture menu, you can set up: Picture Mode: Standard, Soft, Vivid, User ● Color Temperature: Cool, Medium, Warm, User ● Aspect Ratio: 16:9, 4:3, Auto ● Noise Reduction: High, Middle, Low, Default, Off ● Projection Direction (Rotate) ●... -
Page 35: Sound Menu
Sound Menu In the Sound menu, you can set up: Sound Mode: Standard, Sports, Movie, Music, User ● Balance: Increase or decrease sound balance ● Auto Volume: Turn Auto Volume On or Off ●... -
Page 36: Options Menu
Options Menu In the Options Menu, you can set up: OSD Language: Change the OSD Language ● Restore Factory Default ● Slideshow Time: 5sec, 10sec, 15sec, OFF ● Software Version: Check Software Version ●... -
Page 37: Bluetooth Menu
Bluetooth Menu 需替换 In the Bluetooth Menu, you can set up: BT Model: On, Off ● Bluetooth Speaker Set: Bluetooth Speaker Name, Bluetooth Speaker Mode ● Search Bluetooth ● Other device ●... -
Page 38: Timer Menu
Timer Menu In the Timer Menu, you can set up: Projector Time: set the Projector Time ● Automatic Timer: Toggle Timer to “On” to have the projector automati- ● cally turn On and Off Projector On Time: Set the time for the projector to automatically turn on ●... -
Page 39: Chapter 5: Technical Details
Chapter 5: Technical Details Troubleshooting 1. IMAGE IS BLURRED Possible Causes Solution The Projector is not in focus. Adjust the focus wheel on the top of the projector until the image the crisp and clear. Make sure that the projector is placed at least 2 feet away from the screen. (check page 6) The Projector is offset from plane / Move the projector so that it is both 180 degrees and on an evern plane with the... - Page 40 Be sure to setup the computer to enable a video signal output. On some laptops this is done by pressing and holding Function F5 key. If using the HP4 as an external monitor on Windows based systems, this can be done by selecting “extend my desktop to this monitor”.
- Page 41 Technical Details Troubleshooting 5. NO PICTURE / FILE NOT SUPPORTED Possible Causes Solution The video source is not properly Check the video source signal to ensure that it is properly connected. Select the connected or selected current input source by choosing the input desired from the main menu Incorrect file extension / Video is Please refer to “Specifications”...
-
Page 42: Specifications
Specifications Brightness: 250 LED Lumens Maximum Resolution: 1080P Native Resolution: 1920x1080 (1080p) Contrast Ratio: 2000:1 Aspect Ratio: 16:9 Projection Lens: Manual Focus Image Size: 18~200 inches Video in: HDMI, AV (3.5mm), Wireless Mirroring File Play Back: USB Memory Stick reader (up to 64GB), Micro SD/TF Card Reader (up to 64GB) Audio Output: 3W High-Low Frequency Speaker, Stereo speaker / headphone mini-jack Menu Language:... -
Page 43: Notes
Notes... - Page 44 Please direct all customer service inquiries to: AAXA Technologies, Inc. 17781 Sky Park Circle, Suite #F, Irvine, CA 92614 TECHNOLOGIES Tel: +1 (714) 957-1999 | Email: info@aaxatech.com...
Need help?
Do you have a question about the HP4 and is the answer not in the manual?
Questions and answers