Table of Contents
Advertisement
Advertisement
Table of Contents

Related Manuals for AAXA Technologies P1


Summary of Contents for AAXA Technologies P1
-
Page 2: Table Of Contents
Table of Contents Table of Contents...1 Warnings ...2 Accessories ...3 General Operation Turning the Projector On/Off ...4 Projector Description ...5 Focus Adjustment / Throw Distance ...6 Tripod Adapter ...6 dapte Input / Output ...7 ut ... Menu System ystem AV Input ...8 In Inpu SD Card ...9-14 SD Card... -
Page 3: Warnings
P1 Jr. pico projector. * Notice: The P1 Jr is designed to be used in dark areas only – use in lit areas is not recommended. Warning: Please use this product as instructed to prevent any injuries. -
Page 4: Package Contents
Package Contents P1 Jr. Projector P1 J Pro roje jector USB C USB Cable b le AV Cable Cabl C bl * No * Note: Actual accessories may appear different from those te: A shown above. AC Ad AC Adapter/Charger... -
Page 5: General Operation
The welcome screen should appear while the projector is loading and will automatically load into the onboard media player. Note: Please make sure the P1 Jr is fully charged before use. Charge time can be up to 3-4 hours. To charge the projector: 4 hou 1. -
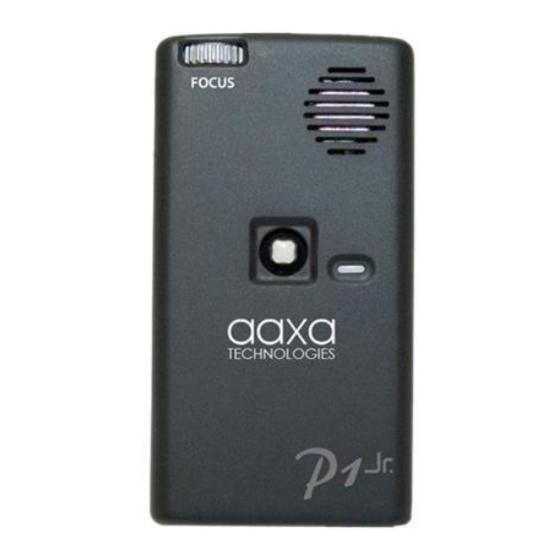
Page 6: On/ / Off O Projector Description
General Operation 1. Projection lens The projection lens emits the image from the projector. Make sure there is nothing obstructing the lens to obtain a clear image. 2. Focus adjustment If the projected image is not in focus, move the ring to the left or right to bring the image into focus. -
Page 7: Focus Adjustment / Throw Distance
General Operation Focus Adjustment / Throw Distance The focus can be adjusted by turning the wheel located at the front of the projector. The projector is capable of the distances specified on the right. Tripod Adapter Trip p od Insert the tripod to the bottom of s ert the projector as shown to the left. -
Page 8: Input / Output
Data description on page 14 to learn more. descr crip ipti o on page 4. Projector Power – The P1 Jr. accepts 100-240V 50-60hz power at 2000ma. The charge receptacle is Projec c to o r Power – The P1 J r. -
Page 9: Menu System Ystem
AV (Audio / Video) Input Selecting the AV input will enable the P1 Jr. to display enable video from a device connected to the AV port. Input nnected t... -
Page 10: Sd Card D
USB Data section on page 15 for additional information. B Data s sec ecti tion on pa Setup Selecting the Setup option allows the user to change various settings on the P1 Jr. Please see the Settings etup op option a ll reen... -
Page 11: Sd Card Memory
SD Card Memory To access data from the SD Card slot: a. Insert the SD Card as shown. The gold connectors on the card should face down. Maximum of 8GB SDHC cards are supported. b. Access the SD Card Memory menu from the main menu. c. - Page 12 SD Card Memory Videos Selecting the video menu brings up the video selection submenu seen on the right. To navigate to a video, press the joystick up and down. To select and play a video, click the joystick. For compatible video formats, please see the specifications page.
- Page 13 SD Card Memory Photos Photos will initially be seen in thumbnail mode. Selecting a photo will begin displaying the pictures in slideshow mode (bottom right). The slideshow can be customized in the Settings Menu. Please see the Slideshow page to see what settings can be customized. During the slideshow, joystick controls are: e slideshow Previous/Next: Left/Right...
- Page 14 SD Card Memory Music To listen to music on the P1 Jr., select the Music icon. A list of available music files will appear. Click on the desired song to begin playing. Move the joystick up and down to navigate between songs.
- Page 15 SD Card Memory SD Card Memory SD Card Memory Files The file menu allows for browsing and deletion of the files currently on the SD card. Click on the Files icon from the main menu to enter the submenu. To navigate through the list, press up and down on the joystick.
-
Page 16: Usb Data
P1 Jr. To access the data on your USB OTG device, plug your USB device to the back of the P1 Jr (shown below). Once the connection is made, select USB Data from the main menu and the data will appear. You should now be able to access the data on your device. -
Page 17: Settings Menu
Fren French, German, Italian, Spanish Germ rman , It Keystone – The P1 Jr. ’ s keystone settings can be changed here. ystone e – T h e P1 Jr. ’ s keys ysto tone Please see the Keystone section on the following page to see how this affects the image. - Page 18 “Normal” will display pictures in their actual resolution. play pi pict ctures Keystone ystone The P1 Jr. ’ s keystone settings will only affect vertical keystone. This means only the top and bottom of the he P1 Jr r . ’ s k k eystone settings image may be adjusted.
-
Page 19: Troubleshooting
Troubleshooting Troubleshooting THE PROJECTOR DOES NOT TURN ON Possible Causes There is no power The power button was not held long enough NO PICTURE / FILE NOT SUPPORTED Possible Causes The video source is not properly connected or selected properly connected Incorrect file extension / Video is ecoded with incorrect codec file exte... -
Page 20: Specifications
Specifications PROJECTION SYSTEM Projection Lens: Projection Image: Lamp: GENERAL SPECIFICATIONS Audio Output: Supported Languages: Aspect Ratio Control: tr trol ol: Dimensions: ions Weight: eight: Power Consumption: ower Co o ns s umption: Power Supply: wer Su pply: Conformances: e s: INPUTS / OUTPUTS OUTPU PUTS...
Need help?
Do you have a question about the P1 and is the answer not in the manual?
Questions and answers