
Related Manuals for Formax atlas-AS


Summary of Contents for Formax atlas-AS
- Page 1 Air Feed Document Folder atlas Font: ERAS Medium ITC MAINTENANCE MANUAL 4/2024...
- Page 2 INTRODUCTION i ... Introduction All the engineering adjustments are shown at the end of each relevant section. Operator's adjustments and routine maintenance are explained in the appropriate operators guide which should always be used in conjunction with this manual. It is always a good idea to have a copy of the machine's illustrated parts manual available when servicing, as its illustrations provide an invaluable reference to the construction of the individual assemblies used to build the machine.
- Page 3 INTRODUCTION Pan head and Cross - head countersunk screws all have metric Taptite threads and Pozi - drive recesses. Use No.2 point Pozidriv or Supadriv drivers for all screws M4 & above, and No.1 point drivers for M3 & below. WARNING WORK SHOULD BE CARRIED OUT BY A TRAINED AND COMPETENT ENGINEER AND ALL SAFETY PROCEDURES SHOULD BE ADHERED...
-
Page 4: Table Of Contents
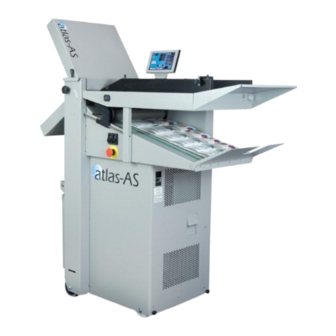
Replacement of ITX Board. R eplacement of ITX Board PSU. Replacement of Touch Screen Assembly …….. Atlas-AS Wiring Diagram.EMD Motor... ….. Atlas-AS Wiring Diagram.Lemac Motor. UL. . 47 Fuse Positions and Ratings ......Section 13 …..Optical Sensors…….…………………………………….. Section 14 …...Trouble Shooting…………………………………………. - Page 5 AUTOMATIC PAPER FOLDING MACHINE Key to drawing below A Moving side lay knob H System switch R Roller Tilt lever B Paper gate knob Front pins S Emergency stop switch C Suction slot knob K Upper fold plate T Compressor switch D Air distribution knob L Vacuum bleed knob U Extension table...
-
Page 6: Introduction
SECTION 1. GENERAL PROCEDURES The Engineer Tools Page Overview Introduction The Engineer Tools Page is used to calibrate and adjust important machine settings, and must only be opened by a factory trained technician. To open the Engineer Tools Page see Access the Engineer Tools Page. The Engineer Tools Page The Configuration Button The configuration button toggles between the display scheme... - Page 7 The Maximum Delivery Roller Position Button The maximum delivery roller position button enables you to set the delivery roller assembly to its maximum position. The Minimum Delivery Roller Position Button The minimum delivery roller position button enables you to set the delivery roller assembly to its minimum position The JDF Enable Button The JDF enable button enables you to setup and configure the JDF...
- Page 8 Engineer Plug 90-046 Engineer Plug Socket Procedure Step Action Information Turn on the Atlas-AS Insert the Engineer Plug The Engineer Plug socket is located through the Service Panel at the rear of the fixed sidelay. Remove the plastic dust cap...
-
Page 9: Introduction
When all of the reference positions have been stored the fold plate is calibrated and the Atlas-AS control system can accurately position the fold plate stop, or deflector, to suit the fold type selected by the machine operator. - Page 10 Fold Plate Calibration Page Description The fold plate calibration page is used to set the fold axis reference points for the fold stop or deflector. The motor control buttons are used to operate the direction of the fold plate motor so that the fold stop/deflector can be correctly positioned during calibration. A reference point is stored by touching the confirmation button when the fold stop is physically in the correct place.
- Page 11 The fold calibration page can be closed by touching the Close Page button. Set / Check the Fold Plate Potentiometer Calibration The Atlas-AS converts the voltage across the fold plate potentiometer to a digital value that it can use to accurately position the fold plate/deflector.
- Page 12 (+/-) 150 (+/-) 150 Procedure: Before you start: Remove the fold plate front cover Connect the fold plate lead to the top lead on the Atlas-AS. Insert an engineer plug in the Atlas-AS. Step Action Information Disengage the potentiometer pinion-gear Remove one of the potentiometer from the fold-stop/deflector shaft.
- Page 13 BLANK PAGE FOLDER Page 13...
- Page 14 Atlas-AS an and d p p l l a a c c e e t t he...
- Page 15 Calibration Plate 90-044 Engineer Plug 90 Engineer Plug 90-046 Extension Lead 90 Extension Lead 90-133 Be careful not to touch any live circuits when the Atlas-AS is powered on. C AUTION Step Action Information on t th h e e folder...
- Page 16 Step Action Information pressed squarely against the top rail Touch the motor forward button and allow the deflector to move towards the Calibration Plate Assembly. Touch the motor stop button to halt the deflector before it touches the Calibration Plate Assembly Touch the (-) trim on the fold stop position button to gradually...
- Page 17 LEFT wh en fitted to a Fold Plate switched to the RIGHT when fitted to a De flector Plate · Before you begin: Turn off the Atlas-AS · Remove the Fold Plate / Deflector Plate · Remove the fold plate top cover ·...
- Page 18 Tools: Allen Key: 2.5mm Allen Key: 2.5mm Screwdriver: small electrical Screwdriver: small electrical Step Action Information Disconnect the cables from the Disconnect the cables from the Disconnect the: fold plate control pcb fold plate control pcb potentiometer cable interface cable motor cable Remove the fold plate control Remove the fold plate control...
- Page 19 The Delivery Roller automatically a djusts it s position o n the delivery to s uit the finished sheet size. To do this, an electric motor, w hich i s c ontrolled b y the Atlas-AS control system, moves t he Delivery Roller up and down the d elivery a xis. To a ccurately set...
- Page 20 Use extreme caution not to touch li ve c ircuits w hen the Atlas-AS is WARNING turned on. Step Action Information Loosen the delivery roller axis This action allows: drive motor fixing screws The tension to be released on the delivery roller axis drive belt...
- Page 21 Step Action Information button A (-) value will position the delivery roller closer to the delivery cover A (+) value will position the delivery roller closer to the stacker Repeat Steps 12 – 15 until the If you can’t calibrate the delivery delivery roller assembly moves roller axis correctly within the freely within the axis and there is...
- Page 22 Calibrate the Drive Motor High/Low Speed Limits Introduction The Atlas-AS uses v ariable s peed c ontrol to operate t he DC Drive M otor. The voltage supplied to the motor is regulated b y the 95-138 M otor Speed Control p cb and by the Atlas-AS Controller pcb.
- Page 23 95-138 Motor Speed Control PCB Test Points Procedure Use extreme caution not to touch live circuits when the Atlas-AS i s WARNING turned on. TOOLS Screwdrivers: Pozidriv No. 2, Small electrical Calibrated Multimeter Engineer Plug 90-046 Step Action Information Turn on the Atlas-AS...
- Page 24 Step Action Information Touch the High Speed Limit setting button The drive motor will operate at its maximum speed Turn on the compressor switch Allow the compressor motor to reach full speed and the drive motor speed to stabilise Connect a Multimeter across the Set the Multimeter to read DC drive motor power wires voltage...
- Page 25 AS Controller pcb. It is i mportant that the HIGH (20) motor rpm pr eset and the LOW (1) motor rpm p reset a re e ach c alibrated to e nable t he Atlas-AS to ope rate through the c orrect s peed r ange.
- Page 26 VR1 OL VR5 HIGH VR4 LOW 95 18 - 9 DC Motor Board pcb test points Procedure Use extreme caution not to touch live circuits when the Atlas-AS is WARNING turned on. T OOLS Screwdrivers: Pozidriv No. 2, Small electrical...
- Page 27 Step Action Information The drive motor will operate at its maximum speed Connect a Multimeter across the Set the Multimeter to read DC drive motor power wires voltage See Diagram: 95-189 DC Motor Board pcb Test Points Set the motor voltage to 62vdc Adjust VR2 on the controller pcb to set the voltage Turn VR2 to the right to...
- Page 28 Replace the DC Motor Board pcb (LEMAC – UL Motor) Mounting Screws Fixing Screw DC Motor Board pcb Housing Before you begin: Turn off the Atlas-AS Remove the compressor cover TOOLS Screwdriver: Pozidriv No.2 Allen Key: 2.5mm Step Action Information...
-
Page 29: Section 1
SECTION 2. COVERS 2.1 The Front Cover (Compressor Panel). The front cover, which is situated below the delivery bed, also covers the compressor. It is located by three tongues protruding into the main frame and is secured by 11 taptite screws. To remove this cover, remove all screws and twist forwards to clear emergency stop button;... -
Page 30: Section 2
NEVER loosen the support plate stop bolt as this can cause the feed drum assembly and the CAUTION: sidelay to become misaligned. 1. Turn off the Atlas-AS. 2. Remove the service panel. See Remove the service panel Section. 3. Remove the compressor panel. See Remove the compressor panel Section. - Page 31 Fit the Feed Drum Assembly 1. Fit the feed drum drive shaft assembly. Make sure that the bearing dust cover is fitted. 2. Fit the feed drive pulley. Fit the drive belt on the feed drive pulley. Fit the 2 grub screws. 3.
-
Page 32: Section 3
SECTION 4. 4.1 Remove and Fit the Vacuum Valve Assembly. Tools: 4.0mm Allen Key 19mm Spanner Remove the service panel See Remove the service panel Section 2.2 Remove the vacuum valve assembly Remove the 2 fixing screws Pull the vacuum valve assembly towards you. Note: Make sure that you do not lose the O-ring seal that is fitted between the vacuum valve and the side frame Remove the air supply hose... - Page 33 4.4 Fit the vacuum valve assembly. Fit the vacuum supply hose. Fit cable tie as required. Fit the vacuum valve coil assembly. Fit the air supply hose to the vacuum valve assembly. Make sure that the vacuum valve coil cable is fitted behind the air supply hose. Fit the vacuum valve.
-
Page 34: Section 4
Warning. You must be careful to lift the fold plate. Do not let the fold plate drop on your hands or feet. Caution: Do not let the fold plate drop as this can damage it. Turn off the Atlas-AS. Disconnect the fold plate interface cable. -
Page 35: Section 5
Caution. Do not let the fold roller cassette drop as this can damage. Remove the Fold Roller Cassette 1. Turn off the Atlas-AS. 2. Remove the fold plates. See Remove and refit the fold plates Section 5. 3. Remove the 2 scallop knobs. -
Page 36: Section 6
SECTION 7. ROLLER BELT CHANGE. Unscrew the two knobs that retain the fold roller cassette assembly and remove the complete assembly from the machine. Remove top cover with 4 pozi-drive screws. Remove circlips from roller guard, only on belt side. With 10 mm spanner loosen belt tensioner &... -
Page 37: Section 7
SECTION 8. REPLACE ROLLERS . Dismantle assembly, as in previous instructions. Remove rubber rings, remove all none gear rollers first, then roller with gear drive last. Again be careful not to loosen rubber 0’rings from ends of rollers. Fit new gear roller first, with rings, then fit last 3 rollers and 0’rings, then belt. Refit end plate, make sure both plates are fitted square before tightening the fixing bolts. -
Page 38: Section 9
SECTION 10. DELIVERY BELT CHANGE. Remove the Roller Assembly. Remove the Rear Access Panel and the Compressor Access Panel Remove the cover on the underside of the Delivery Remove the wires from the system switch and compressor switch. Remove the Emergency stop button by pulling off the yellow safety clip, move the lock to one side & remove the rear contact block. -
Page 39: Section 10
SECTION 11. DELIVERY DRIVE BELT CHANGE. Without removing the Delivery Assembly Remove the Roller Assembly. Remove the Rear Access Panel and the Compressor Access Panel. Remove the Drive belt from the bottom pulley Remove the Delivery Roller Catcher Assembly by unscrewing the two bracket fixing screws from within the roller frame area. -
Page 40: Section 11
SECTION 12. The control system is essentially a computer system just like the PC you use at home. Unlike your Microsoft Windows PC, the PRO system uses a LINUX operating system and runs only one program, which is the machine control program for the particular machine that it is installed on. - Page 41 NOTE:- The 2nd tab from the left is the Crease Setting tab on the Autocreaser Pro and Documaster Pro machines. The 2nd tab from the left is the Fold Setting tab on the Atlas-AS machine. Boot Code Version (iv) Choose the latest version of the machine software from the list to update the machine program chip.
- Page 42 SECTION 12 M.2 SSD Hard Drive FIG.1 FIG. 1 FIG.1 above shows the M.2 SSD hard drive plugged into the Asus ITX motherboard type J4005i-C. REPLACEMENT OF M.2 SSD HARD DRIVE. The M.2SSD Hard Drive controls all functions of the graphics and touch screen operation. The M.2 SSD is plugged directly into the motherboard, to remove the SSD remove the small screw securing the SSD to motherboard &...
- Page 43 SECTION 12 ITX BOARD REPLACEMENT (see Tb3006). The ITX mother board supplies the graphics to the touch screen display, to remove.- 1. Switch the mains power off. 2. Cut cable ties and unplug all the plugs. 3. Unscrew the four fixing screws attaching the board to the plate and remove from the machine.
- Page 44 BLANK PAGE Page 44 PAPER...
-
Page 45: Section 12
SECTION 12. (Continued) Replacing the Touch Screen Assembly Replacing the Touch Screen Assembly. Ensure the mains power is turned off but with the plug in the socket, this maintains an earth to reduce static damage. 1. Remove the rear cover to expose the electrical panel. 2. - Page 46 EARTH LEAD 97-149 TO EARTH STUD ON STOP SERVICE PANEL 95-164 L N E 95-166 DISTRIBUTION BLOCK SCRN SCRN CONTROL LEG TRUNKING ASSEMBLY MOTOR 95-163 CONTROL SYSTEM ASSEMBLY COMP Atlas-AS Wiring Diagram Part no 940820T (EMD Motor) Page 46 PAPER...
- Page 47 Atlas-AS W iring Diagram Part no 940820S (Lemac/Parvalux Motor FOLDER Page 47...
-
Page 48: Fuse Positions And Ratings
FUSE POSITIONS & RATINGS (Non UL) PSU (5V / 12V) SPARE FUSE T5A (47061) POSITION PSUs (24V) PSU (48V) T4.0A (681-015) F3.15A (613-023) FUSE POSITIONS & RATINGS (UL) TRANSFORMER ASSY. MAINS INPUT T5A (47061) T15A (652-047) PSUs (24V & 48V) PSU (48V) T4.0A (681-015) F3.15A (613-023) -
Page 49: Section 13
SECTION 13. Top Sensor Replacement To remove top sensor, remove rear cover by removing seven screws and lifting panel. Remove feed bed and side lay. Remove ~ sensor cables from PCB, making note of their positions. Remove two bolts holding the sensor and ball carrier. The sensor is built into this assembly and has to be replaced as an assembly. -
Page 50: Section 14
Section 14 Trouble Shooting Fault Reason Solution TROUBLE SHOOTING BAD FOLDING Ink build up on rollers. Clean rollers with cleaning kit. Part no. 90-018. Paper jammed in fold plate Remove fold plate from machine. Remove shoulder screws from front rail & open up plate, then remove paper Roller gap incorrectly set... - Page 51 Section 14 Trouble Shooting Fault Reason Solution TROUBLE SHOOTING NOT COUNTING Sensor requires cleaning. Clean sensors top & bottom. Sensor worn. Check voltage, replace if required. PCB failure Replace Main PCB WILL NOT PULSE As above Clean sensors FEED Replace Main PCB Check valve ONLY STREAM As above...
- Page 52 FAULT:- ‘NO SYNC’ appears on touchscreen. (Machine will not boot up). 1. CHECK THE ATX POWER SUPPLY AS FOLLOWS:- (i) Disconnect the 20/24 way ATX power supply connector from the ITX Motherboard. (ii) Using a piece of tinned copper wire, short out the GREEN (Pin 16) and BLACK (Pin 15) wires of the connector as shown in FIG.1 below FIG.1 TINNED COPPER WIRE LINK...
- Page 53 PINS 3 & 4 FIG.2 FIG. 2 IMPORTANT RECYCLING NOTE:- The ITX mother board has a lithium battery fitted, the board together with its battery must be recycled in compliance with agreed national Procedures. Please contact your local disposal authority for information. CAUTION.
- Page 54 FAULT:- No Touchscreen Display, (Machine will not boot up). When you release the E-stop switch, the control system should receive power and begin to boot-up. After a short period of time you will see the touchscreen become active and display the boot-up sequence.
- Page 55 FAULT:- Pump will not operate when the Compressor switch is switched on. Check the fuse on the PCB, in the Pump Overload assembly. The Pump Overload assembly is located on the inside of the yellow leg, below the baffle plate. FUSE YELLOW ORANGE...
Need help?
Do you have a question about the atlas-AS and is the answer not in the manual?
Questions and answers