Table of Contents
Advertisement
Quick Links
NOT FOR RESIDENTIAL USE
•
Please read this manual and the enclosed safety materials completely, prior to installation and use!
•
This product is to be installed and serviced by a trained door systems technician ONLY.
•
These operators are compatible with myQ®, myQ® Smart Facility Access™, and Security+ 2.0®
accessories.
•
These operators are Wi-Fi® compatible.
2 YEAR WARRANTY
Serial #
Installation Date
Scan here for
LiftMaster support
videos and content.
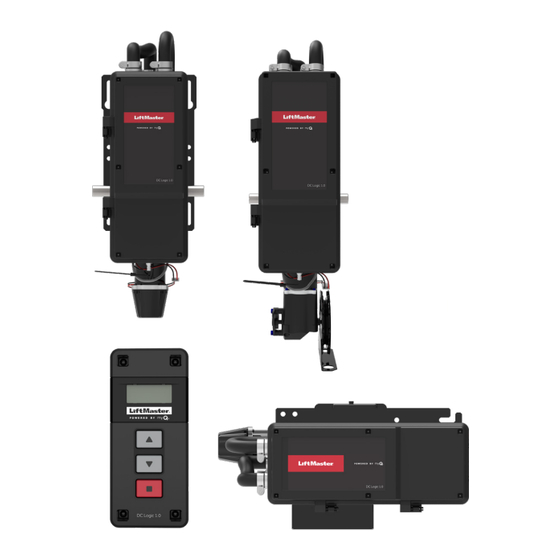
Industrial DC
Operators
Models JDC, JHDC, and
DC Jackshaft, Hoist, and Trolley
For Doors up to 700, 1200, and 2200 lbs
NOT FOR RESIDENTIAL USE
TDC
LiftMaster
300 Windsor Drive
Oak Brook, IL 60523
Advertisement
Table of Contents

Subscribe to Our Youtube Channel
Related Manuals for Chamberlain JDC7S1BMC


Summary of Contents for Chamberlain JDC7S1BMC
- Page 1 Industrial DC Operators Models JDC, JHDC, and DC Jackshaft, Hoist, and Trolley For Doors up to 700, 1200, and 2200 lbs NOT FOR RESIDENTIAL USE NOT FOR RESIDENTIAL USE • Please read this manual and the enclosed safety materials completely, prior to installation and use! •...
-
Page 2: Table Of Contents
Table of Contents Safety Information Wall Controller Installation Safety Symbol and Signal Word Review....3 Factory Wiring Diagram Planning Accessory Wiring Diagram Introduction Power Wiring Diagram Voltage Selection . -
Page 3: Safety Information
Safety Information Safety Symbol and Signal Word Review WARNING IMPORTANT NOTES: • BEFORE attempting to install, operate or maintain the commercial door operator, you must read and Mechanical fully understand this manual and follow all safety instructions. WARNING • DO NOT attempt repair or service of a commercial door operator unless you are an Authorized Service Technician. -
Page 4: Planning
Planning SECTIONAL DOORS Recommended Drum/Sprocket Configuration for 12"/second Door Speed Operator Door Type Drum* Sprockets** Standard D400-96 Hi-lift D400-54 Standard D400-144 Vertical D850-132 Standard D5250-18 1200 Hi-lift D525-54 Hi-lift D575-120 Standard D525-216 Vertical D1100-216 Hi-lift D6375-164 2200 Standard D800-384** Hi-lift D800-120 Vertical D1350-336... -
Page 5: Introduction
208V 3 phase Via accessory step down transformer 600V 3 phase Via accessory step down transformer Amperage Model Operator Type Voltage Cycle Max. Door Weight JDC7S1BMC 120/240 single, 3 phase Jackshaft non-hoisted Standard Cycle 700 lbs. JDC7S4BMC 480V 3 phase BBU Operators... -
Page 6: Operator Specifications
Operator Specifications Door Speed: Duty Cycles: Fine adjustments are made via Wall Controller menu; if • Standard: 20 cycles per hour / 90 cycles per day you want to slow down the operator, please adjust via • Extended: 30 cycles per hour / 150 cycles per day sprocket choice: Wall Controller: NEMA 1 General Purpose 3-Button Wall •... -
Page 7: Operator Dimensions
Operator Dimensions Jackshaft (JDC) and Hoist (JHDC) -
Page 8: Tdc Trolley
Operator Dimensions (continued) TDC Trolley Battery Backup 7H Battery 4.70" (11.9 cm) 4.70" 7.22" (11.9 cm) (18.4 cm) 4H Battery 6.37" (16.2 cm) -
Page 9: Tdc Trolley Operators
TDC Trolley Operators WARNING To prevent possible SERIOUS INJURY or DEATH: • Disable ALL locks and remove ALL ropes connected to door BEFORE installing and operating door • DO NOT connect electric power until instructed to operator to avoid entanglement. do so. -
Page 10: Tdc Trolley Assembly
TDC Trolley Assembly HARDWARE Assemble the Operator Bolt 3/8"-16 Install the track spacers evenly over the length of the track. Fasten x 3/4" the spacers to the track with bolt (A) and flange hex nuts (B). Flange Hex Nut Spacers Provided Track Length 3/8"-16 8-14 foot... -
Page 11: Install The Chain
TDC Trolley Assembly (continued) Install the Chain The chain is packed separately from the operator. Please ensure you have your chain before starting installation. Position the trolley 2 inches (5.1 cm) away from the front idler. Attach the chain to the trolley threaded shaft using the master link. Run the chain along the track to the operator. -
Page 12: Tdc Trolley Installation
TDC Trolley Installation Install the Header Bracket WARNING The trolley operator is generally mounted over the center of the door. However, off center mounting may be required due to interfering structures To prevent possible SERIOUS or location of the door stile / top section support. Typically, the operator INJURY or DEATH: may be mounted up to 24 inches (60.1 cm) off center on torsion spring •... -
Page 13: Operator
TDC Trolley Installation (continued) THE TRACK TO THE HEADER BRACKET AND HANG THE OPERATOR TRACK TO THE HEADER BRACKET AND HANG THE OPERATOR Attach the Track to the Header Bracket and Hang the Operator Align the track with the header bracket. ack with the header bracket. -
Page 14: Attach The Door Arm And Bracket
TDC Trolley Installation (continued) Attach the Door Arm and Bracket HARDWARE Latch the door arm to the trolley. Make sure the open side of the Flanged Hex notch on the door arm faces the door. Nut 3/8"-16 (2) Position the door bracket to the center line of the door and attach the door bracket to the door using appropriate hardware (not Nylok Nut 3/8"- included). -
Page 15: Jackshaft (Jdc) And Hoist (Jhdc) Operators
Jackshaft (JDC) and Hoist (JHDC) Operators Carton Inventory Your door operator is packaged in one carton which contains the motor unit and the parts illustrated below. If anything is missing, carefully check the packing material. WARNING Description • Powerhead assembly To prevent possible SERIOUS INJURY, DEATH, or uncontrolled •... -
Page 16: Jdc/Jhdc Assembly
JDC/JHDC Assembly Configure the Operator WARNING Units are now dual handed and can be used in either the right or left side. To prevent possible SERIOUS Select right (R) or left (L) handing for the sprocket and hoist as INJURY or DEATH: needed. -
Page 17: Jdc/Jhdc Installation
JDC/JHDC Installation WARNING Determine Mounting Location The operator may be mounted on the wall, shelf, TO REDUCE THE RISK OF SEVERE INJURY: or bracket (not provided, see "Accessories" on • Install the operator, a minimum of 8 feet (2.44m) from page 52).
Need help?
Do you have a question about the JDC7S1BMC and is the answer not in the manual?
Questions and answers