
Related Manuals for Aiwa CX-NV8000


Summary of Contents for Aiwa CX-NV8000
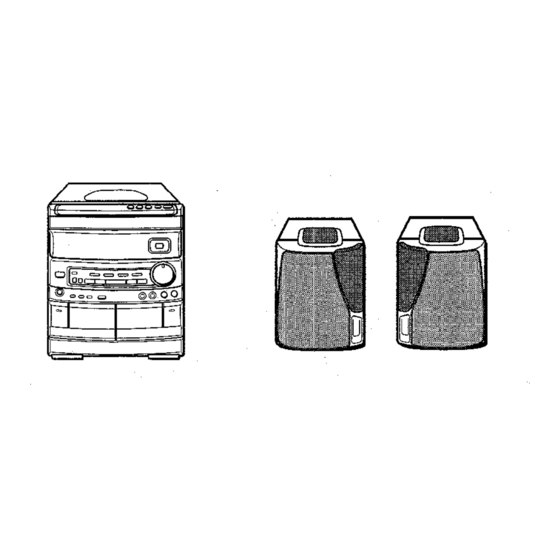
- Page 1 For Assistance And Information Toll Free I-800-BUY-AIWA C~ll (United States and Puerto Rico) 86-NF5-903-219 962607 DKY-U...
-
Page 2: Table Of Contents
Congratulations on your purchase of an Aiwa Stereo System. To optimize the performance of this system, please take the time to read through these Operating Instructions and become familiar with the operating procedures. Check your system and accessories... -
Page 3: Precautions
PRECAUTIONS Read the Operating Instructions carefully and completely before operating the unit. Be sure to keep the Operating Instructions for future reference, All warnings and cautions in the Operating Instructions and on the unit should be strictly followed, as well as the safety suggestions below. -
Page 4: Connections
CONNECTIONS Before connecting the AC cord The rated voltage of your unit shown on the rear panel is 120 V AC. Check that the rated voltage matches your local voltage. IMPORTANT Connect the speakers, antennas, and all optional equipment first. Then connect the AC cord in the end. The front speaker marked R on the rear is the right speaker, and the marked L is the left speaker, ENGLISH... - Page 5 3 Connect thesupplied antennas. Connect the FM antenna to the FM 75 Q terminals and the AM antenna to the AM LOOP terminals. FMantenna —Z====== 4 Connect the AC cord to an AC outlet. To stand the AM antenna on a surface Fix the claw to the slot.
-
Page 6: Before Operation
BEFORE OPERATION -—— ._ __ —— .——_- -— —— ___ .._ ——— - To turn the unit on Press one of the function buttons (TAPE, TUNER, VIDEO/AUX, CD). Playback of the inserted disc or tape begins, or the previously tuned station is received (Direct Play Function). The POWER button is also available. -
Page 7: Sound
ADJUSTING THE SOUND Your speakers feature the Front 180” system with uni-directional speakers and built-in surround speakers pointed inward at angles of 45”. You can get an optimal stereo effect not only directly in front of the speakers but also when off the center line between the s~eakers. -
Page 8: Front Surround System
FRONT SURROUND SYSTEM —___ ._ _ ..— — ---- -.———_ _ ___ __. _——.— The front surround system uses a DSP (Digital Signal Processor) to enhance the simulated surround sound effect for your listening pleasure. When you select the FRONT SURROUND mode, the sound presence of a disco (DISCO), live music performance (LIVE), or concert hall (HALL) can be obtained. -
Page 9: Presetting Stations
PRESETTING STATIONS The unit can store a total of 32 preset stations. When a station is stored, a preset number is assigned to the station, Use the preset number to tune in to a preset station directly. 7 Press the TUNER/BAND button to select a band, l<<... -
Page 10: Basic Operations
BASIC OPERATIONS LOADING DISCS Press the CD button, then press the= button to open the disc compartment. with the label side up. To play one or two discs, place the discs on tray 1 and 2. To play three discs, press the DISC CHANGE button to rotate the trays after placing two discs. - Page 11 RANDOM PLAY All the tracks on the selected disc or on all the discs can be played randomly. Press the RANDOM button on the remote control. RANDOM lights up on the display. To cancel random play, press again. Even if the << button is pressed, a previously played track cannot be skipped.
-
Page 12: Basic Operations
BASIC OPERATIONS TAPEI DECK DOLBY REV MO .= _._. Deck 1 INSERTING TAPES On deck 1, tapes are always played back on both sides. On deck 2, you can select a reverse mode to play back one or both sides, Use Type I (normal), Type (high/CrOz) or Type tapes for playback. -
Page 13: Continuous Play
CONTINUOUS PLAY —— ._ ””___ .—. — .— After playback on one deck finishes, the tape in the other deck will start to play without interruption. Insert tapes into deck 1 and deck 2. Press the TAPE/DECKl/2 button to select the deck to be played back first. -
Page 14: Recording
BASIC RECORDING This section explains how to record from the tuner, CD player, or external equipment. ,___ \-——_:“,- _— _., )... __ j .._ —–-– —_—_ –— —--- Preparation Set the tape to the point where recording will start. Use Type I (normal) and Type (high/CrOz) tapes for recording. -
Page 15: Dubbing A Tape Manually
DUBBING A TAPE MANUALLY Preparation Set the tape to the point where recording will start. The reverse mode is automatically set to Z. Note that recording will be done on one side of the tape only, Press the TAPE button. Insert the original tape into deck 1 and the tape to be recorded on into deck 2. -
Page 16: Al Edit Recording
Al EDIT RECORDING The Al edit function enables CD recording without worrying about tape length and track length. When a CD is inserted, the unit automatically calculates track lengths. If necessary, the order of tracks is rearranged so that no track is cut short. (Al: Artificial Intelligence) Al edit recording will not start from a point halfway into the tape. -
Page 17: Programmed Edit Recording
PROGRAMMED EDIT RECORDING Programmed edit function enables CD recording while checking the remaining time on each side of the tape as the tracks are programmed. The programmed edit recording will not start from a point halfway in the tape. The tape must be recorded from the beginning of either side, Use the remote control from steps 3 to 8. -
Page 18: Microphone Mixing
In this case, turn the MIC MIXING control toward Recommended microphones The use of unidirectional type microphones is recommended to prevent howling. Contact your local Aiwa dealer for details. ENGLISH VOCAL FADEWMULTIPLEX This unit can use discs or tapes as Karaoke sources. -
Page 19: Karaokeprograms
KARAOKEPROGRAMS Before or during CD play, you can reserve up to 15 tracks to be played after thecurrenttrack. Each reservation iscleared when it finishes playing, Use the remote control. Press the PRGM button =. Press one of the DISC DIRECT PLAY buttons to select a disc and the numeric buttons to select a track. -
Page 20: Setting The Timer
SETTING THE TIMER The unit can be turned on at a specified time every day built-in timer. Preparation Make sure the clock is set correctly, (See page 5.) Use the remote control. Press the TIMER button on the remote control once to display 0, and press the II SET button within 4 seconds. -
Page 21: Setting The Sleep Timer
R jack, and the white plug to the L time is displayed jack. When connecting Use an Aiwa turntable equipped with a built-in equalizer amplifier. on the display CD DIGITAL, OUT (OPTICAL) JACK This unit can output CD digital sound signals through this jack. -
Page 22: Listening To External Sources
LISTENING TO EXTERNAL SOURCES ‘--_—–_ — — ——- To play equipment connected to the VI DEO/AUX as follows. 1 Press the VIDEO/AUX button. VIDEO appears on the display. 2 Play the connected equipment. To change a source name in the display When the VIDEO/AUX button is pressed,... -
Page 23: Specifications
SPECIFICATIONS Main unit CX-NV8000 FM tuner section Tuning range 87.5 MHz tO 108 MHz Usable sensitivity (IHF) 13.2 dBf Antenna terminals 75 ohms (unbalanced) Ahrl tuner section Tuning range 530 kHz to 1710 kHz (10 kHz step) 531 kHz to 1602 kHz (9 kHz... -
Page 24: Troubleshooting Guide
TROUBLESHOOTING [f the unit fails to perform as described Instructions, check the following guide. GENERAL There is no sound. Is the AC cord connected properly? “ Is there a bad connection? (+ page 3) * There may be a short circuit in the speaker Disconnect cord, then... - Page 25 2-@. area shown in Figure To solve this problem, Aiwa has developed directional speakers for this new speaker system featuring cardioid directivity of 1 kHz or less. These speakers inward at angles of 45°...
- Page 26 GUIA PARA LA SOLUCION INDICE DE LAS PARTES PRINCIPIO DELANTERO INSIDE, DE LA RADIO DE DISCOS COMPACTOS DE CINTAS CONTINUA ... 12 PARA DORMIR ...20 ... 22 DE PROBLEMAS ...23 ... 23 DEL SISTEMA DE ALTAVOCES DE 180° DE AIWA ...,,. .,. 24...
-
Page 27: Precauciones
PRECAUCIONES Lea cuidadosa y completamente el manual antes de utilizar la unidad, Asegtirese de guardar instrucciones para utilizarlo como referencia Ias advertencias y precauciones del manual de instrucciones de la unidad deberan cumplirse estrictamente, Ias sugerencias de seguridad mencionadas lnstalacion Agua y humedad —... -
Page 28: Conexiones
CONEXIONES Antes de conectar el cable de alimentacion de La tension nominal de su unidad, mostrada es de 120 V. Asegurese de que la tension la tension empleada en su Iocalidad. IMPORTANTE . Conecte primero Ios altavoces, Ias antenas equipos opcionales. - Page 29 Conecte Ias antenas suministradas. Conecte la antena de FM a Ios terminals de AM a Ios terminals AM LOOP. Antena de FM ======+— Conecte el cable de alimentacion toma de CA. Para poner la antena de AM en position una superficie Fije el gancho en la ranura.
-
Page 30: Antes De La Operacion
ANTES DE LA OPERACION __ ——.—--\ )-——— —_. ————- Para encender la unidad Pulse uno de Ios botones de funcion (TAPE, TUNER, AUX, CD). La reproduction dei disco ode la cinta insertada recibira la emisora previamente sintonizada reproduction directs). Tambien podra utilizarse el boton POWER. -
Page 31: Ajuste Del Sonido
AJIJSTE DEL SONIDO altavoces constan del sistema frontal de 180°, con altavoces de sonido ambiental unidireccionales y altavoces orientados hacia adentro con angulos de 45°, Podra obtener un sonido est&eo optimo no solo cuando se encuentre delante de Ios altavoces, sino tambien cuando se encuentre de la Iinea central de ambos altavoces. -
Page 32: Sistema Delantero De Sonido Ambiental
SISTEMA DELANTERO DE SONIDO AMBIENTAL ,____ _ _.– ——— - El Sistema delantero de sonido ambiental (procesador de seiral digital), para realzar el efecto del sonido am biental simulado y aumentar su placer reproduction. Cuando seleccione el modo FRONT SURROUND, podra obtener el efecto del sonido de una discoteca... -
Page 33: Preajuste De Emisoras
PREAJUSTE DE EMISORAS Esta unidad puede almacenar un total de 32 emisoras. almacene una emisora, a esa emisora se Ie asignara de preajuste. Utilice el ntimero de preajuste directamente una emisora preajustada, Pulse el boton TUNER/BAND una banda, y pulse el boton 1+4 DOWN o F>l UP para seleccionar una emisora. - Page 34 11#----- INTRODUCTION DE DISCOS Pulse e! boton CD, y Iuego pulse el boton = OPEN/ CLOSE para abrir el compartimiento Introduzca el(los) disco(s) cone! Iado de la etiqueta hacia arriba. Para reproducer uno o dos discos, ponga bandejas 1 y 2. Para reproducer tres discos, pulse el bot6n DISC CHANGE para hater...
- Page 35 REPRODUCTION ALEATORIA Todas Iascanciones deundisco seleccionado discos podran reproducirse aleatoriamente. Pulse el boton RANDOM del control remoto. RANDOM se enciende en el visualizador. Para cancelar la reproduction aleatoria, Aunque se pulse el boton <<, una cancion reproducida no podra ser omitida. La unidad volvera solamente al principio de la cancion actual.
-
Page 36: Operaclones Basicas
OPERACIONES BASICAS Platina 1 INSERCION DE CINTAS En la platina 1, Ias cintas se reproduce caras, En la platina 2, podra seleccionar un modo de inversion reproducer una o dos caras. Utilice cintas tipo I (normales), tipo (alta polarization/CrOz) o tipo IV (metal) para la reproduction. Pulse el boton TAPE y la marca = EJECT para abrir el portacasete. - Page 37 REIWIDUCCION CONTINUA Despues de terminar la reproduction en una platina, la otra platina empezara a reproducirse sin interruption Inserte cintasen lasplatinasl Pulse el boton TAPE/DECK 1/2 para seleccionar la platina que vaya a realizar la reproduction primer Iugar. Pulse el boton REV MODE para seleccionar Pulse el boton +&...
-
Page 38: Grabacion Basica
GRABACION BASICA Esta seccion explica como grabar del sintonizador, reproductor de discos compactos o de equipos -—- .— +.-.-It .—_. Prer3aracion Bo”bine la cinta hasta el punto donde grabacion. Utilice cintas tipo I (normales) y tipo II (alta polarization/CrOz) para la grabacion, Inserte la cinta que vaya a grabar en la platina 2. -
Page 39: Copiado Manual De Una Cinta
COPIADO MANUAL DE UNA CINTA Prer3araci6n * Ponga la cinta en el punto donde vaya a empezar * El modo de inversion se ajusta automaticamente Tenga en cuenta que la grabacion se hara en una cara cinta solamente, Puke el boton TAPE. Inserte la cinta original en la platina 1 y la cinta que vaya a grabar en la platina 2. -
Page 40: Grabacion Con Edicion Al
GRABACION CON EDICION Al La funcion de edition Al permite grabar discos compactos preocuparse de la duration de la cinta Cuando se inserte disco compacto, automaticamente la duration de [as canciones. necesario, el orden de Ias canciones se cambiara ninguna cancion quede cortada. -
Page 41: Grabacion Con Edicion Programada
GRABACION CON EDICION PROGRAMADA La funcion de edition programada permite compactos mientras se comprueba el tiempo cara de la cinta segun se programan Ias canciones. La grabacion con edition programada no empezara punto ubicado en medio de la cinta. La cinta debera desde el principio de una de Ias caras. -
Page 42: Mezcla Microfonica
FRONT desvanecimiento se repondran quiza separe el nivel del sonido alto para evitar Aiwa para DE DESVANECIMIENTO puede utilizar discos o cintas como fuentes el boton VOCAL FADEWMULTIPLEX la funcion de desvanecimiento de voz para discos o cintas... -
Page 43: Programas De Karaoke
*2 Para cambiar el canal silenciado rntiltiplex Cuando se seleccione multiplex, “MPX-L” 3 segundos y cambiara al nombre de la funcion Despues de visualizarse el nombre de la funcion mantenga pulsado el boton VOCAL FADER/MULTIPLEX que el canal que vaya a salir por ambos MPX-R, sea seleccionado. -
Page 44: Ajuste Del Temporizador
AJUSTE DEL TEMPORIZADOR La unidad podra encenderse a la hors especificada d(as gracias al temporizador incorporado. Preparation Asegurese de que la hors del reloj sea corrects. pagina 5.) Utilice el control remoto. Pulse una vez el boton TIMER del control para visualizer y pulse el boton de we... -
Page 45: Ajuste Del Temporizador Para Dormir
Ponga la tapa contra el polvo. TOMA SUPER WOOFER d Conecte un altavoz amplificador incorporado del equipo conectaldo para no han sido suministrados. Obtenga necesarios. AIWA en cuanto al equipo introducer sehales de sonido analogico equipos de reproductores de discos k%er, v[deos,... -
Page 46: Escucha De Fuentes De Sonido Externas
ESCUCHA DE FUENTES DE SONIDO EXTERNAS \:_..- _ __.._. Y-- - ---4’---=4 “ m-nn — —. —.-—- __., _-— Para hater la reproduction en el equipo conectado VI DEO/AUX, siga el procedimiento siguiente: Pulse el boton VIDEO/AUX. VIDEO aparecera en el visualizador. 2 Haga la reproduction en el equipo Para cambiar el nombre de una fuente de sonido en el... - Page 47 ESPECJFICACIONES Unidad principal CX-NV8000 Seccion del sintonizador de FM Gama de sintonizacion 87,5 MHz a 108 MHz Sensibilidad util (IHF) 13,2 dBf Terminals de antena 75 ohmios (desequilibrada) Seccion del sintonizador de AM Gama de sintonizacion 530 kHz a 1710 kHz (pasos de...
-
Page 48: De Problemas
GUIA PARA LASOLUCION DEPROBLEMAS Si la unidad no funciona como se describe instrucciones, compruebe la guia siguiente: GENERALIDADES No hay sonido. . ~ESta bien Conectado el cable de alirnentaci~n & CA? LHay alguna conexion mal hecha? (+ pagina 3) Puede haber un cortocircuito en Ios terminals Desconecte el cable de alimentacion... -
Page 49: Del Sistema De Altavoces
6ptimo se limits al Area estrecha mostrada en la fi.gura 2–@. Para resolver este problems, Aiwa ha desarrollado altavoces unidireccionales para sistema de altavoces con directividad para frecuencias de 1 kHz o menos. Estos altavoces apuntan hacia adentro con Angulos de 45°... - Page 50 Felicitations pour votre achat d’une chatne stereo Aiwa. La lecture de ce mode d’emploi vous permettra l’Utilization et d’optimiser Ies performances Contr61er la chatne et Ies accessoires. CX-NV8000 Radio SX-ANV8000 Enceintes magnetocassette Iecteur de disques compacts stereo Telecommande Antenne Antenne Mode d’emploi,...
- Page 51 PRECAUTIONS Lire Ie mode d’emploi attentivement et completement d’utiliser I’appareil. Garder Ie mode d’emploi pour toute reference future. Tous Ies avertissements et toutes Ies precautions clans Ie mode d’emploi et sur I’appareil doivent Iettre, aussi bien que Ies suggestions de securite installation Eau et humidite —...
-
Page 52: Connexions
CONNEXIONS Avant de brancher Ie cordon secteur La tension nominale d’alimentation secteur de I’appareil, indiquee au dos de ce dernier, est de 120V. S’assurer nominale correspond a celle du secteur IMPORTANT Commencer par brancher Ies enceintes, appareil optionnel. Brancher Ie cordon secteur L’enceinte avant portant... - Page 53 Connecter Ies antennes fournies. Connecter I’antenne FM aux bornes FM 75 Q et I’antenne AM aux bornes AM LOOP. Antenne FM Brancher Ie cordon secteur courant. Pour poser I’antenne AM sur une surface Fixer la griffe clans la rainure. Pour positioner Ies antennes Antenne FM interieure: Deployer...
-
Page 54: Avant L'utilisation
AVANT LWTILISATION ,——— —--:” .___—. Pour mettre I’appareil sous tension Appuyer sur une des touches de fonction VIDEO/AUX, CD). La lecture du disque ou de la cassette en place commence, la station ecoutee en dernier est re$ue directe), On peut aussi appuyer sur la touche POWER. -
Page 55: Reglage Du Son
REGLAGE DIJ SON Les enceintes acoustiques sent munies d’un systeme diffusion sonore sur 180° par des haut-parleurs et de haut-parleurs surround integres I’interieur. On peut ainsi obtenir un effet stereo seulement directement en face des enceintes et d’autre de I’axe de Ieur point milieu. COMMAINDE DU VOLUME Tourner la commande VOLUME de I’appareil principal, ou appuyer sur Ies touches VOLUME de la telecommande. -
Page 56: Systeme Surround Avant
SYSTEMESURROUND Lesystemesurround avantestmunid’un processeurnumerique designaux(DSP) pour ameliorerl’effet de son surround et augmenter ainsi Ie plaisir d’ecoute. Quand on selectionne mode FRONT SURROUND, on peut obtenir la presence d’un discotheque (DISCO), d’une representation direct (LIVE) ou d’une sane de concert (HALL). Les haut-parleurs surround avant sent loges clans Ie coffret des... -
Page 57: Memorisation De Stations
MEMORISATION DE STATIONS P---- 1- !– - --=-!! L’appareil peut memoriser un total de 32 stations. station est memorisee, un numero de prereglage Pour accorder I’appareil directement sur une station memorisee, utiliser Ie numero de prereglage correspondent. Appuyer la touche TUNER/BAND selecticmner une gamme,... -
Page 58: Lecture De Cassettes
OPERATIONS DE BASE MISE EN PLACE DE DISQUES Appuyer sur la touche CD, puis appuyer touche OPEN/CLOSE pour compartment a disques. Mettre Ie(s) disque(s) en place avec I’etiquette en haut. Pour Iire un ou deux disques, mettre plateaux 1 et 2. Pour Iire trois disques, appuyer sur la touche DISC CHANGE pour faire tourner... - Page 59 LECTURE ALEATOIRE Toutes Ies plages du disque selectionne ou de tous Ies disques peuvent ~tre Iues clans un ordre aleatoire, Appuyer sur la touche RANDOM de la telecommande. RANDOM s’allume sur I’affichage. Pour annuler la lecture aleatoire, appuyer touche. M6me si on appuie sur la touche <<, la plage precedemment Iue ne peut pas 6tre sautee.
- Page 60 OPERATIONS DE BASE _— - 1 –.– &- Platine 1 MISE EN PLACE DE CASSETTES ~Avec la platine 1, Ies cassettes sent toujours faces. Avec la platine 2, on peut choisir un mode d’inversion une face ou Ies deux. 0 Pour la lecture, utiliser des cassettes de type I (normales), type II (high/CrOz)
-
Page 61: Lecture Continue
LECTURE CONTINUE Une fois que la lecture sur une platine est terminee, de la cassette de I’autre platine demarre Inserer des cassettes clans Ies platines 1 et 2. Appuyer sur la touche TAPE/DECK selectiornner platine a utiliser en premier. Appuyer SIJI’... -
Page 62: De Base
ENREGISTREMENT DE BASE Cette partie explique comment enregistrer lecteur de disques compacts ou d’un appareil Preparation Bobiner la cassette jusqu’a I’endroit oh on veut I’enregistrement. Pour I’enregistrement, utiliser cassettes (normales) ou de type II (high/CrOz). Inserer la cassette a enregistrer Inserer la cassette avec la face a enregistrer en premier orientee vers I’exterieur de I’appareil et avec Ie c6te expose... -
Page 63: Duplication Manuelle D'une Cassette
DUPLICATION MANUELLE D’UNE CASSETTE Preparation Bobiner la cassette jusqu’a I’endroit I’enregistrement. . Le mode d’inversion est automatiquement Remarquer que I’enregistrement ne sera fait que sur une face de la cassette. Appuyer sur la touche TAPE. Inserer la cassette originale clans la platine 1 et la cassette a enregistrer clans la platine 2. -
Page 64: Enregistrement Avec Montage Et Calcul Du Temps
ENREGISTREMENT AVEC MONTAGE ET CALCUL DU TEMPS La fonction montage et calcul du temps permet d’enregistrer partir de disques compacts saris se preoccuper la cassette et des durees des plages. Quand on met un disque compact en place, I’appareil calcule automatiquement des plages. -
Page 65: Programme
ENFHHSTREMENT AVEC MONTAGE PROGRAMME La fonction montage programme permet de disques compacts tout en contr61ant chaque face de [a cassette au fur programmation des plages. L’enregistrement avec montage programme a un point situe au milieu d’une face. La cassette enregistree a partir du debut d’une de ses faces. -
Page 66: Mixage Avec Microphone
I_ ’utilisation de microphones de type recommandee pour eviter Ie hurlement. contacter Ie distributeur Aiwa local. FRAiV~AIS FONCTIONS VOCAL FADER/MULTIPLEX Get appareil permet I’emploi de disques ou de cassettes sources Karaoke. Appuyer sur la touche plusieurs Fader ou Multiplex. -
Page 67: Programmed De Karaoke
Quand orI utilise la telecommande Appuyer sur la touche KARAOKE, Les fonctions VOCAL FADER risquent de ne pas fonctionner correctement avec Ies disques compacts - Disques ou cassettes a enregistrement - Disques ou cassettes enregistres avec de forts ethos - Disques ou cassettes avec la partie vocale enregistree la droite ou la gauche... -
Page 68: Reglage De La Minuterie
REGLAGE DE LA MINUTERIE Avec la minuterie integree, I’appareil peut iMre mis sous tension chaque jour a I’heure specifiee. Preparation S’assurer que I’horloge est reglee correctement. (Voir page 5.) Utiliser la telecommande. Appuyer une fois sur la touche telecommande pour afficher 0, puis appuyer sur la touche II SET clans Ies uuatre secondes suivent. -
Page 69: Reglage De La Minuterie D'arret
Aiwa local. peut recevoir des signaux sonores analogiques un appareil Iecteur de disque laser, magnetoscope, un tourne-disque Aiwa muni d’un amplificateur a egaliseur peut sortir Ies signaux sonores numeriques par cette prise, Utiliser un cable optique (amplificateur numerique, de minidisques, etc.). -
Page 70: Ecoute De Sources Externes
ECOUTE DE SOURCES EXTERNES )—_ Pour utiliser I’appareil connecte aux prises VI DEO/AUX, de la maniere suivante. Appuyer sur la touche VIDEO/AUX. VIDEO apparalt sur I’affichage. Mettre l’appareil connecte en marche. Pour changer Ie nom de sur I’affichage source Quand on appuie sur la touche VIDEO/AUX, initialement. -
Page 71: Specifications
SPECIFICATIONS Appareii principal CX-NV8000 Partie tuner FM Plage d’zrccmrd 87,5 MHz a 108 MHz Sensibilih4 utile (IHF) 13,2 dBf Bornes d’antenne 75 ohms (asymetrique) Partie tuner AM Plage d’accord 530 kHza kHz) 531 kHz a 1602 kHz (pas de 9... -
Page 72: En Cas De Probleme
EN CAS DE PROBLEME Si I’appareil ne fonctionne pas comme d’emploi, controller Ie guide suivant. GENERALITIES II n’y a pas de son. Le cordon secteur est-il branche correctement? c N’y a-t-ii pas une mauvaise connexion? II y a peut-etre un court-circuit clans Ies bornes d’enceinte. - Page 73 1$’0° Les enceintes acoustiques Aiwa & diffusion sonore frontale sur 180° donnent un excellent sonore pour vraie reproduction partir de n’importe g-uel angle d’kcoute. Jusqu’~ maintenant, clans les systdmes duction sonore stereo, la zone d’6coute otil’effet ster60 optimal obtenu etait &troite.
- Page 76 NOTE This equipment has been tested and found to comply limits for a Class B digital device, pursuant Rules. These limits are designed to provide tion against harmful interference in a residential This equipment generates, uses, and can radiate radio frequency energy and, if not installed and used in accordance...