Table of Contents
Advertisement
Available languages
Available languages
Quick Links
Advertisement
Table of Contents

Subscribe to Our Youtube Channel
Related Manuals for LEXIBOOK BARBIE DIGITAL CAMERA


Summary of Contents for LEXIBOOK BARBIE DIGITAL CAMERA
- Page 1 Barbie Digital Camera User Guide Mode d’emploi DJ200BB...
- Page 3 SD Card...
-
Page 4: Description De L'appareil
Note impo DESCRIPTION DE L’APPAREIL tous les fich les fichiers Merci de considérer les images A & B au dos de la page de couverture. INSTA 1. Bouton de mise en marche. 2. Bouton de sélection de mode Votre appar 3. - Page 5 Suivez les instructions suivantes pour installer le pilote et le logiciel d’application dans votre ordinateur. 1. Insérez le CD du logiciel (fourni) dans votre lecteur de CD-ROM. Le CD se lance automatiquement avec apparition du menu d’installation. Cliquez sur « Install Driver » (installation du pilote de l’appareil un choc photo), puis suivez les instructions à...
- Page 6 Remarques : - Il faut installer le pilote avant de télécharger des photos de votre appareil photo. 1. Mettez l’a - Ne branchez pas l’appareil photo à votre PC pendant l’installation du pour accéd logiciel. haut à gauc - Vous devez cliquer sur “Browse CD” (Navigation CD) pour lire le 2.
-
Page 7: Mode De Lecture
à ondes gauche de l’écran. n de mise 2. Le nombre de séquences vidéo ou photos prises est indiqué en bas ’appareil à gauche de l’écran. 3. Pressez la touche de navigation vers l’ avant (4) pour visionner la photo ou vidéo précédente. -
Page 8: Formatage De La Carte Sd
MODE DE STOCKAGE DE MASSE 4. Sélection accepté pa 1. Eteignez l’appareil photo numérique. 2. Soulevez le cache de la prise USB. Branchez la petite fiche du câble Chat MSN USB au port USB de l’appareil photo. Branchez la grande fiche du 1. Assurez- câble USB au port USB de votre ordinateur de bureau ou portable. - Page 9 à l’écran LCD. Vous êtes maintenant en mode caméra PC. Pour voir les images en temps réel prises par la caméra PC, allez dans « Poste e) ou DSC de travail » et cliquez deux fois sur un nouveau pilote appelé “Digital Camera”.
-
Page 10: Garantie
When the lo Important Informations sur la protection de l’environnement Tout appareil électrique usé est une matière recyclable et ne devrait pas faire partie des ordures when repla ménagères! Nous vous demandons de bien vouloir nous soutenir en contribuant activement au ménagement des ressources et à... -
Page 11: Getting To Know Your Camera
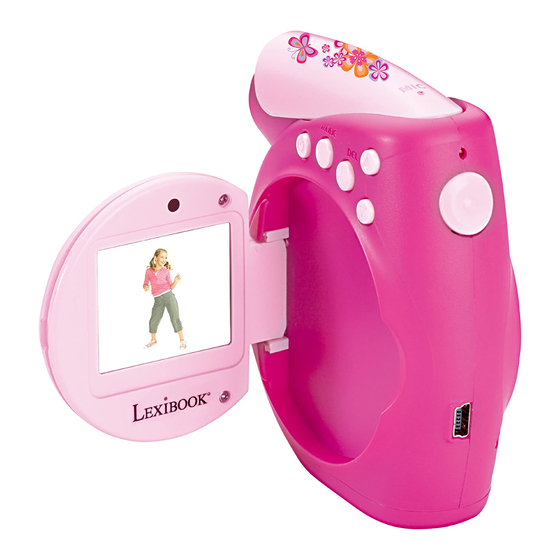
GETTING TO KNOW YOUR CAMERA à l’aide du Please refer to images A & B located at the back of the cover nversation. page. er puis 1. Power button 2. MODE button 3. Delete button 4. Up arrow key 5. Down arrow key 6. LED 7. Shutter button 8. LCD display 9. -
Page 12: Installing An Optional Memory Card
You may also insert an SD card (not included) to increase the memory camera OF size of the camera. To do so, push the SD card firmly into the slot until Note: The c you hear a “click” sound. Please refer to image D located at the back of the cover page. -
Page 13: Shooting Video Clips
SHOOTING VIDEO CLIPS powering 1. Turn the video camera ON; and make sure it is set to video shooting mode. The icon is displayed in the upper left corner of the screen. 2. Hold the video camera firmly and lift the LCD screen [8] open. -
Page 14: Deleting Files
1. Turn the seconds to confirm. All photos/video clips will be deleted. 2. Press an Note: if you press the DEL button by mistake, just wait 5 seconds to your compu cancel this operation or press the up or down arrow keys. -
Page 15: Mass Storage Mode
2. Run the video conference software Microsoft NetMeeting on your computer. creen. 3. Input the IP address of the computer you wish to dial in the address r card will bar. 4. Select tool/accept/transfer options. When the other parties have p or down accepted your call, you can now hold a video conference. -
Page 16: Warranty
Nota impo almacenad Environmental Protection Unwanted electrical appliances can be recycled and should not be discarded along with regular transferirlos household waste! Please actively support the conservation of resources and help protect the environ- ment by returning this appliance to a collection centre (if available). - Page 17 Advertencia: En caso de que la unidad funcionase mal o recibiese ford Road, una descarga electrostática, retira la pila y vuelve a colocarla. hone Indicador de carga de la pila El nivel de carga de la batería se indica con los siguientes iconos en la pantalla LCD: Llena Media Baja Cuando el icono de nivel bajo de pila parpadea, sustituye las pilas.
- Page 18 Tu cámara digital Barbie tiene una memoria SDRAM interna de 32 MB. Puedes colocarle también una tarjeta SD (no incluida) para aumentar el tamaño de la memoria de la cámara. Para ello, empuja la tarjeta SD en su ranura hasta que oigas que queda encajada con un “click”.
-
Page 19: Para Tomar Fotografías
OFTWARE segundos de inactividad. plicación, TOMAS DE CLIPS DE VÍDEO 1. Enciende la cámara y asegúrate de que está en modo de tomas de CD-ROM vídeo. En la esquina superior izquierda de la pantalla debe mostrarse ostrará en el icono stall Driver”... -
Page 20: Modo De Reproducción
3. Pulsa la tecla de flecha hacia arriba [4] para ver la fotografía o el vídeo anterior. Pulsa la tecla de flecha hacia abajo [5] para ver la 1. - Page 21 1. Pon la cámara digital en el modo DV (vídeo digital) o DSC (cámara fotográfica). en el lado 2. Pulse el botón DEL [3]. En la pantalla se mostrará el mensaje “Format card?”.
- Page 22 Para acceder al modo PC Cam al lugar de 1. Apaga la cámara digital. Nuestra ga 2. Mantén pulsado el botón de disparo [7], y conecta la cámara a tu al fabricant ordenador utilizando el cable USB que se suministra. respeto del 3.
- Page 23 ¡Los aparatos eléctricos desechados son reciclables y no deben ser eliminados en la basura ar una doméstica! Por ello pedimos que nos ayude a contribuir activamente en el ahorro de recursos y en la protección del medio ambiente entregando este aparato en los centros de colección (si existen).
- Page 24 Por favor, consulte as imagens A e B que se encontram na parte traseira da capa. 1. Botão da energia 2. Botão MODE 3. Botão de apagar 4. Seta para A sua Câm cima 5. Seta para baixo 6. LED 7. Obturador 8. Ecrã LCD incorporada 9.
- Page 25 Siga estas instruções para instalar o controlador da câmara e o software no sistema do seu PC. erior do 1. Insira o CD do Software (incluído) na unidade do CD-ROM. O CD partimento entra automaticamente no menu de instalação. Clique em “Install Driver”...
-
Page 26: Ligar E Desligar A Câmara
2. Segure fi existentes na câmara. 3. Prima o o - Não ligue a câmara de vídeo ao seu PC durante a instalação do software. - Pode clicar em “Browse CD” para ler os ficheiros de informação do software PhotoImpression e VideoImpression. Se não conseguir ler os 1. -
Page 27: Modo De Reprodução
2. O número de filmes/imagens tiradas é indicado no canto inferior esquerdo do ecrã. a câmara. 3. Prima a seta para cima [4] para ver a foto ou vídeo anterior. Prima a rês segun- seta para baixo [5] para ver a foto ou vídeo seguinte. - Page 28 2. Prima o botão DEL [3]. Aparece a mensagem “Format card?” (For- matar o cartão?) no ecrã. Videoconfe 3. Prima o botão DEL [3] no espaço de 5 segundos para confirmar. O 1. Coloque seu cartão será formatado. Nota: Espere 5 segundos para cancelar esta operação, ou prima as 2.
- Page 29 Entrar no modo de webcam para PC 1. Desligue a câmara de vídeo digital. 2. Prima e mantenha premido o obturador [7] e ligue a câmara ao seu computador com o cabo USB fornecido. r todos os 3. Não deixe de premir o obturador [7] até que o ícone apareça...
- Page 30 Aparelhos eléctricos antigos são materiais que não pertencem ao lixo doméstico! Por isso pedimos prima di ca para que nos apoie, contribuindo activamente na poupança de recursos e na protecção do ambiente ao entregar este aparelho nos pontos de recolha, caso existam.
- Page 31 CONOSCERE LA PROPRIA MACCHINA FOTOGRAFICA . Para Fare riferimento alle figure A & B collocate sul retro di copertina. avor 1. Pulsante accensione 2. Pulsante MODE (modalità) 3. Pulsante a. A nossa Delete (cancella) 4. Pulsante Up (Su) 5. Pulsante Down (Giù) 6. LED m impu- 7.
- Page 32 SD (non in dotazione) per aumentare la dimensione della memoria della macchina fotografica. Per fare ciò, spingere la scheda SD con ACCEN forza nello slot fino a quando si sente un “click”. Fare riferimento alla figura D sul retro di copertina. Tenere prem Comparirà...
-
Page 33: Scattare Foto
2. Tenere saldamente la video camera e aprire lo schermo LCD [8]. dopo 3. Premere il pulsante otturatore [7] per iniziare a filmare. La durata del video clip compare nell’angolo in basso a destra dello schermo LCD. 4. Premere nuovamente il pulsante otturatore [7] per smettere di girare. -
Page 34: Modalità Playback
Compare l’icona nell’angolo in alto a sinistra cancellare dello schermo. 2. Il numero di video clip/ foto scattate è indicato nella parte in basso a 1. Mettere l sinistra dello schermo. DSC (macc 3. Premere la freccia su [4] per visualizzare la foto o il video preceden- 2. - Page 35 4. Fare doppio click su My Computer /Removable Disk [3] per (disco rimovibile)/DCIM/100JLCAM. ?” (cancella 5. Ora si possono copiare tutti i file su altri drive del PC. mare. Foto MODALITÀ PC CAM di per Accedere alla modalità PC Cam...
- Page 36 2. Tenere premuto il pulsante otturatore [7] e collegare la macchina fotografica al computer utilizzando il cavo USB in dotazione. 3. Non rilasciare il pulsante otturatore [7] fino a che non compare sullo Questo pro schermo l’icona . Ora si è in modalità PC Cam. Per visualizzare le usufruire de immagini in tempo reale riprese dalla webcam, andare a “My Com-...
-
Page 37: Garanzia
Gli apparecchi elettrici vecchi sono materiali pregiati, non rientrano nei normali rifiuti domestici! Preghiamo quindi i gentili clienti di contribuire alla salvaguardia dell’ambiente e delle risorse e di consegnare il presente apparecchio ai centri di raccolta competenti, qualora siano presenti sul... - Page 38 ERSTE SCHRITTE MIT DER KAMERA SO S Siehe Abbildungen A & B auf der Rückseite des Deckblatts. Deine Barb 1. Netzschalter 2. Modus-Taste 3. Taste löschen 4. Rückwärtspfeil mit 32 MB. 5. Vorwärtspfeil 6. LED 7. Blenden-Taste 8. LCD-Anzeige enthalten) e 9.
- Page 39 32 MB. Du kannst auch eine SD-Karte (nicht im Lieferumfang enthalten) einlegen, um den Kameraspeicher zu vergrößern. Dazu schiebst du die SD-Karte fest in den Schlitz, bis sie einrastet (Klick). Siehe Abbildung D auf der Rückseite des Deckblatts. Das Symbol wird eingeblendet nachdem die SD-Karte eingelegt worden ist und die Kamera eingeschaltet wird.
- Page 40 2. Halte die Videokamera fest und hebe den LCD-Schirm [8] an. Wähle wäh 3. Drücke die Blendentaste [7], um die Aufnahme zu beginnen. Die DEL [3]. We Länge des Videoclips wird in der Ecke unten rechts an der LCD-An- eingeblend zeige eingeblendet. Sekunden d 4.
- Page 41 Sekunden die Taste DEL [3]. Das ausgewählte Foto/der Videoclip wird beenden. gelöscht. So löschst du alle Dateien Halte während der Wiedergabe die Taste DEL [3] circa 6 Sekunden ge- ildauf- drückt. Wenn “Delete all?” (Alle löschen) an der Anzeige eingeblendet en Ecke wird, drückst du zur Bestätigung innerhalb von 5 Sekunden die Taste...
- Page 42 “Digitalkam 1. Schalte deine Digital-Videokamera in den Modus DV (Digitalvideo) oder DSC (Fotokamera). Videokonfe 2. Drücke die Taste DEL [3]. Am Bildschirm wird “Format card?” (Karte 1. Schalte d formatieren) eingeblendet. 2. Starte die 3. Drücke innerhalb von 5 Sekunden zur Bestätigung die Taste DEL deinem Com [3].
- Page 43 4. Verbinde deine Digitalkamera mit dem USB-Kabel mit dem Computer. 00JLCAM. 5. Wähle an der MSN-Schnittstelle Aktion/Start aus, um das nem PC Videogespräch zu beginnen. 6. Wähle die Person aus, mit der du chatten möchtest und klicke auf mera mit...
-
Page 44: Garantie
PC zet vo Hinweise zum Umweltschutz Elektronische Geräte können aufbereitet werden und dürfen nicht im Haushaltsmüll entsorgt werden. Bitte unterstützen Sie die Wiederaufbereitung und schützen Sie die Umwelt, indem Sie Altgeräte entsprechend der Umweltschutzbestimmungen entsorgen bzw. abgeben. - Page 45 3. Let op de polariteit van de batterijen (+/- tekens) binnenin het bat- n Farben terijencompartiment. n der 4. Voeg 3 nieuwe AA batterijen in. Plaats het deksel en sluit deze door ook.com hem op zijn plaats te schuiven. Waarschuwing: Als het apparaat niet goed functioneert of als u een...
- Page 46 3. Druk op opnieuw opstarten na het installeren van het besturingsprogramma. van het vide Noot: Als de CD niet automatisch start, Klik op Start ‡ Uitvoeren, type het LCD sc “D: “autorun.exe” in het Uitvoeren dialog tekstveld (waarbij D:\ de naam 4.
- Page 47 Druk 3 seconden op de Aan-Uit knop [1] om de videocamera in te s het schakelen. Druk 3 seconden op de Aan-Uit knop [1] op de camera uit te schake- len. N SOFTWARE Noot: De camera zal automatisch uitschakelen nadat deze 60 secon- den niet gebruikt wordt.
- Page 48 1. Stel de d benedenhoek van het scherm. (fotocamera 3. Druk op de pijl-omhoog knop [4] om de vorige foto of video te zien. 2. Druk op Druk op de pijl-omlaag knop [5] om de volgende foto of video te zien..
- Page 49 3. Druk op de wissen (DEL) knop [3] binnen 5 seconden om te bevesti- gen. De kaart wordt geformatteerd. je af te Noot: Wacht 5 seconden om het wissen af te breken, of druk op de en te pijl-omhoog of -omlaag knop.
- Page 50 De camera is nu in de PC-Cam functie. Om naverkoopd “real-time” beelden te bekijken die met de webcam werden genomen, je verkoper ga je naar “Mijn Computer” en klik je tweemaal op de nieuwe drive onderverme “Digitale Camera”. schade aan...
- Page 51 Niet langer bruikbare electrische apparaten kunnen gerecycleerd worden en mogen niet weggegooid worden met het gewone huisvuil! Gelieve actief de bescherming van bronnen te ondersteunen en deel te nemen in de bescherming van het milieu door dit toestel terug te zenden naar een verzamelcentrum (indien aanwezig).
Need help?
Do you have a question about the BARBIE DIGITAL CAMERA and is the answer not in the manual?
Questions and answers