Table of Contents
Advertisement
Quick Links
Advertisement
Table of Contents

Related Manuals for Fire dept WD57


Summary of Contents for Fire dept WD57
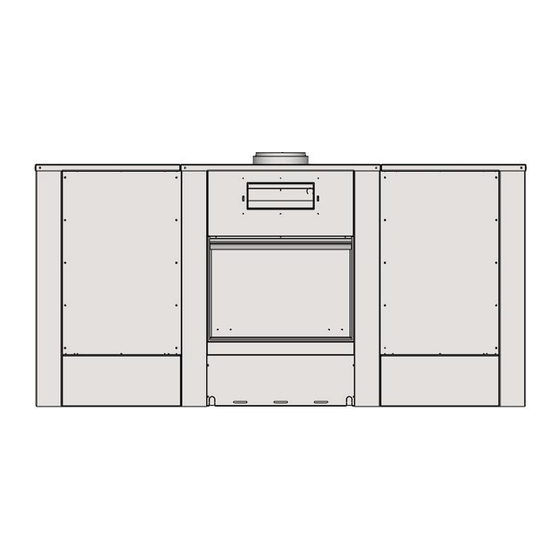
- Page 1 WD57 Installation Guide Operating Instructions Warranty...
-
Page 2: Table Of Contents
Product warranty ......................24 Information in this installation guide may be subject to change without notice. Please ensure you have the current version before beginning installation. If you have any queries, please contact ‘The Fire Dept.’ on 0800 888 550 Version: November 2022... -
Page 3: Step 1: Unpack And Ensure All Components Are Correct And Undamaged
Flue kit. • Pizza paddle. • Baffle hook. • WD57 technical specifications (to be read in conjunction with this installation guide). • BBQ Grill/Hotplate (optional). • Heat barrier (optional – required for installation onto combustible surface). • Tread plate aluminium hearth panel (optional – required for installation onto combustible surface). -
Page 4: Step 2: Pre-Installation Checklist
Step 2: Pre-installation checklist • Ensure clearances are correct – refer to technical specifications. • Ensure hearth dimensions are correct – refer to technical specifications. • Plan flue path. • Ensure the base is strong enough to support the fireplace. The starting point. -
Page 5: Step 3A: Crane Fireplace And Woodbox Into Position
Step 3A: Crane fireplace and woodboxes into position The best installation option is to crane the fully assembled fireplace into position. If this is not possible, follow the instructions in step 3B. Important Safety Note: It is the installer’s responsibility to ensure that the crane, operator and equipment are suitably certified to lift the fireplace. - Page 6 4. Connect lifting shackles through the 15mm holes in the flue spigot. 2 x 15mm holes in flue spigot for lifting the fireplace. 5. Carefully lift the fireplace and woodboxes into position. Note: • Take care not to damage the base of the fireplace outer side panels during this process.
-
Page 7: Step 3B: Disassemble Then Reassemble Fireplace & Woodbox Into Position
Step 3B: Disassemble then reassemble fireplace & woodboxes into position If the fireplace cannot be craned into position, it needs to be disassembled then reassembled into position. Important Safety Note: It may be necessary to manually handle heavy components (greater than 25kg). It is the installer’s responsibility to ensure appropriate manual-handling techniques are employed. - Page 8 3. Remove the woodboxes closer panel from the inside 4. Remove the woodboxes front lower panel. (2 x 5mm top of each wood box (10 x 5mm countersunk cap cap screws at each side). screws). 5. Remove the woodboxes top panels (9 x 5mm 6.
- Page 9 Top panel Gather Rear top panel Front top panel Door Oven tile Brackets x 2 Grate Front channel Firebox Left side panel Rear lower panel Fire bricks Right side panel Front lower panel shut open To open door, lift up and out in one movement. To remove door, lift open door up and out in one movement.
- Page 10 1. Remove door, oven tile, grate and fire bricks. 2. Remove the front lower panel. The front lower Take a photo of the fire bricks set-up, as you’ll need panel hangs on bolts. Carefully lift the front lower it later. panel up 10mm and pull it away from the front of the fire in one movement.
- Page 11 Lift Support 5. Lift from under the firebox until the side panels are free from the ground and support the fire. Lift Support Handy tip: Use a car jack to lift one side at a time. 5mm fixing nuts and bolts 10mm fixing bolts 6.
- Page 12 6mm countersunk cap screws 8. Remove the side panels. (2 x 6mm countersunk 9. Remove the gather with the front top panel cap screws each side). attached (3 x 10mm bolts at each side of the firebox). Requires 4 x people one at each corner 10.
- Page 13 5mm fixing nuts and bolts 6mm countersunk cap screws 12. Fit the side panels. (2 x 6mm countersunk cap 13. Fit the nuts and bolts that hold the side panels to screws each side). the front top panel. 3 x 5mm nuts and bolts at each side of the firebox.
- Page 14 Supported Remove support and lower Remove support and lower In position 16. Fit the rear lower panel and then the Rear top 17. Fit the top panel (11 x 5mm countersunk cap panel (4 x 5mm countersunk cap screws each screws).
-
Page 15: Step 4: Fix Fireplace Into Position
Step 4: Fix fireplace into position 1. Fix the fireplace into position • Position the fireplace and ensure that it complies with the minimum clearances required (100mm on all sides) to the surrounding enclosure. • In order to provide maximum positioning flexibility, the base has two 30mm long slots in each side panel. - Page 16 3. Fireplace ready to be reassembled. 4. Fit the woodboxes rear lower panels and then the woodboxes rear top panels (4 x 5mm countersunk cap screws each panel). 5. Fit the woodboxes inner panels (12 x 5mm 6. Fit the woodboxes top panel (9 x 5mm countersunk countersunk cap screws).
- Page 17 7. Fit the woodboxes front lower panels. (2 x 5mm cap 8. Fit the woodboxes closer panels inside the top of the screws at each side). woodboxes (10 x 5mm countersunk cap screws). 9. Fix the woodboxes into position 10. Fit the woodboxes hearth plates (7 x 6mm countersunk cap screws) and firebricks •...
-
Page 18: Step 5: Fit Hearth (Optional)
Step 5: Fit hearth (optional) Heat barrier and hearth will be required if the fireplace is to be positioned onto combustible materials 1. Fix the AAC heat barrier supporting brackets into 2. Fix AAC heat barrier panel to steel supporting brackets. position in accordance with technical specifications. - Page 19 Optional extras: Tread plate aluminium hearth panel. Includes powder-coating. AAC heat barrier. Box-folded steel woodbox hearth panel. Box-folded steel appliance hearth panel. Includes supporting brackets. Includes powder-coating. Includes powder-coating. AAC hearth. Tread plate aluminium hearth panel. Includes supporting brackets. Includes powder-coating. 1 x appliance and 1 x woodbox.
-
Page 20: Step 6: Fit Flue
Step 6: Fit flue Each flue joint must have a minimum of 4 x stainless steel rivets. 1065mm 1. Run the 2 x flues. 2. Run the first casing. 3. Run the second casing. The crimped end runs into the The crimped end is at the top. -
Page 21: Step 7: Fit Oven Tile, Door, Fire Bricks And Grate
Step 7: Fit oven tile, door, fire bricks and grate Oven tile Fireplace fire bricks Woodboxes Door fire bricks Grate Fit the oven tile. Fit the door by reversing the door removal process described earlier. Replace the firebricks. Refer to the photos you took earlier. Place the grate in the centre of the fire cavity. -
Page 22: Step 8: How To Operate Fireplace
Step 8: How to operate fireplace • Following the Operating Instructions on the next page, show the owner how to operate the baffle. • If the owner is not available, leave this manual by the fireplace. Version: November 2022... -
Page 23: Operating Instructions
OPERATING INSTRUCTIONS • The WD57 has an integrated baffle, which controls the amount of heat and smoke that enters the cooking area. Baffle Hook Pizza Paddle Push baffle back to allow heat and smoke to Pull the baffle forwards to stop/adjust heat enter the cooking area. -
Page 24: Product Warranty
5 (five) years. Beyond normal heat-induced staining, tarnishing and mild warping , if a firebox, outer skin or support frame defect occurs, contact ‘The Fire Dept.’ and the defect will be repaired or replaced at our discretion with all costs covered.
Need help?
Do you have a question about the WD57 and is the answer not in the manual?
Questions and answers