Table of Contents
Advertisement
Quick Links
Advertisement
Table of Contents

Related Manuals for Fire dept GD13


Summary of Contents for Fire dept GD13
- Page 1 GD13 Installation Guide Operating Instructions Warranty...
-
Page 2: Table Of Contents
Information in this installation guide may be subject to change without notice. Please ensure that you have the current version before beginning installation. If you have any queries, please contact ‘The Fire Dept.’ on 0800 888 550 Version: June 2019... -
Page 3: Step 1: Ensure All Appliance Components Are Correct And Undamaged
The appliance is supplied with a 1000mm long electrical cable and 3 pin plug that will plug into the electrical wall socket (electrical wall socket not supplied). Refer to appropriate ‘The Fire Dept.’ product specification for specific gas bayonet location requirements. -
Page 4: Glass Removal Process
Glass Removal Process • Carefully remove glass, which is held in place by retaining clips at the top sides of the glass and powerful magnets in each lower corner. • Remove the top retaining clips by undoing the 4mm Allen head cap screws. -
Page 5: Glass Installation Process
Glass Installation Process • Note: Check all glass edges and surfaces for damage. Do not install the glass if it is damaged. Check that the insulating material (ladder rope around the outer edge of the glass and around the opening of the fire) is complete and undamaged. -
Page 6: Step 4: Install Flue And Connect To Appliance
Flue installation must meet the requirements of AS/NZS 5601.1:2013 and comply with all local council requirements and be installed and certified by a suitably qualified person. Refer to appropriate ‘The Fire Dept’ product specifications for specific minimum requirements. • •... -
Page 7: Front Cover Removal Process
Front Cover Removal Process • Carefully fully open and then remove the door panel, which is held in place by 1 x 5mm cap screw in each lower corner and held shut at the top with a magnet. OPEN • Remove the front cover, which is held in place by 9 x 5mm cap screws, 3 at each side and 3 underneath. -
Page 8: Step 5: Connect And Test Electrical Supply
The fan will continue to operate. • NOTE: GD13 models have a fan which operates in both LOW and HIGH settings. • Switch to HIGH setting. Ensure that a red light appears on the electrical connections block and the fan is operating. - Page 9 Version: June 2019...
-
Page 10: Step 6: Connect Gas Supply And Commission
Test/adjust high first and then the low pressures against rating plate specifications. • The GD13 has an input of 15-20MJ/h from one gas injector at the pilot side of the burner tray. • In the unlikely event that the rating plate is not attached, Do Not commission the fire and contact The Fire Dept. -
Page 11: Step 7: Lay The Firebed
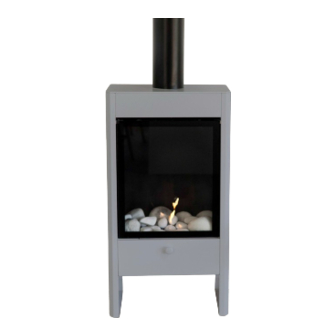
Step 7: Lay the firebed • The GD13 has a River Rocks firebed. • Particular care should be taken when placing the firebed mediums into the burner tray. Failure to place the medium correctly may result in the fire performing inefficiently. -
Page 12: How To Lay Vermiculite
How to lay Vermiculite • In order to access the burner, it is necessary to first remove the glass. • Follow the ‘Glass removal process’ in this guide. • Lift glass away from the appliance and lay flat in a safe place with insulating material facing down. •... -
Page 13: How To Lay River Rocks
How to lay River Rocks • Lay large rocks first, in these positions. • Lay small rocks next, in these positions. • With glass still removed, switch the appliance on at ‘HIGH’ setting to check how flame looks. The flame will take 10-20 seconds to light fully. •... -
Page 14: Step 8: Show Owner How To Operate Appliance
Step 8: Show owner how to operate appliance • Following the GD13 Operating Instructions on the next page, show the owner how to switch the appliance on and off, and how to switch between high and low settings. • If the owner is not available, leave this manual by the appliance. -
Page 15: Operating Instructions
GD13 OPERATING INSTRUCTIONS This GD13 appliance has been designed to be simple to use. It is controlled by a switch (located behind the front door on the appliance) it can also be controlled wirelessly by Bluetooth (optional extra). To start appliance: •... -
Page 16: Troubleshooting
TROUBLESHOOTING Action Problem Probable Cause 1. No gas supply 1. Check gas supply Appliance doesn't start 2. No power supply 2. Check power supply 3. Low or poor pilot flame 3. Check flame size and pressure 4. Signal from flame rectifier interrupted 4. -
Page 17: Warranty
(G) The product contains fire bricks and has not been subjected to the recommended first start-up and run-in procedure. (H) Used in conjunction with any equipment or parts or as part of a system not manufactured or supplied by ‘The Fire Dept.’.
Need help?
Do you have a question about the GD13 and is the answer not in the manual?
Questions and answers