Advertisement
Advertisement
Table of Contents

Related Manuals for NEP BDH-800


Summary of Contents for NEP BDH-800
- Page 1 BDH-800 User Manual...
- Page 2 All such representations or warranties are expressly disclaimed. Neither NEP nor its distributors or dealers shall be liable for any indirect, incidental, or consequential damages under any circumstances.
-
Page 3: System Introduction
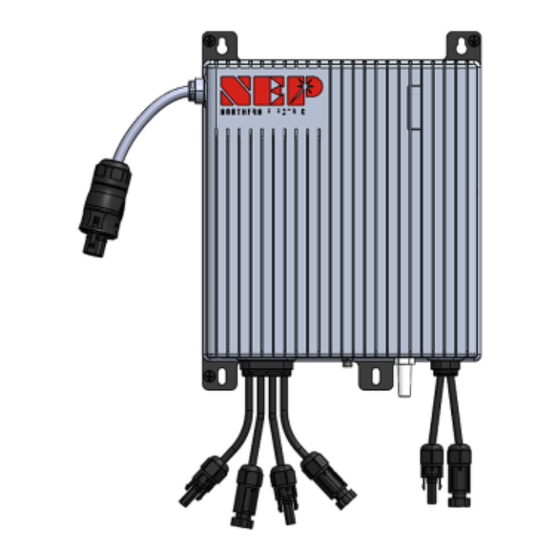
2. Safety Caution! Danger of burn injuries due to hot enclosure parts! During operation, the upper lid of the enclosure and the body may become hot. Only touch the lower enclosure lid during operation. Comply with the local requirements for grounding the PV modules. Do not stay closer than 20 cm to the inverter for any length of time. - Page 4 3.1. Product description AC pigtail cable PV 1(-) PV 1(+) PV 2(-) PV 2(+) Battery (-) Battery (+) CAN communication port WIFI bar Indicator...
- Page 5 3.2. Product dimension(mm) 3.3. Wiring...
- Page 6 Wiring PV1 DC+ PV1 DC- PV2 DC+ PV2 DC- Battery DC- Battery DC+ Battery Communication: CAN bus AC Extension Cable 3.4. Installation...
-
Page 7: Running Status
4. Running status The Hybrid micro inverter is powered on when sufficient DC voltage from the module is applied. The status LED will start flashing after sufficient DC power is applied as an indication that the micro inverter is live. -
Page 8: Specification
5. Specification PV Input | PV Recommended. PV Module 600 * 2 MPPT Voltage Range 22-55 Startup Voltage Max. Input Voltage Max. DC Short Circuit Current 20 * 2 PV Overvoltage Protection Category AC Output (On grid) Max. Continuous AC Output Power Rated AC Output Voltage Max. -
Page 9: Wifi Configuration
6.NEPViewer app How to check the working status of BDH-800 and how to set its parameters? The NEPViewer app will help you. 6.1WiFi configuration 1.DO NOT CONNECT AC In the state of DC connected, AC disconnected, AP mode of the microinverter will be activated. - Page 10 Step 3 NEPViewer WiFI Configuration 1.Click to enter the distribution network 2.Click Allow to obtain geographic location permission (only pops up when installing the app for the first time) 3.Please enter the home WiFi name (the current connected WiFi will be obtained by default) 4.Please enter the password of your home wifi (manual input is required)
- Page 11 5.Read the corresponding steps carefully within 90 seconds of the countdown and check that only DC is plugged in 6.After the countdown ends (the button turns blue), you can jump to the WLAN setting page to connect to the hotspot SSID: MI-XXXXXXXX Password: 12345678 7.Return to NEPViewer app...
- Page 12 8.Allow connection to local network(It will pop up only when the app is installed for the first time,) 9.check this permission you can go to phone settings - NEPViewer - open local network 10.Wait for 50s for the device to complete configuration and restart...
- Page 13 11Click the button to check the connectivity (provided that the current WiFi is connected to the home WiFi 12.Check that the current WiFi is connected to the home WiFi (this step may not appear) 13.Click Sure, click Next,the WiFi configuration has been completed at this time.
- Page 14 6.2Add inverter to NEPViewer 1.Login or Register 2.Click here to create a new site 3.Login WiFi, can be added in the form of GATEWAY CODE. On label of the inverter, a serial number can be found under the bar code, in form of: XXXXX-XXXXXXXX-X...
- Page 15 This EIGHT-digit-code is the GATEWAY CODE *(Only lowercase letters are supported) Fill in other detail info about your site and click on Next Give a name to your site, and fill in GeoLocation click on Next Fill in preferences...
- Page 16 Site added when this dialog shown It's all set! Enjoy your PV freedom!
- Page 17 6.3BDH-800 configuration 1.click on the icon AT you will enter the inverter configuration *(AT intended for inverter configuration in storage system now,such as BDH-800,BDS-1000) 2.Click on the invert model ‘BDH-800’ and you'll see it in detail...
- Page 18 3.In detail,click on text Adjust RTC time you will enter the inverter time sync configuration Click Check ,you can check if inverter has the same time as cell phone. 4.If not,in manual set to fill in the phone time and click Set . 5.If pop up success,inverter has the same time as cell phone now.
- Page 19 6.Click on text Inverter Scheduling you will enter the inverter output power configuration. 7.Click Check ,you can check inverter output power per hour. 8.In Configurate by hour, you can change inverter output power and maximum by hour by swiping left and right .The time range from 0 o’clock to 23 o’clock. *(The maximum power should be greater than the requested output power, and the power adjustment can only be adjusted in base 100)
- Page 20 9.Click Set,if pop up success,your set is ok. Now you can control your device remotely using the NEPViewer app !
Need help?
Do you have a question about the BDH-800 and is the answer not in the manual?
Questions and answers