Epson Perfection V600 Photo User Manual
Hide thumbs
Also See for Perfection V600 Photo:
- User manual (167 pages) ,
- Notices and warranty (21 pages) ,
- Troubleshooting manual (18 pages)
Table of Contents
Advertisement
Quick Links
U s e r ' s G u i d e
Overview of Your Scanner Features
These features help you create the best possible scans,
no matter what shape your original is in.
Placing Originals on the Scanner
Follow the steps here to place your original documents
or photos on the scanner.
Scanning Special Projects
Follow the instructions here for specific scanning
projects you may need to create.
Solving Problems
If you have a problem using your scanner or its
software, check here for solutions.
Safety
Copyright and Trademarks
Guide to the Scanner Parts
Check this section to identify the parts of your scanner.
Scanning Your Originals
Follow the step- by- step instructions here to scan your
original documents or photos using any of the available
scanning methods.
Maintenance
Follow the guidelines here to maintain and transport
your scanner.
Technical Specifications
Check here for technical details about your scanner and
its accessories.
Advertisement
Table of Contents

Related Manuals for Epson Perfection V600 Photo


Summary of Contents for Epson Perfection V600 Photo
- Page 1 U s e r ’ s G u i d e Overview of Your Scanner Features Guide to the Scanner Parts These features help you create the best possible scans, Check this section to identify the parts of your scanner. no matter what shape your original is in.
- Page 2 Home > Overview of Your Scanner Features Overview of Your Scanner Features These features help you create the best possible scans, no matter what shape your original is in. Color Restoration Dust Removal DIGITAL ICE Technology Backlight Correction Text Enhancement...
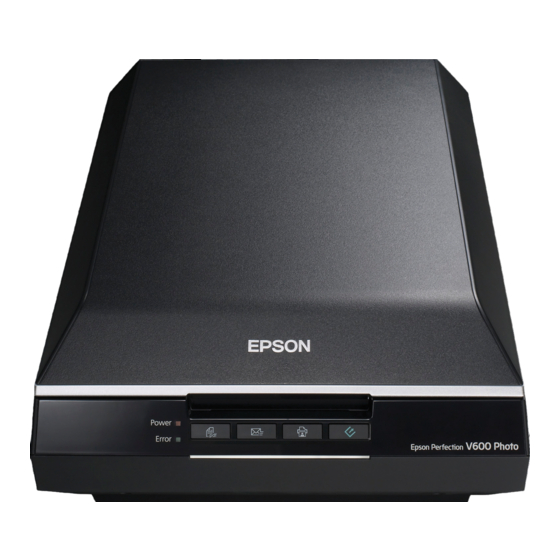
- Page 3 Home > Guide to the Scanner Parts Guide to the Scanner Parts Check these sections to identify the parts of your scanner. Scanner Parts Lights and Buttons...
- Page 4 Home > Placing Originals on the Scanner Placing Originals on the Scanner Follow the steps here to place your original documents or photos on the scanner. Placing Documents or Photos Placing Film or Slides...
-
Page 5: Scanning Your Originals
Follow the step-by-step instructions here to scan your original documents or photos using any of the available scanning methods. Scanning with Epson Scan Starting Epson Scan Selecting an Epson Scan Mode Changing the Scan Mode Scanning in Full Auto Mode Scanning in Office Mode... -
Page 6: Scanning Special Projects
Home > Scanning Special Projects Scanning Special Projects Follow these instructions for specific scanning projects you may need to create. Restoring Color Removing Dust Marks with the Dust Removal Feature Removing Dust and Scratch Marks from Originals Using DIGITAL ICE Technology Fixing Backlit Photos Text Enhancement Using the Scanner as a Copier... -
Page 7: Maintenance
Home > Maintenance Maintenance Follow the guidelines here to maintain and transport your scanner. Cleaning the Scanner Replacing the Scanner Light Source Power Off Timer Setting Transporting the Scanner... -
Page 8: Solving Problems
Home > Solving Problems Solving Problems Troubleshooting If you have a problem using your scanner or its software, check here for solutions. Scanner Problems Scanning Problems Scan Quality Problems Uninstalling Your Scanning Software Where To Get Help Epson Technical Support... -
Page 9: Technical Specifications
Check here for technical details about your scanner and its accessories. System Requirements Scanner Specifications Note: Epson offers a recycling program for end of life products. Please go to www.epson.com/recycle for information on how to return your products for proper disposal. -
Page 10: Important Safety Instructions
Home > Safety Important Safety Instructions Restrictions on Copying Read all these instructions, and follow all warnings and instructions marked on the scanner. In this document, warnings, cautions, and notes indicate the following: Warnings must be followed carefully to avoid bodily injury. Cautions must be observed to avoid damage to your equipment. -
Page 11: Restrictions On Copying
A note concerning responsible use of copyrighted materials Epson encourages each user to be responsible and respectful of the copyright laws when using any Epson product. While some countries' laws permit limited copying or reuse of copyrighted material in certain circumstances, those circumstances may not be as broad as some people assume. -
Page 12: Copyright And Trademarks
Neither Seiko Epson Corporation nor its affiliates shall be liable to the purchaser of this product or third parties for damages, losses, costs, or expenses incurred by the purchaser or third parties as a result of: accident, misuse, or abuse of this product or unauthorized modifications, repairs, or alterations to this product. -
Page 13: Color Restoration
Home > Overview of Your Scanner Features Color Restoration Using the Color Restoration feature in Epson Scan, you can transform an old, faded, or badly exposed photo into one with true-to-life color and sharpness. Original image Color Restoration applied For instructions on using this feature, see Restoring Color. -
Page 14: Dust Removal
Home > Overview of Your Scanner Features Dust Removal Using the Dust Removal feature in Epson Scan, you can virtually “clean” the dust marks from your originals as you scan them. Original image Dust Removal applied For instructions on using this feature, see Removing Dust Marks with the Dust Removal Feature. - Page 15 Home > Overview of Your Scanner Features DIGITAL ICE Technology Your scanner and its Epson Scan software are equipped with the DIGITAL ICE Technology feature that removes dust or scratch marks from your originals. Original image DIGITAL ICE Technology applied DIGITAL ICE Technology can remove dust marks that the Dust Removal feature cannot.
-
Page 16: Backlight Correction
Home > Overview of Your Scanner Features Backlight Correction Using the Backlight Correction feature in your scanning software, you can remove shadows from photos that have too much background light. Original image Backlight Correction applied For instructions on using this feature, see Fixing Backlit Photos. - Page 17 Home > Overview of Your Scanner Features Text Enhancement When you scan documents, you can sharpen the text and increase accuracy by using the Text Enhancement feature in Epson Scan. Original Text Enhancement: Off Text Enhancement: On For instructions on using this feature, see Text Enhancement.
-
Page 18: Scanner Parts
Home > Guide to the Scanner Parts Scanner Parts a. scanner cover a. document mat b. document table c. carriage (in the document table) - Page 19 a. Power switch b. DC inlet c. transportation lock d. USB interface connector a. transparency unit window...
-
Page 20: Lights And Buttons
Home > Guide to the Scanner Parts Lights and Buttons Lights Buttons Note: Your product may look different from the illustrations in this guide, but the instructions are the same. The scanner has four buttons for scanning operations. The Status lights indicate whether the scanner is operating normally. a. - Page 21 (None) The scanner is off. Buttons Before using the scanner buttons, make sure you have installed Epson Scan. Button Function Epson Scan starts. Start Copy Utility starts. Copy Epson Scan automatically scans, then the Send File Via E-mail window appears.
-
Page 22: Placing Documents Or Photos
Home > Placing Originals on the Scanner Placing Documents or Photos Placing Documents or Photos on the Document Table Placing Large or Thick Documents Caution: Do not place heavy objects on the document table glass and do not press the glass with too much force. Placing Documents or Photos on the Document Table Open the scanner cover. - Page 23 Note: If you are scanning multiple photos at once, position each photo at least 20 mm (0.8 inch) apart from the others. Close the scanner cover gently so that your original does not move. Note: Always keep the document table clean. Do not leave photos on the document table for an extended period of time as they may stick to the glass.
-
Page 24: Placing Large Or Thick Documents
To start scanning, see Starting Epson Scan for instructions. Placing Large or Thick Documents When you scan a large or thick document, you can pull the scanner cover straight up. Place a large or thick document on the document table. -
Page 25: Placing Film Or Slides
Home > Placing Originals on the Scanner Placing Film or Slides Removing the Document Mat Placing Film in the Holder Placing Slides in the Holder Replacing the Document Mat Removing the Document Mat To scan film strips or slides, you need to remove the document mat from the scanner cover. This uncovers the transparency unit window so your scanner can use it to scan your film or slides. -
Page 26: Placing Film In The Holder
a. transparency unit window To place film for scanning, see Placing Film in the Holder. To place slides for scanning, see Placing Slides in the Holder. To replace the document mat, see Replacing the Document Mat. Placing Film in the Holder Placing 35 mm Film Strips Open the cover of the 35 mm film strip holder. - Page 27 Note: Hold the edge of the film gently or use gloves to touch the film; otherwise you may damage the film. Make sure the white stickers on the back of the film holder and the areas around them are not scratched, dusty, or covered in any way.
- Page 28 Make sure you removed the document mat. See Removing the Document Mat. Close the scanner cover. To scan your film, see Starting Epson Scan. When you are finished scanning film, be sure to replace the document mat before scanning documents or photos. See Replacing the Document Mat.
- Page 29 Make sure the film strip is placed as shown. Close the cover over the film and press it down until it clicks. Then press down on all the edges of the cover to secure it. Place the film holder on the document table so that it is aligned with the upper left corner. Make sure the tab labelled “B”...
-
Page 30: Placing Slides In The Holder
Note: You cannot use Full Auto Mode to scan medium format film. When you are finished scanning film, be sure to replace the document mat before scanning documents or photos. See Replacing the Document Mat. Using the scanning support sheet When the film is curled, flatten the film using the scanning support sheet that came with the medium format film holder. - Page 31 Note: Make sure the white stickers on the back of the film holder and the areas around them are not scratched, dusty, or covered in any way. If the areas are obscured, the scanner may have trouble recognizing your slides in Full Auto Mode. Do not cover the small holes on the film holder.
-
Page 32: Replacing The Document Mat
Make sure you removed the document mat. See Removing the Document Mat. Close the scanner cover. To scan your slides, see Starting Epson Scan. When you are finished scanning slides, be sure to replace the document mat before scanning documents or photos. See Replacing the Document Mat. -
Page 33: Starting Epson Scan
Copy button Start button You can start Epson Scan just by pressing the Start button on the scanner. The Epson Scan window automatically opens. Selecting an Epson Scan Mode for instructions on selecting an Epson Scan mode. You can also start scanning by pressing the following buttons on the scanner. - Page 34 Windows 7/Vista/XP: Double-click the Epson Scan icon on the desktop. Or, select the start button icon or Start > All Programs or Programs > Epson > Epson Scan > Epson Scan. Mac OS X: Select Applications > Epson Software > Epson Scan.
-
Page 35: Selecting An Epson Scan Mode
Mode is best when you need to scan your originals at 100% size and you do not need to preview the images before scanning. You can restore faded colors or remove dust marks in Full Auto Mode. This is the default mode in Epson Scan. -
Page 36: Changing The Scan Mode
Scanning Your Originals Changing the Scan Mode To change the scan mode, click the arrow in the Mode box in the upper right corner of the Epson Scan window. Then, select the mode you want to use from the list that appears. -
Page 37: Scanning In Full Auto Mode
Scanning Your Originals Scanning in Full Auto Mode When you start Epson Scan for the first time, it runs in Full Auto Mode and displays the Epson Scan Full Auto Mode window. Note for film or slides: In Full Auto Mode, you can scan only 35 mm color film strip or color positive slides. To scan other types of film, use Home Mode or Professional Mode. - Page 38 If you started scanning from a TWAIN-compliant program like ArcSoft PhotoStudio, the File Save Settings button does not appear. Select your settings and click OK. For details on selecting the settings in the Customize window, see Epson Scan Help. Click Scan. Epson Scan starts scanning in Full Auto Mode.
- Page 39 Epson Scan previews each image, detects which type of original it is, and selects the scan settings automatically. After a moment, you see a small preview of each image in the Epson Scan window. Note: It takes a few minutes to scan a full film strip.
-
Page 40: Scanning In Office Mode
Home > Scanning Your Originals Scanning in Office Mode When you select Office Mode, you see the Epson Scan Office Mode window. Place the original(s) on the document table. See Placing Documents or Photos for instructions. Start Epson Scan. See Starting Epson Scan for instructions. - Page 41 Click the arrow to open the Resolution list and select an appropriate resolution for your original. See Selecting the Scan Resolution for instructions. Click Preview to preview your image(s). The Preview window appears and displays your image. See Previewing and Adjusting the Scan Area for instructions.
-
Page 42: Scanning In Home Mode
> Scanning Your Originals Scanning in Home Mode When you select Home Mode, you see the Epson Scan Home Mode window. Place your original(s) on the document table. See one of these sections for instructions. Documents or photos: Placing Documents or Photos... - Page 43 Other if you want to select a specific resolution for other purposes. Epson Scan selects a default resolution setting based on the Destination setting you select. If you selected Other as the Destination setting to select a specific resolution, see Selecting the Scan Resolution for instructions.
-
Page 44: Scanning In Professional Mode
Home > Scanning Your Originals Scanning in Professional Mode When you select Professional Mode, you see the Epson Scan Professional Mode window. - Page 45 Place your original(s) on the document table. See one of these sections for instructions. Documents or photos: Placing Documents or Photos Film or slides: Placing Film or Slides Start Epson Scan. See Starting Epson Scan for instructions. Select Professional Mode in the Mode list. See Changing the Scan Mode for instructions.
- Page 46 What happens next depends on how you started your scan. See Finishing the Scan for instructions.
-
Page 47: Selecting File Save Settings
The File Save Settings window appears. Note: If you start Epson Scan from a TWAIN-compliant program, such as ArcSoft PhotoStudio, the File Save Settings button or File Save Settings icon does not appear. In the File Save Settings window, specify the file folder in which you want to save your scanned image. - Page 48 Multi-TIFF (*.tif) A TIFF format where multiple pages are saved to the same file. You can also edit the scanned images before saving them. See Epson Scan Help for details. To open Multi-TIFF files, you need a program that supports it.
-
Page 49: Detailed Setting Instructions
Home > Scanning Your Originals Detailed Setting Instructions Selecting the Scan Resolution Previewing and Adjusting the Scan Area Adjusting the Color and Other Image Settings Selecting the Scan Size Selecting the Scan Resolution You can select a specific Resolution setting for your images. Keep in mind that higher resolution settings increase scanning time, so do not select a higher resolution than you need. - Page 50 Click the Specify resolution for Full Auto Mode check box and select the number of dpi (dots per inch) at which you want to scan. Selecting the Resolution in Home Mode To change the resolution, first select Other as the Destination setting. Click the arrow next to the Resolution list and select the number of dpi (dots per inch) at which you want to scan.
-
Page 51: Previewing And Adjusting The Scan Area
Normal preview displays your previewed image(s) in their entirety. You must select the scan area and make any image quality adjustments manually. Thumbnail preview displays your previewed image(s) as thumbnail(s). Epson Scan automatically locates the edges of your scan area, applies automatic exposure settings to the image(s), and rotates the image(s) if necessary. - Page 52 Thumbnail preview Document Film If you are viewing the normal preview, you can do the following to adjust the image(s). To select your scan area, click the auto locate icon to create a marquee that marks the edges of your image area.
- Page 53 If you are going to scan at a different size than your original, you must first select your Target Size and automatically create a marquee that is proportioned to that size. See Selecting the Scan Size instructions. You can then copy the marquee and place it on each image you will scan at that size. To enlarge or reduce the preview image in the Normal preview, resize the Preview window.
- Page 54 50) on each image to scan different image areas in separate scan files. Note for film or slides: When you use the Thumbnail preview, Epson Scan automatically creates marquees around your image(s) for you. If you need to adjust a marquee, click inside it and click the delete marquee icon before completing the steps in this section.
- Page 55 Do one of the following to adjust the marquee. To move the marquee, position your cursor inside the marquee. The pointer becomes a hand. Click and drag the marquee to the desired location. To resize the marquee, position your cursor over the edge or corner of the marquee. The pointer becomes a straight or angled double-arrow.
-
Page 56: Adjusting The Color And Other Image Settings
Adjusting the Color and Other Image Settings Once you have previewed your image(s) and adjusted the scan area, you can modify the image quality, if necessary. Epson Scan offers a variety of settings for improving color, sharpness, contrast, and other aspects affecting image quality. Before you make adjustments, be sure to click the image or marquee for the area you want to adjust. - Page 57 Certain settings may not be available, or may be automatically selected, depending on the type of image you are previewing and other settings you have selected. You can customize how certain Epson Scan settings behave by clicking Configuration and changing settings in the window that appears. See Epson Scan Help for details.
- Page 58 The table below describes the settings available in Home Mode. For details on adjusting these settings, see Epson Scan Help. Note: If you are scanning multiple images at the same time and you want to apply the image adjustments to all of your images or scan areas, click All in the Preview window before you begin making your adjustments.
- Page 59 Certain settings may not be available, or may be automatically selected, depending on the type of image you are previewing and other settings you have selected. You can customize how certain Epson Scan settings behave by clicking Configuration and changing settings in the window that appears. See Epson Scan Help for details.
- Page 60 The table below describes the settings available in Professional Mode. For details on adjusting these settings, see Epson Scan Help. Note: You may need to scroll down to view the Adjustments area of the Professional Mode window. If you are scanning multiple images at the same time and you want to apply the image adjustments to all of your images or scan areas, click All in the Preview window before you begin making your adjustments.
- Page 61 Certain settings may not be available, or may be automatically selected, depending on the type of image you are previewing and other settings you have selected. You can customize how certain Epson Scan settings behave by clicking Configuration and changing settings in the window that appears. See Epson Scan Help for details.
-
Page 62: Selecting The Scan Size
To undo any image quality adjustments you make to the preview image, click Reset if available, turn off the setting, or preview your image again. Selecting the Scan Size You can scan your images at their original size, or you can reduce or enlarge their size as you scan them. You do this using the Target Size setting. - Page 63 If you need to create a scan size that is not in the Target Size list, you can create a custom size. Click the arrow to open the list and select Customize. You see the Target Size window. Type a name for your custom size, enter the size, click Save, then click OK. Your new size appears in the Target Size list.
- Page 64 orientation icon is not available if you selected Original as the Target Size setting. Selecting the Scan Size in Professional Mode You can select a predefined scan size from the Target Size list. Click the arrow to open the list and select the size you want.
- Page 65 To size your image by a certain percentage, adjust the Scale value. To change the way your image is cropped, turn Trimming on or off. See Epson Scan Help for details. To unlock the proportions of your scan size, click the lock icon.
-
Page 66: Finishing The Scan
Full Auto Mode: If you started your scan by running Epson Scan from the Epson Scan icon, your scanned image is saved in the file format and location you selected in the File Save Settings window. If you did not select any settings in the File Save Settings window, it is saved as a JPEG file in Pictures or My Pictures. - Page 67 Do one of the following to start Easy Photo Scan: Windows 8: Navigate to the Apps screen and select Easy Photo Scan. Windows 7/Vista/XP: Click the start button icon or Start > All Programs or Programs > Epson Software > Easy Photo Scan.
- Page 68 Epson Scan window. Click Scan in the Epson Scan window. The scanned image is displayed in the Easy Photo Scan window. To edit the name of the file, select the image thumbnail at the bottom of the screen, click , and enter the new filename.
-
Page 69: Restoring Color
Using the Color Palette Feature (for Professional Mode Only) Using the Color Restoration feature in Epson Scan, you can transform old, faded, or badly exposed photos into ones with true-to-life color and sharpness. You can restore printed photos, film, or slides automatically as you scan them. -
Page 70: Color Restoration In Home Mode
Note: If you started Epson Scan from a TWAIN-compliant program like ArcSoft PhotoStudio, the File Save Settings button does not appear. When you finish making all the necessary settings, click OK to return to the Full Auto Mode window. -
Page 71: Color Restoration In Professional Mode
Size your image(s) as necessary. See Selecting the Scan Size for details. Click Scan. What happens next depends on how you started Epson Scan. See Finishing the Scan for instructions. Color Restoration in Professional Mode Place your original(s) on the document table. See one of these sections for instructions. -
Page 72: Using The Color Palette Feature (For Professional Mode Only)
Size your image(s) as necessary. See Selecting the Scan Size for details. Click Scan. What happens next depends on how you started Epson Scan. See Finishing the Scan for instructions. Using the Color Palette Feature (for Professional Mode Only) Follow the steps in these sections to fine-tune the colors in your image using the Color Palette feature in Professional Mode. - Page 73 To load a previously saved color, select the color and click the apply to palette icon. When you are finished adjusting the color, click Close to return to the Professional Mode window. For further details on using the Color Palette feature, see Epson Scan Help.
- Page 74 Applying a Color to an Image Click the Color Palette icon. Select the cell that contains the hue you would like to use to adjust the color in your image. This color now becomes the color of the center cell. Note: You can also use the cells to the right of the adjustment area to change the brightness, if necessary.
- Page 75 For further details on using the Color Palette feature, see Epson Scan Help.
- Page 76 Dust Removal in Full Auto Mode Dust Removal in Professional Mode Using the Dust Removal feature in Epson Scan, you can virtually “clean” the dust marks from your originals as you scan them. Before scanning your originals, carefully remove any dust that you can see on them.
-
Page 77: Dust Removal In Professional Mode
Note: If you started Epson Scan from a TWAIN-compliant program like ArcSoft PhotoStudio, the File Save Settings button does not appear. When you finish making all the necessary settings, click OK to return to the Full Auto Mode window. - Page 78 Make any other necessary image adjustments. See Adjusting the Color and Other Image Settings for instructions. Size your image(s) as necessary. See Selecting the Scan Size for instructions. Click Scan. What happens next depends on how you started Epson Scan. See Finishing the Scan for instructions.
-
Page 79: Digital Ice Technology Specifications
Using DIGITAL ICE Technology in Home Mode Using DIGITAL ICE Technology in Professional Mode Your scanner and its Epson Scan software are equipped with the DIGITAL ICE Technology feature that removes stubborn dust or scratch marks from your originals. Original image DIGITAL ICE Technology applied DIGITAL ICE Technology can remove dust marks that the Dust Removal feature cannot. - Page 80 1853 MB 1106 MB * This is the actual scan resolution used by DIGITAL ICE Technology, which is higher than the scan resolution you specify in Epson Scan. Make sure your system resources meet these increased requirements. You can use DIGITAL ICE Technology on the following types of originals.
- Page 81 Selecting the Scan Size for instructions. Click Scan to scan and remove dust and scratch marks in your image(s). What happens next depends on how you started Epson Scan. See Finishing the Scan for details. Using DIGITAL ICE Technology in Professional Mode Place your original(s) on the document table.
- Page 82 Size your image(s) as necessary. See Selecting the Scan Size for instructions. Click Scan to scan and remove dust and scratch marks in your image(s). What happens next depends on how you started Epson Scan. See Finishing the Scan for details.
-
Page 83: Fixing Backlit Photos
Backlight Correction in Home Mode Backlight Correction in Professional Mode Using the Backlight Correction feature in Epson Scan, you can remove shadows from photos that have too much background light. You can fix printed photos, film, or slides automatically as you scan them. -
Page 84: Backlight Correction In Professional Mode
Size your image(s) as necessary. See Selecting the Scan Size for details. Click Scan. What happens next depends on how you started Epson Scan. See Finishing the Scan for instructions. Backlight Correction in Professional Mode Place your original(s) on the document table. See one of these sections for instructions. - Page 85 Make any other necessary image adjustments. See Adjusting the Color and Other Image Settings for details. Size your image(s) as necessary. See Selecting the Scan Size for details. Click Scan. What happens next depends on how you started Epson Scan. See Finishing the Scan for instructions.
-
Page 86: Text Enhancement
Text Enhancement Using the PDF Button Text Enhancement in Office Mode Text Enhancement in Home Mode When you scan documents, you can sharpen the text and increase accuracy by using the Text Enhancement feature in Epson Scan. Original Text Enhancement: Off... - Page 87 Click Close to close the Scan to PDF Settings window, then click Scan or press the Start button on the scanner. Epson Scan scans your page. When you are finished scanning all of your pages, click Finish or press the PDF button on the scanner.
- Page 88 Place your document on the document table. See Placing Documents or Photos for instructions. Start Epson Scan. See Starting Epson Scan for instructions. In the Home Mode window, select the Document Type, Image Type, and Destination settings. For details, see Scanning in Home Mode.
-
Page 89: Using The Scanner As A Copier
Copy button, the Epson Scan window opens at the same time. Windows 8: Navigate to the Apps screen and select Copy Utility. Windows 7/Vista/XP: Select the start button or Start > Programs or All Programs > Epson Software > Copy Utility. - Page 90 The scanned image is displayed in the Copy Utility main window. Check the scanned image and then rotate it using the thumbnail tool if necessary. When you have finished checking the image, click The window for print settings is displayed. Note: button is not active until after a scan has been performed and an image is ready to be printed.
-
Page 91: Scanning To A Pdf File
PDF File Using the PDF Button for instructions. Using Epson Scan, you can create a PDF file with the following features. Scanning multiple document pages into a single PDF file: You can scan multiple document pages and save them in a single PDF file. - Page 92 Click Settings. You see the Scan to PDF Settings window. Select Color, Grayscale, or Black&White as the Image Type setting to select the colors in the original.
- Page 93 Select Document Table as the Document Source setting. Click the arrow to open the Size list and select the size of your original(s). If you need to select a size that is not in the Size list, you can create a custom size. Click the arrow in the Size list and select Customize.
- Page 94 - when the Image Type is set to Color and Image Option is selected - when the Image Type is set to Grayscale and Image Option is selected - when the Image Type is set to Black&White and Image Option is selected When the Image Type is set to Black&White, the results of Text Enhancement do not appear in the preview, only in your scanned...
-
Page 95: Scanning To A Pdf File In Office Mode
If you need to change any of the current PDF settings, click Options. You see the Epson PDF Plug-in Settings window. Select the settings that match your document and click OK. You return to the File Save Settings window. Note: The Text tab is available only when ABBYY FineReader is installed. - Page 96 Select PDF as the Type setting. The current Paper Size, Orientation, Margin, and other settings are displayed below it. Click Options. You see the Epson PDF Plug-in Settings window. To create a searchable PDF file, click the Text tab, select the Create searchable PDF check box, then select your...
- Page 97 Note: The Text tab is available only when ABBYY FineReader is installed. If ABBYY FineReader is not available in your country, you will not see the Text tab. To specify the maximum number of pages that can be included in one PDF file, click the General tab and adjust the Select number to make file setting.
- Page 98 For other settings in the Epson PDF Plug-in Settings window, see Epson Scan Help for details. Select the settings that match your document and click OK. You return to the File Save Settings window. Make any other file save settings, and click OK. Epson Scan scans your document and displays the window below. Note: If you deselect the Show Add Page dialog after scanning check box in the File Save Settings window, this window does not appear and Epson Scan automatically saves your document.
-
Page 99: Scanning To A Pdf File In Home Mode
For further details on the tools in the Editing Page window, see Epson Scan Help. When you have finished editing your pages, click OK. The pages are saved in one PDF file in Pictures, My Pictures, or the location you selected in the File Save Settings window, and you return to the Office Mode window. - Page 100 Select PDF as the Type setting. The current Paper Size, Orientation, Margin, and other settings are displayed below it. Click Options. You see the Epson PDF Plug-in Settings window. To create a searchable PDF file, click the Text tab, select the Create searchable PDF check box, then select your...
- Page 101 Note: The Text tab is available only when ABBYY FineReader is installed. If ABBYY FineReader is not available in your country, you will not see the Text tab. To specify the maximum number of pages that can be included in one PDF file, click the General tab and adjust the Select number to make file setting.
- Page 102 For other settings in the Epson PDF Plug-in Settings window, see Epson Scan Help for details. Select the settings that match your document and click OK. You return to the File Save Settings window. Make any other file save settings, and click OK. Epson Scan scans your document and displays the window below. Note: If you deselect the Show Add Page dialog after scanning check box in the File Save Settings window, this window does not appear and Epson Scan automatically saves your document.
-
Page 103: Scanning To A Pdf File In Professional Mode
For further details on the tools in the Editing Page window, see Epson Scan Help. When you have finished editing your pages, click OK. The pages are saved in one PDF file in Pictures, My Pictures, or the location you selected in the File Save Settings window, and you return to the Home Mode window. - Page 104 Select PDF as the Type setting. The current Paper Size, Orientation, Margin, and other settings are displayed below it. Click Options. You see the Epson PDF Plug-in Settings window. To create a searchable PDF file, click the Text tab, select the Create searchable PDF check box, then select your...
- Page 105 Note: The Text tab is available only when ABBYY FineReader is installed. If ABBYY FineReader is not available in your country, you will not see the Text tab. To specify the maximum number of pages that can be included in one PDF file, click the General tab and adjust the Select number to make file setting.
- Page 106 For other settings in the Epson PDF Plug-in Settings window, see Epson Scan Help for details. Select the settings that match your document and click OK. You return to the File Save Settings window. Make any other file save settings, and click OK. Epson Scan scans your document and displays the window below. Note: If you deselect the Show Add Page dialog after scanning check box in the File Save Settings window, this window does not appear and Epson Scan automatically saves your document.
- Page 107 For further details on the tools in the Editing Page window, see Epson Scan Help. When you have finished editing your pages, click OK. The pages are saved in one PDF file in Pictures, My Pictures, or the location you selected in the File Save Settings window, and you return to the Professional Mode window.
-
Page 108: Scanning Directly To An E-Mail
Film or slides: Placing Film or Slides Press the E-mail button on the scanner. Epson Scan starts in Full Auto Mode and automatically scans your image as a JPEG file. Note: If you want to restore color in or remove dust from your images before scanning, click the Pause button to return to the Full Auto Mode window. - Page 109 Note: The box at the bottom of the window displays information about the image file(s) you are attaching to the e- mail message. Click OK. Your e-mail program is opened and any scanned images you selected are attached to a new e-mail message. See your e-mail program Help if you need instructions on sending your e-mail message.
-
Page 110: Converting Scanned Documents Into Editable Text
Home > Scanning Special Projects Converting Scanned Documents Into Editable Text Converting into Editable Text in Full Auto Mode Converting into Editable Text in Office Mode Converting into Editable Text in Home Mode Converting into Editable Text in Professional Mode You can scan a document and convert the text into a format that you can edit with a word processing program. - Page 111 Select the language used in the document you are going to scan as the Document Language setting. Click either the Scan to Other Formats icon or the icon that corresponds with the program you want to scan to. If you see the Select Scanner window, select your product and click OK. Note: Do not select a WIA option for your product;...
-
Page 112: Converting Into Editable Text In Office Mode
Select the language used in the document you are going to scan as the Document Language setting. Click the icon for the type of document you want to scan to. Epson Scan starts in the last mode you used. Change the scan mode to Full Auto Mode if necessary. See Changing the Scan Mode for instructions. - Page 113 Select the language used in the document you are going to scan as the Document Language setting. Click either the Scan to Other Formats icon or the icon that corresponds with the program you want to scan to. If you see the Select Scanner window, select your product and click OK. Note: Do not select a WIA option for your product;...
- Page 114 Select the language used in the document you are going to scan as the Document Language setting. Click the icon for the type of document you want to scan to. Epson Scan starts in the last mode you used. Change the scan mode to Office Mode if necessary. See Changing the Scan Mode for instructions.
-
Page 115: Converting Into Editable Text In Home Mode
Converting into Editable Text in Home Mode Windows Place your document on the document table. See Placing Documents or Photos for instructions. Do one of the following to start ABBYY FineReader. Windows 8: Navigate to the Start screen and select ABBYY FineReader 9.0 Sprint. Windows 7/Vista/XP: Select the start button or Start >... - Page 116 Select the language used in the document you are going to scan as the Document Language setting. Click the icon for the type of document you want to scan to. Epson Scan starts in the last mode you used. Change the scan mode to Home Mode if necessary. See Changing the Scan Mode for instructions.
-
Page 117: Converting Into Editable Text In Professional Mode
Settings for instructions. When you see the Document Conversion window with the finished message, click Close in the Epson Scan window. Follow the instructions in ABBYY FineReader Help to edit and save your document. Converting into Editable Text in Professional Mode Windows Place your document on the document table. - Page 118 Select the language used in the document you are going to scan as the Document Language setting. Click either the Scan to Other Formats icon or the icon that corresponds with the program you want to scan to. If you see the Select Scanner window, select your product and click OK. Note: Do not select a WIA option for your product;...
- Page 119 Select the language used in the document you are going to scan as the Document Language setting. Click the icon for the type of document you want to scan to. Epson Scan starts in the last mode you used. Change the scan mode to Professional Mode if necessary. See Changing the Scan Mode for instructions.
- Page 120 Scanning Special Projects Scanning Accurate Color Images Start Epson Scan, select Home Mode or Professional Mode, select the appropriate scan settings, then click Preview to prescan your image and adjust the marquee. For details, see one of these sections. Home Mode:...
- Page 121 For the Target setting, select Adobe RGB. Select Display preview using monitor compensation, then click OK to return to the Epson Scan window. Click Scan. What happens next depends on how you started your scan. See Finishing the Scan for instructions.
- Page 122 The Scan to PDF window appears. Assigning a Project Program in Epson Event Manager to a Scanner Button You can assign any of the scanner buttons to open a program in the Epson Event Manager to make scanning your projects even quicker.
- Page 123 Now whenever you press the button you assigned, the action you selected opens. Note: If you need help using Epson Event Manager, do one of the following. For Windows: Click the icon in the upper right corner of the screen.
-
Page 124: Cleaning The Scanner
Home > Maintenance Cleaning the Scanner To keep your scanner operating at its best, clean it periodically using the following procedure. Caution: Do not press the glass surface of the document table with any force. Be careful not to scratch or damage the glass surface of the document table, and do not use a hard or abrasive brush to clean it. - Page 125 a. transparency unit window Make sure that no dust builds up on the surface of the document table or the transparency unit window. Dust can cause spots in your scanned images.
- Page 126 The luminosity of the scanner light source declines over time. If the light source breaks or becomes too dim to operate normally, the scanner stops working and the Status light rapidly flashes. When this happens, the light source assembly must be replaced by a professional. For details, contact Epson Support. See Epson Technical Support...
-
Page 127: Power Off Timer Setting
Make sure that the scanner is connected to your computer and that the scanner is turned on. Start Epson Scan Settings. Windows: Start > All Programs or Programs > EPSON > EPSON Scan > EPSON Scan Settings Mac OS X: Select Applications > EPSON Software > EPSON Scan Settings. -
Page 128: Transporting The Scanner
Home > Maintenance Transporting the Scanner Before you transport the scanner for a long distance or store it for an extended period of time, the scanner’s carriage needs to be in the home position to prevent damage. Make sure the carriage is in the home position on the upper side of the scanner. If the carriage is not in the home position, turn on the scanner and wait until the carriage moves to the home position. -
Page 129: Scanner Problems
The Status Light Is Flashing The Scanner Does Not Turn On The Scanner Turns Off You Cannot Start Epson Scan Pressing a Scanner Button Does Not Start the Correct Program The Status Light Is Flashing The green and orange status lights are on the left of the PDF button and the blue status light is on the bottom of the four buttons. -
Page 130: You Cannot Start Epson Scan
Make sure your scanner’s name appears under Imaging device without a (?) or an exclamation (!) mark in the Device Manager window. If the scanner’s name appears with one of these marks or as an Unknown device, uninstall Epson Scan as described Uninstalling Your Scanning Software, then reinstall it as described in the Start Here sheet. -
Page 131: Scanning Problems
Home > Solving Problems Scanning Problems You Cannot Scan Using the Thumbnail Preview You Have Trouble Adjusting the Scan Area in the Thumbnail Preview Negative Film Preview Images Look Strange You Cannot Scan Multiple Images at One Time You Cannot Scan in Full Auto Mode Scanning Takes a Longer Time You Cannot Scan Film or Slides You Cannot Scan Using the Thumbnail Preview... -
Page 132: You Cannot Scan Multiple Images At One Time
You Cannot Scan Multiple Images at One Time Position photos at least 20 mm (0.8 inch) apart from each other on the document table. You Cannot Scan in Full Auto Mode If you are scanning images with a very dark or bright background, switch to Office Mode, Home Mode, or Professional Mode. -
Page 133: Scan Quality Problems
Home > Solving Problems Scan Quality Problems The Edges of Your Original Are Not Scanned You See Only a Few Dots in Your Scanned Image A Line or Line of Dots Always Appears in Your Scanned Images Straight Lines in Your Image Come Out Crooked Your Image Is Distorted Colors Are Patchy or Distorted at the Edges of Your Image Your Scanned Image Is Too Dark... -
Page 134: Straight Lines In Your Image Come Out Crooked
The document table or transparency unit window may need cleaning. Clean the document table. See Cleaning the Scanner. If you still have the problem, the document table or transparency unit window may be scratched. Contact Epson Support for assistance. See Epson Technical Support. -
Page 135: Your Scanned Image Is Too Dark
Fixing Backlit Photos for instructions. Check the Brightness setting in Office Mode, Home Mode, or Professional Mode. See Epson Scan Help for details. Click Configuration, select the Color tab, and change the Display Gamma setting to match your output device, such as a monitor or printer. -
Page 136: Characters Are Not Recognized Well When Converted Into Editable Text (Ocr)
Click Configuration, select the Color tab, and change the Display Gamma setting to match your output device, such as a monitor or printer, in the Color menu. See Epson Scan Help for details. Adjust the Auto Exposure setting in Professional Mode. Also try selecting a different Tone Correction setting. See Adjusting the Color and Other Image Settings for instructions. -
Page 137: Images Are Rotated Incorrectly
Show Texture is not available when scanning films. DIGITAL ICE Technology is not available when the Show Texture check box is selected and reflective document is selected as Document Type. The Show Texture check box is cleared when you restart the Epson Scan. -
Page 138: Uninstalling Your Scanning Software
Windows 8/7/Vista: Click Uninstall a program from the Programs category. Windows XP: Double-click the Add or Remove Programs icon. Select the software you want to uninstall such as Epson Scan, your scanner’s Manual, or another application from the list displayed. - Page 139 In most cases, you do not need to uninstall your product software before reinstalling it. However, you can download the Uninstaller utility from the Epson support website to uninstall your product software as described here. Note: To uninstall applications you must log in as an administrator. You cannot uninstall programs if you log on as a Limited account user.
-
Page 140: Epson Technical Support
Other Software Technical Support Before Contacting Epson If your Epson product is not operating properly and you cannot solve the problem using the troubleshooting information in your product documentation, contact Epson support services for assistance. Epson support will be able to help you much more quickly if you give them the following information: Product serial number (The serial number label is usually on the back of the product.) -
Page 141: Help For Users In Latin America
For help using any other software on your system, see the documentation for that software for technical support information. Purchase Supplies and Accessories You can purchase genuine Epson accessories from an Epson authorized reseller. To find the nearest reseller, call 800-GO-Epson (800-463-7766). Or you can purchase online at http://www.epsonstore.com (U.S. -
Page 142: Other Software Technical Support
Venezuela (58 212) 240-1111 * Contact your local phone company to call this toll free number from a mobile phone. ** Dial the first 7 digits, wait for a message, then enter the code. Other Software Technical Support ArcSoft PhotoStudio www.arcsoft.com/support ABBYY FineReader (408) 457-9777... -
Page 143: Windows System Requirements
See your system documentation for details.) Note: Epson Scan does not support the UNIX File System (UFS) for Mac OS X. You must install Epson Scan on a disk or in a partition that does not use UFS. -
Page 144: Scanner Specifications
Home > Technical Specifications Scanner Specifications General Mechanical Electrical Environmental Interfaces Standards and Approvals Note: Specifications are subject to change without notice. General Scanner type Flatbed color Photoelectric device Color CCD line sensor Effective pixels 54400 × 74880 pixels at 6400 dpi Scanning area may be restricted if resolution setting is large. - Page 145 The AC adapter model varies in certain locations. Default Delay Times for Power Management for Epson® products This product will enter sleep mode after a period of nonuse. The time interval has been set at the factory to ensure that the product meets Energy Star standards of energy efficiency, and cannot be modified by the consumer.
-
Page 146: Standards And Approvals
Operating conditions Ordinary office or home conditions. Avoid operating the scanner in direct sunlight, near a strong light source, or in extremely dusty conditions. Interfaces USB Interface Interface type Universal Serial Bus Specification Revision 2.0 Electrical standard Full Speed mode (12 Mbits per second) and Hi-Speed mode (480 Mbits per second) of Universal Serial Bus Specification Revision 2.0.
Need help?
Do you have a question about the Perfection V600 Photo and is the answer not in the manual?
Questions and answers
Epson V600 how to scan multitple pages into 1 file
To scan multiple pages into one file using the Epson Perfection V600 Photo, follow these steps:
1. Scan the first page of your document.
2. When the scan is complete, a window appears with options.
3. Click "Add Page" to scan the next page.
4. Replace the first page on the scanner with the next page and click "Scan" again.
5. Repeat this process for each page you want to include.
6. Once all pages are scanned, click "Edit Page" if you need to make adjustments.
7. When you are ready to save, click "Save File" to store all scanned pages in a single PDF file.
This ensures that all pages are combined into one document.
This answer is automatically generated
The icon presents a black screen with only Scanner, File Type, Color Mode, Resolution (DPI) and Save file to options. There is no option to add a page.
When I scan my documents it comes in lanscape format. How do I change to portrait?
To change the scan orientation from landscape to portrait on the Epson V600 Photo, go to the File Save Settings window during the scanning process and adjust the Orientation setting. Select "Portrait" as the desired orientation before saving the scanned file.
This answer is automatically generated