Chapters
Table of Contents

Subscribe to Our Youtube Channel
Related Manuals for Medion LIFE P13299


Summary of Contents for Medion LIFE P13299
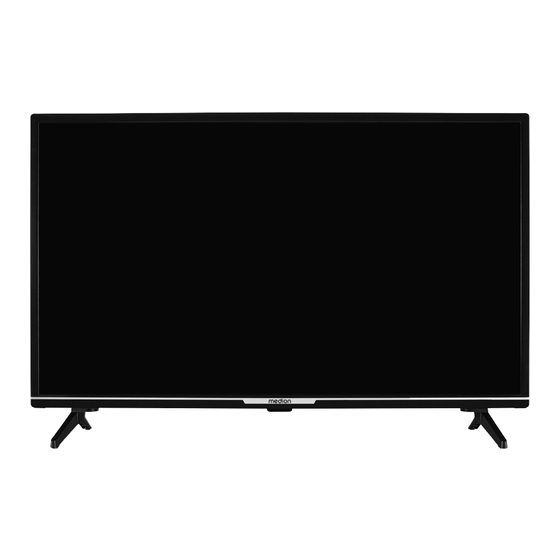
- Page 1 Kurzanleitung Guide de démarrage rapide Guida rapida Korte handleiding Quick Start Guide Guía rápida Guia rápido 80 cm (32“) Android Full HD Smart-TV MEDION LIFE P13299 (MD 30050)
-
Page 2: Table Of Contents
Inhalt Informationen zu dieser Kurz anleitung ................2 Lieferumfang ...........................2 Geräteübersicht ........................3 3.1. Vorderseite..............................3 3.2. Rückseite und rechte Seite ........................4 3.3. Fernbedienung ............................5 Inbetriebnahme ........................7 4.1. Auspacken ..............................7 4.2. Montage ................................ 7 4.3. Batterien in die Fernbedienung einlegen ..................8 4.4. Antenne anschließen ..........................8 4.5. -
Page 3: Informationen Zu Dieser Kurz Anleitung
. Informationen zu dieser Kurz anleitung Bei dieser Kurzanleitung handelt es sich um eine verkürzte Druckausgabe der vollständigen Bedie- nungsanleitung. WARNUNG! Lesen Sie vor Inbetriebnahme die Sicherheitshinweise und die vollständige Bedienungs- anleitung aufmerksam durch. Beachten Sie die Warnungen auf dem Gerät und in der Bedienungsanleitung, um Personen- und Sachschäden zu vermeiden. -
Page 4: Geräteübersicht
. Geräteübersicht .. Vorderseite 1. Bildschirm : Smart-TV ein-/ausschalten. 3. Infrarot-Sensor: Empfangsfeld für die Infrarot-Signale der Fernbedienung. Betriebsanzeige: leuchtet auf, wenn sich das Gerät im Standby-Modus befindet. -
Page 5: Rückseite Und Rechte Seite
.. Rückseite und rechte Seite 5Vdc Max. 500mA 5Vdc Max. 500mA 13 Vdc/18 Vdc SPDIF Optic. out Video BACK AV IN 1. COMMON INTERFACE (CI+): Einschubfach zur Nutzung von Pay-TV-Karten 2. USB (5V , 500 mA max.): USB-Anschluss für Medienwiedergabe/Aufnahme (PVR) 3. -
Page 6: Fernbedienung
.. Fernbedienung MENU TEXT... - Page 7 1. Mikrofon 2. Zifferntasten: TV: Programmwahl, Videotext: Seitenwahl : DTV/Satellit/Mediabrowser: Untertitelfunktion : Stummschalten : Programmwahltasten TV: nächste (+) / vorherige (-) Programm auswählen; Videotext: nächste (+) / vorherige (-) Seite auswählen / : Mikrofontaste zur Aktivierung der Sprachsteuerung : Öffnen des Startbildschirms : Digital-TV: Anzeigen von Informationen (z.
-
Page 8: Inbetriebnahme
. Inbetriebnahme Lesen Sie vor der Inbetriebnahme bitte unbedingt die „Sicherheitshinweise“. .. Auspacken • Wählen Sie vor dem Auspacken einen geeigneten Platz zum Aufstellen. • Öffnen Sie den Karton sehr vorsichtig, um eine mögliche Beschädigung des Gerätes zu verhin- dern. Dies kann passieren, wenn zum Öffnen ein Messer mit einer langen Klinge verwendet wird. •... -
Page 9: Batterien In Die Fernbedienung Einlegen
.. Batterien in die Fernbedienung einlegen Entfernen Sie die Batteriefachabdeckung auf der Rückseite der Fernbedienung. Legen Sie zwei Batterien vom Typ LR03 / AAA / 1,5V in das Batteriefach der Fernbedienung ein. Beachten Sie dabei die Polung der Batterien (im Batteriefachboden markiert). ... -
Page 10: Erstinstallation Nach Dem Ersten Einschalten
.. Erstinstallation nach dem ersten Einschalten Wenn Sie Ihr Gerät zum ersten Mal einschalten, werden Sie durch die Erstinstallation geführt. Sie können die Erstinstallation jederzeit über das Menü EINSTELLUNGEN > GERÄTEEINSTELLUN GEN > ZURÜCKSETZEN aufrufen und erneut durchführen. Català Čeština Dansk Willkommen Deutsch... - Page 11 ... Netzwerk/Internet-Einstellungen Als nächstes können Sie Netzwerk-/Internet-Verbindungen vornehmen. WLAN auswählen WLAN Du kannst eine Internetverbindung auch mithilfe eines Ethernetkabels herstellen. Anderes Netzwerk... Ethernet verwenden Überspringen Es werden Ihnen alle vorhandenen WLAN-Netzwerke direkt angezeigt. Wählen Sie mit den Tasten das gewünschte WLAN-Netzwerk aus und drücken Sie .
- Page 12 Bedenken Sie, dass bei Aktivierung dieser Funktion ein höherer Energieverbrauch entsteht. ... Nutzungsbedingungen und sonstige Voreinstellungen Daraufhin werden Sie aufgefordert, den Nutzungsbedingungen, Datenschutzerklärung und Google Play-Nutzungsbedingungen zuzustimmen. Dies ist notwendig, wenn Sie beabsichtigen, die Goog- le-Dienste in Anspruch zu nehmen. ...
- Page 13 Folgende Optionen stehen Ihnen daraufhin zur Verfügung: Kabelsuchlaufkonfiguration SUCHLAUFMO Wählen Sie hier den gewünschten Suchlaufmodus VOLLSTÄNDIG (nur bei der Betreiberwahl SONSTIGE), ERWEITERT oder SCHNELL. FREQUENZ Stellen Sie hier die Frequenz ein. Die Standardeinstellung ist AUTOMATISCH. (KHZ) NETZWERKID Stellen Sie hier die Netzwerk-ID ein. Die Standardeinstellung ist AUTOMA TISCH.
- Page 14 Satelliten-Setup TONEBURST Wenn Ihre Satelliten-Anlage ein Tonburst benötigt, können Sie hier BURST A oder B einstellen TRANSPONDER Wählen Sie den Transponder aus, über den der Suchlauf gestartet werden soll. SIGNALQUALITÄT Die Signalqualität wird in Prozent dargestellt. Einstellungen sind hier nicht möglich. SIGNALSTÄRKE Die Signalstärke wird in Prozent dargestellt.
- Page 15 Akzeptieren oder Überspringen Sie abschließend die Hinweise zur Hersteller Verwendung & Di- agnose zur Übermittlung Ihrer Nutzerdaten an den Hersteller des Geräts. Auf diese Weise kann der Hersteller eine optimale Funktionsweise des Geräts sicherstellen. Die Einrichtung ist nun beendet und das Gerät schaltet automatisch in den Internet-Modus. Drü- cken Sie die Taste oder , um in den TV-Modus zu gelangen.
-
Page 16: Problembehebung
. Problembehebung Fehlfunktionen können manchmal banale Ursachen haben, aber manchmal auch von defekten Komponenten ausgehen. Wir möchten Ihnen hiermit einen Leitfaden an die Hand geben, um das Problem zu lösen. Wenn die hier aufgeführten Maßnahmen keinen Erfolg bringen, helfen wir Ihnen gerne weiter. -
Page 17: Benötigen Sie Weitere Unterstützung
Fehler Maßnahmen Die Fernbedienung • Überprüfen Sie, ob die Batterien in der Fernbedienung funktionstüch- funktioniert nicht. tig und richtig eingelegt sind. • Vergewissern Sie sich, dass das Sensorfenster nicht starker Lichtein- strahlung ausgesetzt ist. Menü kann nicht ge- • Prüfen Sie, ob CEC aktiviert ist. In diesem Fall kann das Menü nicht öffnet werden. -
Page 18: Produktdatenblatt
• In unserer Service-Community treffen Sie auf andere Benutzer sowie unsere Mitarbeiter und können dort Ihre Erfahrungen austauschen und Ihr Wissen weitergeben. Sie finden unsere Service-Community unter community.medion.com. • Gerne können Sie auch unser Kontaktformular unter www.medion.com/contact nutzen. • Selbstverständlich steht Ihnen unser Serviceteam auch über unsere Hotline oder postalisch zur Verfügung. -
Page 19: Impressum
Schweiz Öffnungszeiten Rufnummer Mo. - Fr.: 09:00 - 19:00 0848 - 33 33 32 Serviceadresse MEDION/LENOVO Service Center Ifangstrasse 6 8952 Schlieren Schweiz Belgien & Luxemburg Öffnungszeiten Rufnummer (Belgien) 02 - 200 61 98 Mo. - Fr.: 09:00 - 19:00 Rufnummer (Luxemburg) ... - Page 20 Sommaire Informations concernant le présent guide de démarrage rapide ........2 Contenu de l’emballage ......................2 Vue d’ensemble de l’appareil ....................3 3.1. Face avant ..............................3 3.2. Dos et côté droit ............................4 3.3. Télécommande ............................5 Mise en service.........................7 4.1. Déballage ..............................7 4.2. Montage ................................
-
Page 21: Informations Concernant Le Présent Guide De Démarrage Rapide
. Informations concernant le présent guide de démarrage rapide Ce guide de démarrage rapide est une version papier raccourcie de la notice d’utilisation complète. AVERTISSEMENT ! Lisez attentivement les consignes de sécurité et la notice d’utilisation complète avant la mise en service. Veuillez tenir compte des avertissements figurant sur l’appareil et dans la notice d’utilisation afin d’éviter tout dommage corporel ou matériel. -
Page 22: Vue D'ensemble De L'appareil
. Vue d’ensemble de l’appareil .. Face avant 1. Écran : éteindre/allumer la Smart TV 3. Capteur infrarouge : champ de réception du signal infrarouge de la télécommande. Voyant de fonctionnement : s’allume lorsque l’appareil se trouve en mode veille. -
Page 23: Dos Et Côté Droit
.. Dos et côté droit 5Vdc Max. 500mA 5Vdc Max. 500mA 13 Vdc/18 Vdc SPDIF Optic. out Video BACK AV IN 1. COMMON INTERFACE (CI+) : compartiment d’insertion pour l’utilisation de cartes de télévision payante 2. USB (5 V , 500 mA max.) : port USB pour lecture de médias/enregistrement (PVR) 3. -
Page 24: Télécommande
.. Télécommande MENU TEXT... - Page 25 1. Microphone 2. Touches numériques : TV : sélection du programme, télétexte : sélection de la page : DTV/satellite/navigateur médias : fonction de sous-titrage : mise en sourdine : touches de sélection des programmes TV : sélectionner le programme suivant (+)/précédent (−) ; télétexte : sélectionner la page sui- vante (+)/précédente (−) / : touche du microphone pour l’activation de la commande vocale : accès à...
-
Page 26: Mise En Service
. Mise en service Avant de mettre l’appareil en marche, lisez impérativement les consignes de sécurité. .. Déballage • Avant de commencer à déballer, choisissez un endroit approprié pour l’installation. • Ouvrez le carton avec grande précaution afin d’éviter tout endommagement éventuel de l’appa- reil. -
Page 27: Insertion De La Pile Dans La Télécommande
.. Insertion de la pile dans la télécommande Retirez le couvercle du compartiment à piles au dos de la télécommande. Insérez deux piles de type LR03/AAA/1,5 V dans le compartiment à piles de la télécommande. Re- spectez la polarité des piles (indiquée au fond du compartiment à piles). ... -
Page 28: Première Installation Après La Première Mise En Marche
.. Première installation après la première mise en marche Lorsque vous mettez l’appareil en marche pour la première fois, vous serez guidé dans la procédure de première installation. Vous pouvez accéder à la première installation à tout moment par le menu PARAMÈTRES >... - Page 29 ... Réglages Internet/réseau La prochaine étape vous permet d’établir des connexions réseau/Internet. Sélectionnez un réseau Wi-Fi Wi-Fi Autre réseau Vous pouvez également brancher un câble Ethernet pour vous connecter à Internet Utiliser Ethernet Passer Tous les réseaux Wi-Fi disponibles sont directement affi chés. ...
- Page 30 ... Conditions d’utilisation et autres préréglages Il vous sera ensuite demandé d’accepter les conditions d’utilisation, la déclaration de confidentialité et les conditions d’utilisation Google Play. Cette étape est obligatoire si vous souhaitez profiter des services Google. Lisez attentivement ces documents, puis sélectionnez l’option ACCEPTER pour confirmer votre accord et appuyez sur ...
- Page 31 Configurer la recherche de chaînes câblées FRÉQUENCE (KHZ) Réglez ici la fréquence. Le réglage par défaut est AUTO. IDENTIFIANT RÉSEAU Réglez ici l’ID de réseau. Le réglage par défaut est AUTO. Appuyez sur la touche pour démarrer la recherche. ...
- Page 32 Configuration du satellite CÂBLE UNIQUE /CÂBLE UNIQUE JESS IMPULSION DE TONALI Permet d’activer ou de désactiver le mode satellite. S’il est désactivé, TÉ il est impossible de modifier les réglages LNB ou de lancer une re- cherche. NOM DU SATELLITE Sélectionnez ici le satellite souhaité.
-
Page 33: Dépannage
. Dépannage Les dysfonctionnements ont des causes diverses, parfois banales, parfois dues à des composants défectueux. Nous vous proposons ci-après un petit guide qui vous aidera à tenter de résoudre vous- même le problème. Si les mesures que nous vous indiquons n’aboutissent pas, n’hésitez pas à nous appeler. -
Page 34: Vous Avez Besoin D'une Aide Supplémentaire
Erreur Mesures La télécommande ne • Vérifiez si les piles sont usées ou mal insérées dans la télécommande. fonctionne pas. • Assurez-vous que la fenêtre de capteur ne se trouve pas dans un ray- on lumineux intense. Il est impossible •... -
Page 35: Informations Relatives Au Service Après-Vente
• Au sein de notre Service-Community, vous pouvez discuter avec d’autres utilisateurs ainsi qu’avec nos collaborateurs pour partager vos expériences et vos connaissances. Vous pouvez accéder à notre Service-Community ici : community.medion.com. • Vous pouvez également utiliser notre formulaire de contact disponible ici : www.medion.com/contact. -
Page 36: Mentions Légales
La présente notice d’utilisation est protégé par les droits d’auteur. Toute reproduction sous forme mécanique, électronique ou sous toute autre forme que ce soit est interdite sans l’autorisation préalable écrite du fabricant. L’entreprise suivante possède les droits d’auteur : MEDION AG Am Zehnthof 77 45307 Essen Allemagne Veuillez noter que l’adresse ci-dessus n’est pas celle du service des retours. - Page 38 Sommario Informazioni relative alla presente guida rapida ..............2 Contenuto della confezione ....................2 Panoramica dell’apparecchio ....................3 3.1. Lato anteriore ..............................3 3.2. Lato posteriore e lato destro ........................4 3.3. Telecomando ...............................5 Messa in funzione ........................7 4.1. Apertura della confezione ........................7 4.2. Montaggio ..............................
-
Page 39: Informazioni Relative Alla Presente Guida Rapida
. Informazioni relative alla presente guida rapida Questa guida rapida è una versione cartacea breve delle istruzioni per l’uso complete. AVVERTENZA! Leggere attentamente le avvertenze sulla sicurezza e le istruzioni per l’uso complete prima della messa in funzione. Osservare le avvertenze riportate sull’apparecchio e nelle istruzioni per l’uso per evitare danni a persone e cose. -
Page 40: Panoramica Dell'apparecchio
. Panoramica dell’apparecchio .. Lato anteriore 1. Schermo : accensione/spegnimento della Smart TV 3. Sensore a infrarossi: campo di ricezione dei segnali a infrarossi del telecomando. Indicatore di funzionamento: si illumina quando l’apparecchio si trova in modalità standby. -
Page 41: Lato Posteriore E Lato Destro
.. Lato posteriore e lato destro 5Vdc Max. 500mA 5Vdc Max. 500mA 13 Vdc/18 Vdc SPDIF Optic. out Video BACK AV IN 1. COMMON INTERFACE (CI+): slot per l’utilizzo di schede Pay TV 2. USB (5V , 500 mA max.): porta USB per la riproduzione dei media/registrazione (PVR) 3. -
Page 42: Telecomando
.. Telecomando MENU TEXT... - Page 43 1. Microfono 2. Tasti numerici: TV: selezione dei programmi, televideo: selezione delle pagine : DTV/satellite/browser media: funzione sottotitoli : disattivazione dell’audio : Tasti di selezione canale TV: selezione canale successivo (+) / precedente (-); televideo: selezione pagina successiva (+) / precedente (-) / : Tasto del microfono per attivare il comando vocale : apertura della schermata iniziale...
-
Page 44: Messa In Funzione
. Messa in funzione Prima di mettere in funzione l’apparecchio è fondamentale leggere le “indicazioni di sicu- rezza”. .. Apertura della confezione • Prima di aprire la confezione scegliere un luogo adatto per il posizionamento. • Aprire il cartone con cautela per evitare danni all’apparecchio. Questo potrebbe succedere se la confezione viene aperta usando un coltello a lama lunga. -
Page 45: Inserimento Delle Batterie Nel Telecomando
.. Inserimento delle batterie nel telecomando Rimuovere il coperchio del vano batterie sul retro del telecomando. Inserire due batterie di tipo LR03/AAA/1,5 V nel vano batterie del telecomando. Prestare attenzio- ne alla corretta polarità delle batterie (indicata sul fondo del vano batterie). ... -
Page 46: Installazione Iniziale Dopo La Prima Accensione
.. Installazione iniziale dopo la prima accensione Quando si accende l’apparecchio per la prima volta, si viene guidati attraverso la prima installazio- ne. È possibile accedere all’installazione iniziale in qualsiasi momento dal menu IMPOSTAZIONI > PREFERENZE DEL DISPOSITIVO > REIMPOSTA ed eseguirla nuovamente. Hrvatski Indonesia IsiZulu... - Page 47 ... Impostazioni di rete/Internet Successivamente, è possibile effettuare connessioni di rete / Internet. Seleziona la tua rete Wi-Fi Wi-Fi Puoi anche collegare un cavo Ethernet per connetterti a Internet. Altra rete... Utilizza rete Ethernet Ignora Tutte le reti Wi-Fi esistenti vengono visualizzate direttamente. ...
- Page 48 ... Condizioni d’uso e altre preimpostazioni Verrà quindi chiesto di accettare i Termini di utilizzo, l’Informativa sulla privacy e i Termini di utilizzo di Google Play. Ciò è necessario se si intende utilizzare i servizi di Google. Leggere attentamente gli elementi desiderati e selezionare l’opzione ACCETTA per confermare e premere ...
- Page 49 ... Satellite Assicurarsi che il cavo satellitare sia collegato alla presa LNB. In IMPOSTAZIONE DI CONFIGURAZIONE DEL DVBS, sotto TIPO DI ANTENNA, è possibile selezionare UNIVERSALE, CAVO SINGOLO o UNICABLE JESS. Selezionare TIPO DI ANTEN NA e premere se si desidera modificare l’impostazione. Qui è preimpostata l’impostazione UNIVERSALE.
- Page 50 Installazione del satellite CAVO SINGOLO / UNICABLE JESS STATO SATELLITE Attiva/disattiva lo stato del satellite. Nello stato disattivato, non è possibile modificare le impostazioni dell’LNB o avviare una ricerca. NOME SATELLITE Selezionare qui il satellite desiderato. (solo con ELENCO PRESET CARICO) POSIZIONE Selezionare qui la posizione desiderata A o...
-
Page 51: Risoluzione Dei Problemi
. Risoluzione dei problemi A volte i malfunzionamenti possono avere cause banali, altre possono essere causati da compo- nenti difettosi. Vogliamo fornire una guida per risolvere tali problemi. Se le misure qui descritte non risolvono il problema siamo a completa disposizione per fornire assistenza. È sufficiente chiamare! Errore Misure Non viene visualizza-... -
Page 52: Serve Ulteriore Assistenza
Errore Misure Il menu non può esse- • Verificare se CEC è attivo. In caso positivo il menu non può essere re aperto. aperto, pertanto questo non rappresenta un difetto. In determinati casi si apre il menu dell’apparecchio collegato tramite HDMI. Questo dipende dal dispositivo di riproduzione e tale funzionalità... -
Page 53: Informazioni Relative Al Servizio Di Assistenza
Orari di apertura Assistenza Post-Vendita Lun.-ven.: 9.00-19.00 0848 - 33 33 32 Indirizzo del servizio di assistenza MEDION/LENOVO Service Center Ifangstrasse 6 8952 Schlieren Svizzera Queste e altre istruzioni per l’uso possono essere scaricate dal portale dell’assisten- za www.medionservice.com. - Page 54 Inhoudsopgave Informatie over deze beknopte gebruiksaanwijzing ............2 Inhoud van de levering ......................2 Overzicht van het apparaat ....................3 3.1. Voorkant ................................3 3.2. Achterkant en rechterkant ........................4 3.3. Afstandsbediening ............................5 Ingebruikname ........................7 4.1. Uitpakken ..............................7 4.2. Montage ................................ 7 4.3. Batterijen in de afstandsbediening plaatsen ...................8 4.4.
-
Page 55: Informatie Over Deze Beknopte Gebruiksaanwijzing
. Informatie over deze beknopte gebruiksaanwijzing Deze beknopte gebruiksaanwijzing is een verkorte gedrukte versie van de volledige gebruiksaan- wijzing. WAARSCHUWING! Lees de veiligheidsvoorschriften en de volledige gebruiksaanwijzing aandachtig door voordat u het apparaat in gebruik neemt. Volg de waarschuwingen op het apparaat en in de gebruiksaanwijzing op om letsel en materiële schade te voorkomen. -
Page 56: Overzicht Van Het Apparaat
. Overzicht van het apparaat .. Voorkant 1. Beeldscherm : schakel het apparaat in en uit 3. Infraroodsensor: ontvanger voor de infraroodsignalen van de afstandsbediening. Statuslampje: licht op als het toestel in stand-bymodus staat. -
Page 57: Achterkant En Rechterkant
.. Achterkant en rechter kant 5Vdc Max. 500mA 5Vdc Max. 500mA 13 Vdc/18 Vdc SPDIF Optic. out Video BACK AV IN 1. COMMON INTERFACE (CI+): sleuf voor het gebruik van kaarten voor betaal-tv 2. USB (5 V , 500 mA max.): USB-aansluiting voor mediaweergave/opname (PVR) 3. -
Page 58: Afstandsbediening
.. Afstandsbediening MENU TEXT... - Page 59 1. Microfoon 2. Cijfertoetsen: Tv: zender kiezen, teletekst: pagina kiezen : DTV/satelliet/mediabrowser: ondertitelfunctie : geluid dempen : Toetsen om een zender mee te kiezen Tv: volgende (+) / vorige (-) zender kiezen; teletekst: volgende (+) / vorige (-) pagina kiezen / : microfoontoets voor de activering van de spraakbesturing : openen van het startbeeldscherm : Digitale tv: informatie weergeven (bijv.
-
Page 60: Ingebruikname
. Ingebruikname Lees in ieder geval het hoofdstuk ‘Veiligheidsvoorschriften’ , voordat u het toestel in gebru- ik neemt. .. Uitpakken • Kies voordat u het toestel gaat uitpakken een geschikte plaats om het neer te zetten. • Open de doos heel voorzichtig om mogelijke beschadiging van het toestel te voorkomen. Dit kan bijvoorbeeld gebeuren als u een mes met een te lang lemmet gebruikt om de doos te openen. -
Page 61: Batterijen In De Afstandsbediening Plaatsen
.. Batterijen in de afstandsbediening plaatsen Verwijder het klepje van het batterijvak aan de achterkant van de afstandsbediening. Plaats twee batterijen van het type LR03/AAA/1,5V in het batterijvak van de afstandsbediening. Let hierbij op de polariteit van de batterijen (aangegeven op de bodem van het batterijvak). ... -
Page 62: Eerste Installatie Na De Eerste Keer Inschakelen
.. Eerste installatie na de eerste keer inschakelen Als u het toestel voor het eerst inschakelt, wordt u door de eerste installatie geleid. U kunt de eerste installatie altijd via het menu INSTELLINGEN > APPARAATVOORKEUREN > RESETTEN opro- epen en opnieuw uitvoeren. Lietuvių... - Page 63 ... Netwerk- en internetinstellingen Vervolgens kunt u de netwerk-/internetverbindingen tot brengen. Je wifi-netwerk selecteren wifi Je kunt ook een ethernetkabel aansluiten om verbinding met internet te maken. Ander netwerk... Ethernet gebruiken Overslaan Alle aanwezige wifi netwerken worden direct weergegeven. Kies met de toetsen het gewenste wifinetwerk en druk op .
- Page 64 ... Gebruiksvoorwaarden en andere voorinstellingen Daarna wordt u verzocht akkoord te gaan met de gebruiksvoorwaarden, de privacyverklaring en de Google Play-gebruiksvoorwaarden. Dit is noodzakelijk als u van plan bent om gebruik te maken van de Google-diensten. Lees deze aandachtig door en kies om te bevestigen de optie ACCEPTEREN en druk op ...
- Page 65 ... Satelliet Zorg ervoor dat uw satellietkabel met de aansluiting LNB is verbonden. In de DVBSCONFIGURATIEINSTELLING kunt u UNIVERSEEL, ENKELE KABEL of JESS SINGLE CABLE SYSTEM selecteren onder antennetype. Selecteer ANTENNETYPE en druk op als u de instelling wilt wijzigen. De UNIVERSEEL-instelling is hier vooraf ingesteld. Voor het antennetype ENKELE KABEL en ESS ENKELE KABEL zijn de volgende extra opties beschikbaar: Instelling voor DVBS-configuratie TUNER...
- Page 66 Satellietopstelling ENKELE KABEL / JESS ENKELE KABEL SATELLIETSTATUS Activeer/deactiveer de satellietstatus. In gedeactiveerde toestand kunnen geen LNB-instellingen worden gewijzigd en kan het zoeken niet worden gestart. SATELLIET NAAM Selecteer hier de gewenste satelliet. (alleen bij VOORINGE STELDE LIJST LADEN) POSITION Kies hier de gewenste positie A of B LNBFREQUENTIE Hier kunt u de center-frequentie instellen.
-
Page 67: Probleemoplossing
. Probleemoplossing Storingen kunnen voor de hand liggende oorzaken hebben, maar zijn soms ook het gevolg van defecte componenten. Wij geven u hierbij een leidraad om het probleem op te lossen. Als de hier vermelde maatregelen niet werken, helpen wij u graag verder. Bel ons gerust! Fout Maatregelen Geen beeld en geluid. -
Page 68: Hebt U Nog Hulp Nodig
Fout Maatregelen Menu kan niet wor- • Controleer of CEC is geactiveerd. In dat geval kan het menu niet wor- den geopend. den geopend. Het gaat hierbij niet om een defect. Mogelijk verschijnt het menu van het apparaat dat is aangesloten via HDMI. Dit is afhan- kelijk van de aangesloten speler. -
Page 69: Service-Informatie
• In onze Service-Community vindt u andere gebruikers en onze medewerkers en daar kunt u uw ervaringen uitwisselen en uw kennis delen. U vindt onze Service-Community onder community.medion.com. • U kunt natuurlijk ook ons contactformulier gebruiken onder www.medion.com/contact. • En bovendien staat ons serviceteam ook via de klantenservice of per post ter beschikking. Nederland... - Page 70 Contents Information about this short manual ..................2 Package contents ........................2 Device overview ........................3 3.1. Front ................................3 3.2. Rear and right-hand side .........................4 3.3. Remote control ............................5 Getting started ........................7 4.1. Unpacking..............................7 4.2. Mounting ..............................7 4.3. Inserting batteries in the remote control ..................8 4.4.
-
Page 71: Information About This Short Manual
. Information about this short manual This short manual is an abridged printed version of the full user manual. WARNING! Carefully read the safety instructions and the full user manual before using the device for the first time. Observe the warnings on the device and in the user manual to prevent damage to people and property. -
Page 72: Device Overview
. Device overview .. Front 1. Screen : Switch smart TV on/off 3. Infrared sensor: Reception field for the infrared remote control signals. Operating light: lights up when the device is in standby mode. -
Page 73: Rear And Right-Hand Side
.. Rear and right-hand side 5Vdc Max. 500mA 5Vdc Max. 500mA 13 Vdc/18 Vdc SPDIF Optic. out Video BACK AV IN 1. COMMON INTERFACE (CI+): Card slot for connecting pay TV cards 2. USB (5 V , 500 mA max.): USB connection for media playback/recording (PVR) 3. -
Page 74: Remote Control
.. Remote control MENU TEXT... - Page 75 1. Microphone 2. Number buttons: TV: Channel selection, teletext: Page selection : DTV/satellite/media browser: subtitle function : Mute : Channel selection buttons TV: select next (+) / previous (−) channel; teletext: select next (+) / previous (−) page : Microphone button for activating voice control : Open the start screen : Digital TV: show information (e.g.
-
Page 76: Getting Started
. Getting started Before using for the first time, ensure you read the “Safety instructions” section. .. Unpacking • Select a suitable place for setting up the device before unpacking. • Open the box very carefully, to avoid damaging the device. The device might get damaged if you use a knife with a long blade to open the box. -
Page 77: Inserting Batteries In The Remote Control
.. Inserting batteries in the remote control Remove the battery compartment cover on the back of the remote control. Insert two LR03 (AAA) 1.5 V batteries in the battery compartment of the remote control. Check the battery polarity (see label on the bottom of the battery compartment). ... -
Page 78: Initial Installation After Switching On For The First Time
.. Initial installation after switching on for the fi rst time You will be guided through the initial installation after you switch on the device for the first time. You can call up the initial installation at any time via the SETTINGS > DEVICE PREFERENCES > RE SET menu and run it again. - Page 79 ... Network/Internet settings Next, you can establish a connection to the network/Internet. Select your Wi-Fi network Wi-Fi You can also connect an Ethernet cable to connect to the Internet Other network... Use Ethernet Skip All available WLAN networks are displayed directly. ...
- Page 80 ... Terms of use and other default settings At this point, you will be prompted to accept the terms of use, privacy policy and Google Play terms of use. This is essential if you intend to make use of Google services. ...
- Page 81 ... Satellite Make sure that your satellite connection is connected to the LNB connection. In the DVBS CONFIGURATION SETTING, under ANTENNA TYPE, you can select UNIVER SAL, SINGLECABLE or JESS SINGLECABLE. Select ANTENNA TYPE and press if you want to change the setting.
- Page 82 Satellite Setup SINGLECABLE / JESS SINGLECABLE SATELLITE STATUS Activate/deactivate the satellite status. When deactivated, LNB set- tings can be changed or a search started. SATELLITE NAME Select the desired satellite here. (only with PRESET LIST LOAD) POSITION Select the desired position A or B here LNB FREQUENCY You can set the centre frequency here.
-
Page 83: Troubleshooting
. Troubleshooting Malfunctions can sometimes have quite trivial causes, but they may also be the result of defective components. We have included a brief troubleshooting guide below which may help to solve any problems. If these measures don’t solve the problem, we’ll be more than pleased to help you fur- ther. -
Page 84: Do You Need More Help
Fault Actions The menu cannot be • Check whether CEC is enabled. In this case, the menu cannot be ope- opened. ned. This is not a defect. In some cases, the menu of the device con- nected via HDMI opens. This is dependent on the playback device and must be supported accordingly. -
Page 85: Service Information
• In our Service-Community, you can meet other users, as well as our staff, and you can exchange your experiences and pass on your knowledge there. You will find our Service-Community at community.medion.com. • Alternatively, use our contact form at www.medion.com/contact. • You can also contact our Service team via our hotline or by post. Opening times Hotline number UK ... -
Page 86: Supplier/Producer/Importer
Please note that you cannot use the address below for returns. Please contact the Service Centre mentioned above. MEDION AG Am Zehnthof 77 45307 Essen Germany Importer for GB market by: MEDION AG c/o MEDION ELECTRONICS LTD. 120 Faraday Park, Faraday Road, Dorcan Swindon SN3 5JF, Wiltshire United Kingdom... - Page 88 Contenido Información acerca de esta guía breve ..................2 Volumen de suministro ......................2 Vista general del aparato ......................3 3.1. Parte delantera ............................3 3.2. Parte trasera y lado derecho ........................4 3.3. Mando a distancia ............................5 Puesta en servicio ........................7 4.1. Desembalaje ..............................7 4.2.
-
Page 89: Información Acerca De Esta Guía Breve
. Información acerca de esta guía breve Esta guía breve es una edición impresa resumida del manual de instrucciones completo. ¡ADVERTENCIA! Lea atentamente las indicaciones de seguridad y el manual de instrucciones completo an- tes de la puesta en servicio. Preste atención a las advertencias que aparecen en el propio aparato y en el manual de instrucciones para evitar daños personales y materiales. -
Page 90: Vista General Del Aparato
. Vista general del aparato .. Parte delantera 1. Pantalla : encender/apagar smart-TV 3. Sensor de infrarrojos: campo de recepción para las señales de infrarrojos del mando a distancia. Indicador de servicio: se enciende cuando el aparato se encuentra en el modo Standby. -
Page 91: Parte Trasera Y Lado Derecho
.. Parte trasera y lado derecho 5Vdc Max. 500mA 5Vdc Max. 500mA 13 Vdc/18 Vdc SPDIF Optic. out Video BACK AV IN 1. COMMON INTERFACE (CI+): ranura para tarjetas de televisión de pago 2. USB (5V , 500 mA max.): conexión USB para reproducción de archivos multimedia/grabación (PVR) 3. -
Page 92: Mando A Distancia
.. Mando a distancia MENU TEXT... - Page 93 1. Micrófono 2. Teclas numéricas: TV: selección de canal, teletexto: selección de página : DTV/satélite/navegador de medios: función de subtítulos : modo silencioso : teclas de selección de canal TV: seleccionar canal siguiente (+)/anterior (-); teletexto: seleccionar página siguiente (+)/ante- rior (-) / : tecla de micrófono para activar el control por voz : abrir la pantalla de inicio...
-
Page 94: Puesta En Servicio
. Puesta en servicio Es imprescindible que lea las indicaciones de seguridad antes de realizar la puesta en ser- vicio. .. Desembalaje • Antes de proceder al desembalaje, elija un lugar adecuado para la instalación. • Abra la caja con mucho cuidado para evitar dañar el aparato. Se podrían producir daños si para abrirla se utiliza un cuchillo con una hoja larga. -
Page 95: Colocación De Las Pilas En El Mando A Distancia
.. Colocación de las pilas en el mando a distancia Retire la cubierta del compartimento de las pilas de la parte trasera del mando a distancia. Coloque dos pilas del tipo LR03/AAA/1,5 V en el compartimento de las pilas del mando a distan- cia. -
Page 96: Primera Instalación Tras El Primer Encendido
.. Primera instalación tras el primer encendido Cuando encienda por primera vez su aparato, se le guiará por la primera instalación. En cualquier momento puede acceder a la guía de primera instalación desde el menú AJUSTES > PREFERENCI AS DEL DISPOSITIVO > RECUPERAR y ejecutarla. Dansk Deutsch Eesti... - Page 97 ... Ajustes de red/Internet Después, puede llevar a cabo las conexiones de red/Internet. Selecciona tu red Wi-Fi Wi-Fi También puedes conectarte a Internet con un cable de Ethernet. Otra red... Usar Ethernet Saltar Se le mostrarán directamente todas las redes wifi existentes. ...
- Page 98 ... Condiciones de uso y otros preajustes Acto seguido, se le solicitará que acepte las condiciones de uso, la declaración de privacidad y las condiciones de uso de Google Play. Esto es necesario si piensa utilizar los servicios de Google. ...
- Page 99 Pulse la tecla para iniciar la búsqueda. ... Satélite Asegúrese de que su cable para satélite esté conectado a la conexión LNB. En AJUSTES DE CONFIGURACIÓN DE DVBS, en TIPO DE ANTENA, puede seleccionar UNI VERSAL, SINGLECABLE o JESS SINGLECABLE. Seleccione TIPO DE ANTENA y presione si desea cambiar la configuración.
- Page 100 Configuración satelital SINGLECABLE / JESS SINGLECABLE ESTADO DEL SATÉLITE Active/desactive el estado del satélite. En estado desactivado, no pueden modificarse ajustes LNB ni iniciarse una búsqueda. NOMBRE DE SATÉLITE Seleccione aquí el satélite deseado. (solo con CARGAR LISTA PRECONFIGURADA) POSICIÓN Seleccione aquí...
-
Page 101: Resolución De Problemas
. Resolución de problemas A veces, los fallos de funcionamiento pueden deberse a causas banales, pero a veces también a componentes defectuosos. En este punto queremos ofrecerle una guía para poder solucionar el problema. Si las medidas aquí indicadas no le resultan útiles, estaremos encantados de ayudarle. ¡No dude en llamarnos! Fallo Medidas... -
Page 102: Necesita Más Ayuda
Fallo Medidas No se puede abrir el • Compruebe si está activado el CEC. Si así fuera, no podrá abrirse el menú. menú, lo cual no supone ningún defecto. En caso dado, se abrirá el menú del aparato conectado por HDMI. Esto dependerá del repro- ductor utilizado, que debe ser compatible. -
Page 103: Informaciones De Asistencia Técnica
Horario Hotline de posventa Lu-Vi: 08:30-17:30 (+34) 91 904 28 00 Dirección de asistencia técnica MEDION Service Center ENAME, S.A Parque Industrial de Coimbrões, LOTE 4 E 5 São João de Lourosa 3500-618 VISEU Portugal Puede descargarse tanto este como muchos otros manuales de instrucciones a tra- vés del portal de servicio www.medionservice.com. - Page 104 Índice Informações sobre este guia rápido ..................2 Volume de fornecimento ......................2 Vista geral do aparelho ......................3 3.1. Parte da frente .............................3 3.2. Parte de trás e lado direito ........................4 3.3. Telecomando ...............................5 Colocação em funcionamento ....................7 4.1. Desembalamento............................7 4.2. Montagem ..............................
-
Page 105: Informações Sobre Este Guia Rápido
. Informações sobre este guia rápido Este guia rápido é uma versão impressa resumida do manual de instruções completo. ATENÇÃO! Ler atentamente as instruções de segurança e o manual de instruções completo antes da colocação em funcionamento. Respeite os avisos no aparelho e no manual de instruções para evitar ferimentos pessoais e danos materiais. -
Page 106: Vista Geral Do Aparelho
. Vista geral do aparelho .. Parte da frente 1. Monitor : ligar/desligar a Smart TV 3. Sensor de infravermelhos: campo de receção para os sinais de infravermelhos do telecomando. Indicador de funcionamento: acende-se se o aparelho se encontrar no modo standby. -
Page 107: Parte De Trás E Lado Direito
.. Parte de trás e lado direito 5Vdc Max. 500mA 5Vdc Max. 500mA 13 Vdc/18 Vdc SPDIF Optic. out Video BACK AV IN 1. COMMON INTERFACE (CI+): ranhura para utilização de cartões Pay TV 2. USB (5 V , 500 mA máx.): porta USB para reprodução multimédia/gravação (PVR) 3. -
Page 108: Telecomando
.. Telecomando MENU TEXT... - Page 109 1. Microfone 2. Teclas numéricas: TV: seleção de programa, teletexto: seleção da página : DTV/satélite/navegador multimédia: função de legendas : desativar o som : teclas de seleção do programa TV: selecionar o programa seguinte (+) / anterior (-); teletexto: selecionar a página seguinte (+) / anterior (-) : tecla de microfone para ativação do comando de voz : abertura do ecrã...
-
Page 110: Colocação Em Funcionamento
. Colocação em funcionamento Leia impreterivelmente as “Indicações de segurança” antes de proceder à colocação em funcionamento. .. Desembalamento • Selecione um local adequado para a instalação antes do desembalamento. • Abra a caixa de cartão com muito cuidado para evitar possíveis danos no aparelho. Tal pode acontecer se utilizar uma faca com uma lâmina comprida para abrir a caixa. -
Page 111: Inserir As Pilhas No Telecomando
.. Inserir as pilhas no telecomando Remova a cobertura do compartimento para pilhas que se encontra na parte de trás do teleco- mando. Insira duas pilhas do tipo LR03 / AAA/ 1,5 V no compartimento das pilhas do telecomando. Ao fazê-lo, tenha em atenção a polaridade das pilhas (assinalada no fundo do compartimento das pilhas). -
Page 112: Primeira Instalação Após A Primeira Ligação
.. Primeira instalação após a primeira ligação Ao ligar o aparelho pela primeira vez, será orientado ao longo da primeira instalação. Pode aceder à primeira instalação a qualquer momento através do menu DEFINIÇÕES > PREFERÊNCIAS DO DISPOSITIVO > RESPOSIÇÃO e executá-la novamente. Norsk bokmål O´zbek Polski... - Page 113 ... Defi nições de rede/internet De seguida poderá estabelecer as ligações de rede e à internet. Selecionar rede Wi-Fi Wi-Fi Também pode ligar um cabo Ethernet para estabelecer ligação à Internet Outra rede... Utilizar Ethernet Ignorar São-lhe indicadas diretamente todas as redes WLAN existentes. ...
- Page 114 ... Termos de utilização e outras predefi nições Ser-lhe-á então solicitado que aceite os termos de utilização, a política de privacidade e os termos de utilização do Google Play. Tal é necessário se pretender utilizar os serviços da Google. Leia-os atentamente e selecione a opção ACEITAR para confirmar e prima ...
- Page 115 Configuração da procura de cabos ID DA RETE Defina aqui o ID da rede. A definição padrão é AUTOMÁTICO. Prima a tecla para iniciar a sintonização. ... Satélite Certifique-se de que o seu cabo de satélite está conectado à ligação LNB. ...
- Page 116 Configuração de Satélite CABO ÚNICO / CABO ÚNICO JESS ESTADO DO SATÉLITE Ative/Desative o estado do satélite. No estado desativado não é pos- sível alterar quaisquer definições LNB nem iniciar uma sintonização. NOME DO SATÉLITE Selecione aqui o satélite desejado. (somente com CARREGAR LISTA PRÉDEFINIDA)
-
Page 117: Resolução De Problemas
. Resolução de problemas Por vezes, as falhas de funcionamento podem ter causas banais, no entanto, por vezes, também podem ser provocadas por componentes defeituosos. Gostaríamos de lhe apresentar alguns prin- cípios orientadores para resolver os problemas. Se as medidas aqui mencionadas não permitirem resolver o problema, teremos todo o gosto em ajudá-lo. -
Page 118: Precisa De Mais Ajuda
Erro Medidas O telecomando não • Verifique se as pilhas no telecomando estão funcionais e devidamen- funciona. te inseridas. • Certifique-se de que a janela do sensor não está exposta a uma inci- dência de luz forte. Não é possível abrir o •... -
Page 119: Informações Sobre Serviços
Tem à sua disposição diferentes formas de entrar em contac- to conosco: • Também pode utilizar o nosso formulário de contacto em www.medion.com/contact. • E naturalmente a nossa equipa de assistência técnica também está ao seu dispor através da linha de assistência ou por correio. - Page 120 MSN 3003 5392...
Need help?
Do you have a question about the LIFE P13299 and is the answer not in the manual?
Questions and answers