Medion LIFE P13207 Operating Instructions Manual
Hide thumbs
Also See for LIFE P13207:
- Operating instructions manual (78 pages) ,
- Quick start manual (84 pages)

Related Manuals for Medion LIFE P13207


Summary of Contents for Medion LIFE P13207
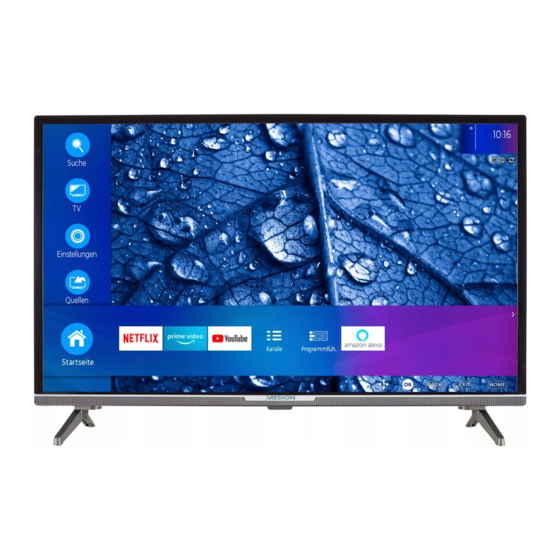
- Page 1 Operating instructions Smart-TV MEDION LIFE P13207 (MD 30018) / P14057 (MD 30019) / P14313 (MD 30020)
-
Page 2: Table Of Contents
Settings menu ..........22 10.5. TV menu ............30 10.6. Media browser menu ........32 HbbTV system ..........33 Data protection MEDION Smart TV ....33 Troubleshooting ..........34 13.1. Do you need more help? ......35 13.2. Smart TV pixel faults ........35 Cleaning ............36... -
Page 3: Information About These Operating Instruc- Tions
Information about these op- 1.1. Explanation of symbols erating instructions If a block of text is marked with one of the warning sym- bols listed below, the hazard described in that text must Thank you for choosing our product. We hope be avoided to prevent the potential consequences descri- you enjoy using this device. -
Page 4: Proper Use
1.2. Proper use 2. Package contents This is an information technology device and is also suit- Please check your purchase to ensure that all items are able for multimedia applications. This device is used to included. If anything is missing, contact us within 14 days receive and play back television programmes. -
Page 5: Safety Instructions
3. Safety instructions – The universal remote control has a class 1 infrared diode. Never use optical devices 3.1. Operating safety to look at the LED. – Check the device for damage before using CAUTION! it for the first time. A defective or damaged Risk of injury! device must not be placed into operation. -
Page 6: Repairs
– Keep your Smart TV and all connected – Do not place the TV on higher or high appliances away from moisture and avoid furniture such as wall cabinets or shelves dust, heat and direct sunlight. Non-com- without ensuring that both the furniture pliance with these instructions can lead to and the TV are safely and securely held in faults or damage to the Smart TV. -
Page 7: Safety When Connecting
– Do not touch the plug with wet hands. NOTICE! – Always hold the plug by its housing and Risk of damage! never pull it out of the socket using the Large changes in temperature or fluc- cable. tuations in humidity can cause mois- –... -
Page 8: Eu - Declaration Of Conformity
1 - 13 19,9 formity 5150 – 5250 36 – 48 22,4 MEDION AG hereby declares that this product conforms 5250 – 5350 52 – 64 22,5 with the essential requirements and the remaining rele- vant regulations: 5470 – 5725 100 –... -
Page 9: Device Overview
5. Device overview 5.2. Rear and right-hand side 5.1. Front MD 30018: 13 Vdc/18 Vdc SPDIF 5Vdc Max. 500mA Optic. out Video 5Vdc Max. 500mA BACK AV IN MD 30019 / MD 30020: COMMON INTERFACE (CI+): Card slot for connecting pay TV cards 2. -
Page 10: Remote Control
8. E X I T : Exiting the menu 5.3. Remote control 9. M E D I O N : Open the MEDION portal 10. T W I T C H : Call up Twitch site : Multifunction button for programme channel or input source 12. -
Page 11: Getting Started
6. Gett ing started 6.3. Inserting batt eries in the re- mote control Before using for the first time, ensure you read Remove the battery compartment cover on the back the “Safety instructions” section. of the remote control. Insert two LR03 (AAA) 1.5 V batteries in the battery 6.1. -
Page 12: Switching The Smart Tv On And Off
Afterwards, press O K to continue. after five minutes. A countdown timer will You will be asked to agree to the MEDION Smart TV appear on the screen until this time. This func- Privacy Policy. This is necessary if you intend to use the tion is not available for all sources. - Page 13 INTERNET SPEED TEST 6.7.3. Receptiom method Press the O K button in order to test the Internet speed. ADVANCED SETTINGS Press the O K button to call up further network configura- Select Broadcast Type: tion options. – CONFIGURATION Scan Encrypted Channels None Select favourite network type Choose the setting AUTOMATIC IP or MAN...
-
Page 14: Using The Multimedia Connections
6.8.3. HDMI ARC (Audio Return Channel) During the search, the scan progress is displayed. In ad- dition, the number of found TV and radio stations is dis- If you want to use a TV set as a signal receiver AND signal played. -
Page 15: Operation
Connect the VGA port of your TV to the YPbPr cinch 7.3. Screen sett ings connections (red/blue/green) of the video device. Use Depending on the programme, the pictures are trans- a YPbPr adapter (optional). mitted in the formats 4:3 or 16:9. As soon as the PIC ... -
Page 16: Selecting The Source
Alternatively, use the direction buttons to go to Above the list, then use the buttons to select EDIT and use the buttons to select a station to the desired source. Confirm your selection with the O K button. be added to the favourites list and press O K . -
Page 17: Teletext
8. Teletext 9. Using the On-Screen Dis- play menu (OSD menu) Teletext is a free service broadcast by most channels and provides the latest news, weather, TV listings, share prices, 9.1. Navigating in the menu subtitles and other information. Your TV set offers many useful functions for using teletext including multipage ... - Page 18 The media portal hides behind areas the apps should be selected from. In ad- the MEDION button, but can also be called up using the dition, you can reset the portal so that the por- M E D I O N button. The first time you use the device, you tal home page is reset to the factory default.
- Page 19 10.1.2. Channels menu – EDIT NAME This function enables you to rename the cur- The channel list is where you manage your channels. The rently selected channel. Press the O K button CHANNELS menu can also be opened by pressing the O K and select the desired characters with the button when the device is in use.
- Page 20 – A Z 10.1.3. Programme guide (EPG – Electron- Here you can individually select each letter of ic Programme Guide) menu the alphabet, at which point only the channels You can use the E P G button to open the programme beginning with the appropriate letter will be guide directly.
-
Page 21: Source Menu
10.2. Source menu The next table shows the additional button functions within the programme guide: This menu displays all active signal sources and can be se- But- lected with the button. Then press the O K button to Function call up the selected source. -
Page 22: Settings Menu
10.4. Sett ings menu – DEVICE Select the ENABLED setting if you want to 10.4.1. Devices menu connect the device to an external speaker via Bluetooth. Then press the O K button to search for available Bluetooth connections. Devices All found connections are then displayed. Use ... - Page 23 10.4.2. Picture menu PC POSITION (only in VGA mode) – AUTOPOSITION As soon as the PICTURE menu is selected using the If you want to move the image, select AUTO buttons, the MODE, ENERGY SAVING and PICTURE POSITION and press O K to move it back to ZOOM submenus appear above for quicker navigation the centre.
- Page 24 – COLOUR SHIFT CEC network via the HDMI2 connection. This setting can only be selected if you have previously activated the CEC Set colour shift function under SETTINGS> DEVICE SETTINGS> CEC. – COLOUR TUNER If this is not the case, a message appears when selecting Activate/deactivate the colour tuner.
- Page 25 DISCONNECT – HEADPHONE Disable network connection Set the headphone volume here. This can PRESS WPS ON YOUR WIFI ROUTER only be changed if SOUND OUTPUT is set to (only for WLAN) HEADPHONE ONLY. This option enables you to quickly establish a WPS con- WARNING! nection via a wireless network (WLAN).
- Page 26 – FREQUENCY 10.4.5. Installation menu Displays the frequency of the current station. The number buttons can be used to specify Installation the frequency to be searched. D. AERIAL – CHANNEL Automatic channel scan Select the channel number for which you want Manual channel scan to carry out a search.
- Page 27 INSTALLATION SETTINGS – AUDIO DESCRIPTION Here you can make additional installation settings. If the station broadcasts special audio signals for visually impaired users, you can change – STANDBY SEARCH the setting to ON to receive these signals. In If the function is set to ON, the TV will search the submenu, select the AVAILABLE LAN...
- Page 28 PRIMARY SUBTITLE LANGUAGE Additional setup steps may be required for some CI mod- ules, which you can complete in the CONDITIONAL AC If the programme includes subtitles for hear- CESS menu. ing impaired users, you can set the preferred If no module is inserted, the message NO COMMON IN language here.
- Page 29 – MATURITY LOCK SOURCES If this option is set, it will obtain age informa- In this menu, you can activate and deactivate sources. tion from the broadcaster. Is the correspond- However, individual sources cannot be selected here. Select a source using the buttons and press O K . ing age level in the device deactivated, access A menu then opens featuring the options ENABLED, to the program is blocked.
-
Page 30: Tv Menu
MORE... 10.5.1. Timer menu – MENU TIMEOUT Shift Timer Here you can set the time after which the OSD If a shift timer has been programmed via the EPG, the menu closes automatically. relevant programme is displayed in the TIMERS menu. –... - Page 31 MAX TIMESHIFT • Enter the end time. This is where you can set the max. timeshift. The timeshift function enables you to pause DURATION playback during the recording with or fast The duration is determined automatically. forward or rewind using and . The re- REPEAT cording runs unimpaired in the background.
-
Page 32: Media Browser Menu
er. Navigate in the media browser using the di- If you have previously started the timeshift re- rection buttons. Open media files using the O K button. cording using the button, you can also start The following options are available: the timeshift playback with this button. -
Page 33: Hbbtv System
The audio video sharing network service allows a data ex- MEDION shall not be liable if the HbbTV, the portal or a change between devices if they support the audio video service does not comply with the user’s requirements, sharing function. -
Page 34: Troubleshooting
13. Troubleshooting There are stripes on the screen or the colours are faded. Malfunctions can sometimes have quite trivial causes, but • Is there interference from another device? they may also be the result of defective components. We • Transmission antennae on radio stations, ham radios have included a brief troubleshooting guide below which and portable phones can also cause interference. -
Page 35: Do You Need More Help
13.1. Do you need more help? Defect Defect type 3 Defect type 2 Defective If the suggestions in the previous sections did not solve type 1 Pixel Continu- sub-pixel your problem, please contact us. To make it easier for us to fault Continu- ously... -
Page 36: Cleaning
14. Cleaning 16. Disposal Packaging DANGER! The product has been packaged to protect it Risk of electric shock! from damage in transit. The packaging is made There is a risk of death due to an elec- of materials that can be recycled in an environ- mentally friendly manner. -
Page 37: Technical Specifications
17. Technical specifi cations Channels VHF (Band I/III) Smart-TV P13207 UHF (BAND U) (MD 30018) HYPERBAND Device name P13207 (MD 30018) CABLE TV (S1-S20) / (S21-S41) Rated voltage 220–240 V ~ 50 Hz HD DVB-T Rated voltage/current DVB-T2 HD (H.265) 13 V/18 V , 300 mA max. -
Page 38: Product Data Sheet
Transmitting Frequency range/MHz Channel The Bluetooth® word mark and logos are registered trade- power/dBm marks of Bluetooth SIG, Inc. and are used by MEDION un- 2400 – 2483.5 1 – 13 19.9 der licence. The Android™ word mark and logos are registered trade- 5150 –... -
Page 39: Service Information
Please always contact our Customer Service team 1 800 992508 first. Service address MEDION Electronics Ltd. 120 Faraday Park, Faraday Road, Dorcan Swindon SN3 5JF, Wiltshire United Kingdom You can download this and many other sets of operating instruc- tions from our service portal at www.medionservice.com. -
Page 40: Index
21. Index Network search ................26 Ambient temperature ..............37 Operation ..................15 Anschließen OSD menu ..................17 Antenne ..................12, 14 Applications ................21 Audio video sharing ..............33 Channels ..................19 Audio-video sharing ...............22, 33 Home page ..................17 Installation ..................26 Batteries ...................7, 11, 36 Media browser ................
Need help?
Do you have a question about the LIFE P13207 and is the answer not in the manual?
Questions and answers