Table of Contents
Advertisement
Quick Links
Advertisement
Table of Contents

Related Manuals for baxter AK 96


Summary of Contents for baxter AK 96
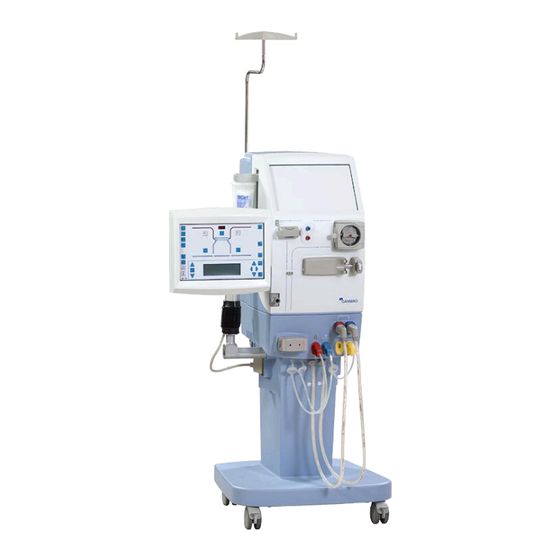
- Page 1 Welcome Home! AK 96 (Open take-off) Independent Home Dialysis System...
-
Page 2: Table Of Contents
These instructions are based on the use of the WRO 300 H unit, if you are using another WRO you should follow the instructions for use for that unit. These short instructions are for the use of the AK 96 dialysis machine running with software version 3.5. The operator of the machine should still read and understand the full text of the AK 96 dialysis machine Operator's Manual sw v3.5 MHCEN12609 before performing a patient treatment. -
Page 3: Preparing For The Treatment
3. Check to ensure rinse light is not on, and the RO disinfect is completed properly. 4. Ensure the main power to the WRO and AK 96 is turned on. 5. Ensure all fluid and drain tubes are connected. 6. Ensure hands have been washed, and room has been prepared. -
Page 4: Starting The Treatment
If you are performing SN dialysis, include the steps marked Single Needle Dialysis. 1. Turn the AK 96 machine on. When the AK 96 has turned on, the WRO will automatically start. (Section 6.2) 2. After 10 minutes, check for Chloramines (S2 & S3), and fill in weekly log sheet (P1, P2, P3, P4 etc.) - Page 5 Select key. 6. Fix the dialyzer in the holder. Confirm dialyzer type to access assisted priming procedure. 7. Hang the saline bag on the stand. 5/18/18 AK 96 Independent Home Dialysis System...
-
Page 6: Lining The Machine - Arterial Line
2. Clamp the arterial line and spike the priming bag of saline. 3. Insert line into the blood pump. 4. Make sure the blood pump segment collars are outside the pump housing. 5. Guide the bloodline. 5/18/18 AK 96 Independent Home Dialysis System... - Page 7 8. Introduce the blood line into the arterial clamp (marked with a red dot). Pull the blood line lightly downwards. 9. Push the arterial pressure transducer into the pressure connector: you’ll hear a slight click, and feel the connector lock into place. 5/18/18 AK 96 Independent Home Dialysis System...
-
Page 8: Lining The Machine - Venous Line
Adjust the position of the venous drip chamber to a proper position, as low as possible to prevent air from passing into the venous line and to avoid air detector alarms. Single Needle dialysis: Install venous expansion chamber to the holder. 5/18/18 AK 96 Independent Home Dialysis System... - Page 9 You’ll hear a slight click, and feel the connector lock into place. 8. Clamp the remaining lines on the top of the air detector chamber. Single Needle: Tilt the expansion chamber holder backwards until it clicks into position. 5/18/18 AK 96 Independent Home Dialysis System...
-
Page 10: Lining The Machine - Heparin Syringe Pump
The heparin pump will start to run at treatment start when blood is detected in the venous bloodline. The heparin pump is pre-set and will automatically stop ___min before the end of treatment. 5/18/18 AK 96 Independent Home Dialysis System... -
Page 11: Preparing The Saline Infusion Line
6. Attach the infusion inlet port on the arterial infusion line and clamp. There are different infusion lines and saline bags. This is just one example. The purpose of the infusion is to avoid – episodes of hypotension. 5/18/18 AK 96 Independent Home Dialysis System... -
Page 12: Priming The Dialysis Circuit
2. Press Select to start assisted priming. 3. Open clamp on arterial line/saline bag. 4. Start the Blood pump to activate the assisted priming procedure. The procedure will start with the fill up phase. 5/18/18 AK 96 Independent Home Dialysis System... - Page 13 6. Press the flashing Air Detector button in order to activate the air detector. 7. When the blood pump has stopped, turn the dialyzer (red end up). 8. Press the flashing Fluid bypass button. 9. Press the flashing Blood pump button. 5/18/18 AK 96 Independent Home Dialysis System...
- Page 14 11. Check that the venous line is correctly placed in the priming detector and press Select to continue. 12. Extra priming If extra priming is necessary, continue priming by selecting EXTRA PRIMING and by pressing the Select key, then the flashing Blood pump button: 5/18/18 AK 96 Independent Home Dialysis System...
- Page 15 If the following attention appears, please refer to patient guidelines for High Venous Pressure Test procedures. 13. Connect Patient When ready to connect patient, select CONNECT PATIENT using the Right/Left cursor keys when the priming procedure is complete. 5/18/18 AK 96 Independent Home Dialysis System...
-
Page 16: Setting Parameters
If you reduce the time, your dialysis will be less efficient. To change the time, press the Time button. Press the Select key to activate the SET function. Use the Display Up/Down keys to change the SET time. 5/18/18 AK 96 Independent Home Dialysis System... - Page 17 Use the Display Up/Down keys to change the set Ultrafiltration volume (patient weight loss). 3. If necessary, set the following parameters: a. Heparin b. Sodium( Na+) c. Bicarbonate(HCO3) 4. BPM Take standing and sitting Blood Pressure (or other, as per unit policy). 5/18/18 AK 96 Independent Home Dialysis System...
-
Page 18: Connect To The Dialysis System
8. Press the Blood Pump button to start the blood pump. The blood pump will start at 100ml/min. 9. When machine detects blood, pump stops. Restart blood pump. 10. The Treatment Overview Screen will be displayed. 5/18/18 AK 96 Independent Home Dialysis System... -
Page 19: Start The Treatment
Increase pump speed slowly while observing venous and arterial pressure. 2. Adjust the blood flow settings using the Blood Pump Up/Down keys Your desired blood flow is _______ml per min. 3. Press the flashing Start/UF/Stop button to start ultrafiltration. 5/18/18 AK 96 Independent Home Dialysis System... - Page 20 7. Check that the venous drip chamber is ¾ full and the short lines from the top are clamped. Single Needle Dialysis: Verify that both expansion chambers are in upright position and filled to the correct level. 5/18/18 AK 96 Independent Home Dialysis System...
- Page 21 Record in log sheet with actual pump speed (if required by unit policy). Single Needle Dialysis: Press the Blood Path button. Select SINGLE NEEDLE using the keypad. Single Needle Dialysis: Press the Select key to deactivate the single needle function. 5/18/18 AK 96 Independent Home Dialysis System...
-
Page 22: End Of Treatment And Disconnection
ACC QB (equivalent to volume of blood processed), ACC UFV, Kt/V (as needed). Single Needle Dialysis: Press the Blood Path button. Select SINGLE NEEDLE using the keypad. Single Needle Dialysis: Press the Select key to deactivate the single needle function. 5/18/18 AK 96 Independent Home Dialysis System... - Page 23 5. Connect the arterial blood line to the rinse back solution and open the clamp. 6. Press the Select key for 3 seconds to start the RINSE BACK. 7. Start the blood pump. 5/18/18 AK 96 Independent Home Dialysis System...
- Page 24 10. When rinse back is complete clamp the venous bloodline and access. 11. Disconnect the venous line from the access as per hospital policy. 12. Select DISCONNECT PATIENT using the right/left cursor keys and press Select. 5/18/18 AK 96 Independent Home Dialysis System...
-
Page 25: Emptying The Blood Lines
5. Press Select 3 seconds to deactivate Air Detector. 6. Start Blood pump. 7. Open arterial line clamp. 8. When the circuit is empty, stop Blood pump. 9. Turn the dialyzer so the blue end is up. 5/18/18 AK 96 Independent Home Dialysis System... - Page 26 12. Press Select key for 3 sec to drain the BiCart. 13. Remove the BiCart when emptied. 5/18/18 AK 96 Independent Home Dialysis System...
- Page 27 3. Select Change using the key pad. 4. Select CleanCart using the key pad. 5. Press the Select key for 3 seconds or until the Rinse/ Disinfection button lights up. 6. Install CleanCart when attention alarm appears. 5/18/18 AK 96 Independent Home Dialysis System...
-
Page 28: Integrated Disinfection
Press MUTE to silence the buzzer. Note the three digit number and have it available if technical assistance is required. Refer to the alarm chapters of the WRO series included with the patient training materials. 5/18/18 AK 96 Independent Home Dialysis System... - Page 29 Abbreviations list: SN: Single Needle Dialysis. DN: Double Needle Dialysis. References: AK 96 Operator Manual SW version 3.5. WRO 300 H Operator Manual SW version 5.x 2012. 5/18/18 AK 96 Independent Home Dialysis System...
- Page 30 For Customer support call 1-800-387-5277 Baxter Corporation 7125 Mississauga Rd Mississauga, Ontario L5N 0C2 Canada www.baxter.ca Gambro, AK96, BiCart, CleanCart, WRO 300 and WRO 300 H are registered trademarks of Baxter International Inc., or its subsidiaries. CAMP/MG3/16-0015 5/18/18 AK 96 Independent Home Dialysis System...
Need help?
Do you have a question about the AK 96 and is the answer not in the manual?
Questions and answers