Advertisement
Quick Links
Advertisement

Related Manuals for HighPoint Rocket 7608A


Summary of Contents for HighPoint Rocket 7608A
- Page 1 Rocket 7608A (R7608A) 8x NVMe Port to PCIe 5.0 x16 NVMe RAID AIC Quick Installation Guide V1.00...
- Page 2 System Requirements PC Requirements System with a free PCIe5.0 (or 3.0 or 4.0) x16 slot Operating System Windows 11,10/Server 2022,2019,2016/ Microsoft Hyper-V RHEL/Debian/Ubuntu/Fedora/Proxmox/Rocky Linux (Linux kernel 3.10 and later) R7608A Kit Content 1x R7608A NVMe RAID AIC ...
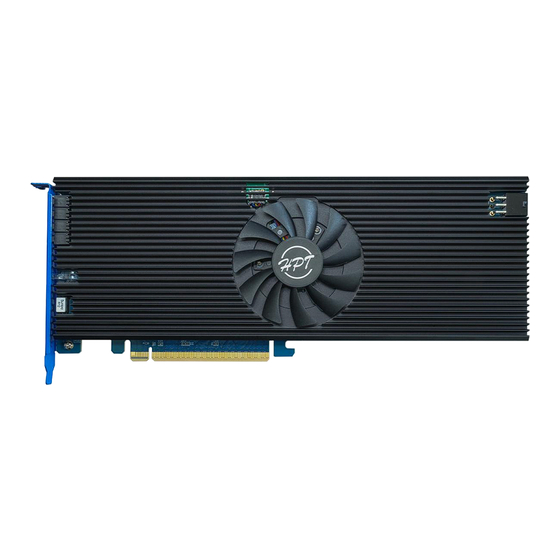
- Page 3 R7608A Hardware Front View Low-Noise Cooling Fan External power port PCIe 5.0 x16 Host Interface Full-height bracket (optional low-profile bracket included)
- Page 4 LED View SSD0 LED SSD1 LED SSD3 LED SSD2 LED SSD5 LED SSD4 LED SSD6 LED SSD7 LED Status LED Fault LED Note: Please refer to the detailed description of LED colors and their status in the R7608A NVMe RAID AIC User Guide on the official website.
-
Page 5: Hardware Installation
2. Unpack and remove the R7608A and check it for damage. If it appears damaged, please get in touch with HighPoint Technical Support. 3. Remove the six screws on the back of the R7608A that secure the heat sink to the PCB and lift the heat sink up from the right side to remove it. - Page 6 2) Select the thermal pad that corresponds to the NVMe SSD. Single-sided Double-sided Left 70mm*90mm*1.5mm 70mm*90mm*0.75mm Right 84mm*90mm*1.5mm 84mm*90mm*0.75mm Left Right Note: This picture only shows the thermal pads on the left and right positions; please follow the table above for specific thermal pad options. 3) Remove the blue film from one side of the thermal pads.
- Page 7 4) Align the thermal pad with the M.2 port and press gently to ensure a tight fit. 5) Remove the blue film from the other side of the thermal pads. 5. Install the NVMe SSDs to the R7608A. 1) Confirm the direction of the rubber (pointing in the opposite direction of the M.2 port).
- Page 8 2) Gently insert the NVMe SSD into the M.2 connector. 3) Press the side of the rubber to align it and insert it into the retention hole on the end of the NVMe SSD. 4) Rotate the direction of the rubber so that it points to the M.2 port to secure the NVMe SSD better.
- Page 9 6. Install the heat sink to the R7608A PCB. 1) Remove the blue film from the thermal pad on the heat sink. 2) Align the left side of the heat sink with the PCB and carefully lower the right side. 3) Carefully and properly align the heat sink with the PCB and retighten the six screws that were removed in step 3.
- Page 10 7. Insert the R7608A into an available PCIe slot. 1) Shut down the system and disconnect the AC power cord. 2) Align the R7608A to one of the motherboard’s available slots. Press down gently but firmly to seat the R7608A correctly in the slot. 3) Connect the 6-pin PCIe power cable to the external power connector on the right side of the R7608A.
-
Page 11: Customer Support
FAQ & Troubleshooting: FAQ - HighPoint Technologies, Inc. (helpjuice.com) Customer Support If you encounter any problems while utilizing the R7608A or have questions about this or any other HighPoint Technologies, Inc. product, please contact our Customer Support Department. Web Support: https://www.highpoint-tech.com/support-and-services...
Need help?
Do you have a question about the Rocket 7608A and is the answer not in the manual?
Questions and answers