Table of Contents
Advertisement
Quick Links
BLACK
HDX BRAND SHEET
BLACK
100% Black when PMS 432 isn't av
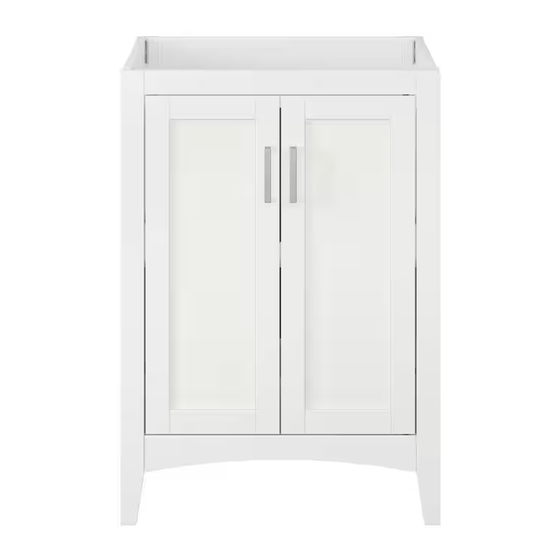
TILTON 24IN FOLDING BATH VANITY CABINET WITHOUT TOP IN
We appreciate the trust and confidence you have placed in Glacierbay Collection through the purchase of this Vanity.We strive to
continually create quality products designed to enhance your home. Visit us online to see our full line of products available for your
aiable as an option
USE AND CARE GUIDE
Questions, problems, missing parts?
Before returning to the store, call Glacierbay Collection Customer Service
8 a.m - 7 p.m., EST, Monday- Friday, 9 a.m.- 6 p.m.,EST, Saturday
HOMEDEPOT.COM/GLACIERBAY
home improvement needs. Thank you for choosing Glacierbay Collection!
HEADER LOCKUP
P
CH
WHITE
1-855-434-5224
THANK YOU
GRAYSCALE
COLOR PALETTE
Gray Backgr
Item #1011624142
PRIMARY
COLOR PALETTE
Model #TJ-0114V2421WH
LOGO CLEAR S
PRIMARY
Negative
MS 1385 C
BLACK
ARCOAL
CMYK: 0/54/100/5
SAGE GREEN
CMYK: 0/
RGB: 213/121/3
RGB: 35/
Advertisement
Table of Contents

Subscribe to Our Youtube Channel
Related Manuals for Glacier bay TILTON TJ-0114V2421WH


Summary of Contents for Glacier bay TILTON TJ-0114V2421WH
- Page 1 GRAYSCALE BLACK HEADER LOCKUP COLOR PALETTE Gray Backgr HDX BRAND SHEET Item #1011624142 PRIMARY COLOR PALETTE Model #TJ-0114V2421WH LOGO CLEAR S PRIMARY PRIMARY BLACK Negative MS 1385 C BLACK ARCOAL CMYK: 0/54/100/5 SAGE GREEN CMYK: 0/ 100% Black when PMS 432 isn’t av aiable as an option RGB: 213/121/3 RGB: 35/...
-
Page 2: Table Of Contents
Table of Contents Table of Contents..........2 Assembly..............7 Safety Information..........2 1 Unfolding the vanity sub-assembly........7 Warranty............3 2 Assembling the bottom panels..........7 Limited lifetime Warranty..........3 3 Assembling the shelves............8 What is Covered..............3 4 Assembling the handles............8 What is not Covered............3 5 Assembling vanity top (not included in the package)..9 California and Minnesota Residents......3 6 Assembling the backsplash (not included in the package)..9 California residents............3... -
Page 3: Warranty
Warranty This warranty applies to the distributor's vanities installed for commercial and residential use. The distributor warrants that, when installed in accordance with the Recognized Plumbing Industry Practice, the vanities are free of manufacturing defects for a period of one (1) year from the date of purchase. We guarantee your satisfaction with each vanity. -
Page 4: Pre-Assembly
Pre-Assembly PLANNING ASSEMBLY Estimated Installation Time: 20-30 minutes (24 hours for silicone caulk to dry). Number of people required: Two adults and several steps are more easily handled with two adults. Check the vanity for damage before installation. If any part of the vanity is missing or damaged, contact the Customer Service Team at 1-855-434-5224. -
Page 5: Parts Included
Pre-Assembly (continued) PARTS INCLUDED NOTE: Parts not shown to actual size and they are pre-installed. Part Description Quantity Part code Left Door 0114V2421-LDO 0114V2421-RDO Right Door 0114V2421-SP Side Panels 0114V2421-FF Front Frame 0114V2421-BF Back Frame Bottom Panel 0114V2421-BP Shelf 0114V2421-SH HOMEDEPOT.COM/GLACIERBAY Please contact 1-855-434-5224 for further assistance. -
Page 6: Package Contents
Pre-Assembly (continued) PACKAGE CONTENTS Part Description Quantity Part code Vanity Sub-Assembly 0114V2421-VSA Bottom Panel 0114V2421-BP Shelf 0114V2421-SH Shelf Brackets SB-00002300 SC-70012303 Screws HD-02000350 Handles Bolts BO-53225321... -
Page 7: Assembly
Assembly Unfolding the Vanity Sub-Assembly Fully unfold the vanity sub-assembly (A) Assembling the bottom panels Pull the side panels out until they are straight, and hold them. Place the bottom panels (G) from behind the vanity in a side to side direction. NOTE: The doors must be closed. -
Page 8: Assembling The Shelves
Assembly Assembling the shelves Insert the shelf brackets (CC) into the desired holes. Ensure that all the shelf brackets (CC) are level. The face of the shelves (H) with pilot hole facing downward. And U shape cut out facing backward. Use a screwdriver (not provided) to screw the screws (DD). -
Page 9: Assembling Vanity Top (Not Included In The Package)
Assembly (continued) Assembling vanity top (not included in the package) Apply silicone to the top edge of vanity. Place the top. Be sure to flush the back and evenly over hang left-right. Gently remove excess glue from the connecting area. Let the vanity sit for 24 hour before use. -
Page 10: Assembling The Faucet (Not Included In The Package)
Assembly (continued) Assembling the faucet (not included in the package) Install the faucet base on your own faucet instruction. -
Page 11: Maintenance
Maintenance In the event that your furniture is stained or otherwise damaged during use, we recommend that you call a professional to repair your furniture. Check bolts/screws periodically and tighten them if necessary. Care and cleaning Rinse vanity top with clean, hot water frequently. Blot spills quickly, and wash with mild soap and warm water. - Page 12 BLACK HEADER LOCKUP COLOR HDX BRAND SHEET PRIMA COLOR P PRIMARY PRIMA BLACK MS 13 ARCOA YK: 0 100% Black when PMS 432 isn’t avaiable as an option s an option RGB: Questions, problems, missing parts? Before returning to the store, call Glacierbay Collection Customer Service 8 a.m - 7 p.m., EST, Monday- Friday, 9 a.m.- 6 p.m.,EST, Saturday 1-855-434-5224 HOMEDEPOT.COM/GLACIERBAY...
Need help?
Do you have a question about the TILTON TJ-0114V2421WH and is the answer not in the manual?
Questions and answers