Table of Contents
Advertisement
Quick Links
A message to hyundai lift truck operators ------------------------------------------------------------------------------- 0-1
Introduction --------------------------------------------------------------------------------------------------------------------------------- 0-2
How to use this manual ------------------------------------------------------------------------------------------------------------- 0-3
Safety labels ------------------------------------------------------------------------------------------------------------------------------- 0-5
Guide (direction, S/No, symbol) ----------------------------------------------------------------------------------------------- 0-9
1. Daily inspection ------------------------------------------------------------------------------------------------------------- 1-1
2. Do's and dont's ------------------------------------------------------------------------------------------------------------- 1-2
3. No riders ------------------------------------------------------------------------------------------------------------------------ 1-4
4. Pedestrians ------------------------------------------------------------------------------------------------------------------- 1-5
5. Operator protection ------------------------------------------------------------------------------------------------------ 1-6
6. Fork safety --------------------------------------------------------------------------------------------------------------------- 1-7
7. Pinch points ------------------------------------------------------------------------------------------------------------------ 1-8
8. Travel ----------------------------------------------------------------------------------------------------------------------------- 1-9
9. Grades, ramps, slopes and inclines --------------------------------------------------------------------------- 1-10
10. Tip over ------------------------------------------------------------------------------------------------------------------------- 1-11
11. Surface and capacity --------------------------------------------------------------------------------------------------- 1-12
12. Parking -------------------------------------------------------------------------------------------------------------------------- 1-13
13. Lifting, jacking and blocking ----------------------------------------------------------------------------------------- 1-14
14. Loading and unloading by crane ------------------------------------------------------------------------------- 1-19
1. Loose loads ------------------------------------------------------------------------------------------------------------------- 2-1
2. Long and wide loads ---------------------------------------------------------------------------------------------------- 2-2
3. Rear swing -------------------------------------------------------------------------------------------------------------------- 2-2
4. Low overhead clearance --------------------------------------------------------------------------------------------- 2-3
5. Fast turns and high loads -------------------------------------------------------------------------------------------- 2-3
6. Right-angle stacking ----------------------------------------------------------------------------------------------------- 2-4
7. Chain slack -------------------------------------------------------------------------------------------------------------------- 2-4
8. Pallets and skids ----------------------------------------------------------------------------------------------------------- 2-5
9. Caution for electrical lines -------------------------------------------------------------------------------------------- 2-5
10. Solid tire ------------------------------------------------------------------------------------------------------------------------- 2-6
1. General locations --------------------------------------------------------------------------------------------------------- 3-1
2. Data/safety plates and decals ------------------------------------------------------------------------------------- 3-2
3. Instruments and controls --------------------------------------------------------------------------------------------- 3-5
CONTENTS
CONTENTS
Advertisement
Table of Contents

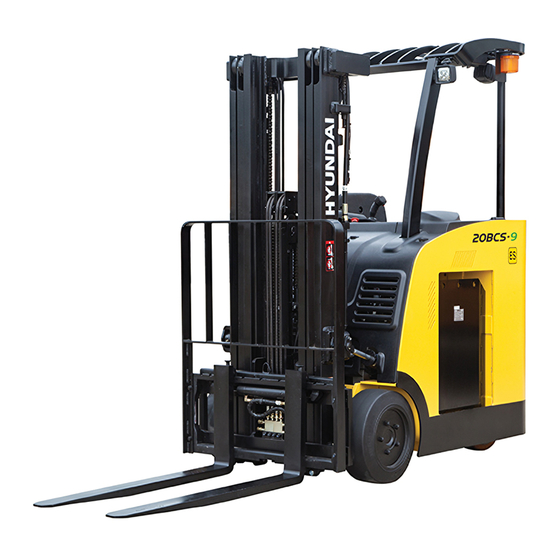
Related Manuals for Hyundai 20BCS-9


Summary of Contents for Hyundai 20BCS-9
-
Page 1: Table Of Contents
CONTENTS CONTENTS A message to hyundai lift truck operators ------------------------------------------------------------------------------- 0-1 Introduction --------------------------------------------------------------------------------------------------------------------------------- 0-2 How to use this manual ------------------------------------------------------------------------------------------------------------- 0-3 Safety labels ------------------------------------------------------------------------------------------------------------------------------- 0-5 Guide (direction, S/No, symbol) ----------------------------------------------------------------------------------------------- 0-9 1. GENERAL SAFETY RULES 1. GENERAL SAFETY RULES 1. Daily inspection ------------------------------------------------------------------------------------------------------------- 1-1 2. - Page 2 4. Instruments panel --------------------------------------------------------------------------------------------------------- 3-6 5. Operating switches and levers ------------------------------------------------------------------------------------ 3-13 6. Battery connector --------------------------------------------------------------------------------------------------------- 3-20 7. Support and safety parts ---------------------------------------------------------------------------------------------- 3-20 8. Adjustable armrest -------------------------------------------------------------------------------------------------------- 3-21 4. DAILY SAFETY INSPECTION 4. DAILY SAFETY INSPECTION 1. Inspecting your truck ---------------------------------------------------------------------------------------------------- 4-1 2.
- Page 3 12. Critical fastener checks ----------------------------------------------------------------------------------------------- 7-17 13. Air cleaning the truck --------------------------------------------------------------------------------------------------- 7-18 14. Electric truck battery maintenance ----------------------------------------------------------------------------- 7-18 15. Battery handling ----------------------------------------------------------------------------------------------------------- 7-19 16. Battery charging ----------------------------------------------------------------------------------------------------------- 7-20 17. Battery removal from truck ------------------------------------------------------------------------------------------ 7-23 18. Battery cleaning and care ------------------------------------------------------------------------------------------- 7-25 19.
-
Page 4: A Message To Hyundai Lift Truck Operators
HYUNDAI lift trucks are built to take hard work, but not abuse. They are built to be dependable, but they are only as safe and efficient as the operator and the persons responsible for maintaining them. -
Page 5: Introduction
HYUNDAI lift truck in a safe and correct manner. Your HYUNDAI lift truck has been designed and built to be as safe and efficient as today's technology can make it. As manufactured, for some models, it meets all the applicable mandatory requirements of ANSI B56.1-1988 Safety Standard for Powered Industrial Trucks. -
Page 6: How To Use This Manual
※The descriptions and specifications included in this manual were in effect at the time of printing. HYUNDAI reserves the right to make improvents and changes in specifications or design, without notice and without incurring obligation. Please check with your authorized HYUNDAI dealer for information on possible updates or revisions. - Page 7 Acquaint yourself with the various procedures in this manual. Understand how all gauges, indicator lights, and controls function. Please contact your authorized HYUNDAI dealer for the answers to any questions you may have about your lift truck's features, operation, or manuals.
-
Page 8: Safety Labels
18BCS9OM101 Model name Circuit diagram (UL) 11 Warning safety Warning mast Maintenance instructions 12 Name plate Logo (HYUNDAI) Battery handling 13 UL label (EE or ES) Hand caution Joystick 15 EE or ES mark Logo (HYUNDAI) 10 Load capacity chart... - Page 9 2. DESCRIPTION 2. DESCRIPTION There are several specific warning labels on this truck please become familiarized with all warning labels. Replace any safety label that is damaged, or missing. 1) 1) WARNING MAST WARNING MAST (ltem 2) This warning label is positioned on the left and right side of the mast.
- Page 10 JOYSTICK JOYSTICK (Item 9, Machine serial No. 15BCS-9 :-#0038, 18BCS-9 : -#0150, 20BCS-9 : -#0176) This decal is located near the joystick. Refer to page 3-16 for the detail descrip- Refer to page 3-16 for the detail descrip- tions. tions.
- Page 11 5) 5) BATTERY HANDLING BATTERY HANDLING (Item 8) This battery handling is located on the rear cross plate of the frame. Refer to page 7-23 for a safe battery Refer to page 7-23 for a safe battery removal. removal. ※ Open the battery cover when charging.
- Page 12 6) 6) WARNING SAFETY WARNING SAFETY (Item 11) This warning safety is located on the rear cross plate of the frame. FOR SAFETY FOR SAFETY Before operating the truck, please check brakes, steering system, horns and other devices for safety and making it easy operation.
-
Page 13: Guide (Direction, S/No, Symbol)
GUIDE GUIDE 1. DIRECTION 1. DIRECTION The direction of this truck indicate forward, backward, right and left when the truck is in the travelling direction. Rear Right Left Front 18BCS9OM0001 2. SERIAL NUMBER 2. SERIAL NUMBER Inform following when you order parts or the truck is out of order. 1) 1) TRUCK TRUCK SERIAL NUMBER... -
Page 14: General Safety Rules
1. GENERAL SAFETY RULES 1. GENERAL SAFETY RULES 1. DAILY INSPECTION 1. DAILY INSPECTION At the beginning of each shift, inspect your truck and fill out a check, maintenance and lubrication table. Check for damage and maintenance problems. Have repairs made before you operate the truck. -
Page 15: Do's And Dont's
2. DO'S AND DON'TS 2. DO'S AND DON'TS Do watch for pedestrians. D35AOM03 Do wear safety equipment when required. D35AOM05 Don't mix drugs or alcohol with your job. D35AOM02 Don't block safety or emergency equipment. 18BCS9OM04 Don't smoke in NO SMOKING areas or when charging. D35AOM06... - Page 16 Don't operate the truck outdoors in rainy day. 18BCS9OM033 Don't perform battery charging service in the room without adequate ventilation. 18BCS9OM034...
-
Page 17: No Riders
3. NO RIDERS 3. NO RIDERS The operator is the only one who should be on a truck. 18BCS9OM11 Never transport personnel on the forks of a lift truck. 18BCS9OM12... -
Page 18: Pedestrians
4. PEDESTRIANS 4. PEDESTRIANS Watch where you are going. Look in the direction of travel. Pedestrians may use the same roadway you do. Sound your horn at all intersections or blind spots. 18BCS9OM13 Watch for people in your work area even if your truck has warning lights or alarms. -
Page 19: Operator Protection
5. OPERATOR PROTECTION 5. OPERATOR PROTECTION Keep under the overhead guard. Always keep your body within the confines of the truck. 18BCS9OM16 Be specially careful when traveling in reverse and maneuvering in tight areas. 18BCS9OM01... -
Page 20: Fork Safety
6. FORK SAFETY 6. FORK SAFETY Never allow anyone to walk under raised forks. B207OM17 There is special equipment to raise people for overhead work. DO NOT USE LIFT TRUCKS. 18BCS9OM19... -
Page 21: Pinch Points
7. PINCH POINTS 7. PINCH POINTS Keep hands, feet and legs out of the Keep hands, feet and legs out of the mast. mast. B207OM20 Don't use the mast as a ladder. Don't use the mast as a ladder. 18BCS9OM21 Never try to repair the mast, carriage, Never try to repair the mast, carriage, chain, or attachment yourself. -
Page 22: Travel
8. TRAVEL 8. TRAVEL Travel with the load near the floor/ground with mast tilted back to cradle the load whenever possible. Never lift or lower the load when the Never lift or lower the load when the truck is in motion. truck is in motion. -
Page 23: Grades, Ramps, Slopes And Inclines
9. GRADES, RAMPS, SLOPES AND INCLINES 9. GRADES, RAMPS, SLOPES AND INCLINES Never turn on a grade, either loaded or unloaded. Never turn on a grade, either loaded or unloaded. UNLOADED UNLOADED - Forks downgrade 18BCS9OM26 LOADED LOADED - Forks upgrade 18BCS9OM27 1-10... -
Page 24: Tip Over
10. TIP OVER 10. TIP OVER LATERAL TIP OVER LATERAL TIP OVER Lateral tip over can occur with a combination of speed and sharpness of turn. This combination will exceed the stability of the truck. This condition is even more likely with an unloaded truck. With the load or mast raised, lateral tip over can occur while turning and/or braking when traveling in reverse or... -
Page 25: Surface And Capacity
11. SURFACE AND CAPACITY 11. SURFACE AND CAPACITY Avoid these conditions. They can cause a truck to tip over or lose traction for braking or driving. Know the weight of your truck and load. Know the weight of your truck and load. Especially when using elevators, Know Especially when using elevators, Know the capacity of the elevator you intend to... -
Page 26: Parking
12. PARKING 12. PARKING Never park on a grade. 18BCS9OM33 Always come to a complete stop before leaving truck. Be sure joystick is in NEUTRAL. 18BCS9OM34 Lower forks fully to floor and tilt forward. 18BCS9OM35 Turn key to OFF position. 18BCS9OM36 1-13... -
Page 27: Lifting, Jacking And Blocking
13. LIFTING, JACKING AND BLOCKING 13. LIFTING, JACKING AND BLOCKING Lifting or jacking any large piece of equipment such as forklift truck presents obvious hazards. Lifting or jacking any large piece of equipment such as forklift truck presents obvious hazards. It must be done with great care and forethought. - Page 28 Slowly lift truck and lower drive wheels onto the cradles or place blocking under frame prop points. When maintenance work is completed, lower the truck to the floor by reversing the lifting procedure. Check to be sure no tools or equipment are under the truck or wheels.
- Page 29 Hold the shorter block against the outer rail and lower the mast until inner rail rests on the block. Carriage & Reverse the procedure to remove backrest blocking. Inner mast Middle mast Outer mast Rail block 18BCS9JB07 5) 5) RAISING REAR OF TRUCK RAISING REAR OF TRUCK The truck may be raised at the rear by jacking and blocking under the center of the frame member at either the front or rear steer axle mounting, or under the center section of the steering axle.
- Page 30 Before performing any maintenance work, check the truck for stable condition on the Before performing any maintenance work, check the truck for stable condition on the blocking. blocking. When maintenance work is completed, lower the rear side of the truck to the floor by reversing the above procedure and lowering each side of the truck 50 mm (2 in) at a time : ·Put jack under frame and raise truck.
- Page 31 7) 7) SHIPPING TIE-DOWN INSTRUCTIONS SHIPPING TIE-DOWN INSTRUCTIONS (1) (1) Front of truck Front of truck ① Lower the carriage fully. ② Put a tie down (e.g., chain) between the carriage fork bars. ※ Protect truck from chain damage by Protect truck from chain damage by using covered chain or protective using covered chain or protective...
-
Page 32: Loading And Unloading By Crane
14. LOADING AND UNLOADING BY CRANE 14. LOADING AND UNLOADING BY CRANE Check the weight, length, width and height of the truck referring to the chapter 8, specifications when you are going to hoist the truck. Before loading the truck, battery must be Before loading the truck, battery must be removed. - Page 33 Do not install the wire to unsafe position Do not install the wire to unsafe position such as forks, carriage, head guard. It such as forks, carriage, head guard. It Wire rope can cause a serious damage to driver can cause a serious damage to driver and truck.
-
Page 34: Operating Hazards
2. OPERATING HAZARDS 2. OPERATING HAZARDS 1. LOOSE LOADS 1. LOOSE LOADS Loose or unbalanced loads are danger- Loose or unbalanced loads are danger- ous. Observe these precautions. ous. Observe these precautions. Never carry loose or uneven material. 18BCS9OM39 Center wide loads. n t e i d e l o a... -
Page 35: Long And Wide Loads
2. LONG AND WIDE LOADS 2. LONG AND WIDE LOADS With long or wide loads, you need more With long or wide loads, you need more room. So slow down and watch your room. So slow down and watch your clearance. -
Page 36: Low Overhead Clearance
4. LOW OVERHEAD CLEARANCE 4. LOW OVERHEAD CLEARANCE Know the height of your truck, with and Know the height of your truck, with and without a load. Check your clearances. without a load. Check your clearances. Keep the load low and tilted back. Keep the load low and tilted back. -
Page 37: Right-Angle Stacking
6. RIGHT ANGLE STACKING 6. RIGHT ANGLE STACKING When right angle stacking or moving with When right angle stacking or moving with a raised load to clear low objects, avoid a raised load to clear low objects, avoid sharp turns and move slowly. sharp turns and move slowly. -
Page 38: Pallets And Skids
8. PALLETS AND SKIDS 8. PALLETS AND SKIDS Do not move or store materials on Do not move or store materials on damaged pallets or skids. Items can fall damaged pallets or skids. Items can fall through them causing severe injury or through them causing severe injury or death. -
Page 39: Solid Tire
10. SOLID TIRE 10. SOLID TIRE Do not travel more than 25 km/hr (16 mph). Do not travel further than 8 km (5 miles) in an hour. Do not drive on the road for automobile. After continuous traveling radiates enough the heat of tire. (e.g. 1 hour radiation of the heat after 2 hours continuous traveling) Our warranty does not cover any damages caused by excessive driving. -
Page 40: Know Your Truck
3. KNOW YOUR TRUCK 1. GENERAL LOCATIONS OUTLINE 18BCS9OM54 TRUCK TYPE : Electric, 48 Volt. Mast Joystick Carriage and backrest Overhead guard Drive wheel Steering wheel Steering axle and tire... -
Page 41: Data/Safety Plates And Decals
Truck serial number An identification number assigned to this particular truck and should be used when requesting information or ordering service parts for this truck from your authorized HYUNDAI dealer. The serial number is also stamped on the frame. (3) (3) - Page 42 OPERATING SAFETY WARNING DECAL FOR SAFETY 91FH-01661 91FH-01661 91B4-00080...
- Page 43 Mast warning decal This safety decal is placed on the mast to warn of the danger of injury from movement between rails, chains, sheaves, fork carriage, and other parts of the mast assembly. Do not climb on or reach into the mast. Personal injury will result if any part of your body is put between moving parts of the mast.
-
Page 44: Instruments And Controls
3. INSTRUMENTS AND CONTROLS 18BCS9OM62 Monitor panel 10 Fan switch (opt) Start switch 11 Brake switch Joystick 12 Dead man switch Steering wheel 13 Room lamp and fan (opt) Emergency switch 14 Beacon lamp (opt) 12V socket 15 Head lamp Head lamp switch 16 Rear work lamp (opt) Rear work lamp switch (opt) -
Page 45: Instruments Panel
4. INSTRUMENT PANEL STRUCTURE The instrument panel (display) has six built-in red LED, which provide the operator with an easy information about the status of some truck devices. 22BH9OM65 Oil level warning lamp Down/turtle button Wrench warning lamp Left/menu button Thermometer warning lamp 10 Right/performance button Seat warning lamp... - Page 46 WARNING LAMP Brake oil level warning lamp This LED lights when measured level of brake oil stored in reservoir tank is below the minimum acceptable mark. BCS-9 truck does not have any mechanical brake which requires brake oil, so that re-fill of brake oil is not required. 22BH9EFD01 Wrench warning lamp This LED lights when an electric device (controller, motor, cable,...
- Page 47 BUTTON These buttons are used to select or change the menu and input value of the LCD function and display menu. Up button Press to select upward move. 22BH9EFD07 DOWN/TURTLE button Press to select downward move. TURTLE MODE ON/OFF 22BH9EFD08 LEFT/MENU button Press to select leftward move.
- Page 48 LCD FUNCTION 22BH9EFD13 Current time Hour meter Turtle mode Wheel position and running direction Truck speed pointer Power mode Speed level BDI (Battery Discharge Indicator) Truck speed 10 Load weight (option) Current time The number shows the current time according to the setting, which can be changed by display setting at page 3-11.
- Page 49 Truck speed The truck speed is shown in number. The unit can be km/h or mph according to the display setting (see 3-11 page). Hour meter The number shows the hours worked. The letter present beside the hour meter number shows which hour meter is displayed.
- Page 50 HOW TO SET THE DISPLAY MENU 22BH9EFD14 3-11...
- Page 51 22BH9EFD15 3-12...
- Page 52 5. OPERATING SWITCHES AND WHEEL KEY SWITCH Power is supplied to the control circuit through this switch, which is placed on OFF ON clockwise. OFF : The key can be removed or inserted and power is turned off. ON : Both control circuits for hydraulics and running can be activated.
- Page 53 DEAD MAN SWITCH The dead man switch always keeps the operator's foot in place during driving the truck or hydraulic operation. If the dead man switch is not pressed, all the electrical functions are taken out of operation with exception of the steering, the display and the horn.
- Page 54 FAN SWITCH (OPTION) This switch is used to operate the fan. When you push this switch, the air come out through the blowing fan. 18BCS9OM19-1 12V SOCKET Utilize the power of 12V as your need and do not exceed power of 12V, 120W. R5573CD49 STEERING WHEEL The steering wheel of the vehicle is provided with the...
- Page 55 Description Machine serial No. Machine serial No. 15BCS-9 : -#0038 15BCS-9 : #0039- 18BCS-9 : -#0150 18BCS-9 : #0151- 20BCS-9 : -#0176 20BCS-9 : #0177- 18BCS9JS01A Side shift button Option button (AUX) Backward driving Auto tilt buttton (option) Tilt button...
- Page 56 Operation Operation ① Driving Driving Backward Forward - Move the joystick in the direction of the arrow to drive forward or backward. - The electrical brake will be applied by shifting the joystick to the opposite position of running direction. 18BCS9JS02A ②...
- Page 57 ④ Auto tilt level (option) Auto tilt level (option) This button is used to return mast to upright vertical position. Auto tilt button 18BCS9JS05A ⑤ Side shift movement Side shift movement Side shift button - Move the joystick in the direction of the arrow while Left pressing the side shift button.
- Page 58 Description Machine serial No. Machine serial No. 15BCS-9 : -#0038 15BCS-9 : #0039- 18BCS-9 : -#0150 18BCS-9 : #0151- 20BCS-9 : -#0176 20BCS-9 : #0177- 18BCS9JS01A Side shift button Option button (AUX) Lift down Auto tilt buttton (option) Tilt button...
- Page 59 Operation Operation ① Driving Driving Forward Backward - Move the joystick in the direction of the arrow to drive forward or backward. - The electrical brake will be applied by shifting the joystick to the opposite position of running direction. 18BCS9JS09A ②...
-
Page 60: Battery Connector
6. BATTERY CONNECTOR Be sure to connect the connector for the battery and body. Battery connector 18BCS9OM87 7. SUPPORT AND SAFETY PARTS HIP SUPPORT To reduce fatigue of an operator, the pads are provided at the places to where waist touch. support 18BCS9OM88 OVERHEAD GUARD... -
Page 61: Adjustable Armrest
8. ADJUSTABLE ARMREST T h e a d j u s t a b l e a r m r e s t i s p r o v i d i n g (stroke: 75mm) convenience to various operator. Armrest Armrest Push the release button and armrest will... -
Page 62: Daily Safety Inspection
Do not make repairs yourself unless you are trained in lift truck repair procedures and authorized by your employer. Have a qualified mechanic make repairs using genuine HYUNDAI or HYUNDAI- approved parts. Do not operate a truck if it is in need of repair. If it is in an unsafe condition, remove the key Do not operate a truck if it is in need of repair. -
Page 63: Visual Checks
2. VISUAL CHECKS 2. VISUAL CHECKS First, perform a visual inspection of the truck and its major components : Walk around your lift truck and take note of obvious damage that may have been caused by operation during the last shift. Check that all capacity, safety, and warning plates or decals are attached and legible. -
Page 64: Functional Checks
3. FUNCTIONAL CHECKS 3. FUNCTIONAL CHECKS Check the operation of the truck as follows. ※ Before performing these checks, familiarize yourself with the operating procedures in Section Before performing these checks, familiarize yourself with the operating procedures in Section 5. 5. Test warning devices, horn, lights, and other safety equipment and accessories. -
Page 65: Operating Procedures
5. OPERATING PROCEDURES 5. OPERATING PROCEDURES 1. BEFORE OPERATING THE TRUCK 1. BEFORE OPERATING THE TRUCK Be sure that you have read and understand the information in this Operator's Manual and are trained and authorized before operating the lift truck. This equipment can be dangerous if not used properly. -
Page 66: Starting The Truck
3. STARTING THE TRUCK 3. STARTING THE TRUCK Before you start the truck, make sure that you have taken all the above mentioned precautions and the joystick is in NEUTRAL. 1) 1) RUNNING RUNNING To start the truck, step down on and press the brake switch and the dead man switch. - Page 67 3) 3) STOPPING AND PARKING STOPPING AND PARKING When parking the vehicle, step down on and press the brake switch and the dead man switch to lower the fork to the lowest position. Tilt the mast forward a little. Forks are down 18BCS9OM90 When leaving the vehicles, do not fail to remove the key.
-
Page 68: Controlling Speed
4. CONTROLLING SPEED 4. CONTROLLING SPEED By varying the movement of the joystick, the vehicle speed can be controlled freely from zero to top speed. Move smoothly it until the truck is moving at the desired speed. 5. BRAKING 5. BRAKING To stop the truck, put the joystick in neutral position and then release the brake switch smoothly until the vehicle stops and take off the foot on the dead man switch. - Page 69 4) 4) REGEN BRAKE REGEN BRAKE Regen provides vehicle braking by controlling the motor as a generator and returning the generated energy back to the battery. A direction change of the joystick will initiate regen braking at a level set by the direction brake current level.
-
Page 70: Operating Safely
7. OPERATING SAFELY 7. OPERATING SAFELY Safe operation is the responsibility of the operator. 1) 1) Watch where you are going. Don't go if you can't see... Watch where you are going. Don't go if you can't see... Before driving, check all around to be sure that your intended path of travel is clear of obstructions and pedestrians. - Page 71 Travel with the fork carriage tilted back and raised only enough to fully clear the ground or obstacles. When the carriage (load) is in an elevated position the stability of the truck is reduced. Do not elevate the load except during stacking. Grades, ramps, and inclines...
-
Page 72: Load Handling
8. LOAD HANDLING 8. LOAD HANDLING 1) 1) GENERAL GENERAL Handle only loads that are within the truck rated capacity as shown on the nameplate. This rating specifies the maximum load that should be lifted. However, other factors such as special load handling attachments, load of a high center of gravity, or uneven terrain may dictate that the safe working load be less than the rated capacity. - Page 73 2) 2) ADJUSTING THE LOAD FORKS ADJUSTING THE LOAD FORKS The load forks are adjustable on the hanger, carriage. Forks should be spaced as far apart as the load will allow. Both forks should always be the same distance from the center of the fork carriage.
- Page 74 4) 4) TRAVELING WITH LOAD TRAVELING WITH LOAD Travel with load or carriage as low as possible and tilted back. Never travel with the load or carriage raised (elevated) in a high position. Do not elevate the load except during stacking. Observe all traffic regulations and watch for other traffic, pedestrians, and safe clearances.
- Page 75 5) 5) PICKING UP AND MOVING LOADS PICKING UP AND MOVING LOADS When picking up a load from the ground, approach the load slowly and carefully align the truck square with the load. The forks should be adjusted to fit the load or pallet being handle and spread as wide as possible to provide good stability and balance.
- Page 76 7) 7) STACKING STACKING (1) (1) To put a load on a stack To put a load on a stack ① Approach slowly and align the lift truck and load squarely with the stack. BR147OM103 ② Raise the load as the lift truck nears the stack. BR147OM104 ③...
- Page 77 (2) (2) To move a load from a stack To move a load from a stack Approach the stack carefully, truck lined up squarely with the load. With mast vertical, raise the forks to the correct height for freely engaging the load pallet. Adjust fork angle as necessary to fit squarely under the load.
-
Page 78: Shut Down Procedure
9. SHUT DOWN PROCEDURE 9. SHUT DOWN PROCEDURE ※ Always leave your lift truck in a safe condition. Always leave your lift truck in a safe condition. When you leave your truck, or park it, follow these safety rules Park in a safe area away from normal traffic. Never park on a grade. -
Page 79: Emergency Towing
6. EMERGENCY TOWING 6. EMERGENCY TOWING 1. TOWING PRECAUTIONS 1. TOWING PRECAUTIONS If your lift truck becomes disabled but it can be moved freely on its own wheels without further damage, use the following procedures to tow it safely to a repair area. ※... -
Page 80: Towing Procedures
2. TOWING PROCEDURES 2. TOWING PROCEDURES Be sure to block the drive wheels on the disabled truck while working around it. When possible, raise the carriage (forks) on the disabled truck about 12 in (300 mm) from the floor or ground. Secure the carriage with a chain. Obtain another lift truck of equal or larger size carrying a partial load for traction. -
Page 81: Planned Maintenance
Specifications for selected components, fuel, lubricants, critical bolt torques, refill capacities, and settings for the truck are found in Section 8. If you need for more information on the care and repair of your truck, see you HYUNDAI dealer. -
Page 82: Planned Maintenance Intervals
The maintenance time intervals referred to in this manual relate to truck operating hours as recorded on the hourmeter, and are based on experience which HYUNDAI has found to be convenient and suitable under typical(normal or average) operating conditions. -
Page 83: Major Component Locations
5. MAJOR COMPONENT LOCATIONS 5. MAJOR COMPONENT LOCATIONS Use the illustration below to locate components included in the PM procedures. VIEW : A 18BCS9OM113 Mast Dashboard 11 Brake switch Lift cylinder Frame 12 Dead man switch Carriage and backrest Drive motor 13 Overhead guard Forks Drive wheel... -
Page 84: Daily Maintenance Checks
6. DAILY MAINTENANCE CHECKS 6. DAILY MAINTENANCE CHECKS The PM intervals are depend on hour meter records of operation. Daily (or every 10 hours) maintenance check list Check truck for obvious damages and leaks. Check clean battery terminals. Check electrolyte level. Check capacity, warning plates and decals. -
Page 85: Periodic Maintenance Checks
Clean* Clean* replacement Hydraulic oil return filter parts Hydraulic tank suction strainer Hydraulic oil (conventional) Hydraulic oil (HYUNDAI genuine) 5000 hours Lift chain adjustment and wear. Check contactor. (Replace contactor tips if roughness is remarkable.) Harsh condition * Normal condition... -
Page 86: Maintenance Chart
8. MAINTENANCE CHART 8. MAINTENANCE CHART MAINTENANCE INSTRUCTIONS DAILY 50 Hrs 1 Week 100 Hrs Or 2 Week 250 Hrs Or 1 Month CLEAN CHECK 1000 Hrs Or 6 Month 2000 Hrs Or 12 Month REPLACE REPLACE (initial only) FILL OR LUBRICATE : Hydraulic oil : Gear oil : Grease... -
Page 87: Safe Maintenance Practices
Carefully read and understand these instructions and the specific maintenance procedures before attempting to do any repair work. When in doubt of any maintenance procedure, please contact your local HYUNDAI dealer. Powered industrial trucks can become hazardous if maintenance is neglected. Therefore, suitable maintenance facilities, trained personnel and procedures shall be provided. - Page 88 Parts, including tires are to be installed per the manufacturer's procedures. Always use genuine HYUNDAI or HYUNDAI-approved parts. Use special care when removing heavy components, such as mast, etc.. Be sure that lifting and...
-
Page 89: Visual Inspection
10. VISUAL INSPECTION 10. VISUAL INSPECTION First, perform a visual inspection of the lift truck and its components. ·Walk around the truck and take note of any obvious damage and maintenance problems. Check for loose fasteners and fittings. ·Check to be sure all capacity, safety, and warning plates or decals are attached and legible. ※... - Page 90 5) 5) FORKS FORKS Inspect the load forks for cracks, breaks, bending, and wear. The fork top surfaces 10% of "A" is should be level and even with each other. max. wear allowed The height difference between both fork tips refer to below table. Fork length Height difference Model...
- Page 91 6) 6) WHEELS AND TIRES WHEELS AND TIRES Check the condition of the drive and steering wheels and tires. Remove objects that are embedded in the tread. Inspect the tires for excessive wear and breaks or chunking out chunking out. Check all wheel lug nuts or bolts to be sure none of them is loose or missing.
-
Page 92: Maintenance Guide
11. MAINTENANCE GUIDE 11. MAINTENANCE GUIDE 1) 1) CHECK AND SUPPLY HYDRAULIC OIL CHECK AND SUPPLY HYDRAULIC OIL Oil level gauge Check the hydraulic tank oil level. Correct oil level is important for proper system High operation. Low oil level can cause pump damage. - Page 93 3) 3) CHECKING OF HUB NUT TIGHTENING CHECKING OF HUB NUT TIGHTENING DRIVE TIRE CONDITION CONDITION Make sure that the hub nut is firmly tightened. Tightening and checking should be made in a diagonal order to prevent unbalanced tightening. (See the figure.) STEERING TIRE 18BCS9OM118A 4) 4)
- Page 94 7) 7) FUSE REPLACEMENT FUSE REPLACEMENT Disconnect the battery connector. Disconnect 18BCS9OM120 Remove the blown fuse and replace with a new one. Relay Fuse box 18BCS9OM121 ※ The blown fuse must be replaced with a fuse of the same capacity. When the fuses are The blown fuse must be replaced with a fuse of the same capacity.
- Page 95 Model A (coil resistance) 15/18BCS-9 32.0Ω at 20˚C 20BCS-9 20.5Ω at 20˚C The magnet & coil sub-assembly (1) is a complete factory sub-assembly and if it is 14BRJ7OM128 faulty (or the friction surface is worn), a complete new magnet &...
- Page 96 HYUNDAI chain lubricant is recommended; it is easily sprayed on and provides superior lubrication. Heavy motor oil may also be used as a lubricant and...
-
Page 97: Critical Fastener Checks
12. CRITICAL FASTENER CHECKS 12. CRITICAL FASTENER CHECKS Fasteners in highly loaded (critical) components can quickly fail if they become loosened. Also, loose fasteners can cause damage or failure of the component. For safety, it is important that the correct torque be maintained on all critical fasteners of components that directly support, handle or control the load and protect the operator. -
Page 98: Air Cleaning The Truck
13. AIR CLEANING THE TRUCK 13. AIR CLEANING THE TRUCK Always maintain a lift truck in a clean condition. Do not allow dirt, dust, lint or other contaminants to accumulate on the truck. Keep the truck free from leaking oil and grease. Wipe up all oil spills. Keep the controls and floorboards clean, dry and safe. -
Page 99: Electric Truck Battery Maintenance
14. ELECTRIC TRUCK BATTERY MAINTENANCE 14. ELECTRIC TRUCK BATTERY MAINTENANCE 1) 1) GENERAL GENERAL BATTERY SERVICE AREA B15AOM128 Battery charging installations must be located in areas designated for that purpose. These areas must be kept free of all non-essential combustible materials. Facilities must be provided for : ·Flushing spilled electrolyte. -
Page 100: Battery Handling
15. BATTERY HANDLING BATTERY HANDLING Change (remove) or service storage batteries only in an area designated for this purpose. Be sure this area has provisions to flush and neutralize spillage, to ventilate fumes from gassing batteries and for fire protection. This area should be equipped with material-handling tools designed for removing and replacing batteries, including a conveyor or overhead hoist. -
Page 101: Battery Charging
16. BATTERY CHARGING BATTERY CHARGING The charger is of the automatic type so that only requirement for charging is to insert t h e p l u g , t h e r e b e i n g n o n e e d f o r BATTERY CHARGER maintaining watch . - Page 102 2) 2) INSTALLATION OF THE CHARGER INSTALLATION OF THE CHARGER Place for installation Install the charger at a place with good ventilation, no excessive temperature, low humidity and little dust. For the primary of the transformer, use the taps corresponding to the power voltage difference. For example, 218V (measured value)-220V (primary).
-
Page 103: Battery Removal From Truck
17. BATTERY INSTALLATION & REMOVAL FROM TRUCK BATTERY INSTALLATION & REMOVAL FROM TRUCK When the spare battery is used for continuous operation or it is required to check the battery, motor, etc., remove the battery through the following procedure: 1) 1) BATTERY REMOVAL BATTERY REMOVAL Turn off the start switch. - Page 104 2) 2) BATTERY INSTALLATION BATTERY INSTALLATION Adjust the height of the roller of the stand to that of the roller of the vehicle and push the battery into the battery compartment. Battery Battery stand 18BCS9OM122 Insert the side plate. Side plate 18BCS9OM121A Connect the battery connector.
-
Page 105: Battery Cleaning And Care
18. BATTERY CLEANING AND CARE BATTERY CLEANING AND CARE 1) 1) AVOID OVER-DISCHARGE AVOID OVER-DISCHARGE If used until the vehicle can no longer run, battery life will be shortened. If the battery capacity indicator's red lamps turns on at on load lift, stop operation and charge the battery without delay. -
Page 106: New Truck Oils
19. NEW TRUCK OILS New truck uses following lubricants and oils. Description Specification Gear oil SAE 80W-90 ISO VG46/VG68, Hyundai genuine long life hydraulic oil Hydraulic oil ★1 ISO VG15, Conventional hydraulic oil Grease NLGI No.2 ·ISO : International Organization for Standardization ★1... -
Page 107: Specifications
8. SPECIFICATIONS 8. SPECIFICATIONS 1. SPECIFICATION 1. SPECIFICATION C C' 18BCS9SP01 Model Unit 15BCS-9 18BCS-9 20BCS-9 Capacity kg (lb) 1361 (3000) 1588 (3500) 1814 (4000) ← ← Load center distance mm (in) 610 (24") Weight (Unloaded, with battery) kg (lb) -
Page 108: Specification For Major Components
ABDD4002 ← Type ← Rated voltage 30V 3Ø Output ← Insulation Class F 2) 2) BATTERY BATTERY Item Unit 15/18BCS-9 20BCS-9 Model VCJ7 VCJ8 Rated voltage Capacity AH/hr 700/5 800/5 Electrolyte Dimension (W×D×H) 975×450×787 975×520×787 Connector (CE spec) SB350 Weight 1080 ±... - Page 109 4) 4) GEAR PUMP GEAR PUMP Item Unit Specification Type Fixed displacement gear pump Capacity cc/rev 16.5 Maximum operating pressure Rated speed (max/min) 3000/500 5) 5) MAIN CONTROL VALVE MAIN CONTROL VALVE Item Unit Specification Type 3 spool, 4 spool Operating method Electric Main relief valve pressure...
- Page 110 9) 9) WHEELS WHEELS Item 15/18/20BCS-9 Type (Front/rear) Rubber / Urethane Quantity (Front/rear) 2 / 2 Ø308×178 Front wheel Ø254×127 Rear wheel BRAKES BRAKES Item Specification Brakes (Service) Regen brake Brakes (Parking) Electric brake (2EA)
-
Page 111: Tightening Torque
3. TIGHTENING TORQUE 3. TIGHTENING TORQUE Items Size kgf·m lbf·ft Hyd pump motor mounting bolt M 8×1.25 2.5±0.5 18.1±3.6 Electric Drive motor mounting bolt M 8×1.25 1.5±0.2 10.8±1.4 system Steering motor mounting bolt M12×1.75 10.5±1.5 75.9±10.8 Hydraulic pump mounting bolt M10×1.5 5±1.0 36.2±7.2...
Need help?
Do you have a question about the 20BCS-9 and is the answer not in the manual?
Questions and answers