Table of Contents
Advertisement
Quick Links
WEEE Warning Message
Symbol for Separate Collection in European Countries
This symbol indicates that this product is to be collected separately.
The following apply only to users in European countries:
This product is designated for separate collection at an appropriate collection point. Do
not dispose of as household waste.
For more information, contact the retailer or the local authorities in charge of waste
management.
FCC STATEMENT
This device complies with Part 15 of the FCC Rules. Operation is subject to the following two conditions:
(1).
This device may not cause harmful interference, and
(2).
This device must accept any interference received, including interference that may cause undesired
operation.
Note:
This equipment has been tested and found to comply with the limits for Class B digital devices, pursuant to Part
15 of the FCC rules. These limits are designed to provide reasonable protection against harmful interference in a
residential installation. This equipment generates uses and can radiate radio frequency energy and, if not
installed and used in accordance with the instructions, may cause harmful interference to radio communications.
However, there is no guarantee that interference will not occur in a particular installation. If this equipment does
cause harmful interference to radio or television reception, which can be determined by turning the equipment off
and on, the user is encouraged to try to correct the interference by one or more of the following measures:
Reorient or relocate the receiving antenna
Increase the separation between the equipment and receiver
Connect the equipment into an outlet on a circuit different from that to which the receiver is connected
Use of shielded cable is required to comply with Class B limits in Subpart B of Part 15 of the FCC rules.
Do not make any changes or modifications to the equipment unless otherwise specified in the manual. If such
-i-
English
Advertisement
Table of Contents

Related Manuals for Genius V1200


Summary of Contents for Genius V1200
- Page 1 Connect the equipment into an outlet on a circuit different from that to which the receiver is connected Use of shielded cable is required to comply with Class B limits in Subpart B of Part 15 of the FCC rules.
- Page 2 Occasionally a retailer will specify a unique product color, appearance, and internal memory capacity. Contact your dealer for precise product definition and included accessories. The illustrations in this manual are for the purpose of explanation and may differ from the actual design of your camera.
- Page 3 Do not subject the LCD monitor to impact. This might damage the glass on the screen or cause the internal fluid to leak. If the internal fluid enters your eyes or comes into contact with your body or clothes, rinse with fresh water.
- Page 4 The digital video camera may feel warm when being used continuously or for an extended period of time. This is normal and not a malfunction. If you will not be using the batteries for an extended period of time, remove them from the camera to prevent leakage or corrosion.
-
Page 5: Table Of Contents
Attaching the Wrist Strap ..................8 Inserting the Battery ....................8 Inserting an SD/SDHC Memory Card ..............9 Charging the Battery ..................... 10 Turning the Power On and Off ................10 Initial Settings ......................10 Modes ........................11 Using the LCD Monitor ................13 LCD Monitor Layout .................... - Page 6 Setting Battery Type ....................78 Setting Memory Kit ....................79 Reset All ........................ 79 Making Connections ................80 Connecting the Camera to a TV ................80 Connecting the Camera a PC ................80 Connecting the Camera to a Printer ..............81 Appendix ....................82 About Folder and File Names ................
-
Page 7: Introduction
Congratulations on the purchase of your new digital camera. This manual provides step-by-step instructions on how to use your camera, and is intended for your reference only. System Requirements In order to get the most out of your camera, your computer must meet the following system requirements: For Windows: •... -
Page 8: Package Contents
• Slideshow feature to review your pictures and movies • A/V output to view your pictures and movies on your TV • USB port to transfer photos and movies to your PC Package Contents Please check the contents of your camera package. It should contain:... -
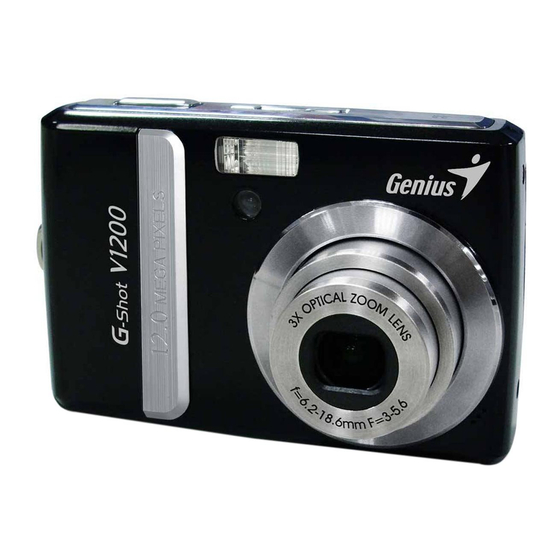
Page 9: Camera Views
Camera Views Front View Flash Self-timer LED / AF Assist Lamp Zoom Lens Microphone Back View Zoom buttons LCD screen Play button LED indicator DISP SET button / 4-way navigation control MENU FUNC Menu button Function / Delete button... - Page 10 Top View Power button Stabilizer button Speaker Shutter button Bottom View Battery compartment Tripod screw hole SD card compartment Left/Right View USB / TV Out Strap ring...
-
Page 11: Camera Buttons
Press to capture an image or start/stop recording video or audio clip. Play If the camera is turned off, press and hold to turn on camera in Playback mode. If the camera is turned on, press to toggle camera to Playback or Record mode. - Page 12 Usage 1. Confirm a selection when using the OSD menus. 1. In Record mode, press to scroll through the flash mode options. (Auto, Anti Red-eye, Fill, Slow Sync and Off) 2. In Playback mode, press to view the next image, video or audio clip.
-
Page 13: Camera Memory
External storage Your camera supports SD cards of up to 4GB in size. It also supports SDHC cards with a maximum capacity of 32GB. If there is a storage card inserted in the memory slot, the camera automatically saves all images, videos and audio clips in the external storage card. -
Page 14: Getting Started
F U N C Inserting the Battery Follow these instructions to insert the AA batteries into the battery compartment. Please read "Battery Information” on page iv before inserting/removing batteries. 1. Make sure the power is off before inserting the batteries. -
Page 15: Inserting An Sd/Sdhc Memory Card
Inserting an SD/SDHC Memory Card Expand your camera’s storage by using SD or SDHC memory cards. 1. Open the SD card compartment at the bottom of the camera. 2. Insert the SD/SDHC card into the memory card slot with the metallic part facing the front side of the camera. -
Page 16: Charging The Battery
See "Modes” on page 11 to know more about Record and Playback mode. Initial Settings When you turn on your camera for the first time, you will be asked to do the initial settings of your camera. When you turn the Power button on, the Language Menu is displayed on the LCD screen for you to setup the display language. -
Page 17: Modes
In Playback mode, press the Play button to switch back to Record mode. Selecting the Record mode options Maximize the quality and ease of use of your camera by using the different mode options. The mode options allow you to capture images with preset settings according to scene conditions. - Page 18 4. Select a mode. AF Lamp 5. Press the SET button to apply selected mode. Sharpness Note • For more information, see "Using the Record Menu” on page 32 • Use the 4-way navigation control to move through the menu selections.
-
Page 19: Using The Lcd Monitor
Using the LCD Monitor The high resolution 2.7” LCD monitor shows all important information regarding camera settings as well as the visual image of your photo or video. The display on the LCD monitor is called the On Screen Display or OSD. - Page 20 Item Description Shots remaining Indicates the remaining shots available. Battery Indicates battery level. Storage media Indicates current storage media in use. Date stamp Indicates date stamp is enabled. Indicates AEB function is enabled Stabilizer Indicates stabilizer function is enabled. Saturation Displays saturation settings.
- Page 21 Item Description White balance Displays white balance settings. Metering Displays metering settings. Sharpness Displays sharpness settings. Quality Displays quality settings. Resolution Displays resolution settings. AF lamp Indicates AF lamp is enabled.
- Page 22 Playback Mode Screen Layout The Playback mode display varies depending on the type of image being viewed. Playback mode display of still images: 27/27 27/27 27/27 SET : F 3.0 F 3.0 F 3.0 1/ 30 1/ 30 1/ 30...
- Page 23 Item Description Storage media Indicates used storage memory. Recording Displays recording information of the file. information DPOF Indicates the file is marked for printing. Resolution Displays the resolution settings. Playback mode of videos: 27/27 27/27 27/27 SET : 0:00:16 / 0:00:20...
- Page 24 Item Description Indicates the button to press on the camera to play a movie Button intro or audio file. Indicates the file number over the total number of files in the File no. / Total no. storage card. Battery Indicates battery level.
- Page 25 Playback mode Indicates playback mode. Protect Indicates the file is protected. Indicates the button to press on the camera to play a Button intro movie or audio file. Indicates the file number over the total number of files in File no. / Total no.
- Page 26 Indicates played time. Playing status Displays playing status. Changing the LCD Monitor Display The type of information displayed on the LCD screen can be changed using the button. Press the button repeatedly to change the LCD display from one type to another.
- Page 27 • The OSD information may vary depending on the record mode type. Note • The following icons, if enabled, are still displayed on the LCD even when OSD off or Guide lines on: AEB, Face tracking, AF lamp, Drive mode, and Macro.
-
Page 28: Recording Photos, Videos And Voices
Recording Photos, Videos and Voices Taking Photos Now that you are familiar with your camera, you are now ready to take your photos. Taking photos with your camera is very simple. 1. Turn on the camera by pressing the Power button. By doing this, your camera is also set to Record mode. -
Page 29: Setting The Zoom Control
30 for more details. Setting the Zoom Control Your camera features up to 3x optical zoom and up to 5x of digital zoom. Optical zoom is achieved by mechanically adjusting the lens. While digital zoom is activated through the menu settings. -
Page 30: Using Flash
4. Press the T button again to switch to digital zoom automatically. Zooming continues. x5.0 x5.0 x5.0 Optical zoom Digital zoom x5.0 x5.0 x5.0 0.0EV 0.0EV 0.0EV AUTO AUTO Digital zoom is not activated in recording movies. Note Using Flash When taking pictures in difficult lighting conditions, use the Flash button to get correct exposure. -
Page 31: Setting The Focus Mode
Setting the Focus Mode This function allows users to define the type focus when recording a still image or a movie clip. To set the Focus mode • Press the Macro button repeatedly until the desired focus mode icon is displayed on the lower left corner of the LCD monitor. -
Page 32: Using The Function Menu
Infinity. When Infinity is set, the camera focuses on distant objects. Using the Function Menu The Function Menu is used to adjust capture settings in Record Mode. It contains My Mode, Resolution, Quality, EV Compensation, White Balance, ISO, Metering, and Color Mode. - Page 33 My Mode The My Mode function displays the 6 most recent modes used in order. When you move through the different modes in the menu options, the items on the menu bar changes synchronously to the corresponding available settings. AUTO...
- Page 34 LCD monitor synchronously displays the image applying the EV settings. Press the SET button to save and apply changes. • The available settings are: OEV, +0.3EV, +0.7EV, +1.0EV, +1.3EV, +1.7EV, +2.0EV, -0.3EV, - 0.7EV, -1.0EV, -1.3EV, -1.7EV, -2.0EV.
- Page 35 The camera automatically adjusts the white balance. Daylight Ideally used for bright sunny conditions. Cloudy Ideally used for cloudy conditions. Ideally used for indoor photos with tungsten or halogen lighting Tungsten without a flash. Ideally used for indoor photos with reddish fluorescent lighting Flourescent 1 conditions.
- Page 36 1600,3200 (3M, 16:9<2M>, VGA), 6400 (16:9 <2M>, VGA) Note If the Stabilizer is enabled, ISO is automatically set to Auto and cannot be adjusted. To adjust ISO, disable Stabilizer first. Metering The Metering function lets you select the area of the subject or frame by which the camera measures light to record still images or movies.
- Page 37 Icon Item Description The camera measures the average light from the entire frame but Center gives more importance to the values near the center. The camera selects the exposure value based on the center of Spot your picture. Color Mode...
-
Page 38: Using The Record Menu
Using the Record Menu If you are in Record mode, you can access the Record menu simply by pressing the MENU button on your camera. When the menu is displayed, use the 4-way navigation control and the SET button to MENU move through menu selections and apply your desired settings. - Page 39 3. To select an item, press 4. Change the submenu settings using the 4-way navigation control. 5. Press the SET button to save and apply settings. Setting the Scene Mode Setting the Scene mode allows you to capture images with preset settings according to the scenes or environment.
- Page 40 Landscape This feature is used to emphasize wide scenic views. Sunset This feature enhances the red hue for recording sunset images. This feature is used to capture the image of a backlight object Backlight by changing the metering. Kids This feature is used to capture still images of moving kids.
- Page 41 This feature is used for wedding or indoor party settings. Candlelight This feature is used to capture warm candle light effects. This feature is used to capture portrait pictures with night or Night Portrait dark background. This feature enhances skin tone thus facial skin appears Soft Skin smooth.
- Page 42 This feature detects if the subject blinked an eye when the Blink Detection image is captured and gives the user an option whether to save it or not. See “Using Blink Detection Mode” on page 41. This feature captures a image temporarily as a reference. Full Pre-composition press shutter after referring the subject to the reference point.
- Page 43 The Smile Capture mode uses smile tracking to automatically capture images. This feature is most useful in capturing different angles and smiles of moving people. When capturing an image with more than one person, the camera detects the smile of the closest person on the center of the screen.
- Page 44 With the Intelligent Scene Mode, the camera automatically detects the shooting conditions and switches to the appropriate scene and settings when aiming on a subject. This feature is most useful for novice users to capture great images even without basic knowledge of photography.
- Page 45 Note When Intelligent Scene function is enabled, icons will be displayed even in Guideline, None Display modes and when the shutter button is half pressed. The table below shows the modes supported by Intelligent scene: Intelligent Icon Description Scene Modes Portrait This mode is set when a face is detected.
- Page 46 Night Scene • The focus distance is more than 1.5 meters. • The EV setting is lower than 5 or 4.5. This mode is set when a face is detected with an EV setting Night Portrait lower than 5 or 4.5.
- Page 47 Face tracking is automatically enabled. 2. Half press the shutter button to focus the subject. The frame turns green to indicate focus is set. 3. Press the shutter button to capture the image. The image is automatically saved unless the camera detects that the subject blinked an eye.
- Page 48 Using Aperture Priority Mode With Aperture Priority mode, users can adjust the aperture value and the camera automatically sets the shutter speed to match the brightness. To activate Aperture Priority 1. Select from the Scene Mode submenu. 2. Press SET button to enter the adjust mode.
- Page 49 Using Manual Exposure Mode With Manual Exposure mode, users can manually adjust the shutter speed and the aperture value. To activate Manual Exposure 1. Select from the Scene Mode submenu. 2. Press SET button to enter the adjust mode. 3. Use the...
- Page 50 Setting the Drive Mode Your camera features a Self-timer and Burst which can be set in the Drive mode function in the Record Menu. The Self-timer allows you to take photos after a pre-defined Record Mode delay. While burst lets you take consecutive shots. This Drive Mode function is only available in recording still images.
- Page 51 Captures an image without time delay. Setting the AEB AEB stands for Automatic Exposure Bracketing. This feature captures the same image with 3 different exposure settings. • The settings are recorded in the following order: standard exposure, under exposure, and over exposure.
- Page 52 The AF Lamp function allows you to record images even in low light conditions. Record Mode If AF Lamp is set to Auto, the AF lamp located in the front Drive Mode of the camera, see “Front View” on page 3, emits an red...
- Page 53 Setting Sharpness This function allows you to enhance or soften finer details of your photos. Record Mode Drive Mode To set Sharpness High 1. From the Record menu, select Sharpness. AF Area Normal AF Lamp 2. Use the keys to go through the selection.
- Page 54 3. Press the SET button to save and apply changes. The table below shows the available Saturation settings. Icon Item Description High Enhances saturation. Normal Normal saturation is applied. Reduces saturation. Setting Contrast This function allows you to adjust the contrast of your photos.
- Page 55 • May slow down AEB/ continuous shooting when Date Stamp is enabled in /AEB/ Burst mode. • If Date Stamp is enabled, digital zoom is automatically turned off. • In vertical or rotated images, the date and time on your photos still appear horizontally.
- Page 56 Setting Auto Review The Auto Review function lets you view the captured image right after shooting it. Saturation If Auto review is On, the camera will display the captured Contrast image for 1 second on the LCD monitor. Digital Zoom...
-
Page 57: Recording Movies
7. To stop recording, press the Shutter button. 0:00:16 0:00:16 • When the maximum capacity for a single video has been reached, simple press the Note shutter button again to continue recording. • The camera will automatically stop recording when the memory capacity is full. - Page 58 640 x 480 For Internet, see “Internet Mode” on page 52 below. To set other movie mode settings, please refer to “Using the Function Menu” on page 26. Internet Mode The Internet Mode allows you to record movies with predefined video settings for easy upload to the Internet website.
-
Page 59: Recording Voices
• Recording automatically stops when the file reaches 100 MB. Recorded movies in the Internet mode are stored following the DCF rule, however movies are saved in a specific folder named “_UTUBE”. For more details, please refer to “Folder Structure”... -
Page 60: Playback
View images, videos and audio clips through your camera’s Playback mode. Viewing in Single Navigation The Single navigation mode displays the image one by one on the LCD monitor. To view images/ videos/audio clips, follow the steps below. 1. Press the Play button to set or turn on the camera to Playback mode. - Page 61 Display Display Thumbnail view Thumbnail icons When you view the thumbnails, some images may contain icons. These icons indicate the type of file or recording. Icons Type Description Voice Memo Indicates that a voice memo is attached to the image.
-
Page 62: Zooming Images
• Use the navigation controls to view the zoomed image. • Press the Play button to close zoom view. Note For 320 x 240 resolution images, you can only zoom in up to 6X. Playing Movies 1. Set the camera to Playback mode. 27/27 27/27 27/27 2. - Page 63 Single navigation mode. 0:00:16 / 0:00:20 0:00:16 / 0:00:20 This feature does not function when the memory card is full or the folder cannot be Note created. The icon does not appear on the screen either.
-
Page 64: Playing Voice Recording
1. Set the camera to Playback mode. 2. Use the navigation controls to scroll through the saved images. An image file with voice memo has a voice memo icon located on the top center of the LCD monitor. See picture on the right. -
Page 65: Deleting An Image/Video/Audio
• Using the Delete button, or • Using Playback Menu Delete settings. See “Delete” on page 62. Using the Delete Button Use the Delete button on your camera to delete or mark an image/video/audio clip for deletion. FUNC 1. Set the camera to Playback mode. -
Page 66: Playback Menu
9. To close the Delete function and go back to viewing in single navigation mode, select Cancel. Note Locked files cannot be deleted at any time. When you try to delete a locked file, the camera displays “File Locked” message on the LCD monitor. Playback Menu The Playback menu allows you to edit images, records voice memo, and setup playback settings. - Page 67 Slideshow The Slideshow function allows you to view all stored photos/videos in still image format in a continuous sequence. To view slideshow: 1. From the Playback menu, select Slideshow. The Slide Show Slideshow menu appears. Start 2. Set the slideshow settings.
- Page 68 Available settings are: Yes, No. Delete The Delete function lets you remove unwanted files in the internal memory or on the memory card. Protected files cannot be erased, to delete, unprotect the file first. See “Protect” on page 65.
- Page 69 6. From the Delete submenu, select Voice only. 7. A confirmation selection appears, select Delete. 8. Press the SET button to delete the attached voice memo and go back to Playback mode. Note The Voice Only submenu is disabled if the current image displayed, at the time you...
- Page 70 SET button to mark image/ video/audio clip for deletion. Select Select Next Next 4. Repeat step 3 until all desired images for deletion are marked. 5. Press the MENU button. A confirmation selection appears. 6. Select Yes to confirm. Delete selected files ? 7.
- Page 71 Protect The Protect function lets you lock a photo or video to protect it from being modified or accidentally erased. A protected file has a lock icon when viewed on Playback mode. To protect files: 1. From the Playback menu, select Protect.
- Page 72 5. Press the MENU button. A confirmation selection appears. Change protect settings ? 6. Select Yes. 7. Press the SET button to lock files and go back to Playback mode. Cancel To protect all files: 1. Select Lock all in the Protect submenu. A confirmation message appears.
- Page 73 Save As Cancel Cancel 7. After completing Red eye correction, a menu selection appears. Select whether to: • Overwrite. Save and replace the old file with the new one. • Save As. Save the new file as a new one.
- Page 74 Voice Memo The Voice Memo function allows you to record and attach a voice memo to a saved image. You can record a maximum of 30 seconds of Voice memo per image. This function is only available in still images.
- Page 75 Photo Edit The Photo Edit function lets you adjust edit still images to apply different colors or tones for a more artistic effect. Edited photos in this function is saved as a new file. To activate Photo Edit: 1. Set the camera to Playback mode.
- Page 76 Image is saved with greenish tint. Vivid Blue Image is saved with bluish tint. Trim The Trim function allows you to trim an image to another image size. This function is only available for still images. Trim To trim an image: Resize 1.
- Page 77 SET: 5M SET: 5M 顯示已顯示區域的大致位置。 6. 使用瀏覽鍵移動影像。 7. 按下 SET 按鍵套用變更隨即出現選單選項。 8. 選擇: • 取代現有檔案。儲存新檔案並取代舊檔案。 • 另存新檔。將檔案另存成新檔案。 • 取消。取消尺寸變更。 9. 按下 SET 按鍵儲存 / 取消變更。 Note • 「裁切」功能不適用於影像解析度設為 3:2, 16:9 及 VGA 的照片。 • 無論原始影像比例為何,所有影像均會裁切成 4:3 比例。 尺寸變更 「尺寸變更」功能可讓您將大型影像的影像解析度變更為較小的解析度。本功能僅適用於靜態影 像。 欲變更影像尺寸:...
- Page 78 DPOF 5. 選擇尺寸:8M、5M、3M 與 VGA。可用尺寸設定會因 原始影像尺寸而異。無法使用的設定會在 「尺寸變更」 子選單中顯示為灰色圖示。 6. 選擇尺寸後,會出現選單選項。選擇: • 取代現有檔案。儲存新檔案並取代舊檔案。 • 另存新檔。將檔案另存成新檔案。 • 取消。取消尺寸變更。 7. 按下 SET 按鍵儲存 / 取消變更。 尺寸變更功能不適用於影像解析度設為 3:2, 16:9 Note 及 VGA 的照片。 開機畫面 「開機畫面」功能可讓您設定開啟相機電源時的開機畫面。 1. 按下 MENU 按鍵開啟 「播放」選單。 2. 選擇開機畫面,隨即出現選單選項。 3. 選擇選項:...
- Page 79 The Digital Print Order Format (DPOF) function allows you to mark image in your memory card for printing and allows you to specify the number of copies that you want to print at a later date. When all images to be printed are marked, take the memory card to a digital printing service, or use a DPOF compatible printer.
- Page 80 3. Press the SET button to reset DPOF settings. Cancel Note You can specify up to 99 copies for DPOF. If you specify 0 copies, the DPOF setting of that image is automatically disabled. PictBridge The PictBridge function allows you to print images captured by your camera without connecting the camera to a PC.
- Page 81 Connect your camera to a PictBridge compatible printer using the USB cable. See illustration below. Note If the printer does not support date stamp, the date stamp function will be disabled in PictBridge.
-
Page 82: Using The Setup Menu
Using the Setup Menu You can access the Setup menu whether you are in Record or Playback mode. The Setup menu allows you to configure general camera settings. To go to Setup Menu: 1. Press to launch the Record/Playback Menu. -
Page 83: Setting Power Save
Enables or disables operation sound. Volume Adjusts volume. Setting Power Save The Power Save function allows you to set an idle time after which the camera automatically sets to sleep mode to Sounds save power. After a minute of being in sleep mode, the Power Save 1 min. -
Page 84: Setting Date & Time
Setting Date & Time Use the Date & Time function to set the date and time of Date & Time your camera. This function is useful in attaching date stamps on captured images. Your camera uses a 24-hour time format. -
Page 85: Setting Tv Out
Setting TV Out Use the TV Out function to adjusts video output signal to accommodate different regional settings. If TV out is not set correctly, the image may not display properly on TV. Available settings are: • NTSC. Applicable in Japan, USA, Canada, Taiwan... -
Page 86: Setting Memory Kit
• If there is a memory card inserted in the memory slot, the camera automatically saves all files to the memory card. • If there is no memory card or the internal memory is empty, the Copy to Card function is disabled. -
Page 87: Making Connections
Making Connections You can connect your camera to: TV, computer, or a printer. Connecting the Camera to a TV To connect your camera to a TV: Video Audio 1. Turn on the camera. 2. Set the TV out to match the TV’s video out format. -
Page 88: Connecting The Camera To A Printer
You can print your photos directly using a PictBridge compatible printer. 1. Turn on your camera. 2. Set PictBridge settings. 3. Connect the camera to the printer using the USB cable. For more details on how to print photos, see “PictBridge” on page 74. -
Page 89: Appendix
• Reset the file number. See “Setting File Numbering” on page 77 • Plug in a new memory card. Warning Do not change the folder and file names in the memory card using your PC. It may be unable to playback the data using the camera. -
Page 90: Troubleshooting
LCD, then Batteries are exhausted, please replace or recharge. the camera turns off. LCD screen displays ‘No The image file on the memory card. Image file format may not be image’. supported. LCD screen displays ‘Not Function is only available for specific file types. File format is not available for this file’. - Page 91 TV screen TV-out type to match your TV system. Do not force the lens to go back. The type of the battery used The lens got stuck up. may be incorrect or the battery power level is too low. Change the...
-
Page 92: Specifications
Still Image: EXIF 2.2 compatible format (JPEG compression) Video: AVI (MJPEG) Audio: WAV Resolution 12M (4000 X 3000), 3:2 (4000 X 2672), 8M (3264 X 2448), 5M (2592 X (Still image) 1944), 3M (2048 X 1536), HD (1920 x 1080), VGA (640 X 480) Resolution (Video) - Page 93 Normal, B&W, Sepia, Negative, Mosaic, Vivid Red, Vivid Green, Vivid Blue Storage Internal memory: 32MB flash memory External memory: SD (up to 4GB), SDHC card (up to 32GB guaranteed) OSD Language English, French, Spanish, German, Italian, Russian, Portuguese, Brazil Portuguese, Dutch, Turkish, Polish, Hungarian, Romanian, Czech,...
- Page 94 Speaker Built-in Dimensions 92 X 60.5 X 25.03 mm Weight 125g...
Need help?
Do you have a question about the V1200 and is the answer not in the manual?
Questions and answers