Table of Contents
Advertisement
Available languages
Available languages
Quick Links
Advertisement
Table of Contents

Related Manuals for DEGEN DE 13DSP


Summary of Contents for DEGEN DE 13DSP
- Page 1 DE 13DSP RECEPTOR FM / MW / SW1 / SW2 FM / MW / SW1 / SW2 RECEIVER ES Manual de instrucciones..… … … … … …...
- Page 2 ESPAÑOL INFORMACION: Este aparato es conforme con la Directiva 2012/19/UE sobre residuos de aparatos eléctricos y electrónicos (RAEE). Una vez finalizada su vida útil, debe ser reciclado o desmantelado. Los productos electrónicos no reciclados son potencialmente peligrosos para el medio ambiente. Para más información, puede contactar con su distribuidor, vendedor o su administración local o regional.
-
Page 3: Lateral Derecho
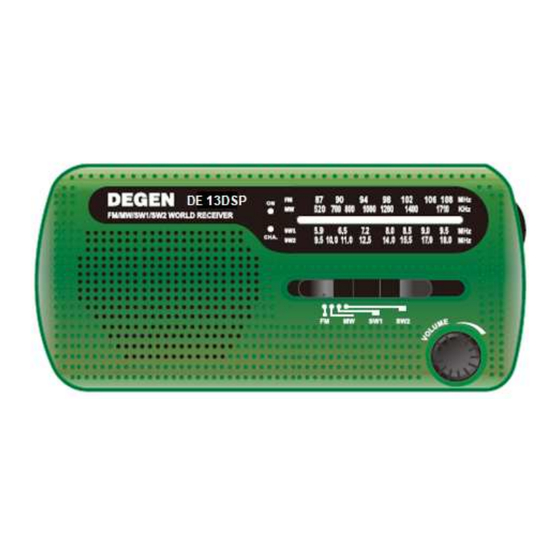
CARACTERISTICAS: ● Receptor FM / MW / SW1 / SW2. 87 – 108 MHz. MW: 520 – 1710 kHz. SW1: 5.9 – 9.5 MHz. SW2: 9.5 – 18.0 MHz. ● Alimentación solar y dinamo. ● Luz LED roja (intermitente) y función de alarma. ●... -
Page 4: Parte Superior
PARTE SUPERIOR: PARTE TRASERA: Conmutador multifuncional. (14) Compartimento para pilas (tipo AAA). (10) Interruptor [ON/OFF]. (15) Manivela de la dinamo. (11) Panel solar. (16) Compartimento de baterías (Ni-MH). (12) Orificio para la correa de mano. (17) Linterna LED. (13) Antena telescópica. ALIMENTACION: Baterías Ni-MH: 1. - Page 5 la batería Ni-MH en el conector respetando su posición. A continuación sitúe el interruptor [ON/OFF] en la posición “ ”. Pilas AAA (Alcalinas o recargables): 1. El compartimento para las pilas se encuentra en la parte inferior de la radio. 2.
- Page 6 2. Coloque la radio bajo la luz del sol; asegúrese de que la luz del sol radia directamente sobre el panel solar de la radio. La radio cargará la batería Ni-MH automáticamente. 3. Durante la carga, el led “CHA” de la parte delantera de la radio permanecerá encendido.
- Page 7 2. Conecte un extremo del cable USB al conector USB del ordenador; conecte el otro extremo al conector [DN IN] de la radio. La radio cargará la batería Ni-MH automáticamente. 3. Durante la carga, se encenderá el led “CHA” de la parte delantera de la radio. Nota: - El tiempo de carga máximo es de 8 horas.
-
Page 8: Escuchar La Radio
USO DE LA LUZ DE ALERTA: Seleccione “ ” en el conmutador multifuncional, el led rojo central parpadeará. Seleccione la posición “OFF” en el conmutador multifuncional para desactivar la luz de alerta. USO DE LA SIRENA: Seleccione “ ” o “OFF” en el conmutador multifuncional para activar o desactivar la sirena. -
Page 9: Especificaciones Tecnicas
Notas: - Mientras escucha emisoras de radio en FM, SW1 y SW2, extienda la antena telescópica al máximo, gire la radio y acérquese a una ventana para obtener la mejor recepción. - Cuando escuche emisoras de radio en MW, gire la radio para obtener la mejor recepción. -
Page 10: Declaracion De Conformidad
DECLARACION DE CONFORMIDAD: Español - 10 -... -
Page 11: Condiciones De Garantia
CONDICIONES DE GARANTIA: Las condiciones de garantía reúnen todos los derechos que tiene el consumidor o usuario de acuerdo con lo dispuesto en la Ley General para la Defensa de los Consumidores y Usuarios. Estas condiciones de garantía son independientes de los derechos que tiene el consumidor o usuario frente al vendedor derivado del contrato de compra-venta del aparato. - Page 12 ENGLISH INFORMATION: This equipment complies whit Directive 2012/19/EU on waste electrical and electronic equipment (WEEE). Once its useful life is finished, it must be recycled or dismantled. Non-recycled electronic products are potentially dangerous for the environment. For more information, please contact your distributor, salesperson or your local or regional administration.
-
Page 13: Right Side
CHARACTERISTICS: ● FM / MW / SW1 / SW2 receiver. FM: 87 - 108 MHz. MW: 520 - 1710 kHz. SW1: 5.9 - 9.5 MHz. SW2: 9.5 - 18.0 MHz. ● Cranking dynamo & solar power supply. ● Red LED light (flashes) & alarm function. ●... -
Page 14: Top Side
TOP SIDE: REAR SIDE: Multifunctional switch. (14) Battery compartment (AAA type). (10) [ON/OFF] power switch. (15) Hand crank. (11) Solar panel. (16) Battery compartment (Ni-MH). (12) Strap hole. (17) LED flashlight. (13) Telescopic antenna. POWER SUPPLY: Ni-MH battery: 1. The battery compartment is in the rear of the radio. -
Page 15: Solar Power
battery plug into its socket according to the correct direction. Then set the [ON/OFF] switch to “ ” position. AAA batteries (Alkaline or rechargeable): 1. The battery compartment is in the bottom side of the radio. 2. After installing the batteries, select “ ”... - Page 16 2. Place the radio in the sunlight; make sure that the solar panel of the radio is irradiated directly by the sunlight. The radio will charge the Ni-MH battery automatically. 3. While charging, the “CHA” LED on the front of the radio will be on. CHARGING WITH THE DYNAMO (Ni-MH battery): 1.
- Page 17 2. Plug one port of the USB cable into the USB jack of the computer; plug the other port into the [DN IN] jack of the radio. The radio will charge the Ni-MH battery automatically. 3. While charging, the “CHA” LED on the front of the radio will be on. Note: - The maximum charging time is 8 hours.
-
Page 18: Listening To The Radio
TO USE THE ALERT LIGHT: Select “ ” on the multifunctional switch, the middle red LED will flash. Select “OFF” on the multifunctional switch to turn OFF the alert light. TO USE THE SIREN: Select “ ” or “OFF” on the multifunctional switch to turn ON/OFF the siren. Note: - You can use the flashlight, alert light and siren in any operation mode. -
Page 19: Technical Specifications
Notes: - While listening to the FM, SW1 and SW2, pull up the telescopic antenna all the way, rotate the radio and get close to a window for best reception. - When listening to MW, rotate the radio for best reception. 5. -
Page 20: Declaration Of Conformity
DECLARATION OF CONFORMITY: English - 20 -... -
Page 21: Guarantee Conditions
GUARANTEE CONDITIONS: The guarantee conditions comply with all the rights that the consumer or user has in accordance with the provisions of the General Law for the Protection of Consumers and Users. These guarantee conditions are independent of the rights that the consumer or user has against the salesperson derived from the purchase-sale agreement of the equipment.
Need help?
Do you have a question about the DE 13DSP and is the answer not in the manual?
Questions and answers