Table of Contents
Advertisement
Quick Links
Advertisement
Table of Contents

Related Manuals for Gaggenau RW222 Series


Summary of Contents for Gaggenau RW222 Series
- Page 1 Gaggenau Information for Use RW222.. RW282.. Wine storage compartment...
-
Page 2: Table Of Contents
Further information and explanations are available online: Table of contents 1 Safety ........... 4 7.4 Setting the temperature... 14 1.1 General information.... 4 7.5 Lock......... 15 1.2 Intended use...... 4 7.6 Display brightness.... 15 1.3 Restriction on user group.. 4 8 Additional functions .... 15 1.4 Safe transport ...... - Page 3 13 Troubleshooting...... 21 14 Storage and disposal.... 23 14.1 Taking the appliance out of operation ....... 23 14.2 Disposing of old appliance ... 23 15 Customer Service.... 23 15.1 Product number (E-Nr.) and production number (FD).. 24 16 Technical data ...... 24...
-
Page 4: Safety
en Safety 1 Safety Observe the following safety instructions. 1.1 General information Read this instruction manual carefully. ¡ Keep the instruction manual and the product information safe ¡ for future reference or for the next owner. Do not connect the appliance if it has been damaged in transit. ¡... -
Page 5: Safe Installation
Safety en 1.5 Safe installation WARNING ‒ Risk of electric shock! Incorrect installation is dangerous. Connect and operate the appliance only in accordance with the ▶ specifications on the rating plate. Connect the appliance to a power supply with alternating cur- ▶ rent only via a properly installed socket with earthing. The protective conductor system of the domestic electrical in- ▶... -
Page 6: Safe Use
en Safety Portable multiple socket strips or portable power supply units may overheat and cause a fire. Do not place portable multiple socket strips or power supply ▶ units on the back of the appliance. 1.6 Safe use WARNING ‒ Risk of electric shock! An ingress of moisture can cause an electric shock. -
Page 7: Damaged Appliance
Safety en WARNING ‒ Risk of fire! Electrical devices within the appliance may cause a fire, e.g. heat- ers or electric ice makers. Do not operate electrical devices within the appliance. ▶ WARNING ‒ Risk of injury! Injury to the eyes caused by escaping flammable refrigerant and hazardous gases. - Page 8 en Safety Switch off the appliance. → Page 14 ▶ Unplug the mains plug from the mains or switch off the circuit ▶ breaker in the fuse box. Call customer service. → Page 23 ▶...
-
Page 9: Preventing Material Damage
Preventing material damage en – Maintain a 30 mm clearance to Preventing material damage 2 Preventing material electric or gas cookers. – Maintain a 300 mm clearance to damage oil or solid-fuel cookers. Never cover or block the exterior ¡ Preventing material damage ATTENTION! ventilation grilles. -
Page 10: Criteria For The Installation Location
en Installation and connection Equipment and accessories ¡ Climate Permitted room tem- Installation instructions ¡ class perature User manual ¡ 16 °C to 32 °C Customer service directory ¡ 16 °C to 38 °C Warranty enclosure ¡ 16 °C to 43 °C Energy label ¡ Information on energy consump- ¡... - Page 11 Installation and connection en Check the mains plug is inserted properly. The appliance is now ready for use.
-
Page 12: Familiarising Yourself With Your Appliance
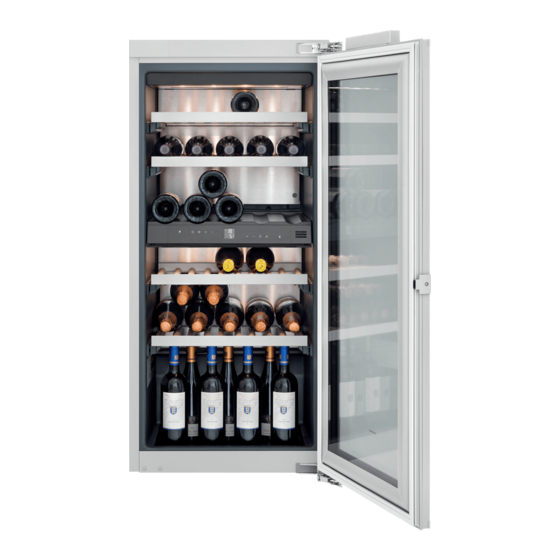
en Familiarising yourself with your appliance Familiarising yourself with your appliance 5 Familiarising yourself with your appliance Familiarising yourself with your appliance 5.1 Appliance You can find an overview of the parts of your appliance here. Interior lighting Rating plate → Page 24 Screw foot Control panel → Page 13 Extendable bottle shelf → Page 14... -
Page 13: Control Panel
Familiarising yourself with your appliance en Note: Deviations between your appli- ance and the diagrams may differ with regard to their features and size. 5.2 Control panel You can use the control panel to configure all functions of your appliance and to obtain information about the operating status. The main switch turns the ap- sets the temperature of pliance on or off. -
Page 14: Features
en Features Displays the set temperature Basic operation 7 Basic operation of the wine-storage compart- ment °C. Basic operation switches the interior light- 7.1 Switching on the appli- ing on or off. ance switches the warning signal Press off. The appliance begins to cool. Set the required temperature. -
Page 15: Lock
Additional functions en Setting the display brightness 7.5 Lock Press and hold for 5 seconds. The button lock prevents the appli- "MENU" appears in the display and ance from being operated accident- "c" flashes. ally or incorrectly while running. Press until "h" lights up. Switching on the keylock Press Press and hold... -
Page 16: Ventilation
en Alarm Press Setting the brightness of the presentation lighting The submenu display shows "h". Press Press appears in the display. The settings menu is exited. Press and hold Press and hold / until the Alarm required brightness is reached. 9 Alarm Release Alarm... -
Page 17: Arranging The Maximum Number Of Standard Bottles
Wine storage compartment en Before you enjoy your wine, you ¡ 10.1 Arranging the maximum should slowly warm it to room tem- number of standard perature. Take rosé out of the ap- bottles pliance 2 to 5 hours before con- suming, and take red wine out of To place the maximum number of ▶... -
Page 18: Defrosting
en Defrosting Suitable cleaning agents and ¡ Defrosting 11 Defrosting cleaning cloths are available from our customer service, your dealer Defrosting or on our website. 11.1 Defrosting in the wine storage compartment 12.2 Preparing the appliance for cleaning When the appliance is operating, condensation droplets or frost form Switch off the appliance. -
Page 19: Cleaning The Condensation Channel And Drainage Hole
Cleaning and servicing en If liquid gets into the drainage hole, 12.5 Removing the fittings the evaporation pan may overflow. If you want to clean the fittings thor- The rinsing water must not get into ▶ oughly, remove these from your ap- the drainage hole. -
Page 20: Replacing The Odour Filter
en Cleaning and servicing Push the bottle shelf fully to the rear until it clicks into place at the front. Push the rear bottle shelf downwards and click it into place. 12.6 Replacing the odour fil- Push the odour filter cover, release it and remove it. -
Page 21: Troubleshooting
Troubleshooting en Troubleshooting 13 Troubleshooting You can rectify minor faults on your appliance yourself. Read the troubleshoot- Troubleshooting ing information before contacting after-sales service. This will avoid unneces- sary costs. WARNING Risk of electric shock! Improper repairs are dangerous. Repairs to the appliance should only be carried out by trained specialist ▶... - Page 22 en Troubleshooting Fault Cause and troubleshooting The appliance hums, Not a fault. A motor is running, e.g. refrigerating unit, bubbles, buzzes, fan. Refrigerant flows through the pipes. The motor, gargles or clicks. switches or solenoid valves are switching on or off. No action required.
-
Page 23: Storage And Disposal
Storage and disposal en Dispose of the appliance in an en- Storage and disposal 14 Storage and disposal vironmentally friendly manner. Information about current disposal Storage and disposal methods are available from your 14.1 Taking the appliance out specialist dealer or local authority. of operation This appliance is la- Switch off the appliance. -
Page 24: Product Number (E-Nr.) And Production Number (Fd)
en Technical data Detailed information on the warranty You can find more information about period and terms of warranty in your your model online at https:// country is available from our after- eprel.ec.europa.eu/ . This web ad- sales service, your retailer or on our dress is linked to the official EU website. - Page 28 BSH Hausgeräte GmbH Valid within Great Britain: Carl-Wery-Straße 34 Imported to Great Britain by 81739 München, GERMANY BSH Home Appliances Ltd. www.gaggenau.com Grand Union House Old Wolverton Road Wolverton, Milton Keynes MK12 5PT United Kingdom...
Need help?
Do you have a question about the RW222 Series and is the answer not in the manual?
Questions and answers