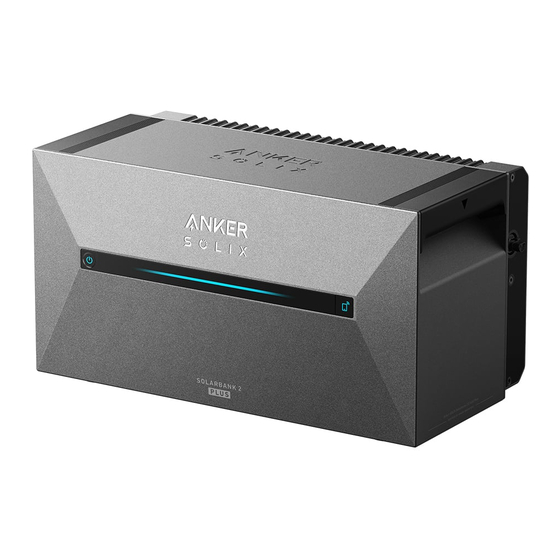
Anker SOLIX Solarbank 2 E1600 Plus Manual
Hide thumbs
Also See for SOLIX Solarbank 2 E1600 Plus:
- User manual (10 pages) ,
- Quick installation manual (2 pages) ,
- Installation manual
Table of Contents
Advertisement
Quick Links
Warning Signs
About This Guide
Unboxing
Check Before Installation
What's in the Anker SOLIX Solarbank 2 E1600 Plus Box
Optional Accessories
Overview
Product Overview
Button Controls
LED Guide
Installing Your Solarbank
Select an Installation Site
What You Need
Installation
Electrical Connections
Connecting Cables
Turn On the Solarbank
Using the App
Download the App
Account Registration
Initialization Setting
Network Configuration
Add Home Devices (Optional)
Firmware Update
Power Mode Setting Initialization
Energy Plan Setting
FAQ
Specifications
Advertisement
Table of Contents

Related Manuals for Anker SOLIX Solarbank 2 E1600 Plus


Summary of Contents for Anker SOLIX Solarbank 2 E1600 Plus
- Page 1 Warning Signs About This Guide Unboxing Check Before Installation What's in the Anker SOLIX Solarbank 2 E1600 Plus Box Optional Accessories Overview Product Overview Button Controls LED Guide Installing Your Solarbank Select an Installation Site What You Need Installation Electrical Connections...
-
Page 2: Warning Signs
This guide shows the primary system for the whole-home photovoltaic energy cycle, with Anker SOLIX Solarbank 2 E1600 Plus installed as the main service equipment. This guide describes Anker SOLIX Solarbank 2 E1600 Plus in terms of unboxing, product overview, installation, electrical connections, button and light explanation, customer service, and safety guidelines. -
Page 3: Optional Accessories
What's in the Anker SOLIX Solarbank 2 E1600 Plus Box Model: A17C3 Anker SOLIX Solar Panel Anker SOLIX Solarbank 2 Extension Cable (3m) Anker SOLIX AC Cable with E1600 Plus (×8) Schuko (5m) M5×60 Self-Tapping Wrench for Removing L-Shape Wall Mount Fitting... -
Page 4: Product Overview
Overview Product Overview Power Button IoT Button Power Status LED IoT Status LED Working Status LED PV Connector Ports for PV Input 1 PV Connector Ports for PV Input 2 Ground Screw Hole (Protective earthing conductor wire should be at least 4mm²) Grid-Tied Terminal... -
Page 5: Button Controls
Button Controls Button Action Function Press for 4 seconds Turn on Solarbank Press for 2 seconds Turn off Solarbank Press once when powered on Check current battery level Press once Enable Internet connection Press for 2 seconds Disable Internet connection Press for 7 seconds Reset Bluetooth and Wi-Fi Simultaneously press for 9... - Page 6 Solarbank 2 E1600 Plus Expansion Battery Module ×1 ×2 ×3 ×4 ×5 Energy 1600Wh 3200Wh 4800Wh 6400Wh 8000Wh 9600Wh 2. Equipment Dimensions Figure: Figure: Anker SOLIX Solarbank 2 E1600 Plus 254mm 460mm 249mm Figure: Anker SOLIX BP1600 Expansion Battery 233mm 460mm 217.5mm...
-
Page 7: Installation
What You Need Anker SOLIX Solarbank 2 Multiple Anker SOLIX L-Shape Wall Mount Fitting E1600 Plus BP1600 Expansion Batteries (×2) M5×60 Self-Tapping Fixed Bracket M5×10 Combined Phillips Expansion Screws (×2) Screws (×2) Note: The following components are not included in this package. Please make sure they are ready before installation and electrical connection. - Page 8 2. Use a Phillips screwdriver to pry open the rubber plug. Note: When installing the bottom battery pack or only one Solarbank, please do not remove the bottom rubber plug to avoid water damage to the equipment. 3. Stack expansion batteries in sequence with Solarbank at the top by inserting the two corresponding ports into each other.
- Page 9 4. Pre-fasten the L-Shape Wall Mount Fitting to both sides of the first expanion battery under Solarbank using M5×10 combined Phillips screws. The installation of the L-Shape Wall Mount Fitting will not be affected whether it is mounted on the front or back side. 5.
- Page 10 6. Use a hammer to tap the plastic sleeve of the M5×60 self-tapping expansion screw into the hole, and then use a Phillips screwdriver to fasten the M5×60 self-tapping screw against the L-Shape Wall Mount Fitting. 7. Use a Phillips screwdriver to fasten the M5×10 combination Phillips screws against the L-Shape Wall Mount Fitting; then secure the interlocking bracket to the expansion battery using the M5×10 combined Phillips screws to complete the installation.
-
Page 11: Electrical Connections
Note: · The grid connection must be connected to a socket with grounding, otherwise there is a risk of electric shock. Alternatively, the casing should be grounded. The grounding point is shown below. · This product includes a double isolation transformer, which meets safety requirements without array ground insulation resistance measurement and array residual current detection. - Page 12 2. Find the PV connector ports of your solar panels. 3. Connect each set of PV modules to each set of PV input ports in Solarbank using the included Anker SOLIX Solar Panel Extension Cable (3m). Solar Panels Anker SOLIX Solarbank 2 E1600 Plus...
-
Page 13: Using The App
3. If you want to turn it off, please use the wrench to remove the solar panel extension cables on the device side and press the power button for 2 seconds. Using the App Download the App Search "Anker" and download the App via App Store or Google Play. Or scan QR code below to go to the corresponding application store. -
Page 14: Account Registration
You can login via Anker account, Amazon, or Apple ID. If you do not have an Anker account, you can tap [Sign Up] to register an account: Please prepare an email for the registration process. Passwords must contain 8-20 characters using uppercase and lowercase letters, numbers, and symbols. - Page 15 Step 2 Press the right button on the device, enable Wi-Fi mode. · When the IoT light flashes, the device is in Configuration mode. · If the device has configured Wi-Fi and you wish to reset it, you may hold the IoT button for 7 seconds. Step 3 1.
- Page 16 Step 4 The Anker App will automatically search for your Solarbank. Once the device is found, it will appear on the list. · Please make sure your phone's Bluetooth is on, and the Anker App is authorized to access Bluetooth and Wi-Fi.
- Page 17 Step 5 After connecting Solarbank via Bluetooth, you should choose a Wi-Fi network for the device. Select the Wi-Fi network from the list and enter the password. · The device only supports 2.4GHz Wi-Fi. · Make sure the password is correct.
- Page 18 · Move the router closer to the device. · Make sure the Wi-Fi password is correct. Solarbank 2 E1600 Plus Add Home Devices (Optional) If you have purchased Anker SOLIX Smart Meter, please scan the QR code below for more details.
-
Page 19: Firmware Update
Anker SOLIX Smart Meter can be added to the home system by following the process below. If you do not need to add any devices, you can skip the process by clicking [Skip]. 1. Click [Start] to begin the process of adding home devices. - Page 20 Power Mode Setting Initialization 1. Tap [Create] to create a system for the previously added device. 2. You can initially set up the system's energy plan with the following options : · Self-Consumption: Solarbank will intelligently perform the charging and discharging based on real-time power demand required by household loads obtained from the Smart Meter.
- Page 21 Custom Mode Select Custom Mode, then click the button below it: 1. Tap [Settings] to enter the Energy Plan setting page, which will list all the plans you have set up. If there is no plan, Solarbank will discharge 200W to home loads at all times. 2.
- Page 22 A: No. Never connect two or more components in series because this causes the input voltage to exceed 60V and will damage the equipment. Solar Panels Anker SOLIX Solarbank 2 E1600 Plus Never connect two or more components in series because this causes the input voltage to exceed 60V and will...
-
Page 23: Specifications
Specifications Specifications are subject to change without notice. Model A17C3 Rated Capacity 100Ah/1600Wh Rechargeable Li-Ion Battery LifePO4 Wireless Connection Bluetooth, 2.4G Hz Wi-Fi Max PV Input Voltage 60VDC Max PV Input Current 16ADC (per channel) Max Isc PV 20ADC PV Terminal Max MPPT input power 1200W Operation Voltage Range...
Need help?
Do you have a question about the SOLIX Solarbank 2 E1600 Plus and is the answer not in the manual?
Questions and answers