
Related Manuals for CommScope ERA UAP2


Summary of Contents for CommScope ERA UAP2
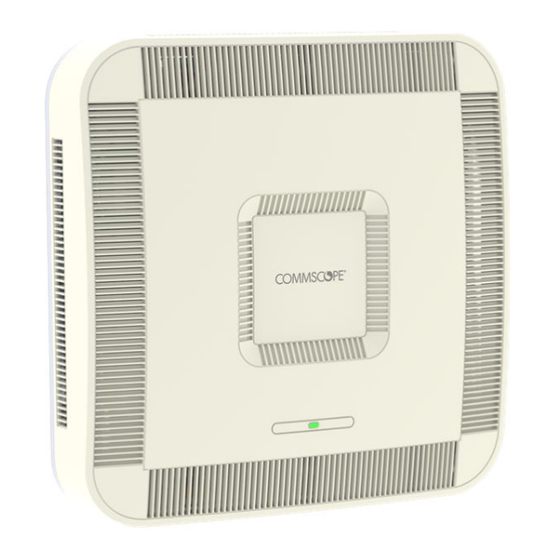
- Page 1 DRAFT: CONFIDENTIAL ® CommScope ERA UAP2 with Fiber Interface Installation Guide Release P/N M0203AB, DRAFT Rev D 31 Aug 2023...
-
Page 2: Copyright Statement
© Copyright 2023 CommScope, All rights reserved. THIS DOCUMENT HAS BEEN DEVELOPED BY COMMSCOPE, AND IS INTENDED FOR THE USE OF ITS CUSTOMERS AND CUSTOMER SUPPORT PERSONNEL. THE SPECIFICATIONS AND INFORMATION REGARDING THE PRODUCTS IN THIS MANUAL ARE SUBJECT TO CHANGE WITHOUT NOTICE. -
Page 3: Document Revision History
■ revises Table 3: Maximum Power Output by Frequency (page 12) ■ added 2 new points in Powering on a Fiber UAP2 (page 39). CommScope ERA ® UAP2 with Fiber Interface Installation Guide , Release P/N M0203AB, DRAFT Rev D... -
Page 4: Table Of Contents
Mounting a UAP2 with a Hybrid Splice Kit..................21 Assembling and Wiring the Hybrid Fiber Splice Box..............21 Mounting a UAP2 on a Ceiling......................29 Mounting a UAP2 on a Wall........................ 34 CommScope ERA ® UAP2 with Fiber Interface Installation Guide , Release P/N M0203AB, DRAFT Rev D... - Page 5 DRAFT: CONFIDENTIAL Contents Connect the Fiber UAP2 to a Classic CAN or TEN................38 Chapter 5. Powering on a Fiber UAP2....................39 Contacting CommScope........................40 Hardware to Software Mapping Information..................40 DAS and Small Cell Technical Support....................40 Telephone Helplines........................40 Online Support..........................40 Waste Electrical and Electronic Equipment Recycling................
-
Page 6: Chapter 1. Document Overview
This document may contain any of the following notes, cautions, and warning icons. Note: This symbol without additional icons indicates a general note. Notes provide information about special circumstances. CommScope ERA ® UAP2 with Fiber Interface Installation Guide , Release P/N M0203AB, DRAFT Rev D... -
Page 7: Abbreviations Used In This Guide
Carrier Access Point, Low Power Multi-Mode Fiber CAP M Carrier Access Point, Medium Power Optical Transport Category Power over Ethernet Copper Transport Part Number CommScope Mobility Solutions Regional-Area Network Decibel Radio Frequency Decibel-milliwatts Rack Unit Direct Current Receive EFTA European Free Trade Association... -
Page 8: Safely Working With Era Hardware
Make sure the unit's settings are correct for the intended use (refer to the manufacturer product information) and regulatory requirements are met. Do not carry out any modifications or fit any spare parts, which are not sold or recommended by the manufacturer. CommScope ERA ® UAP2 with Fiber Interface Installation Guide , Release... -
Page 9: General Installation Safety Requirements
Do not remove protective caps from any of the connectors until instructed to do so. Note: The UAP2 is to be used only with CommScope (NEC Class 2) or Limited Power Source ERA Subrack, or equivalent. Guard Against Damage from Electro-Static Discharge Note: Electro-Static Discharge (ESD) can damage electronic components. -
Page 10: Compliance
RF radiation is not emitted in excess of the Health Canada's requirement. Information can be obtained at http://www.hc-sc.gc.ca/ewh-semt/pubs/radiation/radio_guide-lignes_direct-eng.php. Changes or modifications not expressly approved by the party responsible for compliance could void the user's authority to operate the equipment. CommScope ERA ® UAP2 with Fiber Interface Installation Guide , Release P/N M0203AB, DRAFT Rev D... -
Page 11: Equipment Symbols Used / Compliance
Please observe the meanings of the following symbols used in our equipment and the compliance warnings listed in Table 2: Compliance Labels (page 12). CommScope ERA ® UAP2 with Fiber Interface Installation Guide , Release P/N M0203AB, DRAFT Rev D... -
Page 12: Maximum Output Power Levels
1930 - 1995 30.9 2110 - 2180 30.7 2110 - 2170 30.8 2496 - 2690 29.9 2620 - 2690 29.9 3450 - 3550 29.3 CommScope ERA ® UAP2 with Fiber Interface Installation Guide , Release P/N M0203AB, DRAFT Rev D... - Page 13 TABLE 3: Maximum Power Output by Frequency (continued) UAP2 Band DL Frequency Range (MHz) Power Output EIRP (dBm) 3410 - 3640 29.2 3580 - 3800 29.1 3700 - 3980 29.3 CommScope ERA ® UAP2 with Fiber Interface Installation Guide , Release P/N M0203AB, DRAFT Rev D...
-
Page 14: Chapter 2. Fiber Uap2
The red Primary port is always used. The blue Secondary port is used if more than 320 MHz of transport bandwidth is required. FIGURE 1: UAP2 Ports CommScope ERA ® UAP2 with Fiber Interface Installation Guide , Release P/N M0203AB, DRAFT Rev D... -
Page 15: Uap2 Accessories And Options
Wall and Ceiling mounting brackets are included with the UAP2. For Ceiling mounting, a 24” drop rail is also needed. In the NAR market, this drop rail can be ordered as part OC-BA50A. In other markets the drop rail may not be available as a CommScope part number; look for compatible third-party options such as the Eaton BA50A. - Page 16 DRAFT: CONFIDENTIAL Chapter 2: Fiber UAP2 TABLE 5: Supported SFP+ Modules (continued) CommScope PN Description Maximum Range 7680813 SFP+, 10GBase-LR, Single Mode 10km 7803247 SFP+, 10GBase CWDM-270 40km 7803249 SFP+, 10GBase CWDM-290 40km 7803291 SFP+, 10GBase CWDM-310 40km 7803293 SFP+, 10GBase CWDM-330...
- Page 17 DRAFT: CONFIDENTIAL Chapter 2: Fiber UAP2 TABLE 5: Supported SFP+ Modules (continued) CommScope PN Description Maximum Range A 7846857 BIDI 40km Kit 40km 1 x Attenuator , LC/UPC, 7dB A7843668 1 x 10G BIDI SFP+ TX1270/RX1330 40km A7832204 1 x 10G BIDI SFP+ TX1330/RX1270...
-
Page 18: Chapter 3. Plan And Prepare For A Fiber Uap2 Installation
Using the Hybrid Splice Box will increase the needed space; see Figure 3: UAP2 Dimensions with Hybrid Splice Box (page 21). CommScope ERA ® UAP2 with Fiber Interface Installation Guide , Release P/N M0203AB, DRAFT Rev D... -
Page 19: Unpack And Inspect The Uap2 And Accessories
2. Unpack each container while carefully checking the contents for damage and verify with the packing slip. 3. If damage is found or parts are missing, file a claim with the commercial carrier and notify CommScope Technical Support (see DAS and Small Cell Support). -
Page 20: Chapter 4. Mount The Fiber Uap2
Kit. 3. Connect the Local Power Jumper Cable to the UAP2 -42 to -57 Vdc Power connector. 4. Plug AC power cord into an AC power source. CommScope ERA ® UAP2 with Fiber Interface Installation Guide , Release P/N M0203AB, DRAFT Rev D... -
Page 21: Mounting A Uap2 With A Hybrid Splice Kit
FIGURE 3: UAP2 Dimensions with Hybrid Splice Box The UAP2 Hybrid Fiber Splice Box Kit (CommScope PN 7693816-xx) provides a connection solution for both power and optical signals to a UAP2. You have the option to use composite cable to transport signals from a TEN or Classic CAN via fiber and power from a remote DC supply, and then use the UAP2 Hybrid Fiber Splice Box Kit to terminate the power and fiber at the UAP2. - Page 22 M4 washer. 3. From the UAP2 Hybrid Fiber Splice Box Kit, insert Fiber Patch Cord in one of the cable glands indicated in the graphic. CommScope ERA ® UAP2 with Fiber Interface Installation Guide , Release P/N M0203AB, DRAFT Rev D...
- Page 23 It is necessary to remove the nut to perform this action. The cable must be fed through the nut and it must be retightened once finished. 6. Bend the spliced fibers using the corner guides and fix the splices to the splice holder. CommScope ERA ® UAP2 with Fiber Interface Installation Guide , Release...
- Page 24 9. Remove the sealing nut and rubber of the cable gland and insert the optical cables. 10. Place each cable into one of the grooves of the seal insert. CommScope ERA ® UAP2 with Fiber Interface Installation Guide , Release...
- Page 25 13. It is possible to separate the optical cables and use two different cable glands. Remove the sealing nut and rubber on each cable gland. 14. Close all unused grooves with the plastic cylinders, no matter if one or two cable glands are used. CommScope ERA ® UAP2 with Fiber Interface Installation Guide , Release...
- Page 26 Use the 4-wire power setup when Limited Power Source (LPS) is required by local electrical/safety codes. Each UAP2 can accept two Limited Power Sources from the DC PSU where local regulations require it. CommScope ERA ® UAP2 with Fiber Interface Installation Guide , Release...
- Page 27 2. After you have wired the Hybrid Fiber Splice box, complete the steps in Mounting a UAP2 on a Ceiling Mounting a UAP2 on a Wall. CommScope ERA ® UAP2 with Fiber Interface Installation Guide , Release P/N M0203AB, DRAFT Rev D...
- Page 28 2. After you have wired the Hybrid Fiber Splice box, complete the steps in Mounting a UAP2 on a Ceiling Mounting a UAP2 on a Wall. CommScope ERA ® UAP2 with Fiber Interface Installation Guide , Release P/N M0203AB, DRAFT Rev D...
-
Page 29: Mounting A Uap2 On A Ceiling
The drop rail is NOT included with the UAP2 and needs to be ordered separately. In the NAR market, this drop rail can be ordered as part OC-BA50A. In other markets the drop rail may not be available as a CommScope part number; look for compatible third-party options such as the Eaton BA50A. - Page 30 UAP2 kit. 9. Slide the Power Supply onto the L-bracket and secure with the four screws provided in the Power Supply Kit. CommScope ERA ® UAP2 with Fiber Interface Installation Guide , Release P/N M0203AB, DRAFT Rev D...
- Page 31 Mounting a UAP2 with a Hybrid Splice Kit. 12. Close splice box cover and tighten screws. 13. Remove the angle brackets from the splice box plate. CommScope ERA ® UAP2 with Fiber Interface Installation Guide , Release P/N M0203AB, DRAFT Rev D...
- Page 32 16. Insert the SFP+ modules in the UAP2 Primary and Secondary ports. Depending on the configuration, one or two SFP+ modules (Primary and Secondary) may be required. 17. Lift the UAP2 to the splice box plate. CommScope ERA ® UAP2 with Fiber Interface Installation Guide , Release...
- Page 33 Insert the AP into the splice box mounting plate slot and slide until the AP plate meets the tabs on the splice box plate. c. Tilt up the drop rail bar to insert the UAP2 in the ceiling tile cut out. CommScope ERA ® UAP2 with Fiber Interface Installation Guide , Release...
-
Page 34: Mounting A Uap2 On A Wall
UAP2 . 4. On the wall, use the U-bracket as a template to mark the holes at the location where you will mount the UAP2. CommScope ERA ® UAP2 with Fiber Interface Installation Guide , Release... - Page 35 5. Attach the U-bracket to the wall with four anchor screws. Note: The anchor screws are not provided by CommScope. Follow the local building codes to determine the anchor screw and torque required. 6. For AC power configurations only, attach the PSU L-bracket to the U-bracket using the four M4 screws provided in the mounting kit.
- Page 36 11. Attach the base plate to the UAP2. 12. Insert the SFP+ modules in the UAP2 Primary and Secondary ports. Depending on the configuration, one or two SFP+ modules (Primary and Secondary) may be required. CommScope ERA ® UAP2 with Fiber Interface Installation Guide , Release...
- Page 37 15. Push the UAP2 downward and slide it into the locked position. 16. If using a PSU, plug the AC power cord into an AC power source. CommScope ERA ® UAP2 with Fiber Interface Installation Guide , Release...
-
Page 38: Connect The Fiber Uap2 To A Classic Can Or Ten
(page 38) to Step 4 (page 38) using the blue Secondary port on the UAP2 and an adjacent port on the same OPT card. CommScope ERA ® UAP2 with Fiber Interface Installation Guide , Release P/N M0203AB, DRAFT Rev D... -
Page 39: Chapter 5. Powering On A Fiber Uap2
■ Slow-Flashing Red—The ERA GUI is reporting a critical alarm for the unit. The AP can be recovered without replacing hardware. ■ Steady Red—The ERA GUI is reporting a critical alarm for the unit. The AP or SFP+ must be replaced. CommScope ERA ® UAP2 with Fiber Interface Installation Guide , Release... -
Page 40: Contacting Commscope
24x7 Helpline. Online Support To go to the CommScope Wireless Support Request web site from which you can initiate a Technical Support ticket, do one of the following: ■ Scan the QR Code below. -
Page 41: Waste Electrical And Electronic Equipment Recycling
Visit My Commscope at https://www.mycommscope.com. b. Click New User Registration and follow the prompts. c. After you’ve registered in My CommScope, click the Request Additional Access button and select the DAS and Small Cell Customer Portal from the list of applications. - Page 42 DRAFT: CONFIDENTIAL Contacting CommScope Alternatively, visit MyCommScope and use the DAS and Small Cell Customer Portal Application. 3. In Tools and Documentation, search by product, document category or title. 4. Click on the title of any document to open it.
- Page 43 DRAFT: CONFIDENTIAL CommScope ERA ® UAP2 with Fiber Interface Installation Guide , Release P/N M0203AB, DRAFT Rev D...
- Page 44 DRAFT: CONFIDENTIAL Corporate Headquarters CommScope · Hickory · North Carolina · 28602 · USA T: 1-828-324-2200 www.commscope.com...
Need help?
Do you have a question about the ERA UAP2 and is the answer not in the manual?
Questions and answers