Table of Contents
Advertisement
Quick Links
Advertisement
Table of Contents

Subscribe to Our Youtube Channel
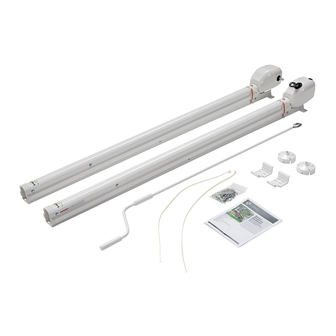
Summary of Contents for Lippert Solera 1500 Series
- Page 1 1500 Series Hybrid Awning OWNER'S MANUAL Scan for product support...
-
Page 2: Table Of Contents
Lippert limited warranty. The “WARNING” symbol above is a sign that a procedure has a safety risk involved and may cause death or serious personal injury if not performed safely and within the parameters set forth in this manual. -
Page 3: Operation
IMPACT OR CRUSH HAZARD - Pitch MUST be set to lower one side of the awning after the awning is extended. Failure to set pitch could lead to water, snow or debris accumulating on the awning fabric, which could cause the awning to move unpredictably, become unstable, and bend or collapse causing death or personal injury or property damage. - Page 4 Locate the crank handle for the awning. Insert the hook end of the crank handle into the eye bolt on the drive head (Fig. 1). Turn the crank in a clockwise direction and fully extend the awning (Fig. 2). Note: Keeping the handle as parallel to the support arm assembly as possible makes it easier to turn. Note: Extension is considered complete when the fabric is completely unrolled, the valance is hanging down from the roll tube and a section of the roll tube is exposed (Fig.
- Page 5 Set pitch using pitch arms with gas strut (Fig.4A). Scan this QR Code to watch the video on How to Correctly Pitch a Lippert Awning. Choose the side of the awning for optimum shade or convenient water runoff. Pitch MUST be set by adjusting the articulating arm to tip one side of the awning to allow water runoff.
-
Page 6: Retracting The Awning
Retracting the Awning The awning MUST be retracted completely during incidents of high wind, heavy rain and/or during any extended time away from the unit. Failure to retract the awning in those instances could cause extensive damage to the awning and unit. Note: The awning can be retracted without resetting the pitch (see Adjusting Pitch). -
Page 7: Troubleshooting
Troubleshooting Solera Hybrid Awning Basic Troubleshooting Chart What Is Happening? What Should Be Done? If optional travel locks are installed, ensure that they have Awning won’t open or close. been unlocked. Check for bad gas strut Check pitch arm bolt for proper tension. (High winds can Awning pitch won’t stay in the flat cause the pitch arm to deviate from the flat position due to position. -
Page 8: Adjusting Pitch Arm Fasteners
Adjusting Pitch Arm Fasteners If the pitch arm does not hold position, it can be tightened by adjusting the bolt (Fig. 9A) in the center of the pitch arm. Use a 1/2" wrench to tighten the nut (Fig. 9A) while holding the bolt (9B) on the other side of the pitch arm with a 1/4"... -
Page 9: Notes
Notes Page 9 Rev: 06.24.24 CCD-0001367... - Page 10 Lippert representative has been provided. Any unauthorized use shall void any applicable warranty. The information contained in this manual is subject to change without notice and at the sole discretion of Lippert. Revised editions are available for free download from lippert.com.


Need help?
Do you have a question about the Solera 1500 Series and is the answer not in the manual?
Questions and answers