Advertisement
Advertisement
Table of Contents

Related Manuals for eufy Security eufyCam E330


Summary of Contents for eufy Security eufyCam E330
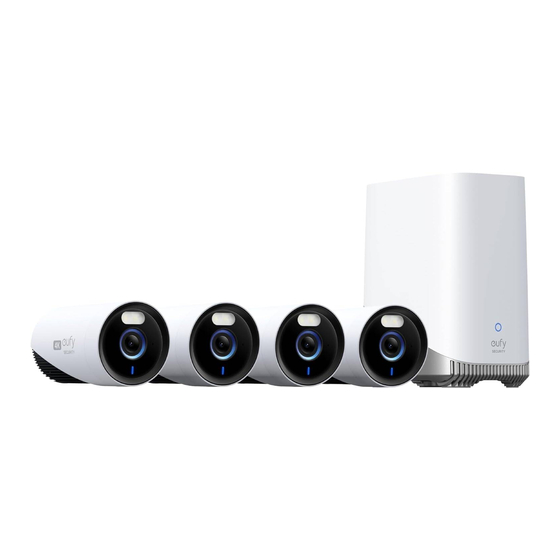
- Page 1 QUICK START GUIDE E330 eufyCam (Professional)
- Page 2 AT A GLANCE S380 HomeBase Model: T8030 Status LED Reset Hole Speaker Hard Drive Bracket SYNC / ALARM OFF Button USB Port 1 (Output: 5Vdc/2.4A) USB Port 2 (Output: 5Vdc/0.7A) Ethernet Port Power Port...
- Page 3 E330 eufyCam (Professional) Ensure Tight Seal SD Card SYNC SYNC Model: T8600 Camera Lens Spotlight LED Indicator Micro USB Port (for maintenance only) microSD Card Slot SYNC Button Mounting Bracket Angle Adjustment Knob...
- Page 4 INSTALLING YOUR STORAGE DRIVE (Optional) (For 4-Cam Kit) The S380 HomeBase comes with a pre- installed 1TB storage drive for storing video recordings. (For 2-Cam Kit) You need to install a storage drive (not included) to store video recordings. • The S380 HomeBase must be powered off when you install or remove a storage drive.
- Page 5 2. Unscrew and take out the storage drive bracket. 3. Fix your storage drive to the bracket with the included screws. HARD DRIVE...
- Page 6 4. Insert and screw the bracket back into the S380 HomeBase, then put the top lid back into place. Your additional storage drive must meet the following requirements: Type Hard disk drive (HDD) or solid-state drive (SSD) that uses the SATA interface Drive Size 2.5 inch Capacity...
-
Page 7: Setting Up The System
SETTING UP THE SYSTEM 1. Power on the S380 HomeBase and connect to your router using an Ethernet cable. Wait for up to 1 minute and the S380 HomeBase is now ready to be set up. 2. Connect your cameras to power using their power adapters. - Page 8 3. Download and install the eufy Security app, then sign in or create an account. 4. Follow the in-app instructions to add the S380 HomeBase and cameras to the device list.
-
Page 9: Mounting Your Camera
MOUNTING YOUR CAMERA Select a Location and a Height Select a location that is within reach of a power outlet. If the distance exceeds 16.4 ft (5 m), please consider a separately sold extension cable. Make sure the camera receives a strong signal from the S380 HomeBase in the location you want to mount it to achieve a smooth video stream in the app. - Page 10 Disconnect the camera from the power outlet before mounting. We recommend mounting the camera 7-10 ft (2-3 m) above the ground. This height maximizes the detection range of the camera. • The camera can be mounted both indoors and outdoors. Avoid mounting the camera under direct sunlight.
-
Page 11: Mount The Camera
Mount the Camera 1. Use the position template to drill holes with correct spacing, then mount the camera using the provided screws. • Screw anchors are necessary for walls that are made out of hard materials such as concrete, brick, or stucco. - Page 12 2. Route the power cable into the waterproof case and connect it to the power adaptor, then plug the adaptor into the power outlet.
- Page 13 3. Rotate the camera to adjust the view and check it using the live stream, which you can access in the eufy Security app. 10~25° (Optimal)
- Page 14 4. Fasten the cable to the wall using the included cable clips if needed.
- Page 15 SAFETY • The suitable temperature range for E330 eufyCam (Professional) and accessories is -20°C to 45°C (-4°F - 113°F). The suitable temperature range for S380 HomeBase and accessories is -10°C to 45°C (14°F - 113°F). The recommended temperature range for devices and accessories is 5°C to 25°C (41°F - 77°F). •...
- Page 16 CAUTION: RISK OF EXPLOSION IF BATTERY IS REPLACED BY AN INCORRECT TYPE. DISPOSE OF USED BATTERIES ACCORDING TO THE INSTRUCTIONS. ATTENTION RISQUE D'EXPLOSION SI LA BATTERIE EST REMPLACÉE PAR UN TYPE INCORRECT. ÉLIMINER LES BATTERIES USÉES SELON LES INSTRUCTIONS. CAUTION: LITHIUM COIN CELL BATTERY. KEEP BATTERIES AWAY FROM CHILDREN. IF SWALLOWED OR PLACED INSIDE THE BODY, BATTERIES CAN CAUSE SEVERE OR FATAL INJURIES IN 2 HOURS OR LESS, SEEK IMMEDIATE MEDICAL CARE IF SUSPECTED.
- Page 17 NOTICE NOTICE (United States of America) FCC Statement This device complies with Part 15 of the FCC Rules. Operation is subject to the following two conditions: (1) this device may not cause harmful interference, and (2) this device must accept any interference received, including interference that may cause undesired operation.
- Page 18 NOTICE (Canada) This device complies with Industry Canada licence-exempt RSS standard(s). Operation is subject to the following two conditions: (1) this device may not cause interference, and (2) this device must accept any interference, including interference that may cause undesired operation of the device." Le présent appareil est conforme aux CNR d'Industrie Canada applicables aux appareils radio exempts de licence.
-
Page 19: Customer Service
Customer Service 12-month limited warranty (US) +1 (800) 988-7973 (UK) +44 (0) 1604 936200 (DE) +49 (0) 69 9579 7960 ) +86 400 0550 036 ) +81 03 4455 7823 (AU) +61 3 8331 4800 (Egypt) +20 8000000826 (UAE) +971 8000320817 (Kuwait) +965 22069086 (Saudi Arabia) +966 8008500030 (Middle East &... - Page 20 Anker Innovations Limited. All rights reserved. eufy Security and eufy Security Logo are trademarks of Anker Innovations Limited, registered in the United States and other countries. All other trademarks are the property of their respective owners. 51005003990 V1...
- Page 21 S380 HomeBase QUICK START GUIDE...
- Page 22 AT A GLANCE S380 HomeBase Model: T8030 Status LED Hard Drive Bracket USB Port 2 (Output: 5Vdc/0.7A) Reset Hole SYNC / ALARM OFF Button Ethernet Port Speaker USB Port 1 (Output: 5Vdc/2.4A) Power Port EN 01...
-
Page 23: Expanding Storage
EXPANDING STORAGE (OPTIONAL) S380 HomeBase comes with 16 GB of storage for saving video recordings and allows you to add an additional hard drive to expand the space. Prepare Your Hard Drive Your hard drive must meet the following requirements: Type Hard disk drive (HDD) or solid state drive (SSD) that uses the SATA interface... - Page 24 Install Your Hard Drive S380 HomeBase must be powered off when you install or remove a hard drive. 1. Push down the top lid to remove it. 2. Loosen the screw, then pull out the hard drive bracket. EN 03...
- Page 25 4. Insert and screw the bracket back to S380 HomeBase, then put the top lid back into place. • You can follow the steps above to expand the storage whenever necessary. • A new hard drive must be initialized through the eufy Security app to work with S380 HomeBase. 04 EN...
- Page 26 CONNECTING S380 HOMEBASE 1. Power on and connect S380 HomeBase to your router. 2. Wait for a moment (up to 1 min) until the status LED turns blue. EN 05...
- Page 27 ADDING TO EUFY SECURITY APP 1. Download and install the eufy Security app, and sign up for an account. 2. Add S380 HomeBase to your device list, and follow the in-app instructions to complete the setup. 9:41 ROY‘s home No devices yet.
- Page 28 ADDING EUFY SECURITY DEVICES TO S380 HOMEBASE Follow the in-app instructions to add your eufy Security devices to the S380 HomeBase. • One S380 HomeBase can pair up to 16 cameras. SAFETY • Do not use the device in the environment at a too high or too low temperature, never expose the device to strong sunshine or too wet environment.
- Page 29 NOTICE NOTICE (Europe and United Kingdom) This product complies with the radio interference requirements of the European Community. Declaration of Conformity Hereby, Anker Innovations Limited declares that this device is in compliance with the essential requirements and other relevant provisions of Directive 2014/53/EU. For the declaration of conformity, visit the website: https://uk.eufylife.com.
- Page 30 Your product is designed and manufactured with high quality materials and components, which can be recycled and reused. This symbol means the product must not be discarded as household waste, and should be delivered to an appropriate collection facility for recycling.
- Page 31 12-month limited warranty United States +1 (800) 988 7973 Mon-Sat 6:15AM-6:45PM(PT) Sun 6:15AM-5:45PM(PT) United Kingdom +44 (0) 1604 936 200 Mon-Sun 6:00-19:00 Germany +49 (0) 69 9579 7960 Mo-Fr 8:00-16:00 Sa 9:00-16:00 support@eufylife.com @EufyOfficial @EufyOfficial @EufyOfficial Anker Innovations Limited Room 1318-19, Hollywood Plaza, 610 Nathan Road, Mongkok, Kowloon, Hong Kong...
- Page 32 Anker Innovations Limited. All rights reserved. eufy Security and eufy Security Logo are trademarks of Anker Innovations Limited, registered in the United States and other countries. All other trademarks are the property of their respective owners. 5100500XXXX V01...
- Page 33 QUICK START GUIDE E330 eufyCam (Professional)
- Page 34 AT A GLANCE E330 eufyCam (Professional) Ensure Tight Seal SD Card SYNC SYNC Model: T8600 Camera Lens Spotlight LED Indicator Micro USB Port (for maintenance only) microSD Card Slot SYNC Button Mounting Bracket Angle Adjustment Knob...
- Page 35 ADDING YOUR CAMERA 1. Connect your cameras to power using their power adapters. 2. Download and install the eufy Security app, then sign in or create an account. 3. Follow the in-app instructions to add the camera to the device list.
- Page 36 Select a location that is within reach of a power outlet. If the distance exceeds 16.4 ft (5 m), please consider a separately sold extension cable. Make sure the camera receives a strong signal from your eufy Security HomeBase in the location you want to mount it to achieve a smooth...
- Page 37 Disconnect the camera from the power outlet before mounting. We recommend mounting the camera 7-10 ft (2-3 m) above the ground. This height maximizes the detection range of the camera. • The camera can be mounted both indoors and outdoors. Avoid mounting the camera under direct sunlight.
- Page 38 Mount the Camera 1. Use the position template to drill holes with correct spacing, then mount the camera using the provided screws. • Screw anchors are necessary for walls that are made out of hard materials such as concrete, brick, or stucco.
- Page 39 2. Route the power cable into the waterproof case and connect it to the power adaptor, then plug the adaptor into the power outlet.
- Page 40 3. Rotate the camera to adjust the view and check it using the live stream, which you can access in the eufy Security app. 10~25° (Optimal)
- Page 41 4. Fasten the cable to the wall using the included cable clips if needed.
- Page 42 SAFETY • The suitable temperature range for E330 eufyCam (Professional) and accessories is -20°C to 45°C (-4°F - 113°F). The recommended temperature range for devices and accessories is 5°C to 25°C (41°F - 77°F). • Unless specifically indicated that it is safe to do so in the user guide or instruction manual, do not use this device in an environment that exceeds the recommended low or high temperature.
- Page 43 harmful interference to radio or television reception, which can be determined by turning the equipment off and on, the user is encouraged to try to correct the interference by one or more of the following measures: (1) Reorient or relocate the receiving antenna.
- Page 44 Customer Service 12-month limited warranty (US) +1 (800) 988-7973 (UK) +44 (0) 1604 936200 (DE) +49 (0) 69 9579 7960 ) +86 400 0550 036 ) +81 03 4455 7823 (AU) +61 3 8331 4800 (Egypt) +20 8000000826 (UAE) +971 8000320817 (Kuwait) +965 22069086 (Saudi Arabia) +966 8008500030 support@eufylife.com...
- Page 45 Anker Innovations Limited. All rights reserved. eufy Security and eufy Security Logo are trademarks of Anker Innovations Limited, registered in the United States and other countries. All other trademarks are the property of their respective owners. 51005003758 V1...
Need help?
Do you have a question about the eufyCam E330 and is the answer not in the manual?
Questions and answers