
Related Manuals for SPL Director Mk2


Summary of Contents for SPL Director Mk2
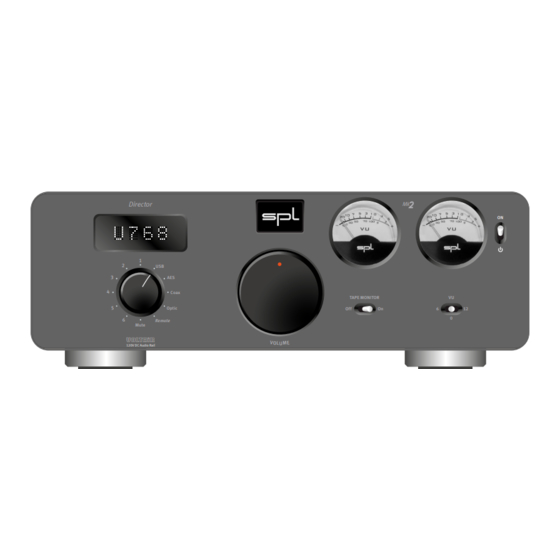
- Page 1 Professional Fidelity Director Mk2 – Manual DA Converter and Preamplifier Version 2.2 More information: www.spl.audio...
- Page 2 Make sure that the selected mains voltage of the Director Mk2 is according to the mains voltage of your region. Make sure that the mains switch on the rear of the Director Mk2 is set to Off (Off = O / On = I). The standby switch on the front panel has to be set to Connect the supplied power cord to the Director Mk2 and to an appropriate mains socket outlet.
- Page 3 Director Mk2 – Manual Digital Audio Inputs Mains Voltage Analog Audio Inputs Mains Switch AMP CTL Voltage Selection: Made in Germany . Remove Fuse Holder . Exchange Fuses . Flip Over . Reinstall COAX 1 2 3 4 VAC [...
-
Page 4: Operation
Switch on mains switch on the back of the Director Mk2 (On = I). Power LED is dimly lit. Operation Switch the Director Mk2 from standby into operation by setting the standby switch to ON. Power LED now lights up brightly. Standby Switch the Director Mk2 in standby mode by setting the standby switch to = Standby). - Page 5 Director Mk2 – Manual 15 17 Power LED Standby Switch Director Coax TAPE MONITOR Optic Remote Mute VOLTAiR 120V DC Audio Rail 12 16 Source Selection Volume 13 17 Mains Switch Voltage Selection: Made in Germany . Remove Fuse Holder .
- Page 6 Learn IR remote control Volume and Source selection The volume and the source selection of the Director Mk2 can be operated by any infrared (IR) remote control. The programming of the Director Mk2 is easy and needs only four steps – one for each function: volume up, volume down, next input (clockwise) and previous input (counter clockwise).
- Page 7 Director Mk2 – Manual Voltage Selection: Made in Germany . Remove Fuse Holder . Exchange Fuses . Flip Over . Reinstall COAX 1 2 3 4 VAC [ VAC [ Fuses: [ V] T A L V/ [ V] T...
-
Page 8: Dip Switches
DIP switch 3: OFF = The AMP CTL connector delivers a low current. This (default) setting can be used to switch an SPL Performer s800 power amplifier on and off, when its serial number is lower than : Black 00273, Silver 00104, Red 00130 DIP switch 3: ON = The AMP CTL connector supplies a high current. - Page 9 Director Mk2 – Manual DIP Switch Voltage Selection: Made in Germany . Remove Fuse Holder . Exchange Fuses . Flip Over . Reinstall COAX 1 2 3 4 VAC [ VAC [ Fuses: [ V] T A L V/ [...
-
Page 10: Security Advices
Director Mk2 – Manual Security Advices professional. Never insert or remove an electric plug with wet hands. Before starting up the device: Fire warning • Read thoroughly and follow the security advices. Do not put burning items, such as candles, on the unit. - Page 11 The company names and product names in this manual are the trademarks or registered trademarks of their respective companies. SPL and the SPL Logo are registered trademarks of SPL electronics GmbH. SPL cannot be held responsible for damage caused by improper use or modification of the device or data that is lost or destroyed.
-
Page 12: Specifications
Director Mk2 – Manual Specifications Analog Inputs & Outputs: XLR (balanced), RCA Maximum input & output gain 32.5 dBu Input impedance (RCA) 47 kΩ Input impedance (XLR) 22 kΩ Output impedance 75 Ω Common mode rejection (XLR) -81 dBu Frequency range (0 dBu) 10 Hz –... - Page 13 Director Mk2 – Manual...
- Page 14 Director Mk2 – Manual © 2021 SPL electronics GmbH | www.spl.audio © 2024 SPL electronics GmbH | spl.audio...
- Page 15 Professional Fidelity Director Mk2 – Bedienungsanleitung DA-Wandler und Vorverstärker Version 2.2 Weitere Informationen: www.spl.audio...
- Page 16 Director Mk2 – Bedienungsanleitung Inbetriebnahme Lesen Sie die Sicherheitshinweise auf Seite 24. Stellen Sie sicher, dass die eingestellte Netzspannung des Director Mk2 mit der Spannung in Ihrer Region übereinstimmt. Achten Sie darauf, dass sich der Netzschalter auf der Rückseite des Director Mk2 in der Aus-Stellung befindet (Aus = O / Ein = I).
- Page 17 Director Mk2 – Bedienungsanleitung Digitale Audio-Eingänge Netzspannung Analoge Audio-Eingänge Netzschalter AMP CTL Voltage Selection: Made in Germany . Remove Fuse Holder . Exchange Fuses . Flip Over . Reinstall COAX 1 2 3 4 VAC [ VAC [ Fuses: [...
-
Page 18: Betrieb
ACHTUNG: Beachten Sie die Hinweise zu DIP-Schalter 3 (siehe Seite 22). Einschalten Regeln Sie die Lautstärke des Director Mk2 herunter. Schalten Sie den Netzschalter auf der Rückseite des Director Mk2 ein (Ein = I). Die Power-LED leuchtet nun schwach. Betrieb Schalten Sie den Director Mk2 mit dem Stand-by-Schalter aus dem Stand-by-Modus in den Betrieb (ON = Betrieb). - Page 19 Director Mk2 – Bedienungsanleitung 15 17 Power-LED Stand-by-Schalter Director Coax TAPE MONITOR Optic Remote Mute VOLTAiR 120V DC Audio Rail 12 16 Quellenwahl Lautstärkeregler 13 17 Netzschalter Voltage Selection: Made in Germany . Remove Fuse Holder . Exchange Fuses . Flip Over .
- Page 20 Director Mk2 – Bedienungsanleitung IR-Fernbedienung anlernen Lautstärke und Quellenwahl Die Lautstärke und die Quellenwahl können mit jeder IR-Fernbedienung gesteuert werden. Das Anlernen der IR-Fernbedienung ist einfach und benötigt nur vier Schritte – einen für jede Funktion: Laustärke erhöhen, Laustärke verringern, nächste Quelle wählen (im Uhrzeigersinn) und vorherige Quelle wählen (gegen den Uhrzeigersinn).
- Page 21 Director Mk2 – Bedienungsanleitung Voltage Selection: Made in Germany . Remove Fuse Holder . Exchange Fuses . Flip Over . Reinstall COAX 1 2 3 4 VAC [ VAC [ Fuses: [ V] T A L V/ [ V] T...
-
Page 22: Dip-Schalter
Mit dieser Einstellung können Endstufen mit 12V-Trigger (z.B. SPL Performer Endstufen) ein- und ausgeschaltet werden. ACHTUNG: Verwenden Sie den AMP CTL in dieser Einstellung nicht, um eine SPL Performer s800 Endstufe ein- oder ausschalten, wenn die Seriennummer der Performer s800 Endstufe kleiner als folgende ist:... - Page 23 Director Mk2 – Bedienungsanleitung DIP-Schalter Voltage Selection: Made in Germany . Remove Fuse Holder . Exchange Fuses . Flip Over . Reinstall COAX 1 2 3 4 VAC [ VAC [ Fuses: [ V] T A L mA L V/ [...
- Page 24 Director Mk2 – Bedienungsanleitung Sicherheitshinweise Vorsicht mit Wasser Achten Sie darauf, dass das Gerät nicht durch Regen nass wird, verwenden Sie es nicht in der Nähe von Vor der Inbetriebnahme des Gerätes: Wasser oder unter feuchten oder nassen Umgebungsbe- • Lesen und befolgen Sie diese Sicherheitshinweise.
- Page 25 Warenzeichen der betreffenden Firmen. Netzkabel aus der Netzsteckdose. SPL und das SPL-Logo sind eingetragene Warenzeichen der SPL electronics GmbH. SPL haftet nicht für Schäden, Verbindungen die auf eine nicht ordnungsgemäße Bedienung oder Bevor Sie das Gerät an andere elektronische Kompo- Änderungen am Gerät zurückzuführen sind, oder für den...
-
Page 26: Technische Daten
W x H x T (Weite x Höhe inkl. Füße x Tiefe) 278 x 100 x 300 mm 11 x 4 x 11,78 inch Gewicht des Geräts 4,55 kg 10 lbs Versandgewicht (inkl. Verpackung) 5,9 kg 13,01 lbs © 2024 SPL electronics GmbH | www.spl.audio... - Page 27 Director Mk2 – Bedienungsanleitung...
- Page 28 Director Mk2 – Bedienungsanleitung...
Need help?
Do you have a question about the Director Mk2 and is the answer not in the manual?
Questions and answers