
Subscribe to Our Youtube Channel
Related Manuals for MDC FORTE SR Series


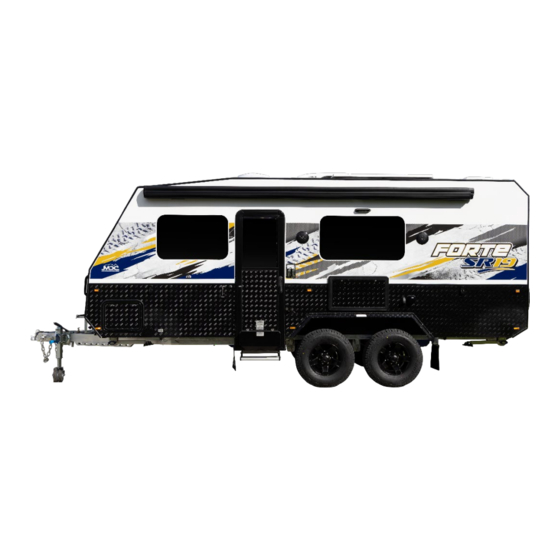
Summary of Contents for MDC FORTE SR Series
- Page 1 OWNER’S MANUAL 2024 Version 1 *Pre-Production Models Shown www.marketdirect.com.au Phone: 1300 494494 www.marketdirect.com.au P a g e www.marketdirect.com.au Ph: 1300 494 494 ©Copyright...
- Page 2 Page Deliberately Left Blank P a g e www.marketdirect.com.au Ph: 1300 494 494 ©Copyright...
-
Page 3: Table Of Contents
Vehicle Electrical Requirements ........ 32 Contents Brake Controller ............ 32 Safety Symbols & Meanings .......... 6 Correct Vehicle Wiring for MDC Caravans ..32 Button Battery Warning! ........6 Trailer Lights ............33 Caravan Use ..............7 Charging Camper/Caravan While Driving ..33 Vehicle with or without smart alternator:.. - Page 4 Electrical Accessories ..........55 Lighting ..............55 Solar Panels ............. 55 Generators .............. 55 12VDC Overload Protection ....... 56 Wiring Diagrams ............58 Forte SR9 ..............58 All Other SR Models ..........59 Troubleshooting ............. 60 240 Volt Electrical ..........60 12 Volt Electrical ..........
- Page 5 Copyright © Market Direct Group Pty Ltd 2021 All Rights Reserved All files and information contained in this Owner’s Manual are copyright by Market Direct Group Pty Ltd, and may not be duplicated, copied, modified, or adapted, in any way without our written permission. Our Owner’s Manual may contain our service marks or trademarks as well as those of our affiliates or other companies, in the form of words, graphics, and logos.
-
Page 6: Safety Symbols & Meanings
INFORMATION- Helpful information and important points. Button Battery Warning! Some MDC models are fitted with remote wireless switches for lighting. These switches contain “Button Batteries” that are harmful or fatal when swallowed. DO NOT allow children to play with these switches or leave unattended in the vicinity of these switches. -
Page 7: Caravan Use
This caravan is for on road use. ON-ROAD CARAVANS MDC On-Road Caravans and Campers are intended to provide a lighter alternative for users who don’t require off- road functionality, without the cost of including features only required for off-road functionality. They are only intended for use: For towing on sealed roads and for limited periods on well-maintained gravelled roads;... -
Page 8: My Forte Sr Caravan
My Forte SR Caravan NAME: ADDRESS 1: ADDRESS 2: MODEL: VIN: HANDOVER DATE: TARE WEIGHT: ATM: ORDER REF: DEALER: P a g e www.marketdirect.com.au Ph: 1300 494 494 ©Copyright... -
Page 9: Contact Details
Contact Details QUEENSLAND Brisbane Caboolture 3/711 Beaudesert Rd 4 Boeing Place Rocklea QLD 4107 Caboolture QLD 4510 NEW SOUTH WALES Sydney Newcastle 111 Newbridge Rd Unit 1, 2364 Pacific Hwy Chipping Norton NSW 2170 Heatherbrae NSW 2324 VICTORIA Melbourne Campbellfield 3/124 Canterbury Rd 1551 Sydney RD Kilsyth South VIC 3137... -
Page 10: Safety Information
Manual content does not imply, express or other any warranty, the owner should read the limited warranty terms included in this booklet. MDC does not cover damage due to unauthorised modifications, misuse, abuse, incorrect assembly, improper and irregular maintenance or accident or collision. -
Page 11: Fire
Fire Ventilation Do not obstruct any permanent ventilation in this camper/caravan including annex attachments. Precautions Do not leave children or pets alone in the camper/caravan. Combustible Materials Keep all combustible materials away from: Ovens and cooktops • Hot water heater •... -
Page 12: Gas & Appliance Safety
Gas & Appliance Safety Gas Certification Your Caravan has been supplied gas tested and certified. Any additions or alterations to the gas system must be performed by an authorized person and will require re-certification and testing. Also note any alterations may affect your warranty on both the system and appliances. General Safety •... -
Page 13: Gas Appliance Safety
Gas Appliance Safety • Gas appliances are certified and have a flame safeguard feature to stop gas flow in the event of the flame going out. Never interfere with this function or replace appliances with a non-certified type. • Slide-out kitchens with cookers should only be operated with an annex fully erected. Failing to do so may affect the safety and operation of the gas appliance. -
Page 14: Electrical Safety
Electrical Safety Failure To Follow These Instructions May Result in Death or Serious Injury! When working with electrical equipment or lithium batteries, have someone nearby in case of an emergency. Study and follow all the manufacturer’s specific precautions when using and servicing the battery and connected appliances. -
Page 15: Using Wheel Chocks And Ramps
Using Wheel Chocks and Ramps Always use wheel chocks to prevent the trailer from moving when unhitched. The stabiliser legs on your caravan are not designed for supporting the full weight of the trailer, they are there to stabilise it once it is level. Using your stabilisers as a lifting mechanism will void your warranty as will extending them with a “rattle gun”... -
Page 16: Terminology & Abbreviations
Terminology & Abbreviations Ball Weight/Coupling Mass: The downward load exerted on the tow point of the vehicle by the trailer. Tare Weight: The total weight of the trailer (load on tyres plus coupling load) with all options and fittings as supplied by the manufacturer, with empty water tanks, excluding fluids not essential for operation on public roads, and without luggage or personal effects. - Page 17 Toe can be measured in linear units, at the front or rear of the tyre, or as an angular deflection. In the case of MDC products, the “toe in” is measured in millimeters at the front of the tyre from the chassis rail.
-
Page 18: Quick Start Checklist
Quick Start Checklist Important items to do before using your caravan. To have your trailer ready for use in the quickest time, the following guide must be followed to ensure safe and correct use and to avoid damages and misuse. Flushing Your Water Tank Propriety Cleaners With any new camper or caravan, it is important to flush the water tank before use as a minimum. -
Page 19: Wheel Nuts
Wheel Nuts It is important to check wheel nuts immediately after picking up your new MDC camper or caravan. Upon pickup, the wheel nuts should be checked at 50, 100, 250 and 500km. They should also be checked before each trip and daily when touring. -
Page 20: Tyre Pressure
ATM Weight Single Axle Dual Axle 1600Kg 1700Kg 1800Kg 2000Kg 2200Kg 2400Kg 2500Kg 2600Kg 2800Kg 3000Kg Video Library You can view the video library on the MDC YouTube Channel https://www.youtube.com/@MARKETDIRECTCAMPERS P a g e www.marketdirect.com.au Ph: 1300 494 494 ©Copyright... -
Page 21: Configuring The Bm500-Bt For Lifepro+ Lithium Batteries
Configuring the BM500-BT For LiFePRO+ Lithium Batteries Pairing The device 1. Go to your app store and download the Projecta BM500-BT 2. Open the app and search for your Projecta Bluetooth device 3. Select “Always connect” and press confirm 4. You will be asked for a 3-digit pin number; this will be displayed on the BM500-BT display. -
Page 22: Setting The Parameters
Setting The Parameters 1. Select settings on the main screen Select Battery settings P a g e www.marketdirect.com.au Ph: 1300 494 494 ©Copyright... - Page 23 2. Change Battery Type to LFP (Lithium) by selecting battery type and LFP in the pull-down menu. Press confirm. 3. Select Battery Capacity and change to 200.0Ah in the menu. Press confirm. 4. Set Starter Battery to DISABLE 5. Select Alarm Settings 6.
- Page 24 11. Select SOC Low and set Alarm or Protection Value to 20% 12. Select SOC Low and set Resume Value to 30% 13. Select Time to Go Low Alarm or Protection value and set at 15min. 00sec 14. Select Time to Go Low Resume Value and set at 20min. 00sec 15.
- Page 25 19. Select Battery Temperature Low Alarm or Protection Value and set to -20.0°C 20. Select Battery Temperature Low Resume Value and set to -10.0°C 21. Select Battery Temperature High Alarm or Protection Value and set to 50.0°C 22. Select Battery Temperature High Resume Value and set to 49.0°C 23.
-
Page 26: Jacking Your Caravan Or Camper
Jacking Your Caravan or Camper Your trailer is fitted with purpose built jacking points and from January 2021 supplied with a suitable jack. An appropriately rated bottle jack is an acceptable alternative, however when using the jacking point beneath the trailing arm ensure the jack is of a retracted height that will fit under the jacking point when the tyre is deflated. -
Page 27: Achieving A Safe Towing Combination
Due to how much a camper or caravan may vary in weight depending on the cargo (as much as 1600kg to 3000kg in the MDC range) it is important to have your tyres at the pressure recommended by the trailer manufacturer, for the actual weight of the trailer when loaded. -
Page 28: Ball (Coupling) Weight
Where you place the items in your trailer will affect how it behaves. Loading too much weight in the extremities of the trailer can have a very bad effect. MDC owner manuals have a loading guide to assist in this area. By following the guide and ball weight recommendations you’ll achieve the best possible result. -
Page 29: Hitch Movement
Hitch Movement Most modern tow bars have an adjustable screw fitted to the hitch receiver that can be used to stop the hitch insert from rattling. Unfortunately, this is not a sure-fire way to limit sideways movement that can affect how well your trailer tows. -
Page 30: Maximum Weight Limits
Maximum Weight Limits The following is an outline of the ratings that will be specified by the manufacturer of your vehicle and the camper/caravan manufacturer. These MUST be followed in conjunction with previously mentioned criteria for safe handling. None of the maximum ratings may be exceeded. ATM (Aggregate Trailer Mass) This limit is specified by the trailer manufacturer and must NOT be exceeded under any circumstances. - Page 31 The purpose of this information is to help you to do a self-assessment and achieve a sound towing combination. If you are not confident you can achieve this, you should consult an expert to assist. If you require assistance from MDC, call 1300 494494 option 3 and speak to our customer service department. P a g e www.marketdirect.com.au...
-
Page 32: Towing Mirrors
Vehicle Electrical Requirements Brake Controller All MDC caravans require an electric brake controller to be fitted to the tow vehicle by law. There is a wide range of controllers available that are suitable. Correct Vehicle Wiring for MDC Caravans... -
Page 33: Trailer Lights
2. 50-amp fuse or circuit breaker at the battery The Projecta IDC25L DC to DC controller fitted in your MDC trailer is programmed to favour the solar panel input exclusively until it drops below a threshold voltage input. By providing accessory power to the number 12 pin, the trigger for the IDC25L will be set off to take power from both the Anderson plug and the solar panels. -
Page 34: Using The Caravan
Caravan to sway and/or roll excessively left and right. The industry optimum ball weight on a caravan is between 9 and 11% of the total Caravan weight. MDC Caravans fit into this category and 10% should be used as the starting point. -
Page 35: Ball Weight
Ball Weight When loading your camper, the generally accepted tow ball weight once loaded is around 10% of the total weight of the caravan. Use a ball weight scale to identify the ball weight and load the camper in a manner that achieves the desired weight. -
Page 36: Pre-Trip Inspection
Pre-Trip Inspection Tyres Before any trip check the following Correct tyre pressures • Tyres in good condition free from damage and uneven wear. • Tread is of legal and acceptable depth. • Wheel Nuts Ensure wheel nuts are tensioned to the correct torque using a torque wrench. •... -
Page 37: Towing The Caravan
Hitching the Caravan Hitch Your Forte SR Series caravan is fitted with a Trojan 3500kg 50mm Ball type hitch. The hitch has a locking mechanism and adjuster bolt. The adjuster bolt is used to ensure a secure connection and reduce rattling. -
Page 38: Safety Chains
Safety Chains Chains should be crossed over and connected with suitable rated shackles. Ensure they are connected in a way to prevent them dragging on the road but not too tight as to restrict the articulation of the vehicle and trailer combination. -
Page 39: Setting Up The Caravan
Setting Up the Caravan Choosing a Position Your caravan will need a suitably sized site to accommodate the caravan and awning. If using a free camp or uneven ground, choose a spot as level as possible that is firm. Avoid low sections that may flood during rain. -
Page 40: Raising & Lowering The Pop Top Roof
Raising & Lowering the Pop Top Roof Forte SR9 Step 1. Release the over center latches on rear of roof Step 2. Raise roof using the internal grab bar Step 3. Ensure permanent vents either side of roof bar are free of obstruction P a g e www.marketdirect.com.au Ph: 1300 494 494... - Page 41 Closing the Forte SR9 Roof 1) Ensure there are no obstructions or materials such as leaf litter along the flat area on top of the Travel Trailer body where the roof seal will make contact. 2) From inside the van, unlock the struts by pressing against the red button. When the roof skirt openings are zipped close, this is identified by the sticker on the vinyl skirt on the passenger side.
-
Page 42: Forte Sr11
Forte SR11 Step 1. Release the over center latches in each corner. Step 2. Raise the roof, front first using the handle mechanism inside the caravan. Lock each handle in place with the chrome tabs. P a g e www.marketdirect.com.au Ph: 1300 494 494 ©Copyright... - Page 43 Closing the Forte SR11 Roof Step 1. Ensure caravan body ledge is free of debris and leaf litter prior to closing and seals are in good condition. Step 2. Pull the rear of the roof down using the handle mechanism. Step 3.
-
Page 44: Opening The Bed Fold Out
Opening the Bed Fold Out Step 1. Unlatch and lower the spare wheel to the ground. Step 2. Unlatch the 3 locks indicated by red arrows Fig 2 and raise the rear panel to form the fold out top. Step 3. Unlatch the two locks indicated by red arrows fig 3 and swing the wing panels out to each side. Step 4. -
Page 45: Setting Up The Kitchen
Setting Up the Kitchen The kitchen can be rolled into position by: 1. Release and raise the spring pad bolt Fig.1 and lock in the up position 2. Press down on the slide lock on the right Fig.2 and pull the kitchen out 3. -
Page 46: Electric Awning
Electric Awning During rain, one end of the awning should be lowered to a point where rainwater cannot gather or “pool” on top of the awning, preferably at the end of the awning further from the entry door. During strong wind and storm conditions, the awning should be packed away for its protection. Always secure the awning with provided pegs on ground or attach to awning brackets on the side of the caravan when in use. -
Page 47: Connecting Shore (Mains) Power
Connecting Shore (Mains) Power MDC Caravans are built with an integrated 240V Alternating Current (240Vac) power supply system for charging the battery system and running fixed appliances, such as the Air Conditioner, and domestic appliances, such as laptop chargers, television sets, toasters etc. Primary supply for this system is by connecting to an external power supply, such as the national grid or a local site supply. -
Page 48: Wireless Rear-View Camera
Wireless Rear-View Camera A wireless rear-view camera has been factory fitted on the rear of your caravan. The unit is connected to your caravan's parking light circuit, allowing the camera to be used when reversing. Activate the camera by turning your vehicle lights on. - Page 49 This product has been added as an ADDITIONAL safety product and should never be used as a substitution for active supervision. MDC shall not be liable for any loss or damage from not following this and the details within the products instruction manual.
-
Page 50: Filling Water Tanks
Filling Water Tanks Water tanks are individually fillable on most MDC models. Fresh water tanks will be marked accordingly. Always use a food grade hose where possible when filling. The addition of a quality filter is also highly recommended. Grey Water Tank The grey water tank collects wastewater from the shower and basins/sinks inside the caravan. -
Page 51: Electrical Systems
Electrical Systems Low Voltage (240Vac) Power System 240VAC Overload Protection Residual Current Device (RCD) Safety Switches The primary shore power safety switch or Residual current Circuit Breaker with Overcurrent protection (RCBO) is located inside the caravan near the entryway. See Fig 6. In the event of a shore power fault, this switch will quickly cut power to the caravans 240Vac system. -
Page 52: Charging From Your Vehicle
Charging from your Vehicle A 12-pin trailer plug is also required. In addition to the standard wiring to pins 1 to 7, power must be supplied to the number 12 pin for the trigger wire for the DC-DC charger while the engine is running. The IDC25L is programmed to favour the solar power supply until the supply falls below the minimum •... -
Page 53: Battery Care & Maintenance
Battery Care & Maintenance Storage type batteries require periodical maintenance to perform at their peak and extend their service life. The following is an outline of how to gain the best performance and lifecycle from the LiFePRO+ batteries fitted in your Always use a quality charger that caters to the voltage requirements of a LiFePO4 battery. -
Page 54: Use Of Appliances
Use of Appliances Always check the input requirements for any appliance before use! All normal household appliances operable from a 10A socket may be used when connected to mains power. • This includes portable induction cookers, jugs for boiling water, electric fry pans and coffee making appliances. -
Page 55: Maximising Battery Use
Maximising Battery Use There are ways to maximise the life of your batteries when off-grid. It is important to have your vehicle wired correctly to charge whilst towing to your campsite. Fridge Maximising You can limit the power required by your refrigerator and freezer by following these steps: Pre-cool/freeze your food and water prior to departure. -
Page 56: 12Vdc Overload Protection
12VDC Overload Protection High Load Primary Circuit Breakers (50A and above) The primary/main 12Vdc circuit breakers will be within 1M of the battery bank. They may be accessed either externally through the battery storage bay or internally through an adjacent electrical bay depending on your caravan model. - Page 57 Single-use Blade Fuses (1A-30A) Located on the primary battery bank circuit breaker these fuses are housed with in-line holders and are • used for constant power circuits (Stereo memory, Emergency Breakaway system) See Figures. 16 & 17. Fig. 16 Fig. 17 PV (Solar) Single-use Ceramic Fuses (10-15A) Located underneath the solar panels these fuses are housed in MC4 connectors specifically used for PV •...
-
Page 58: Wiring Diagrams
Wiring Diagrams Forte SR9 P a g e www.marketdirect.com.au Ph: 1300 494 494 ©Copyright... -
Page 59: All Other Sr Models
All Other SR Models P a g e www.marketdirect.com.au Ph: 1300 494 494 ©Copyright... -
Page 60: Troubleshooting
Troubleshooting 240 Volt Electrical PROBLEM POSSIBLE CAUSE REMEDY Not connected to mains Connect to mains power Reset the RCD unit switch to up position. RCD unit has tripped No power AC/CB1 Check main RCD at entryway. Site power supply tripped Check RCD on site power 10-amp converter tripped Check your 10-amp converter... - Page 61 CONTROL PANEL & ACCESSORIES SYMPTOM POSSIBLE CAUSE REMEDY Flat batteries Charge batteries Control panel will not switch on Tripped circuit breaker Reset circuit breaker DC/CB1 Reset circuit breaker above circuit Accessory circuit not working Tripped circuit breaker switch by pushing in. Listen for click.
- Page 62 P a g e www.marketdirect.com.au Ph: 1300 494 494 ©Copyright...
-
Page 63: Water
Water PROBLEM POSSIBLE CAUSE REMEDY No power from control panel Check circuit breaker Flat Battery Charge battery Pump not working (no Faulty pressure switch Replace pump, Contact dealer for replacement noise) Check connections with multimeter or test Bad electrical connection light Turn on tap and hold finger over nozzle for 5 seconds and release. -
Page 64: Toilet Care And Maintenance
Cleaning Cassette Tank: “Cassette Tank Cleaner” is the recommended product for this application. Grey Water Tank: Tank Freshener Flush Water Tank: Only suitable for MDC models that have a toilet flush tank. Thetford recommend “Aqua Rinse”. Do not use Thetford tank cleaner chemicals in your caravans’ main water tanks. These are NOT food safe chemicals ingestion of these chemicals may lead to illness or injury. -
Page 65: Storage And Care
Storage and Care Storage Long Term Storage To maximise the life of your caravan you should consider additional protection from the elements. UV light and moisture can have an adverse effect on materials when left unprotected outside. This section outlines some of the things you can do as an owner to protect your investment. -
Page 66: Roof Maintenance
Ensuite Finishes: Never use harsh detergents or bleach-based products on the toilet or sealants in the ensuite. Use of such products will damage the seals and sealants. Mirrors: Do not use solvents or chemicals when cleaning mirrors. Warm water and a soft, clean cloth are the best method. -
Page 67: Travel Record
Travel Record Your caravan service record booklet and logbook will help you keep track of kilometres travels and service records. Trip Name Date Km Start Km Finish Cumulative Km P a g e www.marketdirect.com.au Ph: 1300 494 494 ©Copyright... - Page 68 Trip Name Date Km Start Km Finish Cumulative Km P a g e www.marketdirect.com.au Ph: 1300 494 494 ©Copyright...
-
Page 69: Mechanical Maintenance
Mechanical Maintenance Maintenance is essential to keep your caravan in a safe and usable condition. Caravans are no different to any other motor vehicle and require servicing at regular intervals which may vary according to use and the environment in which it is used. -
Page 70: Suspension
Suspension Your camper is fitted with quality independent trailing arm suspension with dual shock absorbers. This design is ideal for the full range of use on road however, there are strict limitations in use on corrugated and rough road. Suspension maintenance should be done as per the schedule contained in this booklet. -
Page 71: Hub Assembly
Hub Assembly P a g e www.marketdirect.com.au Ph: 1300 494 494 ©Copyright... -
Page 72: Trailing Arm Bushes
Trailing Arm Bushes P a g e www.marketdirect.com.au Ph: 1300 494 494 ©Copyright... -
Page 73: Service Schedule
Service Schedule 500KM FIRST SERVICE CHECKED Check hitch bolts to 90Nm. • Hitch Lubricate with high temperature bearing grease. • Inspect and adjust handbrake. Handbrake • Inspect and adjust brakes. The check bearings are well greased, and Brakes & • the crown nut is correctly tightened. - Page 74 12 MONTHS / 10,000KM SERVICE CHECKED Chassis and Suspension Hitch Inspect for damage and lubricate. Check bolt Torque to 90Nm. • Jockey Wheel Inspect for condition and operation. • Check for correct operation. • Breakaway Inspect the lanyard and clip. •...
- Page 75 Test and inspect. • Smoke Alarm Replace battery. • Window Blinds Inspect and adjust tension where necessary. • Damp Check Inspect caravan for any dampness. • Plumbing Hot Water De-scale hot water service. • System Treat tanks and entire system with bacteria killing tank cleaner •...
- Page 76 24 MONTHS / 20,000KM SERVICE CHECKED Chassis and Suspension Hitch Inspect for damage and lubricate. Check bolt Torque to 90Nm. • Jockey Wheel Inspect for condition and operation. • Check for correct operation. • Breakaway Inspect the lanyard and clip. •...
- Page 77 Test and inspect. • Smoke Alarm Replace battery. • Window Blinds Inspect and adjust tension where necessary. • Damp Check Inspect caravan for any dampness. • Plumbing Hot Water De-scale hot water service • System Treat tanks and entire system with bacteria killing tank cleaner •...
- Page 78 36 MONTHS / 30,000KM SERVICE CHECKED Chassis and Suspension Hitch Inspect for damage and lubricate. Check bolt Torque to 90Nm. • Jockey Wheel Inspect for condition and operation. • Check for correct operation. • Breakaway Inspect the lanyard and clip. •...
- Page 79 Test and inspect. • Smoke Alarm Replace battery. • Window Blinds Inspect and adjust tension where necessary. • Damp Check Inspect caravan for any dampness. • Plumbing Hot Water De-scale hot water service. • System Treat tanks and entire system with bacteria killing tank cleaner •...
- Page 80 48 MONTHS / 40,000KM SERVICE CHECKED Chassis and Suspension Hitch Inspect for damage and lubricate. Check bolt Torque to 90Nm. • Jockey Wheel Inspect for condition and operation. • Check for correct operation. • Breakaway Inspect the lanyard and clip. •...
- Page 81 Test and inspect. • Smoke Alarm Replace battery. • Window Blinds Inspect and adjust tension where necessary. • Damp Check Inspect caravan for any dampness. • Plumbing Hot Water De-scale hot water service. • System Treat tanks and entire system with bacteria killing tank cleaner •...
- Page 82 60 MONTHS / 50,000KM SERVICE CHECKED Chassis and Suspension Hitch Inspect for damage and lubricate. Check bolt Torque to 90Nm. • Jockey Wheel Inspect for condition and operation. • Check for correct operation. • Breakaway Inspect the lanyard and clip. •...
- Page 83 Test and inspect. • Smoke Alarm Replace battery. • Window Blinds Inspect and adjust tension where necessary. • Damp Check Inspect caravan for any dampness. • Plumbing Hot Water De-scale hot water service. • System Treat tanks and entire system with bacteria killing tank cleaner •...
- Page 84 72 MONTHS / 60,000KM SERVICE CHECKED Chassis and Suspension Hitch Inspect for damage and lubricate. Check bolt Torque to 90Nm. • Jockey Wheel Inspect for condition and operation. • Check for correct operation. • Breakaway Inspect the lanyard and clip. •...
- Page 85 Test and inspect. • Smoke Alarm Replace battery. • Window Blinds Inspect and adjust tension where necessary. • Damp Check Inspect caravan for any dampness. • Plumbing Hot Water De-scale hot water service. • System Treat tanks and entire system with bacteria killing tank cleaner •...
- Page 86 84 MONTHS / 70,000KM SERVICE CHECKED Chassis and Suspension Hitch Inspect for damage and lubricate. Check bolt Torque to 90Nm • Jockey Wheel Inspect for condition and operation. • Check for correct operation. • Breakaway Inspect the lanyard and clip. •...
- Page 87 Replace battery. • Window Blinds Inspect and adjust tension where necessary. • Damp Check Inspect caravan for any dampness. • Plumbing Hot Water De-scale hot water service. • System Treat tanks and entire system with bacteria killing tank cleaner • Water Tanks and flush.
-
Page 88: Supplier Contact Details
Supplier Contact Details Thetford Australia Dometic Address: 41 Lara Way, Campbellfield VIC 3061 https://www.dometic.com/en-au/au/contact-us Phone: (03) 9358 0700 Email: infoaus@thetford.com.au Cruisemaster Leisure-Tec Australia Pty Ltd (Truma Hot Water) Address: 352B Bilsen Road, Geebung QLD 4034 50 Metrolink Circuit Campbellfield VIC 3061 Phone: (07) 3624 3800 Phone: 1300 072018 Email: sales@cruisemaster.com.au... -
Page 89: Hiring Your Camper/Caravan
Hiring Your Camper/Caravan We want you to get the best experience you can have from your Camper Trailer or Caravan for many years. To help you achieve that, we encourage you to read the below information prior to considering hiring your camper trailer or caravan to third parties. -
Page 90: Warranty Statement
Warranty Statement ON-ROAD CARAVANS Our On-Road Caravans are intended to provide a lighter alternative for users who don’t require off-road functionality, without the cost of including features only required for off-road functionality. They are only intended for use: For towing on sealed roads and for limited periods on well maintained gravelled •... - Page 91 FACTORY SECONDS, EX-DEMONSTRATION AND DAMAGED GOODS From time to time, we may offer for sale items marked as “factory seconds”, “ex- • demonstration”, or “damaged”. This Warranty does not apply to any goods sold under these markings. If other warranties apply to goods sold while marked as “factory seconds”, “ex- •...
- Page 92 If we reject a claim, we will notify you of the rejection and explain the reasons for the • rejection. You may provide us with further information or explanations to appeal the rejection, but providing us with further material may not change the result; or If we have insufficient information to either accept or reject a claim, we will ask you •...
- Page 93 Page Intentionally Left Blank P a g e www.marketdirect.com.au Ph: 1300 494 494 ©Copyright...
Need help?
Do you have a question about the FORTE SR Series and is the answer not in the manual?
Questions and answers
Does the SR forte 11 2024 have a flat pin socket
In addition to clarify previous question, I need to know if it is a FLAT plug in socket