Table of Contents
Advertisement
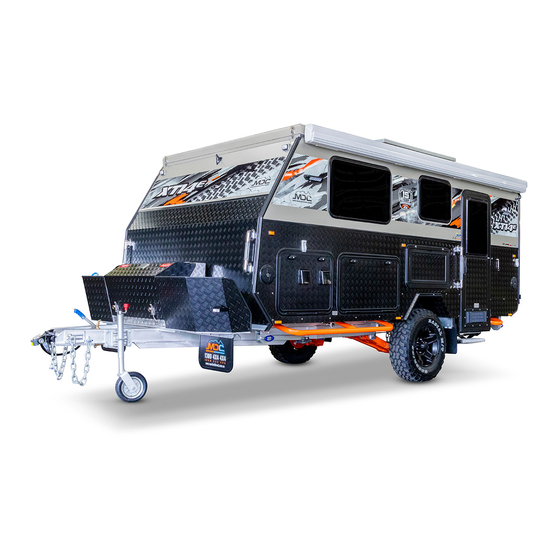
XT 14E
OFFROAD CARAVAN
____________________________________________________________________________________
OWNER'S MANUAL
15
Anniversary Edition - Version 1
th
www.marketdirect.com.au
* January 2021 AU Model shown.
Phone: 1300 494 494
Copyright © Market Direct Group Pty Ltd 2021 All Rights Reserved
Advertisement
Table of Contents
Troubleshooting

Related Manuals for MDC XT 14E 2021


Summary of Contents for MDC XT 14E 2021
- Page 1 XT 14E OFFROAD CARAVAN ____________________________________________________________________________________ OWNER’S MANUAL Anniversary Edition - Version 1 www.marketdirect.com.au * January 2021 AU Model shown. Phone: 1300 494 494 Copyright © Market Direct Group Pty Ltd 2021 All Rights Reserved...
-
Page 2: Table Of Contents
Table of Contents Mains Power ............27 Introduction ..............6 RCD Safety Switch ..........27 WELCOME TO MDC ........... 6 Kitchen ..............28 Terminology & Abbreviations ......6 Control Panel ............29 Terminology & Abbreviations ........7 Towing the Caravan ........... 30 ABOUT YOUR HYBRID OFFROAD Hitch .............. - Page 3 Lithium (LiFePO4) Battery Reset ...... 48 Service Schedule ............. 76 Supplier Contact Details ........98 12 Volt Main Circuit Diagram ......49 Video Tutorials ..........100 12 Volt Switch Circuit ........50 Handover Tutorial ..........100 Gas & Water Systems ..........51 Setup Tutorial ............
- Page 4 You must carry out your own risk assessments as you work. MDC Group PTY LTD does not accept any and all liability which may arise because a user of this publication fails to follow directions in the publication or safe work methods associated with use and maintenance of the product.
- Page 5 My XT14E Hybrid Caravan DISCLAIMER: By receiving this handbook, you confirm there you have read and agree to all the terms and conditions and understood the use and maintenance care of MDC ® Name: Address 1: Address 2: Model: Vin:...
-
Page 6: Introduction
WELCOME TO MDC Off road caravanning is a rewarding way to travel and see our great country. Owning an MDC Caravan will afford you the opportunity to travel to remote places and stay in comfort. It is the intention of MDC for you to have the best possible owner experience and enjoy the great outdoors. -
Page 7: Terminology & Abbreviations
Toe can be measured in linear units, at the front or rear of the tyre, or as an angular deflection. In the case of MDC products, the “toe in” is measured in millimeters at the front of the tyre from the chassis rail. Tow vehicle and Trailer Compatibility Your tow vehicle manufacturer has applied a maximum towing capacity to the vehicle which is the Aggregate Trailer Mass (ATM) and a maximum Gross Combination Mass (GCM). -
Page 8: About Your Hybrid Offroad Caravan
ABOUT YOUR HYBRID OFFROAD CARAVAN Specifications SIZE (CLOSED WITH AC) 2200mmW x 6376mmL x 2720mmH SIZE (OPENED WITH AC) 4200mmW x 6376mmL x 3120mmH STYLE 14’ hybrid offroad caravan TOWBALL WEIGHT Approx. 117kg TARE WEIGHT Approx. 2175kg 3000kg BERTH CHASSIS 150mm x 50mm x 3mm DRAWBAR 120mm x 50mm x 4mm... -
Page 9: Store Locations
SOUTH AUSTRALIA Adelaide Units 2,3 & 4/32-50 Weaver St Edwardstown SA 5042 Contact Details NATIONAL TOLL FREE WARRANTY HOTLINE SPARE PARTS 1300 MDC CARE 1300 MDC PARTS 1300 4X4 4X4 1300 632 2273 1300 632 72787 1300 494 494 www.marketdirect.com.au ©Copyright... -
Page 10: Safety Information
Caravan to sway and/or roll excessively left and right. The industry optimum ball weight on a caravan is between 9 and 11% of the total Caravan weight. MDC Caravans fit into this category and 10% should be used as the starting point. Modifications to The Product Gas Systems The installed gas system on this product is an approved and certified installation. -
Page 11: Jacking Your Caravan Or Camper
Jacking Your Caravan or Camper Your trailer is fitted with purpose built jacking points and from January 2021 supplied with a suitable jack. An appropriately rated bottle jack is an acceptable alternative, however when using the jacking point beneath the trailing arm ensure the jack is of a retracted height that will fit under the jacking point when the tyre is deflated. -
Page 12: Electrical Safety
Electrical Safety Warning Failure To Follow These Instructions May Result In Death Or Serious Injury! When working with electrical equipment or lithium batteries, have someone nearby in case of an emergency. Study and follow all the manufacturer’s specific precautions when using and servicing the battery and connected appliances. -
Page 13: Vehicle Electrical Requirements
For this purpose and Anderson plug connection is fitted to all MDC caravans on the drawbar. Your vehicle will need to be fitted with a power supply to a 50 amp Anderson plug near the towbar so the trailer can be connected. The vehicle only needs to supply power while it is running so a voltage sensitive relay or switching device may be used to protect the start battery when the car engine is stopped. -
Page 14: Trailer Lights
2. 50 amp fuse or circuit breaker at the battery Notes: The Projecta IDC25L DC to DC controller fitted in your MDC trailer is programmed to favour the solar panel input exclusively until it drops below a threshold voltage input. By providing accessory power to the number 12 pin, the trigger for the IDC25L will be set off to take power from both the Anderson plug and the solar panels. -
Page 15: Trail-Assure Electronic Stability Control System
Trail-Assure Electronic Stability Control System As an added safety feature, your 15-year anniversary model caravan is fitted with a Trail-Assure BG-5000 electronic stability control system. This is an asymmetric braking system that uses onboard measuring instruments to determine which wheel brakes to apply, and how often, to increase the stability of your caravan while driving. - Page 16 There is a status light indicator used to determine the functionality and modes of the unit. It is located on the drawbar for ease of access. When inactive the system will enter sleep mode to conserve power. To wake the system and check operation, connect the tow plug to your vehicle and turn on your vehicle.
- Page 17 The BG-5000 is self-diagnosing and in the unlikely event that you need to troubleshoot your unit, identify this module, and determine the series of lights displayed. Refer to the below table to identify the status of the unit. LIGHT CONDITION CORRECTIVE ACTION ACTION Normal operation - no system...
- Page 18 Disclaimer: Electronic stability control systems are NOT substitutes for safe driving or towing practices. In no event shall MDC be liable for loss or damage caused by misuse, modifications, or unsafe driving/towing practices. www.marketdirect.com.au ©Copyright...
-
Page 19: Gas & Appliance Safety
Gas & Appliance Safety Gas Certification Your Caravan has been supplied gas tested and certified. Any additions or alterations to the gas system must be performed by an authorised person and will require re-certification and testing. Also note any alterations may affect your warranty on both the system and appliances. General Safety •... -
Page 20: Gas Appliance Safety
Gas Appliance Safety • Gas appliances are certified and have a flame safeguard feature to stop gas flow in the event of the flame going out. Never interfere with this function or replace appliances with a non-certified type. • Slide-out kitchens with cookers should only be operated with an annex fully erected. Failing to do so may affect the safety and operation of the gas appliance. -
Page 21: Diesel Heater Safety
Diesel Heater Safety Important information before operating the diesel heater. The diesel heater is designed for use in your caravan. • The heater is designed to heat the main living area of your caravan. Attempting to warm the • additional annex area may be beyond the performance of the diesel heater unit. The diesel heater is not to be used for the following. -
Page 22: Using The Caravan
Using the Caravan Weights and Payload Capacities The information plate attached to the drawbar of your caravan displays the relevant weights and weight capacities of the van. Loading Your Caravan It is important to load your caravan correctly to distribute weight evenly and achieve a suitable ball weight load and prevent loading in a manner that can cause a Caravan to sway and/or roll excessively left and right. -
Page 23: Ball Weight
Ball Weight When loading your camper, the generally accepted tow ball weight once loaded is around 10% of the total weight of the caravan. Use a ball weight scale to identify the ball weight and load the camper in a manner that achieves the desired weight. -
Page 24: Pre-Trip Inspection
Pre-Trip Inspection Tyres Before any trip check the following Correct tyre pressures • Tyres in good condition free from damage and uneven wear. • Tread is of legal and acceptable depth. • Wheel Nuts Ensure wheel nuts are tensioned to the correct torque using a torque wrench. •... -
Page 25: Levelling Your Caravan
Levelling Your Caravan The stabiliser legs on your caravan are not designed for supporting the full weight of the trailer, they are there to stabilise it once it is level. Using your stabilisers as a lifting mechanism will void your warranty as will extending them with a “rattle gun”... -
Page 26: Stabiliser Legs
Stabiliser Legs Stabiliser legs are installed to stabilise the caravan or camper when setup. Stabiliser legs should never be used to jack a trailer as they are comprised of small bevel gears held in place by small roll pins that will break if overloaded. -
Page 27: Mains Power
Mains Power The Projecta charger in your caravan is connected via the 15A exterior socket. To use site power, you will require a 15A power lead connected to a 15A outlet. In the event a 15A outlet is unavailable you will need a conversion box that will step up from 10A to 15A with a safety switch. -
Page 28: Kitchen
Kitchen To extend the kitchen from the caravan, press down the blue slide tab, raise the pad bolt and pull kitchen out. The kitchen will lock into place when extended. To put kitchen away, again press down the blue tabs and push back into place. -
Page 29: Control Panel
Control Panel *Voltmeter will indicate battery voltage when idle or charge voltage when charging * Amp meter will show current being used not charge current www.marketdirect.com.au ©Copyright P a g e | 29 Ph: 1300 494 494... -
Page 30: Towing The Caravan
Towing the Caravan Hitch Towing with Trucks & Buses If you intend to tow your caravan with a truck or heavy commercial vehicle you should fit a hitch system to minimise the lash effect of the commercial suspension and distance from the rear axle to the tow point. -
Page 31: How To Hitch Your Coupling
How to Hitch your coupling Here is a short guide on how to safely use your coupling to couple and uncouple the trailer from the towing vehicle. Make sure the handbrake is applied prior to coupling and uncoupling. www.marketdirect.com.au ©Copyright P a g e | 31 Ph: 1300 494 494... - Page 32 Make sure the dust cap is securely connected to the bump cover. This is done by locating the rear lip on the dust cap onto the groove of the bump cover and then pushing it in a downward motion until the dust cover is secure (there should be a slight click when it has been assembled correctly) Test if the dust cover is connected to the bump cover by applying a slight upward force to the dust cover, it shouldn’t separate.
-
Page 33: Coupling
Coupling STEP 1 Push down the button (1) and push the locking mechanism back (2). When the locking mechanism (2) is all the way back, release the button (1) locking the plate in place STEP 2 Offer up the tow pin to the coupling making sure the tow pin cover is removed and there is no visible debris on it. - Page 34 STEP 3 Make sure the tow pin is seated inside the universal and the tow pin top is sticking out of the locking mechanism (see below). Press the button (1) to release the locking mechanism there will be an audible locking noise at which point the mechanism will return to the initial position as shown in step 1.
-
Page 35: Uncoupling
Uncoupling STEP 1 Push down the button 1 and push the locking mechanism back 2. When the locking mechanism is all the way back release the button while holding the mechanism to ensure it does not spring back to the locked position. -
Page 36: Connecting The Breakaway
Connecting the Breakaway The breakaway lanyard is connected to a simple switch on the drawbar. When connecting the lanyard to the tow vehicle it should be connected to a solid part of the vehicle. Do not incorporate its connection with the safety chains. Ensure the electronic sway control system is awake and in normal operation. -
Page 37: Wireless Rearview Camera
This product has been added as an ADDITIONAL safety product and should never be used as a substitution for active supervision. MDC shall not be liable for any loss or damage from not following this and the details within the products instruction manual. -
Page 38: Charging The Caravan
Charging the Caravan Mains Power Your RV will charge from mains power via the Projecta 7 stage charger. Ensure the charger is plugged into its dedicated outlet in its bay and is switched on. The factory battery in your RV is Lithium Iron Phosphate (LiFePO4) Solar Power The roof mounted solar panels will charge automatically provided there is enough radiated energy from... -
Page 39: Storage & Care
Storage & Care Long Term Storage To maximise the life of your caravan you should consider additional protection from the elements. UV light and moisture can have an adverse effect on materials when left unprotected outside. This section outlines some of the things you can do as an owner to protect your investment. Interior Moisture in the smallest amounts can cause mould. - Page 40 The 15-year anniversary models are supplied with an MDC engineered coupling lock device. This device is designed and manufactured to deter the theft of your new caravan. How to attach your lock to your Coupling: Cruisemaster DO-35 coupling Make sure the dust cap is securely connected to the bump cover. This is done by locating the rear lip on the dust cap onto the groove of the bump cover and then pushing it in a downward motion until the dust cover is secure (there should be a slight click when it has been assembled correctly).
-
Page 41: Care And Maintenance Of The Caravan
Care and Maintenance of the Caravan Protection of Finishes Paint The paint coatings on your caravan are no different to that of your car in that they need regular care and maintenance. Rubber seals and applied sealants on caravans can shed polymers and pigments that can stain paint finishes if your caravan isn’t washed regularly. -
Page 42: Roof Maintenance
Roof Maintenance Sealants Roof sealants should be inspected every 6 months for condition. If the sealant has perished or adhesion has failed, it should be repaired immediately. Solar Panels Accumulated dirt and soiling can affect the performance of the solar panels. Panels should be cleaned as necessary to prevent this. -
Page 43: Winegard Sensar Iii Antenna (Optional Extra)
Winegard Sensar III Antenna (optional Extra) Where fitted as an option the mechanism for your Winegard antenna should be lubricated according to the manufacturers specified schedule. www.marketdirect.com.au ©Copyright P a g e | 43 Ph: 1300 494 494... - Page 44 www.marketdirect.com.au ©Copyright P a g e | 44 Ph: 1300 494 494...
-
Page 45: Solar Panels
Solar Panels Accumulated dirt and soiling can affect the performance of the solar panels. Panels should be cleaned as necessary to prevent this. Sealants around solar panel mounts should be checked annually to ensure they are in good condition. Sealants Roof sealants should be inspected every 6 months for condition. -
Page 46: Roof Skirt Elastic Cord
Roof Skirt Elastic Cord The elastic cord surrounding the PVC roof skirt is placed to ensure the skirt pulls inward when lowering the roof. This is an important function that protects the skirt from mechanical damage from the lifting mechanism and getting pinched by the roof. Regular inspection and replacement when necessary is part of the maintenance schedule. -
Page 47: Electrical Systems
Electrical Systems Charging from your Vehicle A 12-pin trailer plug is also required. In addition to the standard wiring to pins 1 to 7, power must be supplied to the number 12 pin for the trigger wire for the DC-DC charger while the engine is running. The IDC25L is programmed to favour the solar power supply until the supply falls below the minimum •... -
Page 48: Chargers & Inverters
Caution Electrical devices can be dangerous. Under no circumstances should repairs and modifications be attempted by unqualified or untrained persons. MDC accepts no liability for any personal injury, damages or loss as a result of unqualified or untrained persons repairing or altering the electrical systems on this product. If in... -
Page 49: 12 Volt Main Circuit Diagram
12 Volt Main Circuit Diagram www.marketdirect.com.au ©Copyright P a g e | 49 Ph: 1300 494 494... -
Page 50: 12 Volt Switch Circuit
12 Volt Switch Circuit www.marketdirect.com.au ©Copyright P a g e | 50 Ph: 1300 494 494... -
Page 51: Gas & Water Systems
Gas & Water Systems Truma Rapid Hot Water System Operating Instructions General Safety *Read the included Truma operation manual supplied with you trailer The use of upright gas cylinders from which gas is taken in the gas phase is mandatory for the operation of gas regulators, gas equipment and gas systems. -
Page 52: Filling The Truma Ultrarapid With Water
The operating pressure for the gas supply is 2.75 kPa (AUS – Propane) and must correspond to • the operating pressure of the appliance (see data plate). LPG systems and pressure regulators must comply with the technical and administrative • regulations of the country in which the appliance is used. -
Page 53: Pressure And Temperature Relief Valve (P&T Safety Valve)
Pressure and Temperature Relief Valve (P&T safety valve) Risk of scalding injury from hot water and/or tampering with the P&T safety valve! • Do not actuate the P&T safety valve as long as the appliance is still hot. • Do not place a plug or reducing coupling in the discharge pipe (Fig. 2a - 4b) of the P&T safety •... -
Page 54: Select Water Heater Mode
Select Water Heater Mode Use the control panel to select the water heater mode a = Red indicator lamp “Fault” b = Water heater “On” 60 °C or 70 °C c = Water heater “Off” If there is air in the gas supply line, it may take up to a minute before the gas is available for combustion. If the appliance switches to “Fault”... -
Page 55: Maintenance
Maintenance Do not modify this appliance • Servicing should only be carried out by authorised personnel. • Only original Truma parts may be used for maintenance and repair work! Please contact the Service Australia for service and repairs. Decalcification The Truma UltraRapid must be descaled on a regular basis (at least twice a year). We recommend the use of suitable normal commercial products for the cleaning, disinfection and care of the Truma UltraRapid. -
Page 56: Water Heater Trouble Shooting
Water Heater Trouble Shooting Gas Operation Symptom Cause Remedy When switching on, the heater No 12 V DC supply Check the power supply does not operate. voltage. (operation voltage min. 10.5 V). Check the Truma UltraRapid fuse (refer to maintenance “Fuses”). When switching on, the heater –... -
Page 57: Water Pumps
Water Pumps The pump when switched on is activated by the release of pressure at the tap and will pump water continuously until the tap is turned off and pressure restored. Should the pumps activate while the taps is turned off this could indicate a leak and require investigation and rectification. Switching Supply Tanks To switch between the supply tanks, locate the valved beneath the caravan underneath the driver’s side near the hot water system. -
Page 58: Connecting The Gas
Connecting the Gas WARNING: Your caravan is fitted with a gas detector. Check operation of the gas detector each time you use your caravan. Fig: 8 Your caravan is fitted with plumbed gas with the regulator and gas bottle placement at the front of the trailer. -
Page 59: Diesel Heater
Diesel Heater Important information before operating the diesel heater. The diesel heater is designed for use in an RV, caravan, or camper. • The heater is designed to heat the main living area of your caravan or camper. Attempting to •... -
Page 60: Heater Control Switch
Heater Control Switch Power on Press the heating (2 power on) button, the heating (constant power) will flash for 0.3S. The heater will begin the start stage. The controller will run heating the program according to the temperature control target set by the control knob. In the start stage, the time delay from switch-on to fuel supply to the fuel pump is around 65 seconds. -
Page 61: Protecting From Mould
Protecting from Mould Mould is very difficult to clean once a porous surface is affected. There are several ways you can prevent the occurrence of mould on your caravan. Never leave your camper packed away wet. If you must leave a campsite with wet canvas or a damn interior, be sure to open and dry out your tent thoroughly at the very first opportunity when you get home. -
Page 62: Covers
Covers Hard floor campers and caravans will benefit greatly from a storage cover. Perishable fittings such as rubber seals and plastic will be protected from UV radiation. Paint and gelcoat finishes will oxidise less, and this will extend the service life of these finishes. Stone Protection There are proprietary devices available that assist in protecting your trailer from stones thrown up by the tow vehicle. -
Page 63: Trouble Shooting
Trouble Shooting 12 Volt Electrical PROBLEM POSSIBLE CAUSE REMEDY No power Main switch turned off Turn on main rotary switch Tripped main circuit breaker Reset CB1 circuit breaker located with batteries (See diagram E1) Flat Battery Battery needs reset: Charge battery on mains power and set charger to “Supply Mode”... -
Page 64: Water
Water Problem Possible Cause Remedy No power from control panel Check circuit breaker Flat Battery Charge battery Replace pump, Contact Pump not working (no noise) Faulty pressure switch dealer for replacement Check connections with Bad electrical connection multimeter or test light Turn on tap and hold finger over nozzle for 5 seconds and release. -
Page 65: Brakes
Brakes Problem Possible Cause Remedy Open Circuits Find and correct Severe under adjustments Adjust brakes No Brakes Faulty controller Test and correct/replace Short circuits Find and correct Great or oil on linings or Clean or replace magnets Corroded connection Clean or replace connectors Worn lining or magnets Replace Scored or grooved brake... -
Page 66: Handy Tips
Handy Tips Driving Off Road Towing your caravan off road adds many dimensions to the driver’s responsibilities and factors to be considered. When travelling remote always carry enough spare parts and supplies to cater for a “worst case scenario.” Always perform preventative maintenance and daily checks. Minimum trailer spares would consist of: Wheel Bearings •... -
Page 67: Trip Planning
Creek and River Crossings These crossings can be extremely dangerous even in low water levels and should never be attempted in times of even mild flooding. Towing a camper or caravan greatly elevates the risk in this situation and should never be attempted unless you are completely assured it is safe to do so. -
Page 68: Warranty Statement
Warranty Statement These Warranty Terms form part of the contract between you and Market Direct Group Pty Ltd (ACN 115 038 483) (“we” or “us”) for the purchase of your new Off-road Caravan or Camper Trailer. Please read these Warranty Terms carefully. - Page 69 a) Except as otherwise required by law, your remedy if we accept a warranty claim will be limited to our choice between repair works with our chosen repairer, replacement goods, or a refund, as we reasonably consider appropriate to rectify the basis of the claim. b) If we accept a warranty claim arising from a major failure, or for which we cannot provide a remedy in a reasonable time, then you may be entitled to a refund for that product.
- Page 70 6. LODGING A CLAIM If you purchased a caravan or camper which you believe is covered by warranty, and you become aware of something you believe to be a defect or damage resulting from a defect, then you should follow the process set out below to obtain the fastest response and greatest chance of having your claim approved: a) As soon as reasonably possible after becoming aware of what you believe to be a defect or damage caused by a defect, lodge a warranty claim through our website using our online Warranty Claim Form;...
-
Page 71: Travel Record
Travel Record Your caravan service record booklet and logbook will help you keep track of kilometres travels and service records. Trip Name Date Km Start Cumulative Finish www.marketdirect.com.au ©Copyright P a g e | 71 Ph: 1300 494 494... - Page 72 Trip Name Date Km Start Cumulative Finish www.marketdirect.com.au ©Copyright P a g e | 72 Ph: 1300 494 494...
-
Page 73: Spare Part Numbers
Spare Part Numbers Hub & Suspension Components Timken Bearing (inner & outer bearings) 25590 Bearing Cone (Inner and outer bearings) 25520 Bearing Seal 55 x 85 x 12mm 50 x 50mm square Poly Orange Bush YJJJ016 Steel Bush Insert 30 x 114mm YZCN002 Adjuster Cam YDS030... -
Page 74: Hub Assembly
Hub Assembly www.marketdirect.com.au ©Copyright P a g e | 74 Ph: 1300 494 494... -
Page 75: Trailing Arm Bushes
Trailing Arm Bushes www.marketdirect.com.au ©Copyright P a g e | 75 Ph: 1300 494 494... -
Page 76: Service Schedule
Service Schedule 500KM FIRST SERVICE CHECKED Check hitch bolts to 90Nm. • Hitch Lubricate with high temp bearing grease • Inspect and adjust handbrake Handbrake • Inspect and adjust brakes. Check bearings are well • Brakes & Bearings greased and crown nut is correctly tightened. Inspect condition and torque to 125Nm (12mm studs) •... - Page 77 Every 6 MONTHS / 5,000KM SERVICE CHECKED Hitch • Check hitch bolts to 90Nm Handbrake • Check cable and adjust if necessary Hand Check brake function and webbing • winch Lubricate and check bushes for excess movement. • Suspension Torque bolts to 190Nm •...
- Page 78 12 MONTHS / 10,000KM SERVICE CHECKED Chassis and Suspension Inspect for damage and lubricate. Check bolt Torque • Hitch to 90Nm Jockey Inspect for condition and operation • Wheel Check for correct operation. • Breakaway Inspect lanyard and clip • Drawbar Inspect wiring grommets and general condition •...
- Page 79 Hatches & Check and lubricate locks • Doors Check condition and correct latch/lock adjustment for • Seals correct 30-50% compression Inspect joint sealants inside and out. • Body Ensuite joints checked for damage and adhesion. • Inspect for soft spots on floor •...
- Page 80 18 MONTHS / 15,000KM SERVICE CHECKED Hitch • Check hitch bolts to 90Nm Handbrake • Check cable and adjust if necessary Hand Check brake function and webbing • winch Lubricate and check bushes for excess movement. • Suspension Torque bolts to 190Nm •...
- Page 81 24 MONTHS / 20,000KM SERVICE CHECKED Chassis and Suspension Inspect for damage and lubricate. Check bolt Torque • Hitch to 90Nm Jockey Inspect for condition and operation • Wheel Check for correct operation. • Breakaway • Inspect lanyard and clip Drawbar •...
- Page 82 Hatches & • Check and lubricate locks Doors Check condition and correct latch/lock adjustment for • Seals correct 30-50% compression Inspect joint sealants inside and out • Body Ensuite joints checked for damage and adhesion • Inspect for soft spots on floor •...
- Page 83 30 MONTHS / 25,000KM SERVICE CHECKED Hitch • Check hitch bolts to 90Nm Handbrake • Check cable and adjust if necessary Hand Check brake function and webbing • winch Lubricate and check bushes for excess movement. • Suspension Torque bolts to 190Nm •...
- Page 84 36 MONTHS / 30,000KM SERVICE CHECKED Chassis and Suspension Inspect for damage and lubricate. Check bolt Torque • Hitch to 90Nm Jockey Inspect for condition and operation • Wheel Check for correct operation. • Breakaway • Inspect lanyard and clip Drawbar •...
- Page 85 Hatches & • Check and lubricate locks Doors Check condition and correct latch/lock adjustment for • Seals correct 30-50% compression Inspect joint sealants inside and out. • Body Ensuite joints checked for damage and adhesion. • Inspect for soft spots on floor •...
- Page 86 42 MONTHS / 35,000KM SERVICE CHECKED Hitch • Check hitch bolts to 90Nm Handbrake • Check cable and adjust if necessary Hand Check brake function and webbing • winch Lubricate and check bushes for excess movement. • Suspension Torque bolts to 190Nm •...
- Page 87 48 MONTHS / 40,000KM SERVICE CHECKED Chassis and Suspension Inspect for damage and lubricate. Check bolt Torque • Hitch to 90Nm Jockey Inspect for condition and operation • Wheel Check for correct operation. • Breakaway • Inspect lanyard and clip Drawbar •...
- Page 88 Hatches & • Check and lubricate locks Doors Check condition and correct latch/lock adjustment for • Seals correct 30-50% compression Inspect joint sealants inside and out. • Body Ensuite joints checked for damage and adhesion. • Inspect for soft spots on floor •...
- Page 89 54 MONTHS / 45,000KM SERVICE CHECKED Hitch • Check hitch bolts to 90Nm Handbrake • Check cable and adjust if necessary Hand Check brake function and webbing • winch Lubricate and check bushes for excess movement. • Suspension Torque bolts to 190Nm •...
- Page 90 60 MONTHS / 50,000KM SERVICE CHECKED Chassis and Suspension Inspect for damage and lubricate. Check bolt Torque • Hitch to 90Nm Jockey Inspect for condition and operation • Wheel Check for correct operation. • Breakaway • Inspect lanyard and clip Drawbar •...
- Page 91 Hatches & • Check and lubricate locks Doors Check condition and correct latch/lock adjustment for • Seals correct 30-50% compression Inspect joint sealants inside and out. • Body Ensuite joints checked for damage and adhesion. • Inspect for soft spots on floor •...
- Page 92 66 MONTHS / 55,000KM SERVICE CHECKED Hitch • Check hitch bolts to 90Nm Handbrake • Check cable and adjust if necessary Hand Check brake function and webbing • winch Lubricate and check bushes for excess movement. • Suspension Torque bolts to 190Nm •...
- Page 93 72 MONTHS / 60,000KM SERVICE CHECKED Chassis and Suspension Inspect for damage and lubricate. Check bolt Torque • Hitch to 90Nm Jockey Inspect for condition and operation • Wheel Check for correct operation. • Breakaway • Inspect lanyard and clip Drawbar •...
- Page 94 Hatches & • Check and lubricate locks Doors Check condition and correct latch/lock adjustment for • Seals correct 30-50% compression Inspect joint sealants inside and out. • Body Ensuite joints checked for damage and adhesion. • Inspect for soft spots on floor •...
- Page 95 78 MONTHS / 65,000KM SERVICE CHECKED Hitch • Check hitch bolts to 90Nm Handbrake • Check cable and adjust if necessary Hand Check brake function and webbing • winch Lubricate and check bushes for excess movement. • Suspension Torque bolts to 190Nm •...
- Page 96 84 MONTHS / 70,000KM SERVICE CHECKED Chassis and Suspension Inspect for damage and lubricate. Check bolt Torque • Hitch to 90Nm Jockey Inspect for condition and operation • Wheel Check for correct operation. • Breakaway • Inspect lanyard and clip Drawbar •...
- Page 97 Hatches & • Check and lubricate locks Doors Check condition and correct latch/lock adjustment for • Seals correct 30-50% compression Inspect joint sealants inside and out. • Body Ensuite joints checked for damage and adhesion. • Inspect for soft spots on floor •...
-
Page 98: Supplier Contact Details
Supplier Contact Details Dometic Thetford Australia https://www.dometic.com/en-au/au/contact-us 41 Lara Way, Campbellfield VIC 3061 Address: Phone: (03) 9358 0700 Email: infoaus@thetford.com.au Cruisemaster Address: 352B Bilsen Road, Geebung QLD 4034 Phone: (07) 3624 3800 Email: sales@cruisemaster.com.au Statewide Bearings Coopers Plains Cairns Address: 902 Beaudesert Rd Coopers Plains QLD Unit3, 49 Cook St Cairns QLD 4870 4108 Phone: (07) 4035 1800... - Page 99 Ph: (08) 9144 2333 Ph: (08) 9091 4111 Email: karratha@statewidebearings.com.au Email: kalgoorlie@statewidebearings.com.au Wangara Wingfield 70 Distinction Road, Wangara, WA 6065 Grand Jct Rd & South Rd Wingfield SA 5013 Ph: (08) 9303 6900 Ph: (08) 8260 6299 Email: wangara@statewidebearings.com.au Email: wingfield@statewidebearings.com.au Dandenong South Somerton 84 Greens Road, Dandenong South VIC 3175...
-
Page 100: Video Tutorials
Video Tutorials Handover Tutorial This video demonstrates requirements before pickup and all features and appliances Scan the code or go to https://youtu.be/HRRHVtMJPNI Setup Tutorial This video demonstrates setting up the caravan Scan the code or go to https://youtu.be/-81haE7OkUA Pack Down Tutorial This video demonstrates packing down the caravan Scan the code or go to https://youtu.be/73kWOBY49a8... - Page 101 www.marketdirect.com.au ©Copyright P a g e | 101 Ph: 1300 494 494...
Need help?
Do you have a question about the XT 14E 2021 and is the answer not in the manual?
Questions and answers