Table of Contents
Advertisement
Quick Links
Legacy™ Line 582K*04-06 Ultra Low NOx (14 ng/J)
S in g le Pa c ka ge R oo ft o p
Gas H e a t ing / El ec t ri c C o o l i n g U n i t
w ith Pu r on® ( R - 4 1 0 A) R efr i ger an t
CONTENTS
SAFETY CONSIDERATIONS . . . . . . . . . . . . . . . . . . . . . . 1
DIMENSIONS . . . . . . . . . . . . . . . . . . . . . . . . . . . . . . . . . 3
Rated Indoor Airflow . . . . . . . . . . . . . . . . . . . . . . . . . . . . . . 3
INSTALLATION . . . . . . . . . . . . . . . . . . . . . . . . . . . . . . . . . 8
Jobsite Survey . . . . . . . . . . . . . . . . . . . . . . . . . . . . . . . . . . . . 8
Step 1 - Plan for Unit Location . . . . . . . . . . . . . . . . . . . . . 8
Step 2 - Plan for Sequence of Unit Installation . . . . . . . . 8
Step 3 - Inspect Unit . . . . . . . . . . . . . . . . . . . . . . . . . . . . . . 8
Step 4 - Provide Unit Support . . . . . . . . . . . . . . . . . . . . . . 8
• ALTERNATE UNIT SUPPORT (IN LIEU OF CURB OR
Step 5 - Field Fabricate Ductwork . . . . . . . . . . . . . . . . . 10
Step 6 - Rig and Place Unit . . . . . . . . . . . . . . . . . . . . . . . 10
(When Required) . . . . . . . . . . . . . . . . . . . . . . . . . . . . . . 11
Step 8 - Install Outside Air Hood . . . . . . . . . . . . . . . . . . 12
Step 9 - Units with Hinged Panels Only . . . . . . . . . . . . . 13
Step 10 - Install Flue Hood . . . . . . . . . . . . . . . . . . . . . . . 13
Step 11 - Install Gas Piping . . . . . . . . . . . . . . . . . . . . . . . 13
(GAS CONNECTIONS)
Step 13 - Make Electrical Connections . . . . . . . . . . . . . 17
Integrated Gas Controller . . . . . . . . . . . . . . . . . . . . . . . . . 27
Manufacturer reserves the right to discontinue, or change at any time, specifications or designs without notice and without incurring obligations.
Catalog No. 04-53582034-01
Installation Instructions
Page
Printed in U.S.A.
Form No. II582K-D-4-6-05 Rev. A
(Optional) . . . . . . . . . . . . . . . . . . . . . . . . . . . . . . . . . . . . . . . . 31
EconomizerONE (Factory Option) . . . . . . . . . . . . . . . . . . 33
RTU Open Controller (Factory Option) . . . . . . . . . . . . . 54
Controller Options . . . . . . . . . . . . . . . . . . . . . . . . . . . . . . . 54
Smoke Detectors . . . . . . . . . . . . . . . . . . . . . . . . . . . . . . . . . 54
Step 14 - Adjust Factory-Installed Options . . . . . . . . . . 55
Step 15 - Install Accessories . . . . . . . . . . . . . . . . . . . . . . 55
Step 16 - Fan Speed Set Up . . . . . . . . . . . . . . . . . . . . . . . 56
START-UP CHECKLIST . . . . . . . . . . . . . . . . . . . . . . . CL-1
SAFETY CONSIDERATIONS
Installation and servicing of air-conditioning equipment can be
hazardous due to system pressure and electrical components.
Only trained and qualified service personnel should install,
repair, or service air-conditioning equipment.
Untrained personnel can perform basic maintenance functions
of cleaning coils and filters and replacing filters. All other
operations should be performed by trained service personnel.
When working on air-conditioning equipment, observe
precautions in the literature, tags and labels attached to the
unit, and other safety precautions that may apply.
Follow all safety codes, including ANSI (American National
Standards Institute) Z223.1. Wear safety glasses and work
gloves. Use quenching cloth for unbrazing operations. Have
fire extinguisher available for all brazing operations.
It is important to recognize safety information. This is the
safety-alert symbol
. When you see this symbol on the unit
and in instructions or manuals, be alert to the potential for
personal injury.
Understand the signal words DANGER, WARNING,
CAUTION, and NOTE. These words are used with the
safety-alert symbol. DANGER identifies the most serious
hazards which will result in severe personal injury or death.
WARNING signifies hazards which could result in personal
injury or death. CAUTION is used to identify unsafe practices,
which may result in minor personal injury or product and
Pg 1
3-24
Replaces: II582K-D-4-6-04
Advertisement
Table of Contents

Subscribe to Our Youtube Channel
Related Manuals for Bryant Legacy 582K 043/D/E


Summary of Contents for Bryant Legacy 582K 043/D/E
-
Page 1: Table Of Contents
Legacy™ Line 582K*04-06 Ultra Low NOx (14 ng/J) S in g le Pa c ka ge R oo ft o p Gas H e a t ing / El ec t ri c C o o l i n g U n i t w ith Pu r on®... - Page 2 property damage. NOTE is used to highlight suggestions which will result in enhanced installation, reliability, or WARNING operation. CARBON-MONOXIDE POISONING HAZARD Failure to follow instructions could result in severe DANGER personal injury or death due to carbon-monoxide ELECTRICAL SHOCK HAZARD poisoning, if combustion products infiltrate into the building.
-
Page 3: Model Number Nomenclature And
WARNING CAUTION FIRE HAZARD UNIT OPERATION HAZARD Failure to follow this warning could result in severe personal Do not detach the burner box from the heat exchanger injury and/or property damage. panel. If the burner box must be replaced, refer to the Service and Maintenance Instructions for the unit. - Page 4 Position: 9 10 11 12 13 14 15 16 17 Example: Unit Type Packaging and Control 582 = Gas Heat RTU, Legacy™ Line A = Standard Packaging, electromechanical controls, no intake or exhaust option. Will allow for use of all field-installed Model economizers, manual or two-position ®...
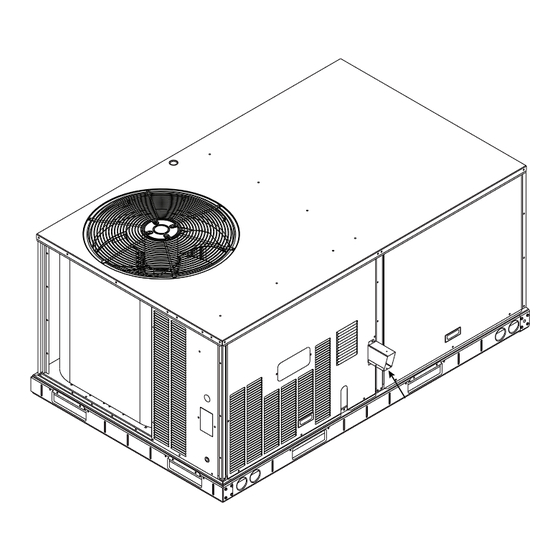
- Page 5 Fig. 2 — 582K Ultra Low NOx — Unit Dimensional Drawing...
- Page 6 Fig. 2 — 582K Ultra Low NOx — Unit Dimensional Drawing (cont)
- Page 7 Fig. 2 — 582K Ultra Low NOx — Unit Dimensional Drawing (cont)
-
Page 8: Installation
INSTALLATION Step 2 — Plan for Sequence of Unit Installation The support method used for this unit will dictate different se- Jobsite Survey quences for the steps of unit installation. For example, on curb- Complete the following checks before installation. mounted units, some accessories must be installed on the unit be- Consult local building codes and the NEC (National Elec- fore the unit is placed on the curb. - Page 9 ROOF CURB NOTES: POWER WIRING CONTROL WIRING ACCESSORY CONVENIENCE CONNECTOR PKG. ACC. GAS CONNECTION TYPE GAS FITTING ACCESSORY # 1. ROOFCURB ACCESSORY IS SHIPPED DISASSEMBLED. FITTING FITTING OUTLET WIRING CONNECTOR 2. INSULATED PANELS: 25.4 [1"] THK. POLYURETHANE FOAM, 44.5 [1-3/4] # DENSITY. 14"...
-
Page 10: Slab Mount (Horizontal Units Only)
NOTE: The gasketing of the unit to the roof curb is critical for a Insulate and weatherproof all external ductwork, joints, and roof watertight seal. Install gasket supplied with the roof curb as shown openings with counter flashing and mastic in accordance with ap- in Fig. -
Page 11: Step 7 - Convert To Horizontal And Connect Ductwork
Place all seal strips in place before "B" placing unit 36-54 in. Required Detail "A" (914-1371 mm) on roof curb Spreader Bars Duct End "C" Side "A" See Detail "A" NOTE(S): 1. SPREADER BARS ARE REQUIRED. Top damage will occur if spreader bars are not used. 2. -
Page 12: Step 8 - Install Outside Air Hood
Screws Hood Parts Plastic Tie Wrap Qty (2) Duct Covers Sheet Metal Face Up Screws for Metal Tray Qty (2) Basepan Fig. 10 — Economizer and Two-Position Damper Hood Parts Location ECONOMIZER AND TWO-POSITION HOOD NOTE: If the power exhaust accessory is to be installed on the Fig. -
Page 13: Step 9 - Units With Hinged Panels Only
Step 9 — Units with Hinged Panels Only If the unit does not have hinged panels, skip this step and continue to Step 10. Relocate latch shipped inside the compressor compartment behind the hinged compressor door to location shown in Fig. 14 after unit Panel installation. -
Page 14: Factory Option Thru-Base Connections
FACTORY OPTION THRU-BASE CONNECTIONS (GAS Table 3 — Natural Gas Supply Line Pressure Ranges CONNECTIONS) UNIT MODEL UNIT SIZE MIN. MAX. This service connection kit consists of a 1/2 in. electrical 5.0 in. wg 13.0 in. wg bulkhead connector and a 3/4 in. electrical bulkhead connector, 582K* Ultra Low NOx 04, 05, 06 (1.24 kPa) - Page 15 and the gasket (located between the “L” bracket and the con- nector plate assembly). 9 in. (229 mm) Minimum NOTE: Take care not to damage the gasket, as it is reused in the following step. Place the gasket over the embossed area in the basepan, align- ing the holes in the gasket to the holes in the basepan.
- Page 16 When installing the gas supply line, observe local codes pertaining to gas pipe installations. Refer to the NFPA 54/ANSI Z223.1 NFGC latest edition (in Canada, CAN/CSA B149.1). In the ab- sence of local building codes, adhere to the following pertinent recommendations: •...
-
Page 17: Step 12 - Install External Condensate Trap And Line
Step 12 — Install External Condensate Trap and Step 13 — Make Electrical Connections Line The unit has one 3/4 in. condensate drain connection on the end of WARNING the condensate pan and an alternate connection on the bottom. See Fig. -
Page 18: Units With Factory-Installed Non-Fused Disconnect
Install the handle on to the painted cover horizontally with the Units Without Non-Fused Disconnect Option red arrow pointing to the left. 10. Secure the handle to the painted cover with (2) screws and lock washers supplied. 11. Engaging the shaft into the handle socket, re-install (3) hex screws on the NFD enclosure. -
Page 19: Convenience Outlets
Operation on improper line voltage or ex- cessive phase imbalance constitutes abuse and may cause damage to electrical components. Such operation would invalidate any ap- PWD-CO plicable Bryant warranty. Transformer max voltage deviation from average voltage % Voltage Fig. - Page 20 Route 125-v power supply conductors into the bottom of the utili- ty box containing the duplex receptacle. Unit-Powered Convenience Outlet A unit-mounted transformer is factory-installed to step down the main power supply voltage to the unit to 115-v at the du- plex receptacle.
-
Page 21: Factory-Option Thru-The-Base Connections (Electrical Connections)
UL-required clearance between high-voltage and low-voltage wiring. THERMOSTAT Install a Bryant-approved accessory thermostat according to in- stallation instructions included with the accessory. For complete economizer function, select a two-stage cooling thermostat. Lo- cate the thermostat accessory on a solid wall in the conditioned space to sense average temperature in accordance with the ther- mostat installation instructions. -
Page 22: Perfect Humidity™ Control Connections
PERFECT HUMIDITY™ CONTROL CONNECTIONS Unit Control Perfect Humidity™ Space RH Controller Board NOTE: The Perfect Humidity™ dehumidification system is a fac- tory-installed option. Perfect Humidity™ dehumidification sys- tem is not available for single phase (-J voltage code) models. The Perfect Humidity™ dehumidification system requires a field- supplied and field-installed space relative humidity control device. - Page 23 Fig. 39 — Typical Control Wiring Diagram — Electromechanical with POL224 — 582K 04-06 Ultra Low NOx — 208/230-3-60 Unit Shown...
- Page 24 Fig. 40 — Typical Control Wiring Diagram — RTU Open Controller — 582K 04-06 Ultra Low NOx — 208/230-3-60 Unit Shown...
- Page 25 A M E R I C A N W I R E G A U G E Fig. 41 — Typical 582K 04-06 Ultra Low NOx — Power Wiring Diagram — 208/230-3-60 Unit Shown...
- Page 26 Fig. 42 — Typical 582K 04-06 Ultra Low NOx — Power Wiring Diagram for 460-3-60...
-
Page 27: Integrated Gas Controller
Integrated Gas Controller When the pressure in the heat exchanger is low enough to close the pressure switch, the ignition activation period begins. Once ig- This unit contains an Integrated Gas Controller (IGC) board. The nition occurs, the IGC board will continue to monitor the condi- IGC control board uses a flue gas pressure switch that senses pres- tion of the burner thermal switch, the limit switches, the pressure sure drop in the heat exchanger due to the combustion inducer. - Page 28 Spade Connect Ignitor Redundant Gas Valve Relay Status LED Overcurrent Fuse Protection Fig. 44 — IGC Board Component Layout UNIT CONTROL BOARD Fig. 45 — Typical IGC Control Wiring Diagram...
- Page 29 Table 5 — IGC Board LED Alarm Codes a,b,c,d FLASH SYMPTOM CAUSE REMEDY CODE Normal Operation — — Check 5-amp fuse on the ICG, power to unit, 24-v circuit breaker, and transformer. Units Loss of power to control No Power or Hardware Failure without a 24-v circuit breaker have an internal overload in the 24-v transformer.
- Page 30 Pre-purge: Induced draft motor Ignition: Gas valve and Call for heat: starts and runs for 30 seconds at igniter energize for 2 W terminal is energized. ignition speed, Speed 1. seconds. Rectification: Flame sensor activates for 2 seconds after Gas valve and igniter ignition period.
-
Page 31: Perfect Humidity Dehumidification System
Perfect Humidity Dehumidification System DEHUM/MECH COOLING (SUBCOOLING) MODE (Optional) This mode increases the latent heat removal and decreases sensi- ble cooling compared to normal cooling. This occurs when there Units with the factory-installed Perfect Humidity ™ system option is a cooling and dehumidification demands. are capable of providing multiple modes of improved dehumidifi- cation as a variation of the normal cooling cycle. - Page 32 Indoor Valve Leaving Air Reheat Mode Metering Device (TXV) Condenser Coil Hot Gas Reheat Coil Outdoor Air Valve Compressor Evaporator Coil = Closed Valve = Open Valve Indoor Entering Air Fig. 47 — Normal Cooling Mode – Perfect Humidity System with Single Stage Cooling, 582K 04-06 Ultra Low NOx Indoor Valve Leaving Air...
-
Page 33: Economizerone (Factory Option)
EconomizerONE (Factory Option) the harness are made to the C (24 vac common) and R (24 vac power) terminals of the economizer controller. See Fig. 52. ECONOMIZER SETTINGS LED Indication Interface Overview NOTE: If different faulty events occur at the same time, then EconomizerONE sensor/DAC LED lights up following the priority below: Red →... - Page 34 Table 7 — LED Indication FREE SENSOR Power STATUS COOLING DAC LED Yellow Yellow Yellow Commissioning mode Blinking Blinking Blinking Power start up Yellow On Yellow On Yellow On Free cooling is running Green On — — Free cooling is available Green —...
- Page 35 Table 8 — Free Cooling Functions CONTROL MODE SENSORS USED ENABLE FREE COOLING? The outside air dry bulb temperature is compared with the set temperature OA (outside air) temperature sensor Control Mode 1 shutoff setpoint. • Fixed Dry bulb If the outside air dry bulb temperature is below the temperature shutoff MA (Mixed Air) temperature sensor setpoint, then the outside air is used to meet all or part of the cooling demand.
- Page 36 Table 9 — 1 and 2-Stage Cooling Stage I/O Logic Table 12 — Different Fan Speeds with Different Configured Outputs ECONOMIZER COOLING COOLING CONDITION MET STAGE 1 STAGE 2 FAN TYPE 1-SPEED COOLING 2-STAGE COOLING • Spd H (regardless of •...
- Page 37 Table 14 — Different Damper Position Settings with Different Configured Outputs (DCV is Enabled) FAN TYPE 1-STAGE COOLING 2-STAGE COOLING • 2VENTMIN H to 2VENTMAX H (regardless of • 2VENTMIN H to 2VENTMAX H (regardless of 1-SPEED FAN cooling demand, OCC=Yes) cooling demand, OCC=Yes) •...
- Page 38 Exhaust Fan Operation Users can enable this function only from the Climatix mobile ap- ™ plication if the related function is available in the current mobile Up to two exhaust fans can be connected to the economizer application version. controller. Fault Detection and Diagnostics •...
-
Page 39: Wiring
WIRING WARNING Failure to follow this caution may result in damage to equipment. Be sure to allow enough time for compressor startup and shutdown between checkout tests so that the compressors do not short-cycle. Mounting Devices Connected to the Economizer Controller Devices like damper actuators, sensors (temperature sensor, humidity sensor, combination temperature and humidity sensor, CO... - Page 40 Table 16 — EconomizerONE Control Wiring Settings LABEL TYPE DESCRIPTION RS485 Modbus A Line A RS485 Modbus B Line B ¬ GND_ISO Earth Ground Type II NTC 10K or 0-10 vdc Mixed or Discharge Air Temperature Sensor Mixed or Discharge Air Temperature Sensor Common Type II NTC 10K or 0-10 vdc Outside Air Temperature Sensor 0-10 vdc or 4-20mA...
- Page 41 Connecting Peripheral Devices to the Economizer Controller See Fig. 57-61 for wiring details. • Outside Air: Connect to the Mixed or Discharge Air Temperature Sensor OAT and COM terminals of the Outside Air Temperature Sensor device. • Return Air (Differential): Return Air Temperature Sensor Connect to the RAT and S-COM...
- Page 42 • Outside Combination Temperature/ Humidity: Connect Combo Temperature and Humidity Sensor to the OAT, COM, and OAH terminals of the device. • Combo Temperature and Humidity Sensor Return Combination Temperature/ Humidity: Connect to the RAT, S-COM, and RAH terminals of the device. Fig.
-
Page 43: Setup And Configuration
SETUP AND CONFIGURATION NOTE: Parameters and display menus may display differently/dynamically if different applications are config- ured. See Tables 17-24. IMPORTANT: Before setup and configuration, it is recommend- ed to obtain some location-based values, such as shutoff points, IMPORTANT: Not all operations are available on the local or utilize the location services in the Climatix ™... - Page 44 Table 17 — Status Display PARAMETER DESCRIPTION VALUE 1FREECOOL Indicates whether the system can use outdoor air for free cooling. 1ECON ENAB Indicates whether outdoor air is being used for the first stage of cooling. Indicates whether the space is occupied. If users choose ALWAYS for 6OCC when configuring I/Os, then the parameter value is YES;...
- Page 45 Table 18 — Parameter Settings — Basic PARAMETER DESCRIPTION RANGE DEFAULT Temperature shutoff setpoint can be obtained automatically if a smartphone or tablet with the mobile application installed on it is connected to the 2 TEMP OFF 48...80°F; increment by 1 63°F network provided by a Wi-Fi/WLAN stick plugged into the economizer controller.
- Page 46 Table 19 — Parameter Settings — Advanced PARAMETER DESCRIPTION VALUE/RANGE DEFAULT 3FREEZE POS Anti-freeze protection damper position (closed or minimum). 3SD ACT POS Damper position during shutdown (open or closed). MAT sensor location: • Choose MAT if the sensor is installed before the DX (Direct Expansion) coil. 3DIF T LOC •...
- Page 47 Table 20 — Parameter Settings — I/O Configurations (cont) PARAMETER DESCRIPTION VALUE DEFAULT Choose “COOL 2” if Cooling Stage 2 is available (another compressor is COOL 2 6Y2O COOL 2 connected to the Economizer). Otherwise, choose “NONE”. NONE Auxiliary DO-1. Configurable as: NONE •...
-
Page 48: Installing Optional Hh57Lw001 Single
Table 23 — Enter Running State PARAMETER DESCRIPTION 8RUN STATE Change to Running State. Press Enter to confirm the change. 8ENTER RUN? Confirm the change to Running State. Perform factory reset. Press Enter to confirm the reset. (This action resets the controller 8FACTORY DEF password to default: OneBT.) 8DEF CONFIRM? - Page 49 Fig. 62 — HH57LW001 Dimensional, Connection and Switching Information Fig. 63 — HH79NZ039 Dry Bulb and Mixed Air Sensor Wiring Actuator Wiring Harness HH79NZ039 Outside Air Temperature Sensor Outside Air Damper Fig. 65 — California Title 24 Zones Fig. 64 — EconomizerONE Component Locations (CRECOMZR108A00 Shown)
- Page 50 U.S. and Canada I-Codes / ASHRAE Zones Climate Zone 1 Climate Zone 5 and Marine Climate Zone 2 Climate Zone 6 Climate Zone 3 Climate Zone 7 and 8 Climate Zone 4 (Except Marine) Fig. 66 — U.S. and Canada Climate Zones Table 25 —...
- Page 51 Economizers are shipped standard with an HH79NZ039 outside Table 26 — California Title 24 Regional High Limit Dry air dry bulb sensor (see Fig. 63). System default setting (high temp Bulb Temperature Settings limit) is 63°F (17°C) and has a range of 48°F to 80°F (9°C to REQUIRED HIGH LIMIT 27°C).
-
Page 52: Checkout
CHECKOUT Status Use the Status menu (refer to Table 17) to check the parameter Inspect all wiring connections at the economizer module’s termi- values for the various devices and sensors configured. nals, and verify compliance with the installation wiring diagrams. For checkout, review the Status of each configured parameter and NOTE: For information about menu navigation and use of the perform the Test Commands tests (refer to Table 22). -
Page 53: Troubleshooting
TROUBLESHOOTING For EconomizerONE troubleshooting issues see Table 28. Table 28 — Operating Issues and Concerns SYMPTOM REASON SOLUTION An alarm is displayed on the Sensor, damper, or the whole working Check sensor, damper, or the whole working system following the detailed alarm information. system may not work properly DAC LED is blinking RED Damper slippage... -
Page 54: Rtu Open Controller (Factory Option)
RTU Open Controller (Factory Option) Screw the sensor and detector plate into its operating position using screws from Step 1. See Fig. 68, Step 3. For details on operating 582K*04-06 units equipped with the fac- tory-installed RTU Open controller option, refer to the Factory-In- Connect the flexible tube on the sampling inlet to the sam- stalled Option RTU Open Multi-Protocol Controller Controls, pling tube on the basepan. -
Page 55: Step 14 - Adjust Factory-Installed Options
Step 14 — Adjust Factory-Installed Options Step 15 — Install Accessories Available accessories include: SMOKE DETECTORS • Roof curb Smoke detector(s) will be connected at the Unit Control Board • Thru-the-base connection kit (must be installed before unit (UCB), at terminals marked “Smoke Shutdown.” Detach the is set on roof curb) jumper covering the Smoke Shutdown terminals on the UCB and then attach the wiring harness from the smoke detector. -
Page 56: Step 16 - Fan Speed Set Up
Step 16 — Fan Speed Set Up UNITS WITH ELECTROMECHANICAL CONTROLS The fan speed set up controls are located on the lower section of the Unit Control Board (UCB). See Fig. 69 for the location on 3-phase voltage units or Fig. 70 for the location on single phase voltage units. - Page 57 ESP in. wg Factory Setting: Calculator 9.0 V 1500 Field Setting: 1625 Record field setting here 10.0 1750 1875 2000 Switch Range: 2125 2250 4.1 - 7.5 2375 6.9 - 8.7 2500 7.7 - 10.0 Field Accessories: Economizer * Overlap in A, B, C switch range designed for maximum field adjustment potential.
- Page 58 © 2024 Carrier Manufacturer reserves the right to discontinue, or change at any time, specifications or designs without notice and without incurring obligations. Catalog No. 04-53582034-01 Printed in U.S.A. Form No. II582K-D-4-6-05 Rev. A Pg 58 3-24 Replaces: II582K-D-4-6-04...
-
Page 59: Start-Up Checklist
START-UP CHECKLIST FOR 582K*04-06 ULTRA LOW NOx SINGLE PACKAGE ROOFTOP GAS HEATING/ELECTRIC COOLING UNIT (Remove and use for job file) NOTE: To avoid injury to personnel and damage to equipment or property when completing the procedures listed in this start-up checklist, use good judgment, follow safe practices, and adhere to the safety considerations/information as outlined in preceding sections of this document. - Page 60 PRESSURES Gas Inlet Pressure _____________ in. wg Gas Manifold Pressure STAGE 1 _____________ in. wg STAGE 2 _____________ in. wg Refrigerant Suction _____________ PSIG Refrigerant Discharge _____________ PSIG Verify Refrigerant Charge using Charging Charts. (Y/N) _____ GENERAL Economizer minimum vent and changeover settings to job requirements (if equipped). (Y/N) _____ Verify smoke detector unit shutdown by utilizing magnet test.
Need help?
Do you have a question about the Legacy 582K 043/D/E and is the answer not in the manual?
Questions and answers