
Related Manuals for Galil Motion Control DMC-41 3 Series


Summary of Contents for Galil Motion Control DMC-41 3 Series
- Page 1 USER MANUAL DMC-41x3 Manual Rev. 1.0f Galil Motion Control, Inc. 270 Technology Way Rocklin, California 916.626.0101 support@galilmc.com galil.com 11/2014...
- Page 2 Using This Manual This user manual provides information for proper operation of the DMC-41x3 controller. A separate supplemental manual, the Command Reference, contains a description of the commands available for use with this controller. It is recommended that the user download the latest version of the Command Reference and User Manual from the Galil Website.
-
Page 3: Table Of Contents
Contents Contents Chapter 1 Overview Introduction ........................1 Part Numbers ........................ 2 Overview of Motor Types ..................... 6 Overview of External Amplifiers .................. 6 Overview of Galil Amplifiers and Drivers ..............7 DMC-41x3 Functional Elements .................. 8 Chapter 2 Getting Started Dimensions ........................ - Page 4 Virtual Axis ........................102 Stepper Motor Operation ....................103 Stepper Position Maintenance Mode (SPM) ..............105 Dual Loop (Auxiliary Encoder) ..................108 Motion Smoothing ....................... 110 Homing ......................... 111 High Speed Position Capture (The Latch Function) ............ 114 Chapter 7 Application Programming Overview ........................
- Page 5 Description ........................203 Electrical Specifications ....................204 Operation ........................205 A3 – AMP-43240 (-D3240) Description ........................206 Electrical Specifications ....................207 Operation ........................208 Error Monitoring and Protection ................... 210 A4 – AMP-435x0 (-D3540,-D3520) Description ........................212 Electrical Specifications ....................213 Operation ........................
-
Page 6: Chapter 1 Overview
Chapter 1 Overview Introduction The DMC-41x3 Series are Galil’s Econo motion controller that is a scaled-down version of the DMC-40x0 Acclerra series controller. The controller series offers many enhanced features compared to prior generation Econo series controllers including high speed communications, non-volatile program memory, faster encoder speeds, and improved cabling for EMI reduction. -
Page 7: Part Numbers
Part Numbers The DMC controller board comes in comes in two sizes, 1-4 axis models (labeled A-D) and 5-8 axis models (labeled E-H). The number of axis is designated by x in the part number DMC-41x3. In addition, Axis A-D and Axis E-H have their own set of axis-specific options that can be ordered. - Page 8 Form Factor (example) Part Number Description DMC-41x3, 1-4 axis model ordered with the -CARD -CARD option. DMC-41x3, 5-8 axis model ordered with the -CARD -CARD option. DMC-41x3, 1-4 axis model ordered with the -BOX4 option. -BOX4 This option is required if DMC-41x3 is ordered with internal amplifiers, AMP or SDM.
- Page 9 Figure 1.3: Layout of full DMC-41x3 part number If the part number is not readily available, you can determine the information by using the 'ID' command. Issuing an 'ID' command when connected to the controller will return your controller's internal hardware configuration. The placement of the AMP/SDM options is extremely important for 5-8 axis models.
- Page 10 Axis-specific options, “-ABCD(Y) and -EFGH(Y)” Option Type Options Brief Description Documentation SSI feedback BiSS and SSI – BiSS and SSI Absolute Encoder Interface, starting on pg 183 BiSS BiSS feedback HSRC 500mA Sourcing Outputs 500mA Sourcing Optoisolated Outputs (HSRC), pg 41 LSNK 25mA Sinking Outputs 25mA Sinking Optoisolated Outputs (LSNK), pg 39...
-
Page 11: Overview Of Motor Types
Overview of Motor Types The DMC-41x3 can provide the following types of motor control: 1. Standard servo motors with ±10 volt command signals 2. Step motors with step and direction signals 3. Other actuators such as hydraulics and ceramic motors - For more information, contact Galil. The user can configure each axis for any combination of motor types, providing maximum flexibility. -
Page 12: Overview Of Galil Amplifiers And Drivers
Overview of Galil Amplifiers and Drivers With the DMC-41x3 Galil offers a variety of Servo Amplifiers and Stepper Drivers that are integrated into the same enclosure as the controller. Using the Galil Amplifiers and Drivers provides a simple straightforward motion control solution in one box. -
Page 13: Dmc-41X3 Functional Elements
DMC-41x3 Functional Elements The DMC-41x3 circuitry can be divided into the following functional groups as shown in Figure 1.4 and discussed below. Figure 1.4: DMC-41x3 Functional Elements Microcomputer Section The main processing unit of the controller is a specialized Microcomputer with RAM and Flash EEPROM. The RAM provides memory for variables, array elements, and application programs. - Page 14 inputs (2 inputs / each axis). The general inputs as well as the index pulse can also be used as high speed latches for each axis. A high speed encoder compare output is also provided. The DMC-4153 through DMC-4183 controller provides an additional 8 optoisolated inputs and 8 4183 optoisolated outputs.
- Page 15 Encoder An encoder translates motion into electrical pulses which are fed back into the controller. The DMC-41x3 accepts feedback from either a rotary or linear encoder. Typical encoders provide two channels in quadrature, known as MA and MB. This type of encoder is known as a quadrature encoder. Quadrature encoders may be either single- ended (MA and MB) or differential (MA+, MA- and MB+, MB-).
-
Page 16: Chapter 2 Getting Started
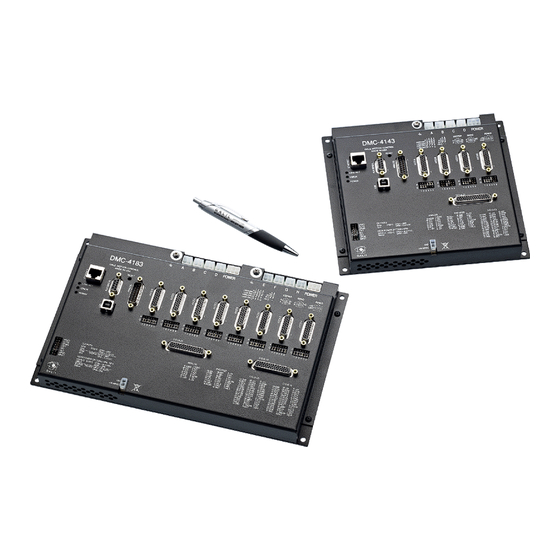
Chapter 2 Getting Started Dimensions DMC-4143-CARD Figure 2.1: DMC-41x3 Dimensions (in inches) where x= 1, 2, 3, and 4-axis Dimensions are subject to change. Contact the Galil factory for current dimensions of all products. Chapter 2 Getting Started ▫ 11 DMC-41x3 User Manual... - Page 17 DMC-4183-CARD Figure 2.2: DMC-41x3 Dimensions (in inches) where x= 5, 6, 7, and 8-axis Dimensions are subject to change. Contact the Galil factory for current dimensions of all products. DMC-41x3 User Manual Chapter 2 Getting Started ▫ 12...
- Page 18 DMC-4143-BOX4 Figure 2.3: DMC-41x3-BOX4 Dimensions (in inches) where x= 1, 2, 3, and 4-axis Dimensions are subject to change. Contact the Galil factory for current dimensions of all products. Chapter 2 Getting Started ▫ 13 DMC-41x3 User Manual...
- Page 19 DMC-4183-BOX8 Figure 2.4: DMC-41x3-BOX4 Dimensions (in inches) where x= 5, 6, 7, and 8-axis Dimensions are subject to change. Contact the Galil factory for current dimensions of all products. DMC-41x3 User Manual Chapter 2 Getting Started ▫ 14...
-
Page 20: Dmc-41X3 Power Connections
DMC-41x3 Power Connections SDM/AMP Power SDM/AMP Power Axis A-D Axis E-H 2-pin Molex controller power connector Figure 2.5: Power Connector locations for the DMC-41x3 Figure 2.6: Power Connector used when controller is ordered without Galil Amplifiers For more information on powering your controller see Step 4. Power the Controller, pg 18. For more information regarding connector type and part numbers see Power Connector Part Numbers, pg 185. -
Page 21: Elements You Need
-CARD All standoff locations must be used when mounting the -CARD version of the DMC-41x3 controllers. There are 6 standoff locations for the DMC-4143 controller and 8 standoff locations for the DMC-4183 controller. See Figure 2.1 and Figure 2.2 for mounting hole sizing and locations. The minimum standoff height that should be used for the DMC-41x3-CARD controllers is 0.656”. -
Page 22: Installing The Dmc, Amplifiers, And Motors
Installing the DMC, Amplifiers, and Motors Installation of a complete, operational motion control system consists of the following steps: Step 1. Determine Overall System Configuration, pg 17 Step 2. Install Jumpers on the DMC-41x3, pg 17 Step 3. Install the Communications Software, pg 18 Step 4. -
Page 23: Step 3. Install The Communications Software
Motor Off Jumper It is recommended to use the MO jumper when connecting motors for the first time. With a jumper installed at the MO location, the controller will boot-up in the “motor off” state, where the amplifier enable signals are toggled to “inhibit/disable”. -
Page 24: Step 5. Establish Communications With Galil Software
Options Ordered Power Connector Locations AMP/SDM AMP/SDM Controller Power AMP/SDM Power, Axis A-D AMP/SDM Power, Axis E-H ISCNTL ISAMP Axis A-D Axis E-H (2-pin Molex near bottom) (6- or 4-pin Molex) (6- or 4-pin Molex) Table 2.1: Available power connectors based upon option ordered In this configuration the amplifiers are sharing power. -
Page 25: Step 6. Connecting Encoder Feedback
Step 6. Connecting Encoder Feedback The type of feedback the unit is capable of depends on the options ordered. Table 2.2 shows the different Encoder feedback types available for Standard DMC-41x3 models and additional feedback types available as options. Note that each feedback type has a different configuration command. -
Page 26: Step 7. Setting Safety Features Before Wiring Motors
5. Issue TP to determine the current motor position, record this value. 6. Move the motor by hand some measured physical distance. 7. Query TP again. Take the absolute difference from the current TP and the TP recorded from Step 5. 8. - Page 27 NOTE: Off-on-error (OE) requires the amplifier enable signal to be connected from the controller to the amplifier. This is automatic when using Galil's internal amplifiers, see Step 9. Connecting External Amplifiers and Motors, pg 29 for external amplifiers. Step C. Understanding and Correcting for Runaway Motors A runaway motor is a condition for which the motor is rotating uncontrollably near it's maximum speed in a single direction.
-
Page 28: Step 8. Wiring Motors To Galil's Internal Amps
2. Reverse direction of the motor by swapping any two motor phases (or two hall sensors if using a trapezoidal amplifier). The motor will now have to be re-commutated by using either the Trapezoidal or Sinusoidal method, see Step 8a. Commutation of 3-phased Brushless Motors, pg 24. Non-wiring Options You can reverse the direction of the motor command line by using the MT command or reverse direction of the feedback by using the CE command (standard quadrature and step/direction feedback only). -
Page 29: Step 8A. Commutation Of 3-Phased Brushless Motors
Amplifier Commutation Halls Required A1 – AMP-430x0 (-D3040,-D3020), pg 198 Trapezoidal Halls required for brushless motors A2 – AMP-43140 (-D3140), pg 204 Brushed A3 – AMP-43240 (-D3240), pg 207 Trapezoidal Halls required for brushless motors A4 – AMP-435x0 (-D3540,-D3520), pg 213 Sinusoidal Halls optional for brushless motors A5 –... - Page 30 in both directions. The two most common methods for doing so are trapezoidal commutation (use of Hall sensors) and through position sensor algorithms (sinusoidal commutation, no Halls required). The following sections provide a brief description and guide on how to perform either commutation method including wiring and configuration commands.
- Page 31 8. The correct wiring combination will be the one with the least difference in magnitude between the velocities in the positive and negative direction. In the case where there are two combinations that meet this criteria, choose the combination that has the higher velocities. In the example table shown in Table 2.7, Trial 1 would be the correct choice.
- Page 32 10. Issue MO A and set OFA= 0. Set small, and appropriate values of KP A and KD A and verify the motor holds position once a SH A is issued. The motor is now under closed loop control. 11. Double check commutation by issuing a small jog command (JGA=1000; BGA) and verify the motor spins smoothly for more than 360 degrees.
- Page 33 If your motor has halls, it is recommended to use the BI/BC method. The following sections discuss how to wire and configure a motor for sinusoidal commutation using the different commutation methods: BZ/BX Method The BZ command must move the motor to find the zero commutation phase. This movement is WARNING sudden and will cause the system to jerk.
-
Page 34: Step 9. Connecting External Amplifiers And Motors
and C, and hall C aligns with the excitement of motor phases C and A. Setting up the motor for BI/BC initialization may require wiring changes to both the motor leads and the hall inputs. The following steps will ensure that the correct configuration is reached: 1. - Page 35 Motor Type Connection Requirements Servo motors • Power to controller and amplifier (Brushed and Brushless) • Amplifier enable • Encoder feedback • Motor command line • See amplifier documentation for motor connections Stepper motor • Power to controller and amplifier •...
-
Page 36: Step 10. Tune The Servo System
The DMC has two ways of controlling amplifiers: 1. Using a motor command line (±10V analog output) The motor and the amplifier may be configured in torque or velocity mode. In the torque mode, the amplifier gain should be such that a 10V signal generates the maximum required current. In the velocity mode, a command signal of 10V should run the motor at the maximum required speed. -
Page 37: Chapter 3 Connecting Hardware
Chapter 3 Connecting Hardware Overview The DMC-41x3 provides optoisolated digital inputs for forward limit, reverse limit, home, and abort signals. The controller also has 8 optoisolated, uncommitted inputs (for general use) as well as 8 optoisolated outputs and 8 analog inputs configured for voltages between ±10 volts. Controllers with 5 or more axes have an additional 8 optoisolated inputs and an additional 8 4183 optoisolated outputs. - Page 38 Home Switch Input Homing inputs are designed to provide mechanical reference points for a motion control application. A transition in the state of a Home input alerts the controller that a particular reference point has been reached by a moving part in the motion control system.
- Page 39 If the Off-On-Error function is disabled, the motor will decelerate to a stop as fast as mechanically possible and the motor will remain in a servo state. All motion programs that are currently running are terminated when a transition in the Abort input is detected. This can be configured with the CN command.
-
Page 40: Optoisolated Input Electrical Information
Optoisolated Input Electrical Information Electrical Specifications INCOM/LSCOM Max Voltage 24 V INCOM/LSCOM Min Voltage Minimum current to turn on Inputs 1.2 mA Minimum current to turn off Inputs once activated (hysteresis) 0.5 mA 11 mA Maximum current per input Internal resistance of inputs 2.2 kΩ... - Page 41 Wiring the Optoisolated Digital Inputs To take full advantage of optoisolation, an isolated power supply should be used to provide the voltage at the input common connection. Connecting the ground of the isolated power to the ground of the controller will bypass optoisolation and is not recommended if true optoisolation is desired.
- Page 42 Figure 3.3: Limit Switch Inputs for Axes A-D Figure 3.4: Limit Switch Inputs for Axes E-H Figure 3.5: ELO, Abort and Reset Inputs Chapter 3 Connecting Hardware ▫ 37 DMC-41x3 User Manual...
-
Page 43: Optoisolated Outputs
Optoisolated Outputs The DMC-41x3 has several different options for the uncommitted digital outputs (labeled as DO). The default outputs are 4mA sinking which are ideal for interfacing to TTL level devices. Additional options include 25mA sinking (lower power sinking, LSNK), 25mA sourcing (low power sourcing, LSRC), and 500mA sourcing outputs (high power sourcing, HSRC). - Page 44 Figure 3.7: 4mA sinking wiring diagram for Bank 1, DO[16:9] 25mA Sinking Optoisolated Outputs (LSNK) Description The 25mA sinking option, refereed to as lower power sinking (LSNK), are capable of sinking up to 25mA per output. The voltage range for the outputs is 5-24 VDC. These outputs should not be used to drive inductive loads directly. Electrical Specifications Output PWR Max Voltage 24 V...
- Page 45 Figure 3.9: 25mA sinking wiring diagram for Bank 1, DO[16:9] 25mA Sourcing Optoisolated Outputs (LSRC) Description The 25mA sourcing option, refereed to as lower power sourcing (LSRC), are capable of sourcing up to 25mA per output. The voltage range for the outputs is 5-24 VDC. These outputs should not be used to drive inductive loads directly.
- Page 46 Figure 3.11: 25mA sourcing wiring diagram for Bank 1, DO[16:9] 500mA Sourcing Optoisolated Outputs (HSRC) Description The 500mA sourcing option, refereed to as high power sourcing (HSRC), is capable of sourcing up to 500mA per output and up to 3A per bank. The voltage range for the outputs is 12-24 V .
-
Page 47: Ttl Inputs And Outputs
Figure 3.13: 500mA sourcing wiring diagram for Bank 1, DO[16:9] TTL Inputs and Outputs Main Encoder Inputs The main encoder inputs can be configured for quadrature (default) or pulse and direction inputs. This configuration is set through the CE command. The encoder connections are found on the HD D-sub Encoder connectors and are labeled MA+, MA-, MB+, MB-. - Page 48 voltage that is ~½ of the full voltage range (for example, connect the '-' input to the 5 volts on the Galil if the signal is 0 - 12V logic). Example: A DMC-4113 has one auxiliary encoder. This encoder has two inputs (channel A and channel B). Channel A input is mapped to input 81 and Channel B input is mapped to input 82.
-
Page 49: Analog Inputs
4183 For controllers with 5-8 axes, the ERR signal is duplicated on the I/O (E-H) D-Sub connector. For additional information see Error Light (Red LED) in Chapter 9 Troubleshooting. Electrical Specifications Output Voltage 0 – 5 VDC Current Output 20 mA Sink/Source Analog Inputs The DMC-41x3 has eight analog inputs configured for the range between -10V and 10V. -
Page 50: External Amplifier Interface
External Amplifier Interface External Stepper Control The controller provides step and direction (STPn, DIRn) outputs for every axis available on the controller. These outputs are typically used for interfacing to external stepper drivers, but they can be configured for a PWM output. See the MT command for more details. - Page 51 DMC-41x3 User Manual Chapter 3 Connecting Hardware ▫ 46...
- Page 52 Chapter 3 Connecting Hardware ▫ 47 DMC-41x3 User Manual...
- Page 53 DMC-41x3 User Manual Chapter 3 Connecting Hardware ▫ 48...
- Page 54 Chapter 3 Connecting Hardware ▫ 49 DMC-41x3 User Manual...
-
Page 55: Chapter 4 Software Tools And Communication
Chapter 4 Software Tools and Communication Introduction The default configuration DMC-41x3 has one USB port, one RS-232 port and one Ethernet port. The auxiliary RS- 232 port is the data term and can be configured with the software command CC. This configuration can be saved using the Burn (BN) instruction. -
Page 56: Unsolicited Messages Generated By Controller
For instructions that return data, such as Tell Position (TP), the DMC-41x3 will return the data followed by a carriage return, line feed and : . It is good practice to check for : after each command is sent to prevent errors. An echo function is provided to enable associating the DMC-41x3 response with the data sent. - Page 57 USB Port The USB port on the DMC-41x3 is a USB to serial converter. It should be setup for 115.2kB, 8 Data bits, No Parity, 1 Stop Bit and Flow Control set for Hardware. The baud rate can be changed to 19200 baud by installing the 19.2 jumper on JP1, but this configuration is only recommended if a slower baud rate is required from the host communication.
-
Page 58: Ethernet Configuration
Ethernet Configuration Communication Protocols The Ethernet is a local area network through which information is transferred in units known as packets. Communication protocols are necessary to dictate how these packets are sent and received. The DMC-41x3 supports two industry standard protocols, TCP/IP and UDP/IP. The controller will automatically respond in the format in which it is contacted. - Page 59 Be sure that there is only one BOOT-P or DHCP server running. If your network has DHCP or BOOT-P running, it may automatically assign an IP address to the DMC controller upon linking it to the CAUTION network. In order to ensure that the IP address is correct, please contact your system administrator before connecting the I/O board to the Ethernet network.
-
Page 60: Modbus
Multicasting A multicast may only be used in UDP/IP and is similar to a broadcast (where everyone on the network gets the information) but specific to a group. In other words, all devices within a specified group will receive the information that is sent in a multicast. - Page 61 The third level of Modbus communication uses standard Galil commands. Once the slave has been configured, the commands that may be used are @IN[], @AN[], SB, CB, OB, and AO. For example, AO 2020,8.2 would tell I/O number 2020 to output 8.2 volts. If a specific slave address is not necessary, the I/O number to be used can be calculated with the following: I/O Number = (HandleNum*1000) + ((Module-1)*4) + (BitNum-1) Where HandleNum is the handle number from 1 (A) to 8 (8).
- Page 62 Example #2 DMC-4143 connected as a Modbus master to a 3rd party PLC. The DMC-4143 will read the value of analog inputs 3 and 4 on the PLC located at addresses 40006 and 40008 respectively. The PLC stores values as 32-bit floating point numbers which is common.
-
Page 63: Data Record
Data Record The DMC-41x3 can provide a binary block of status information with the use of the QR and DR commands. These commands, along with the QZ command can be very useful for accessing complete controller status. The QR command will return 4 bytes of header information and specific blocks of information as specified by the command arguments: QR ABCDEFGHST Each argument corresponds to a block of information according to the Data Record Map below. - Page 64 Axis Information ADDR TYPE ITEM ADDR TYPE ITEM 82-83 A axis status – see bit field map below 226-227 E axis status – see bit field map below A axis switches – see bit field map below E axis switches – see bit field map below A axis stop code E axis stop code 86-89...
- Page 65 Data Record Bit Field Maps Header Information - Byte 0, 1 of Header: BIT 15 BIT 14 BIT 13 BIT 12 BIT 11 BIT 10 BIT 9 BIT 8 T Block S Block I Block Present Present in Present in in Data Record Data Record Data Record...
- Page 66 Amplifier Status (4 Bytes) BIT 31 BIT 30 BIT 29 BIT 28 BIT 27 BIT 26 BIT 25 BIT 24 ELO Active ELO Active (Axis E-H) (Axis A-D) BIT 23 BIT 22 BIT 21 BIT 20 BIT 19 BIT 18 BIT 17 BIT 16 Peak Current...
-
Page 67: Galilsuite(Windows And Linux)
GalilSuite(Windows and Linux) GalilSuite is Galil's latest set of development tools for the latest generation of Galil controllers. It is highly recommended for all first-time purchases of Galil controllers as it provides easy set-up, tuning and analysis. GalilSuite replaces GalilToolS with an improved user-interface, real-time scopes, advanced tuning methods, and communications utilities. -
Page 68: Creating Custom Software Interfaces
Creating Custom Software Interfaces Galil provides a programming API so that users can develop their own custom software interfaces to a Galil controller. Information on this Galil Communication Library can be found here: http://www.galilmc.com/support/manuals/galiltools/library.html HelloGalil – Quick Start to PC programming For programmers developing Windows applications that communicate with a Galil controller, the HelloGalil library of quick start projects immediately gets you communicating with the controller from the programming language of your choice. - Page 69 C++ Library (Windows and Linux) The Linux version (libGalil.so) is compatible with g++ and the Windows version (Galil1.dll) with Visual C++ 2008. Contact Galil if another version of the C++ library is required. See the getting started guide and the hello.cpp example in /lib.
-
Page 70: Chapter 5 Command Basics
Chapter 5 Command Basics Introduction The DMC-41x3 provides over 100 commands for specifying motion and machine parameters. Commands are included to initiate action, interrogate status and configure the digital filter. These commands are sent in ASCII. The DMC-41x3 instruction set is BASIC-like and easy to use. Instructions consist of two uppercase letters that correspond phonetically with the appropriate function. -
Page 71: Controller Response To Data
Implicit Notation PR is the two character instruction for position relative. 4000 is the argument which represents the required position value in counts. The <return> terminates the instruction. The space between PR and 4000 is optional. For specifying data for the A,B,C and D axes, commas are used to separate the axes. If no data is specified for an axis, a comma is still needed as shown in the examples below. -
Page 72: Interrogating The Controller
DMC-41x3 returns a ? When the controller receives an invalid command the user can request the error code. The error code will specify the reason for the invalid command response. To request the error code type the command TC1. For example: ?TC1 Tell Code command 1 Unrecognized command... - Page 73 Operands Most DMC-41x3 commands have corresponding operands that can be used for interrogation. Operands must be used inside of valid DMC expressions. For example, to display the value of an operand, the user could use the command: where ‘operand’ is a valid DMC operand MG ‘operand’...
-
Page 74: Chapter 6 Programming Motion
Chapter 6 Programming Motion Overview The DMC-41x3 provides several modes of motion, including independent positioning and jogging, coordinated motion, electronic cam motion, and electronic gearing. Each one of these modes is discussed in the following sections. The DMC-4113 are single axis controllers and use X-axis motion only. Likewise, the DMC-4123 use X and Y, the DMC-4133 use X,Y, and Z, and the DMC-4143 use X,Y,Z, and W. -
Page 75: Independent Axis Positioning
Moving along arbitrary profiles or Contour Mode CM, CD, DT mathematically prescribed profiles such as sine or cosine trajectories. Teaching or Record and Play Back Contour Mode with Teach (Record and Play-Back) CM, CD, DT, RA, RD, RC Backlash Correction Dual Loop (Auxiliary Encoder) Following a trajectory based on a master Electronic Cam... - Page 76 The lower case specifiers (x,y,z,w) represent position values for each axis. The DMC-41x3 also allows use of single axis specifiers such as PRY=2000 Operand Summary - Independent Axis OPERAND DESCRIPTION _ACx Return acceleration rate for the axis specified by ‘x’ _DCx Return deceleration rate for the axis specified by ‘x’...
-
Page 77: Independent Jogging
Figure 6.1: Velocity Profiles of XYZ Notes on Figure 6.1: The X and Y axis have a ‘trapezoidal’ velocity profile, while the Z axis has a ‘triangular’ velocity profile. The X and Y axes accelerate to the specified speed, move at this constant speed, and then decelerate such that the final position agrees with the command position, PR. -
Page 78: Position Tracking
Operand Summary - Independent Axis OPERAND DESCRIPTION _ACx Return acceleration rate for the axis specified by ‘x’ _DCx Return deceleration rate for the axis specified by ‘x’ _SPx Returns the jog speed for the axis specified by ‘x’ _TVx Returns the actual velocity of the axis specified by ‘x’ (averaged over 0.25 sec) Example - Jog in X only Jog X motor at 50000 count/s. - Page 79 The position tracking mode shouldn’t be confused with the contour mode. The contour mode allows the user to generate custom profiles by updating the reference position at a specific time rate. In this mode, the position can be updated randomly or at a fixed time rate, but the velocity profile will always be trapezoidal with the parameters specified by AC, DC, and SP.
- Page 80 commanded, the controller decelerates at the rate specified by the DC command. The controller then ramps the velocity in up to the value set with SP in the opposite direction traveling to the new specified absolute position. In Figure 6.3 the velocity profile is triangular because the controller doesn’t have sufficient time to reach the set speed of 50000 counts/sec before it is commanded to change direction.
- Page 81 Figure 6.4: Position and Velocity vs Time (msec) for Motion 3 Figure 6.5: Position and Velocity vs Time (msec) for Motion 3 with IT 0.1 Note the controller treats the point where the velocity passes through zero as the end of one move, and the beginning of another move.
-
Page 82: Linear Interpolation Mode
Linear Interpolation Mode The DMC-41x3 provides a linear interpolation mode for 2 or more axes. In linear interpolation mode, motion between the axes is coordinated to maintain the prescribed vector speed, acceleration, and deceleration along the specified path. The motion path is described in terms of incremental distances for each axis. An unlimited number of incremental segments may be given in a continuous move sequence, making the linear interpolation mode ideal for following a piece-wise linear path. - Page 83 An Example of Linear Interpolation Motion: #LMOVE label DP 0,0 Define position of X and Y axes to be 0 LMXY Define linear mode between X and Y axes. LI 5000,0 Specify first linear segment LI 0,5000 Specify second linear segment End linear segments VS 4000 Specify vector speed...
- Page 84 Command Summary - Linear Interpolation COMMAND DESCRIPTION LM XYZW Specify axes for linear interpolation LM ABCDEFGH (same) controllers with 5 or more axes Returns number of available spaces for linear segments in DMC-41x3 sequence buffer. Zero means buffer full. 511 means buffer empty. LI x,y,z,w<n Specify incremental distances relative to current position, and assign vector speed n.
-
Page 85: Vector Mode: Linear And Circular Interpolation Motion
The result is shown in Figure 6.6. Figure 6.6: Linear Interpolation Example - Multiple Moves This example makes a coordinated linear move in the XY plane. The Arrays VX and VY are used to store 750 incremental distances which are filled by the program #LOAD. #LOAD Load Program DM VX [750],VY [750]... - Page 86 DMC-41x3 performs all the complex computations of linear and circular interpolation, freeing the host PC from this time intensive task. The coordinated motion mode is similar to the linear interpolation mode. Any pair of two axes may be selected for coordinated motion consisting of linear and circular segments.
- Page 87 Additional commands The commands VS n, VA n and VD n are used for specifying the vector speed, acceleration, and deceleration. IT is the s curve smoothing constant used with coordinated motion. Specifying Vector Speed for Each Segment: The vector speed may be specified by the immediate command VS. It can also be attached to a motion segment with the instructions VP x,y <...
- Page 88 Example: Assume an XY table with the Z-axis controlling a knife. The Z-axis has a 2000 quad counts/rev encoder and has been initialized after power-up to point the knife in the +Y direction. A 180° circular cut is desired, with a radius of 3000, center at the origin and a starting point at (3000,0).
- Page 89 When AV is used as an operand, _AV returns the distance traveled along the sequence. The operands _VPX and _VPY can be used to return the coordinates of the last point specified along the path. Example: Traverse the path shown in Figure 6.7. Feed rate is 20000 counts/sec. Plane of motion is XY VM XY Specify motion plane VS 20000...
- Page 90 expressed in units of resolution, and each circular arc is defined by the arc radius, the starting angle, and the angular width of the arc. The zero angle corresponds to the positive direction of the X-axis and the CCW direction of rotation is positive.
- Page 91 Velocity 10000 time (s) 0.05 0.357 0.407 Figure A.9: Vector Velocity Profile The acceleration time, Ta, is given by 100000 0 05 2000000 The slew time, Ts, is given by 35708 0 307 100000 The total motion time, Tt, is given by: ...
-
Page 92: Electronic Gearing
Electronic Gearing This mode allows up to 8 axes to be electronically geared to some master axes. The masters may rotate in both directions and the geared axes will follow at the specified gear ratio. The gear ratio may be different for each axis and changed during motion. - Page 93 Figure 6.11: Velocity counts/sec vs. Time (msec) Instantaneous Gearing Engagement Figure 6.12: Velocity (counts/sec) vs. Time (msec) Ramped Gearing The slave axis for each figure is shown on the bottom portion of the figure; the master axis is shown on the top portion.
- Page 94 Using the ramped gearing, the slave will engage gearing gradually. Since the gearing is engaged over the interval of 6000 counts of the master, the slave will only travel ~3396 counts and ~135 counts respectively. The difference between these two values is stored in the _GPn operand. If exact position synchronization is required, the IP command is used to adjust for the difference.
-
Page 95: Electronic Cam
GA, CX Specify the commanded position of X as master for Y. GR,1 Set gear ratio for Y as 1:1 GM,1 Set gantry mode PR 3000 Command X motion BG X Start motion on X axis You may also perform profiled position corrections in the electronic gearing mode. Suppose, for example, that you need to advance the slave 10 counts. - Page 96 where x,y,z,w specify the cycle of the master and the total change of the slaves over one cycle. The cycle of the master is limited to 8,388,607 whereas the slave change per cycle is limited to 2,147,483,647. If the change is a negative number, the absolute value is specified. For the given example, the cycle of the master is 6000 counts and the change in the slave is 1500.
- Page 97 where x,y,z,w are the master positions at which the corresponding slave axes are disengaged. 3000 2250 1500 2000 4000 6000 Master X Figure 6.13: Electronic Cam Example This disengages the slave axis at a specified master position. If the parameter is outside the master cycle, the stopping is instantaneous.
- Page 98 INSTRUCTION INTERPRETATION #RUN Label Enable cam PA,500 starting position SP,5000 Y speed Move Y motor After Y moved Wait for start signal EG,1000 Engage slave AI - 1 Wait for stop signal EQ,1000 Disengage slave Command Summary - Electronic CAM Command Description EA p...
- Page 99 INSTRUCTION INTERPRETATION #A;V1=0 Label; Initialize variable PA 0,0;BGXY;AMXY Go to position 0,0 on X and Y axes EA Z Z axis as the Master for ECAM EM 0,0,4000 Change for Z is 4000, zero for X, Y EP400,0 ECAM interval is 400 counts with zero start ET[0]=0,0 When master is at 0 position;...
-
Page 100: Pvt Mode
PVT Mode The DMC-41x3 controllers now supports a mode of motion referred to as “PVT.” This mode allows arbitrary motion profiles to be defined by position, velocity and time individually on all 8 axes. This motion is designed for systems where the load must traverse a series of coordinates with no discontinuities in velocity. - Page 101 The “t” value is entered in samples, which will depend on the TM setting. With the default TM of 1000, one sample is 976us. This means that a “t” value of 1024 will yield one second of motion. The velocity value, “v” will always be in units of counts per second, regardless of the TM setting.
- Page 102 The DMC program is shown below and the results can be seen in Figure 6.16. INSTRUCTION INTERPRETATION #PVT Label PVX = 57,437,256 Incremental move of 57 counts in 256 samples with a final velocity of 437 counts/sec PVX = 151,750,256 Incremental move of 151 counts in 256 samples with a final velocity of 750 counts/sec PVX = 214,937,256 Incremental move of 214 counts in 256 samples with a final velocity of 937 counts/sec...
-
Page 103: Contour Mode
PVB = 500,5000,500 point in Figure 6.18 - B axis PVA = 1000,4000,1200 point in Figure 6.18 - A axis PVB = 4500,0,1200 point in Figure 6.18 - B axis PVA = 1000,4000,750 point in Figure 6.18 - A axis PVB = -1000,1000,750 point in Figure 6.18 - B axis BTAB... - Page 104 Specifying Contour Segments The Contour Mode is specified with the command, CM. For example, CMXZ specifies contouring on the X and Z axes. Any axes that are not being used in the contouring mode may be operated in other modes. A contour is described by position increments which are described with the command, CD x,y,z,w over a time interval, DT n.
- Page 105 Command Summary - Contour Mode COMMAND DESCRIPTION CM XYZW Specifies which axes for contouring mode. Any non-contouring axes may be operated in other modes. Contour axes for DMC-4183 CM ABCDEFGH CD x,y,z,w Specifies position increment over time interval. Range is ±32,000. CD 0,0,0.. .=0 ends the contour buffer.
- Page 106 A complete program to generate the contour movement in this example is given below. To generate an array, we compute the position value at intervals of 8 ms. This is stored at the array POS. Then, the difference between the positions is computed and is stored in the array DIF.
-
Page 107: Virtual Axis
Record and Playback Example: #RECORD Begin Program DM XPOS[501] Dimension array with 501 elements RA XPOS[] Specify automatic record RD _TPX Specify X position to be captured Turn X motor off Begin recording; 4 msec interval (at TM1000) #A;JP#A,_RC=1 Continue until done recording #COMPUTE Compute DX DM DX[500]... -
Page 108: Stepper Motor Operation
This can be performed by commanding the X and N axes to perform circular motion. Note that the value of VS must be VS=2π * R * F where R is the radius, or amplitude and F is the frequency in Hz. Set VA and VD to maximum values for the fastest acceleration. - Page 109 caused by the stepper motor smoothing filter, KS. To understand this, consider the steps the controller executes to generate step pulses: First, the controller generates a motion profile in accordance with the motion commands. Second, the profiler generates pulses as prescribed by the motion profile. The pulses that are generated by the motion profiler can be monitored by the command, RP (Reference Position).
-
Page 110: Stepper Position Maintenance Mode (Spm)
Operand Summary - Stepper Motor Operation OPERAND DESCRIPTION _DEx Contains the value of the step count register for the ‘x’ axis _DPx Contains the value of the main encoder for the ‘x’ axis _ITx Contains the value of the Independent Time constant for the ‘x’ axis _KSx Contains the value of the Stepper Motor Smoothing Constant for the ‘x’... - Page 111 Error Limit The value of QS is internally monitored to determine if it exceeds a preset limit of three full motor steps. Once the value of QS exceeds this limit, the controller then performs the following actions: 1. The motion is maintained or is stopped, depending on the setting of the OE command. If OE=0 the axis stays in motion, if OE=1 the axis is stopped.
- Page 112 Example: Error Correction The following code demonstrates what is necessary to set up SPM mode for the X axis, detect error, stop the motor, correct the error, and return to the main code. The drive is a full step drive, with a 1.8 step motor and 4000 count/rev encoder.
-
Page 113: Dual Loop (Auxiliary Encoder)
#MOTION; Perform motion SP16384; Set the speed PR10000; Prepare mode of motion BGX; Begin motion JS#CORRECT; Move to correction #MOTION2 SP16384; Set the speed PR-10000; Prepare mode of motion BGX; Begin motion JS#CORRECT; Move to correction JP#MOTION #CORRECT; Correction code spx=_SPX #LOOP;... - Page 114 DE ?,,? returns the value of the X and Z auxiliary encoders. The auxiliary encoder position may be assigned to variables with the instructions V1= _DEX The command, TD XYZW, returns the current position of the auxiliary encoder. The command, DV 1,1,1,1, configures the auxiliary encoder to be used for backlash compensation. Backlash Compensation There are two methods for backlash compensation using the auxiliary encoders: 1.
-
Page 115: Motion Smoothing
The design approach is to drive the motor a distance, which corresponds to 40,000 rotary counts. Once the motion is complete, the controller monitors the position of the linear encoder and performs position corrections. This is done by the following program. INSTRUCTION INTERPRETATION #DUALOOP... -
Page 116: Homing
ACCELERATION VELOCITY VELOCITY ACCELERATION VELOCITY Figure 6.21: Trapezoidal velocity and smooth velocity profiles Using the KS Command (Step Motor Smoothing): When operating with step motors, motion smoothing can be accomplished with the command, KS. The KS command smoothes the frequency of step motor pulses. Similar to the command IT, this produces a smooth velocity profile. - Page 117 Furthermore, with CN,1 a normally open switch will make _HMX read 0 initially, and a normally closed switch will make _HMX read 1. Therefore, the CN command will need to be configured properly to ensure the correct direction of motion in the home sequence. Upon detecting the home switch changing state, the motor begins decelerating to a stop.
- Page 118 HOME SWITCH _HMX=0 _HMX=1 POSITION VELOCITY MOTION BEGINS IN FORWARD DIRECTION POSITION VELOCITY MOTION CHANGES DIRECTION POSITION VELOCITY MOTION IN FORWARD DIRECTION TOWARD INDEX POSITION INDEX PULSES POSITION Figure 6.22: Homing Sequence for Normally Closed Switch and CN,-1 Example: Find Edge #EDGE Label AC 2000000...
-
Page 119: High Speed Position Capture (The Latch Function)
High Speed Position Capture (The Latch Function) Often it is desirable to capture the position precisely for registration applications. Position capture can be programmed to latch on either a corresponding input (see Table 6.1) or on the index pulse for that axis. The position can be captured for either the main or auxiliary encoder within 25 microseconds of an high-to-low transition. -
Page 120: Chapter 7 Application Programming
Chapter 7 Application Programming Overview The DMC-41x3 provides a powerful programming language that allows users to customize the controller for their particular application. Programs can be downloaded into the DMC-41x3 memory freeing the host computer for other tasks. However, the host computer can send commands to the controller at any time, even while a program is being executed. - Page 121 #BEGIN1 Invalid labels #1Square #123 A Simple Example Program: #START Beginning of the Program PR 10000,20000 Specify relative distances on X and Y axes BG XY Begin Motion Wait for motion complete WT 2000 Wait 2 sec JP #START Jump to label START End of Program The above program moves X and Y 10000 and 20000 units.
-
Page 122: Executing Programs - Multitasking
NOTE: The NO command is an actual controller command. Therefore, inclusion of the NO commands will require process time by the controller. Difference between NO and ' using the GalilTools software The GalilTools software will treat an apostrophe (') commend different from an NO when the compression algorithm is activated upon a program download (line >... -
Page 123: Debugging Programs
Debugging Programs The DMC-41x3 provides commands and operands which are useful in debugging application programs. These commands include interrogation commands to monitor program execution, determine the state of the controller and the contents of the controllers program, array, and variable space. Operands also contain important status information which can help to debug a program. -
Page 124: Program Flow Commands
_ED contains the last line of program execution. Useful to determine where program stopped. _DL contains the number of available labels. _UL contains the number of available variables. _DA contains the number of available arrays. _DM contains the number of available array elements. _AB contains the state of the Abort Input _LFx contains the state of the forward limit switch for the ‘x’... - Page 125 DMC-41x3 Event Triggers Command Function AM X Y Z W or S Halts program execution until motion is complete on the (A B C D E F G H) specified axes or motion sequence(s). AM with no parameter tests for motion complete on all axes. This command is useful for separating motion sequences in a program.
- Page 126 Event Trigger - Set Output after Distance Set output bit 1 after a distance of 1000 counts from the start of the move. The accuracy of the trippoint is the speed multiplied by the sample period. #SETBIT;' Label SP 10000;' Speed is 10000 PA 20000;' Specify Absolute position...
- Page 127 Event Trigger - Multiple Move with Wait This example makes multiple relative distance moves by waiting for each to be complete before executing new moves. #MOVES;' Label PR 12000;' Distance SP 20000;' Speed AC 100000;' Acceleration BGX;' Start Motion AD 10000;' Wait a distance of 10,000 counts SP 5000;' New Speed...
- Page 128 Conditional Jumps The DMC-41x3 provides Conditional Jump (JP) and Conditional Jump to Subroutine (JS) instructions for branching to a new program location based on a specified condition. The conditional jump determines if a condition is satisfied and then branches to a new location or subroutine. Unlike event triggers, the conditional jump instruction does not halt the program sequence.
- Page 129 In this example, this statement will cause the program to jump to the label #TEST if v1 is less than v2 and v3 is less than v4. To illustrate this further, consider this same example with an additional condition: JP #TEST, ((v1<v2) & (v3<v4)) | (v5<v6) This statement will cause the program to jump to the label #TEST under two conditions;...
- Page 130 and has no arguments. If the argument of the IF command evaluates false, the controller will skip commands until the ELSE command. If the argument for the IF command evaluates true, the controller will execute the commands between the IF and ELSE command. Nesting IF Conditional Statements The DMC-41x3 allows for IF conditional statements to be included within other IF conditional statements.
- Page 131 Begin Main Program Clear Output Bit 1 (pick up pen) VP 1000,1000;LE;BGS Define vector position; move pen Wait for after motion trippoint Set Output Bit 1 (put down pen) JS #Square;CB1 Jump to square subroutine End Main Program #Square Square subroutine v1=500;JS #L Define length of side v1=-v1;JS #L...
- Page 132 For example, the #POSERR subroutine will automatically be executed when any axis exceeds its position error limit. The commands in the #POSERR subroutine could decode which axis is in error and take the appropriate action. In another example, the #ININT label could be used to designate an input interrupt subroutine. When the specified input occurs, the program will be executed automatically.
- Page 133 Example - Motion Complete Timeout #BEGIN Begin main program TW 1000 Set the time out to 1000 ms PA 10000 Position Absolute command Begin motion Motion Complete trippoint End main program #MCTIME Motion Complete Subroutine MG “X fell short” Send out a message End subroutine This simple program will issue the message “X fell short”...
- Page 134 Example - Command Error w/Multitasking Begin thread 0 (continuous loop) JP#A End of thread 0 Begin thread 1 N=-1 Create new variable KP N Set KP to value of N, an invalid value Issue invalid command End of thread 1 #CMDERR Begin command error subroutine IF _TC=6...
- Page 135 #LOOP Simple program loop JP#LOOP #TCPERR Ethernet communication error auto routine MG {P1}_IA4 Send message to serial port indicating which handle did not receive proper acknowledgment. Example – Amplifier Error The program below will execute upon the detection of an error from an internal Galil Amplifier. The bits in TA1 will be set for all axes that have an invalid hall state even if BR1 is set for those axes, this is handled with the mask variable shown in the code below.
- Page 136 Example: Variable, and an Important Note about Creating Global Variables #Var value=5 ;'a value to be passed by reference global=8 ;'a global variable JS#SUM(&value,1,2,3,4,5,6,7) ;'note first arg passed by reference value ;'message out value after subroutine. ;'message out returned value #SUM ;NO(* ^a,^b,^c,^d,^e,^f,^g) ^a=^b+^c+^d+^e+^f+^g+^h+global...
- Page 137 Example: Local Scope #Local JS#POWER(2,2) MG_JS JS#POWER(2,16) MG_JS JS#POWER(2,-8) MG_JS #POWER ;NO(base ^a,exponent^b) Returns base^exponent power. ± integer only ^c=1 ;'unpassed variable space (^c-^h) can be used as local scope variables ^b=0 ;'special case, exponent = 0 EN,,1 ENDIF ^b<0 ;'special case, exponent <...
- Page 138 General Program Flow and Timing information This section will discuss general programming flow and timing information for Galil programming. REM vs. NO or ' comments There are 2 ways to add comments to a .dmc program. REM statements or NO/ ' comments. The main difference between the 2 is that REM statements are stripped from the program upon download to the controller and NO or ' comments are left in the program.
-
Page 139: Mathematical And Functional Expressions
AT0;'set initial AT time reference WT 1000,1;'wait 1000 samples t1=TIME AT 4000,1;'wait 4000 samples from last time reference t2=TIME-t1 REM in the above scenario, t2 will be ~3000 because AT 4000,1 will have REM paused program execution from the time reference of AT0 REM since the WT 1000,1 took 1000 samples, there was only 3000 samples left REM of the “4000”... - Page 140 Mathematical operations are executed from left to right. Calculations within parentheses have precedence. Examples: speed = 7.5*V1/2 The variable, speed, is equal to 7.5 multiplied by V1 and divided by 2 count = count+2 The variable, count, is equal to the current value plus 2. result =_TPX-(@COS[45]*40) °...
- Page 141 #TEST Begin main program len=”123456” Set len to a string value Flen=@FRAC[len] Define variable ‘Flen’ as fractional part of variable ‘len’ Flen=$10000*Flen Shift Flen by 32 bits (IE - convert fraction, Flen, to integer) len1=(Flen&$00FF) Mask top byte of Flen and set this value to variable ‘len1’ len2=(Flen&$FF00)/$100 Let variable, ‘len2’...
-
Page 142: Variables
Variables For applications that require a parameter that is variable, the DMC-41x3 provides 510 variables. These variables can be numbers or strings. A program can be written in which certain parameters, such as position or speed, are defined as variables. The variables can later be assigned by the operator or determined by program calculations. For example, a cut-to-length application may require that a cut length be variable. -
Page 143: Operands
SP vS*2000 Assign vS*2000 to SP command Displaying the value of variables at the terminal Variables may be sent to the screen using the format, variable=. For example, v1= , returns the value of the variable v1. Example - Using Variables for Joystick The example below reads the voltage of an X-Y joystick and assigns it to variables vX and vY to drive the motors at proportional velocities, where: 10 Volts = 3000 rpm = 200000 c/sec... -
Page 144: Arrays
Keyword Function _BGn *Returns a 1 if motion on axis ‘n’ is complete, otherwise returns 0. *Returns serial # of the board. *Returns the number of arrays available *Returns the number of available labels for programming *Returns the available array memory *Returns status of Home Switch (equals 0 or 1) _HMn _LFn... - Page 145 Examples: DM speed[10] Dimension speed Array speed[0]=7650.2 Assigns the first element of the array, 'speed' the value 7650.2 speed[0]= Returns array element value posx[9]=_TPX Assigns the 10 element of the array 'posx' the returned value from the tell position command. con[1]=@COS[pos]*2 Assigns the second element of the array 'con' the cosine of the variable POS multiplied by 2.
- Page 146 Command Summary - Automatic Data Capture Command Description Selects up to eight arrays for data capture. The arrays must be defined with the DM command. n[ ],m[ ],o[ ],p[ ] Selects the type of data to be recorded, where type1, type2, type3, and type 4 represent the various types of data (see table below).
-
Page 147: Input Of Data (Numeric And String)
De-allocating Array Space Array space may be de-allocated using the DA command followed by the array name. DA*[0] deallocates all the arrays. Input of Data (Numeric and String) NOTE: The IN command has been removed from the DMC-41x3 firmware. Variables should be entered by sending data directly from the host application. - Page 148 Example Instruction Interpretation JP #LOOP,P2CD< >3 Checks to see if status code is 3 (number received) JP #P,P2CH="V" Checks if last character received was a V PR P2NM Assigns received number to position JS #XAXIS,P2ST="X" Checks to see if received string is X Using Communication Interrupt The DMC-41x3 provides a special interrupt for communication allowing the application program to be interrupted by input from the user.
-
Page 149: Output Of Data (Numeric And String)
#NMLP Routine to check input from terminal JP #NMLP,P2CD<2 Jump to error if string JP #ERROR,P2CD=2 Read value val=P2NM End subroutine #ERROR;CI-1 Error Routine MG "INVALID-TRY AGAIN" Error message JP #NMLP Output of Data (Numeric and String) Numerical and string data can be output from the controller using several methods. The message command, MG, can output string and numerical data. - Page 150 The message command normally sends a carriage return and line feed following the statement. The carriage return and the line feed may be suppressed by sending {N} at the end of the statement. This is useful when a text string needs to surround a numeric value. Example: JG 50000;BGA;ASA MG "The Speed is", _TVA {F5.0} {N}...
- Page 151 Interrogation Commands The DMC-41x3 has a set of commands that directly interrogate the controller. When these command are entered, the requested data is returned in decimal format on the next line followed by a carriage return and line feed. The format of the returned data can be changed using the Position Format (PF), and Leading Zeros (LZ) command.
- Page 152 Local Formatting of Response of Interrogation Commands The response of interrogation commands may be formatted locally. To format locally, use the command, {Fn.m} or {$n.m} on the same line as the interrogation command. The symbol F specifies that the response should be returned in decimal format and $ specifies hexadecimal.
-
Page 153: Hardware I/O
Converting to User Units Variables and arithmetic operations make it easy to input data in desired user units such as inches or RPM. The DMC-41x3 position parameters such as PR, PA and VP have units of quadrature counts. Speed parameters such as SP, JG and VS have units of counts/sec. - Page 154 Sets outputs 2 and 3 of output port to high. All other bits are 0. (2 1 + 2 2 = 6) Clears all bits of output port to zero Sets all bits of output port to one. OP 255 (2 0 + 2 1 + 2 2 + 2 3 + 2 4 + 2 5 + 2 6 + 2 7 ) The output port is useful for setting relays or controlling external switches and events during a motion sequence.
- Page 155 a voltage that is ½ of the full voltage range (for example, connect the - input to 5 volts if the signal is a 0 - 12 volt logic). Example: A DMC-4113 has one auxiliary encoder. This encoder has two inputs (channel A and channel B). Channel A input is mapped to input 81 and Channel B input is mapped to input 82.
- Page 156 bit ADC is available as an option). Analog inputs are useful for reading special sensors such as temperature, tension or pressure. The following examples show programs which cause the motor to follow an analog signal. The first example is a point-to-point move.
-
Page 157: Example Applications
#filt REM an1 = filtered output. Use this instead of @AN[1] an1=@AN[1];'set initial value REM k1+k2=1 this condition must be met REM use division of m/2^n for elimination of round off REM increase k1 = less filtering REM increase k2 = more filtering k1=32/64;k2=32/64 AT0;'set initial time reference #loop... - Page 158 START PULSE I1 MOTOR VELOCITY OUTPUT PULSE output TIME INTERVALS move wait ready move Figure 7.1: Motor Velocity and the Associated Input/Output signals X-Y Table Controller An X-Y-Z system must cut the pattern shown in Figure 7.2. The X-Y table moves the plate while the Z-axis raises and lowers the cutting tool.
- Page 159 VS 40000 Feed rate Start circular move Wait for completion PR,,80000 Move Z up Start Z move Wait for Z completion PR -21600 Move X SP 20000 Speed X Start X Wait for X completion PR,,-80000 Lower Z CR 80000,270,-360 Z second circle move VS 40000 PR,,80000...
- Page 160 Instruction VIN=@AN[1] VEL=VIN*20000 JG VEL JP #B Position Control by Joystick This system requires the position of the motor to be proportional to the joystick angle. Furthermore, the ratio between the two positions must be programmable. For example, if the control ratio is 5:1, it implies that when the joystick voltage is 5 Volts, corresponding to 1028 counts, the required motor position must be 5120 counts.
-
Page 161: Using The Dmc Editor To Enter Programs (Advanced)
2500 lines per turn or 10,000 count per revolution results in a rotary resolution of 0.25 micron. This results in equal resolution on both linear and rotary sensors. To illustrate the control method, assume that the rotary encoder is used as a feedback for the X-axis, and that the linear sensor is read and stored in the variable LINPOS. - Page 162 Line numbers appear as 000,001,002 and so on. Program commands are entered following the line numbers. Multiple commands may be given on a single line as long as the total number of characters doesn’t exceed 80 characters per line. While in the Edit Mode, the programmer has access to special instructions for saving, inserting and deleting program lines.
-
Page 163: Chapter 8 Hardware & Software Protection
Chapter 8 Hardware & Software Protection Introduction The DMC-41x3 provides several hardware and software features to check for error conditions and to inhibit the motor on error. These features help protect the various system components from damage. WARNING: Machinery in motion can be dangerous! It is the responsibility of the user to design effective error handling and safety protection as part of the machine. -
Page 164: Software Protection
Input Protection Lines General Abort A low input stops commanded motion instantly without a controlled deceleration. For any axis in which the Off- On-Error function is enabled, the amplifiers will be disabled. This could cause the motor to ‘coast’ to a stop. If the Off-On-Error function is not enabled, the motor will instantaneously stop and servo at the current position. - Page 165 ER,1,,10 Set Y-axis error limit to 1 count, set W-axis error limit to 10 counts. The units of the error limit are quadrature counts. The error is the difference between the command position and actual encoder position. If the absolute value of the error exceeds the value specified by ER, the controller will generate several signals to warn the host system of the error condition.
- Page 166 Example: DP0,0,0 Define Position BL -2000,-4000,-8000 Set Reverse position limit FL 2000,4000,8000 Set Forward position limit JG 2000,2000,2000 BG XYZ Begin (motion stops at forward limits) Off-On-Error The DMC-41x3 controller has a built in function which can turn off the motors under certain error conditions. This function is known as ‘Off-On-Error”.
- Page 167 Limit Switch Example: #A;JP #A;EN Dummy Program #LIMSWI Limit Switch Utility V1=_LFX Check if forward limit V2=_LRX Check if reverse limit JP#LF,V1=0 Jump to #LF if forward JP#LR,V2=0 Jump to #LR if reverse JP#END Jump to end MG “FORWARD LIMIT” Send message STX;AMX Stop motion...
-
Page 168: Chapter 9 Troubleshooting
Chapter 9 Troubleshooting Overview The following discussion may help you get your system to work. Potential problems have been divided into groups as follows: 1. Installation 2. Stability and Compensation 3. Operation 4. Error Light (Red LED) The various symptoms along with the cause and the remedy are described in the following tables. Installation SYMPTOM DIAGNOSIS... - Page 169 Encoder Position Drifts Significant noise can be seen on 1. Noise Shield encoder cables MA+ and / or MB+ encoder Avoid placing power cables near encoder signals cables Avoid Ground Loops Use differential encoders Use ±12V encoders Stability SYMPTOM DIAGNOSIS CAUSE REMEDY Servo motor runs away when...
- Page 170 the controller back to factory default conditions so it is recommended that all motor and I/O cables be removed for safety while performing the Master Reset. Cables can be plugged back in after the correct settings have been loaded back to the controller (when necessary). To perform a Master Reset - find the jumper location labeled MR or MRST on the controller and put a jumper across the two pins.
-
Page 171: Chapter 10 Theory Of Operation
Chapter 10 Theory of Operation Overview The following discussion covers the operation of motion control systems. A typical motion control system consists of the elements shown in Figure 10.1. COMPUTER CONTROLLER DRIVER ENCODER MOTOR Figure 10.1: Elements of Servo Systems The operation of such a system can be divided into three levels , the levels are: 1. -
Page 172: Operation Of Closed-Loop Systems
This program corresponds to the velocity profiles shown in Figure 10.2. Note that the profiled positions show where the motors must be at any instant of time. Finally, it remains up to the servo system to verify that the motor follows the profiled position by closing the servo loop. -
Page 173: System Modeling
The results may be worse if we turn the faucet too fast. The overreaction results in temperature oscillations. When the response of the system oscillates, we say that the system is unstable. Clearly, unstable responses are bad when we want a constant level. What causes the oscillations? The basic cause for the instability is a combination of delayed reaction and high gain. - Page 174 1. Voltage Drive 2. Current Drive 3. Velocity Loop The operation and modeling in the three modes is as follows: Voltage Drive The amplifier is a voltage source with a gain of K [V/V]. The transfer function relating the input voltage, V, to the motor position, P, is ...
- Page 175 If the motor is a DC brushless motor, it is driven by an amplifier that performs the commutation. The combined transfer function of motor amplifier combination is the same as that of a similar brush motor, as described by the previous equations.
- Page 176 The model of the encoder can be represented by a gain of = 4N/2π [count/rad] For example, a 1000 lines/rev encoder is modeled as = 638 The DAC or D-to-A converter converts a 16-bit number to an analog voltage. The input range of the numbers is 65536 and the output voltage range is ±10V or 20V.
-
Page 177: System Analysis
K = 160 A = 0.9 C = 2 a = 250 rad/s and the equivalent continuous filter, G(s), is G(s) = [16 + 0.144s + 2000/s] · 250/ (s+250) , and two complex poles, p and p . The notch filter has two complex zeros, z and The effect of the notch filter is to cancel the resonance affect by placing the complex zeros on top of the resonance poles. - Page 178 = 0.0003 [V/count] Encoder = 4N/2π = 318 [count/rad] 2000/(s+2000) Digital Filter KP = 12.5, KD = 245, T = 0.001 Therefore, D(z) = 1030 (z-0.95)/Z Accordingly, the coefficients of the continuous filter are: P = 50 D = 0.98 The filter equation may be written in the continuous equivalent form: G(s) = 50 + 0.98s = .098 (s+51) The system elements are shown in Figure 10.6.
-
Page 179: System Design And Compensation
Next, we determine the phase of A(s) at the crossover frequency. A(j200) = 390,000 (j200+51)/[(j200) 2 . (j200 + 2000)] α = Arg[A(j200)] = tan -1 (200/51)-180° -tan -1 (200/2000) α = 76° - 180° - 6° = -110° Finally, the phase margin, PM, equals PM = 180°... - Page 180 The next step is to combine all the system elements, with the exception of G(s), into one function, L(s). L(s) = M(s) K H(s) =3.17· 10 (s+2000)] Then the open loop transfer function, A(s), is A(s) = L(s) G(s) Now, determine the magnitude and phase of L(s) at the frequency ω c = 500. L(j500) = 3.17·...
- Page 181 P = KP D = KD · T KD = D/T Assuming a sampling period of T=1ms, the parameters of the digital filter are: KP = 82.4 KD = 274 The DMC-41x3 can be programmed with the instruction: KP 82.4 KD 274 In a similar manner, other filters can be programmed.
-
Page 182: Appendices
Appendices Electrical Specifications NOTE Electrical specifications are only valid once controller is out of reset. Servo Control Motor command line ± 10 V analog signal Resolution: 16-bit DAC or 0.0003 volts 3 mA maximum. Output impedance – 500 Ω Main and auxiliary encoder inputs ±... - Page 183 Analog Inputs: AI[8:1] ± 10 volts 12-Bit Analog-to-Digital converter 16-bit optional Digital Outputs: DO[16:1]* 4mA sinking (25mA sinking/sourcing and 500mA sourcing options) *[8:1] for 1-4 axes models, [16:1] for 5-8 axes models Auxiliary Inputs as Uncommitted Inputs: The auxiliary pins can be used as uncommitted inputs and are DI[96:81]* assigned to the following bits: Axis A: DI81, DI82...
-
Page 184: Performance Specifications
Performance Specifications Minimum Servo Loop Update Time DMC-4113 125 μsec DMC-4123 125 μsec DMC-4133 250 μsec DMC-4143 250 μsec DMC-4153 375 μsec DMC-4163 375 μsec DMC-4173 500 μsec DMC-4183 500 μsec Position Accuracy ±1 quadrature count Velocity Accuracy Long Term Phase-locked, better than 0.005% Short Term System dependent... -
Page 185: Ordering Options
Ordering Options Overview The DMC-41x3 can be ordered in many different configurations and with different options. This section provides information regarding the different options available on the DMC-41x3 motion controller, axis-specific options, and internal amplifiers. For information on pricing and how to order your controller with these options, see our DMC-41x3 part number generator on our website. - Page 186 -16 bit – 16 bit Analog Inputs The -16 bit option provides 16 bit analog inputs on the DMC-41x3 motion controller. The standard resolution of the analog inputs is 12 bits. Part number ordering example: DMC-4113-CARD(-16bit) 4-20mA – 4-20mA analog inputs The 4-20mA option converts all 8 analog inputs into 4-20mA analog inputs.
- Page 187 RS-422 – Auxiliary Serial Port Serial Communication The default serial configuration for the DMC-41x3 is to have RS-232 communication on the Aux (P2) serial port. The controller can be ordered to have RS-422 for this port. RS-422 communication is a differentially driven serial communication protocol that should be used when long distance serial communication is required in an application.
- Page 188 BiSS and SSI – BiSS and SSI Absolute Encoder Interface The DMC-41x3 controller can be configured to support BiSS and SSI encoders. See the SS and SI commands in the DMC-41x3 Command Reference ( ). Pin-out information is shown www.galilmc.com/support/manuals/com41x3/index.html below: Jn1 - Encoder 26 pin HD D-Sub Connector (SSI or BiSS option) Pin #...
- Page 189 If the ISCNTL option is NOT ordered on the DMC-41x3, the amplifier with the higher bus voltage will automatically power the controller. The amplifier with the higher voltage, and the voltage level does not have to be specified during time of purchase as long as the voltage falls within the range of 20-80VDC. This option is only valid on the 5-8 Axes amplifier board.
-
Page 190: Power Connector Part Numbers
Power Connector Part Numbers Overview The DMC-41x3 uses Molex Mini-Fit, Jr.™ Receptacle Housing connectors for connecting DC Power to the Amplifiers, Controller, and Motors. This section gives the specifications of these connectors. For information specific to your Galil amplifier or driver, refer to the specific amplifier/driver in the Integrated Components section. Molex Part Numbers There are 3 different Molex connectors used with the DMC-41x3. -
Page 191: Input Current Limitations
Input Current Limitations The current for an optoisolated input shall not exceed 11mA. Some applications may require the use of an external resistor (R) to limit the amount of current for an input. These external resistors can be placed in series between the inputs and their power supply (Vs). -
Page 192: Pin-Outs
Pin-outs J5 - I/O (A-D) 44 pin HD D-Sub Connector (Female) Pin# Label Description Pin# Label Description Pin# Label Description Error Output Reset Input Digital Ground Digital Input 1/ A latch INCOM0 Input Common (DI 1-8) Digital Input 2 / B latch Digital Input 4 / D latch Digital Input 3 / C latch Digital Input 5... - Page 193 Jn1 - Encoder 26 pin HD D-Sub Connector (Female) Pin # Label Description Pin # Label Description HALC Hall C Forward Limit Switch Input Amplifier Enable B+ Aux Encoder Input Direction I- Index Pulse Input Home B+ Main Encoder Input LSCOMn Limit Switch Common* Digital Ground...
- Page 194 J1 – Ethernet (RJ45) Pin # Signal The Ethernet connection is Auto MDIX, 100bT/10bT. J2 – USB The USB port on the DMC-41x3 is a Female Type B USB port. The standard cable when communicating to a PC will be a Male Type A – Male Type B USB cable. J3 –...
- Page 195 Label Function (If jumpered) ARXD RS-422 Option Only: Connects a 120 Ω Termination resistor between the differential “Receive” inputs on the Aux Serial port. Pins 2 and 7 on RS-422 Auxiliary Port. ACTS RS-422 Option Only: Connects a 120 Ω Termination resistor between the differential “Clear To Send”...
-
Page 196: Signal Descriptions
Signal Descriptions Outputs Motor Command ±10 Volt range signal for driving amplifier. In servo mode, motor command output is updated at the controller sample rate. In the motor off mode, this output is held at the OF command level. Amplifier Enable Signal to disable and enable an amplifier. - Page 197 Electronic Lock Out Input that when triggered will shut down the amplifiers at a hardware level. Useful for safety applications where amplifiers must be shut down at a hardware level. Forward Limit Switch When active, inhibits motion in forward direction. Also causes execution of limit switch subroutine, #LIMSWI.
-
Page 198: List Of Other Publications
List of Other Publications "Step by Step Design of Motion Control Systems" by Dr. Jacob Tal "Motion Control Applications" by Dr. Jacob Tal "Motion Control by Microprocessors" by Dr. Jacob Tal Training Seminars Galil, a leader in motion control with over 500,000 controllers working worldwide, has a proud reputation for anticipating and setting the trends in motion control. -
Page 199: Contacting Us
Contacting Us Galil Motion Control 270 Technology Way Rocklin, CA 95765 Phone: 916-626-0101 Fax: 916-626-0102 E-Mail Address: support@galilmc.com Web: 370Hhttp://www.galilmc.com/ DMC-41x3 User Manual Appendices ▫ 194... -
Page 200: Warranty
18 months after shipment. Motors, and Power supplies are warranted for 1 year. Extended warranties are available. In the event of any defects in materials or workmanship, Galil Motion Control will, at its sole option, repair or replace the defective product covered by this warranty without charge. To obtain warranty service, the defective product must be returned within 30 days of the expiration of the applicable warranty period to Galil Motion Control, properly packaged and with transportation and insurance prepaid. -
Page 201: Integrated Components
Integrated Components Overview When ordered, the following components will reside inside the box of the DMC-41x3 motion controller. The amplifiers and stepper drivers provide power to the motors in the system, and the interconnect modules and communication boards provide the connections for the signals and communications. A1 –... - Page 202 A6 – SDM-44040 (-D4040,-D4020) 4-axis Stepper Drives The SDM-44040 is a stepper driver module capable of driving up to four bipolar two-phase stepper motors. The current is selectable with options of 0.5, 0.75, 1.0, and 1.4 Amps/Phase. The step resolution is selectable with options of full, half, 1/4 and 1/16.
-
Page 203: A1 - Amp-430X0 (-D3040,-D3020)
A1 – AMP-430x0 (-D3040,-D3020) Description The AMP-43040 resides inside the DMC-41x3 enclosure and contains four transconductance, PWM amplifiers for driving brushless or brush-type servo motors. Each amplifier drives motors operating at up to 7 Amps continuous, 10 Amps peak, 20–80 VDC. The gain settings of the amplifier are user-programmable at 0.4 Amp/Volt, 0.7 Amp/Volt and 1 Amp/Volt. -
Page 204: Electrical Specifications
Electrical Specifications The amplifier is a brush/brushless trans-conductance PWM amplifier. The amplifier operates in torque mode, and will output a motor current proportional to the command signal input. Supply Voltage: 20-80 VDC Continuous Current: 7 Amps Peak Current: 10 Amps Nominal Amplifier Gain: 0.7 Amps/Volt Switching Frequency:... -
Page 205: Operation
Mating Connectors On Board Connector Terminal Pins 6-pin Molex Mini-Fit, Jr.™ POWER MOLEX#44476-3112 MOLEX# 39-31-0060 A,B,C,D: 4-pin Motor 4-pin Molex Mini-Fit, Jr.™ MOLEX#44476-3112 Power Connectors MOLEX# 39-31-0040 For mating connectors see http://www.molex.com/ Power Connector Pin Number Connection 1,2,3 DC Power Supply Ground 4,5,6 (DC Power) Motor Connector... - Page 206 Setting Amplifier Gain and Current Loop Bandwidth AG command: AG setting Gain Value m = 0 0.4 A/V m = 1 0.7 A/V m = 2 1.0 A/V Table A1.1: Amplifier Gain Settings for AMP-430x0 (-D3040,-D3020) The gain is set with the AG command as shown in Table A1.1 for AG n=m. Select the amplifier gain that is appropriate for the motor.
-
Page 207: Error Monitoring And Protection
This mode is useful when using low inductance motors because it reduces the losses due to switching voltages across the motor windings. It is recommended to use chopper mode when using motors with 200-500μH inductance. Using External Amplifiers Use connectors on top of controller to access necessary signals to run external amplifiers. In order to use the full torque limit, make sure the AG setting for the axes using external amplifiers are set to 0 or 1. - Page 208 Under-Voltage Protection If the supply to the amplifier drops below 18 VDC, the amplifier will be disabled. The amplifier will return to normal operation once the supply is raised above the 18V threshold. NOTE: If there is an #AMPERR routine and the controller is powered before the amplifier, then the #AMPERR routine will automatically be triggered.
-
Page 209: A2 - Amp-43140 (-D3140)
A2 – AMP-43140 (-D3140) Description The AMP-43140 resides inside the DMC-41x3 enclosure and contains four linear drives for operating small, brush- type servo motors. The AMP-43140 requires a ± 12-30 VDC input. Output power is 20 W per amplifier or 60 W total. -
Page 210: Electrical Specifications
Electrical Specifications The amplifier is a brush type trans-conductance linear amplifier. The amplifier operates in torque mode, and will output a motor current proportional to the command signal input. DC Supply Voltage: ±12-30 VDC (bipolar) In order to run the AMP-43140 in the range of ±12-20 VDC, the ISCNTL –... -
Page 211: Operation
Operation ELO Input If the ELO input on the controller is triggered, then the amplifier will be shut down at a hardware level, the motors will be essentially in a Motor Off (MO) state. TA3 will return a 3 and the #AMPERR routine will run when the ELO input is triggered. -
Page 212: A3 - Amp-43240 (-D3240)
A3 – AMP-43240 (-D3240) Description The AMP-43240 resides inside the DMC-41x3 enclosure and contains four transconductance, PWM amplifiers for driving brushless or brush-type servo motors. Each amplifier drives motors operating at up to 10 Amps continuous, 20 Amps peak, 20–80 VDC. The gain settings of the amplifier are user-programmable at 0.5 Amp/Volt, 1.0 Amp/Volt and 2.0 Amp/Volt. -
Page 213: Electrical Specifications
Electrical Specifications The amplifier is a brush/brushless trans-conductance PWM amplifier. The amplifier operates in torque mode, and will output a motor current proportional to the command signal input. Supply Voltage: 20-80 VDC Continuous Current: 10 Amps Peak Current 20 Amps Nominal Amplifier Gain 1.0 Amps/Volt Switching Frequency... -
Page 214: Operation
Operation Brushless Motor Setup NOTE: If you purchased a Galil motor with the amplifier, it is ready for use. No additional setup is necessary. To begin the setup of the brushless motor and amplifier, it is first necessary to have communications with the motion controller. - Page 215 (AW). To select normal current loop gain for the X axis and high current loop gain for the Y axis, issue AU 0,1. The command AW is used to calculate the bandwidth of the amplifier using the basic amplifier parameters. To calculate the bandwidth for the X axis, issue AWX=v,l,n where v represents the DC voltage input to the card, l represents the inductance of the motor in millihenries, and n represents 0 or 1 for the AU setting.
-
Page 216: Error Monitoring And Protection
Error Monitoring and Protection The amplifier is protected against over-voltage, under-voltage, over-temperature, and over-current for brush and brushless operation. The controller will also monitor for illegal Hall states (000 or 111 with 120° phasing). The controller will monitor the error conditions and respond as programmed in the application. The errors are monitored via the TA command. - Page 217 Over-Temperature Protection The amplifier is also equipped with over-temperature protection. If the average heat sink temperature rises above 80°C, then the amplifier will be disabled. The over-temperature condition will trigger the #AMPERR routine if included in the program on the controller. The amplifier will not be re-enabled until the temperature drops below 80°C and then either an SH command is sent to the controller, or the controller is reset (RS command or power cycle).
-
Page 218: A4 - Amp-435X0 (-D3540,-D3520)
A4 – AMP-435x0 (-D3540,-D3520) Description The AMP-43540 resides inside the DMC-41x3 enclosure and contains four sinusoidally commutated, PWM amplifiers for driving brushless servo motors. Each amplifier drives motors operating at up to 8 Amps continuous, 15 Amps peak, 20–80 VDC. The gain settings of the amplifier are user-programmable at 0.4 Amp/Volt, 0.8 Amp/Volt and 1.6 Amp/Volt. -
Page 219: Electrical Specifications
Electrical Specifications The amplifier is a brush/brushless transconductance PWM amplifier. The amplifier operates in torque mode, and will output a motor current proportional to the command signal input. Supply Voltage: 20-80 VDC Continuous Current: 8 Amps Peak Current 15 Amps Nominal Amplifier Gain 0.8 Amps/Volt Switching Frequency... -
Page 220: Operation
Operation Commutation Related Velocity When using sinusoidal commutation and higher speed applications, it is a good idea to calculate the speed at which commutation can start to affect performance of the motor. In general, it is recommended that there be at least 8 servo samples for each magnetic cycle. - Page 221 Issue the BZ command to lock the motor into a phase. Note that this will cause up to ½ a magnetic cycle of motion. Be sure to use a high enough value with BZ to ensure the motor is locked into phase properly. BX Command: •...
- Page 222 Setting Peak and Continuous Current (TL and TK) To set TL and TK for a particular motor, find the continuous current and peak current ratings for that motor and divide that number by the amplifier gain. For example, a particular motor has a continuous current rating of 2.0 A and peak current rating of 5.0 A.
-
Page 223: Error Monitoring And Protection
Error Monitoring and Protection The amplifier is protected against over-voltage, under-voltage, over-temperature, and over-current for brush and brushless operation. The controller will monitor the error conditions and respond as programmed in the application. The errors are monitored via the TA command. TA n may be used to monitor the errors with n = 0, 2, or 3. -
Page 224: A5 - Amp-43640 (-D3640)
A5 – AMP-43640 (-D3640) Introduction The AMP-43640 contains four linear drives for sinusoidally commutating brushless motors. The AMP-43640 requires a single 15–30VDC input. Output power delivered is typically 20 W per amplifier or 80 W total. The gain of each transconductance linear amplifier is 0.2 A/V. Typically a 24VDC supply will deliver 1A continuous and 2A peak while a 30VDC will be able to provide 1.0 A continuous and 2.0 A peak. -
Page 225: Electrical Specifications
Electrical Specifications The amplifier is a brushless type trans-conductance linear amplifier for sinusoidal commutation. The amplifier outputs a motor current proportional to the command signal input. DC Supply Voltage: 15-30 VDC In order to run the AMP-43640 in the range of 15-20 VDC, the ISCNTL –... - Page 226 Power Unlike a switching amplifier a linear amplifier does not have a straightforward relationship between the power delivered to the motor and the power lost in the amplifier. Therefore, determining the available power to the motor is dependent on the supply voltage, the characteristics of the load motor, and the required velocity and current.
-
Page 227: Operation
Operation Commutation Related Velocity When using sinusoidal commutation and higher speed applications, it is a good idea to calculate the speed at which commutation can start to affect performance of the motor. In general, it is recommended that there be at least 8 servo samples for each magnetic cycle. - Page 228 Issue the BZ command to lock the motor into a phase. Note that this will cause up to ½ a magnetic cycle of motion. Be sure to use a high enough value with BZ to ensure the motor is locked into phase properly. BX Command: •...
- Page 229 ELO Input If the ELO input on the controller is triggered, the amplifier will be shut down at a hardware level, the motors will be essentially in a Motor Off (MO) state. TA3 will change state and the #AMPERR routine will run when the ELO input is triggered.
-
Page 230: A6 - Sdm-44040 (-D4040,-D4020)
A6 – SDM-44040 (-D4040,-D4020) Description The SDM-44040 resides inside the DMC-41x3 enclosure and contains four drives for operating two-phase bipolar step motors. The SDM-44040 requires a single 12-30 VDC input. The unit is user-configurable for 1.4 A, 1.0 A, 0.75 A, or 0.5 A per phase and for full-step, half-step, 1/4 step or 1/16 step. -
Page 231: Electrical Specifications
Electrical Specifications DC Supply Voltage: 12-30 VDC In order to run the SDM-44040 in the range of 12-20 VDC, the ISCNTL – Isolate Controller Power option must be ordered Max Current (per axis) 1.4 Amps/Phase Amps (Selectable with AG command) Maximum Step Frequency: 6 MHz Motor Type:... -
Page 232: Operation
Operation The SDM-44040 should be setup for Active High step pulses (MT-2 or MT-2.5). The AG command sets the current on each axis, the LC command configures each axis’s behavior when holding position and the YA command sets the step driver resolution. These commands are detailed below, see also the command reference for more information: Current Level Setup (AG Command) AG configures how much current the SDM-44040 delivers to each motor. - Page 233 When running in full step mode – the current to the motor is 70% of maximum. All micro-step settings are able to deliver full current. Protection Circuitry The SDM-44040 has short circuit protection as well as over-temperature and under-voltage detection. The short circuit protection will protect against phase to phase shorts, a shorted load and a short to ground or chassis.
-
Page 234: A7 - Sdm-44140 (-D4140)
A7 – SDM-44140 (-D4140) Description The SDM-44140 resides inside the DMC-41x3 enclosure and contains four microstepping drives for operating two- phase bipolar stepper motors. The drives produce 64 microsteps per full step or 256 steps per full cycle which results in 12,800 steps/rev for a standard 200-step motor. The maximum step rate generated by the controller is 6,000,000 microsteps/second. -
Page 235: Electrical Specifications
Electrical Specifications DC Supply Voltage: 20-60 VDC Max Current (per axis) 3.0 Amps (Selectable with AG command) Max Step Frequency: 6 MHz Motor Type: Bipolar 2 Phase Switching Frequency: 60 kHz Minimum Load Inductance: 0.5 mH Mating Connectors On Board Connector Terminal Pins Molex Mini-Fit, Jr.™... -
Page 236: Operation
Operation The SDM-44140 should be setup for Active High step pulses (MT-2 or MT-2.5). The AG command sets the current on each axis and the LC command configures each axis’s behavior when holding position. These commands are detailed below: Current Level Setup (AG Command) AG configures how much current the SDM-44140 delivers to each motor. - Page 237 Under-Voltage Protection If the supply to the amplifier drops below 12 VDC, the amplifier will be disabled. The amplifier will return to normal operation once the supply is raised above the 12V threshold; TA 0 will tell the user whether the supply is in the acceptable range.
Need help?
Do you have a question about the DMC-41 3 Series and is the answer not in the manual?
Questions and answers