Table of Contents
Advertisement
Quick Links
Advertisement
Table of Contents

Related Manuals for Gaggenau RC289300


Summary of Contents for Gaggenau RC289300
- Page 1 Gaggenau User manual RC 289 Refrigerator...
-
Page 2: Table Of Contents
Table of contents 1 Safety .......... 4 8 Additional functions .... 16 1.1 General information.... 4 8.1 Fast cooling ...... 16 1.2 Intended use....... 4 9 Alarm........... 16 1.3 Restriction on user group... 4 9.1 Door alarm ....... 16 1.4 Safe transport ...... 4 1.5 Safe installation ...... 5 10 Home Connect ...... - Page 3 15 Troubleshooting....... 24 16 Storage and disposal.... 26 16.1 Taking the appliance out of operation ........ 26 16.2 Disposing of old appliance .. 26 17 Customer Service..... 27 17.1 Product number (E-Nr.) and production number (FD).. 27 18 Technical data ...... 27 19 Declaration of Conformity ..
-
Page 4: Safety
en Safety 1 Safety Observe the following safety instructions. 1.1 General information Read this instruction manual carefully. ¡ Keep the instruction manual and the product information safe ¡ for future reference or for the next owner. Do not connect the appliance if it has been damaged in transit. ¡... -
Page 5: Safe Installation
Safety en 1.5 Safe installation WARNING ‒ Risk of electric shock! Improper installation is dangerous. Connect and operate the appliance only in accordance with the ▶ specifications on the rating plate. Connect the appliance to a power supply with alternating cur- ▶ rent only via a properly installed socket with earthing. The protective conductor system of the domestic electrical in- ▶... -
Page 6: Safe Use
en Safety 1.6 Safe use WARNING ‒ Risk of electric shock! An ingress of moisture can cause an electric shock. Only use the appliance in enclosed spaces. ▶ Never expose the appliance to intense heat or humidity. ▶ Do not use steam- or high-pressure cleaners to clean the appli- ▶... -
Page 7: Damaged Appliance
Safety en WARNING ‒ Risk of injury! Containers that contain carbonated drinks may burst. Do not store containers that contain carbonated drinks in the ▶ cool-fresh compartment. Injury to the eyes caused by escaping flammable refrigerant and hazardous gases. Do not damage the tubes of the refrigerant circuit or the insula- ▶... - Page 8 en Safety Incorrect repairs are dangerous. Repairs to the appliance should only be carried out by trained ▶ specialist staff. Only use genuine spare parts when repairing the appliance. ▶ If the power cord of this appliance is damaged, it must be re- ▶...
-
Page 9: Preventing Material Damage
Preventing material damage en – Maintain a 30 mm clearance to Preventing material damage 2 Preventing material electric or gas cookers. – Maintain a 300 mm clearance to damage oil or solid-fuel cookers. Use a niche depth of 560 mm. ¡ Preventing material damage ATTENTION! Never cover or block the exterior ¡... -
Page 10: Criteria For The Installation Location
en Installation and connection Equipment and accessories ¡ Climate Permitted room tem- Installation material ¡ class perature Installation instructions ¡ 10 °C to 32 °C User manual ¡ 16 °C to 32 °C Customer service directory ¡ 16 °C to 38 °C Warranty enclosure ¡ Energy label ¡... -
Page 11: Connecting The Appliance To The Electricity Supply
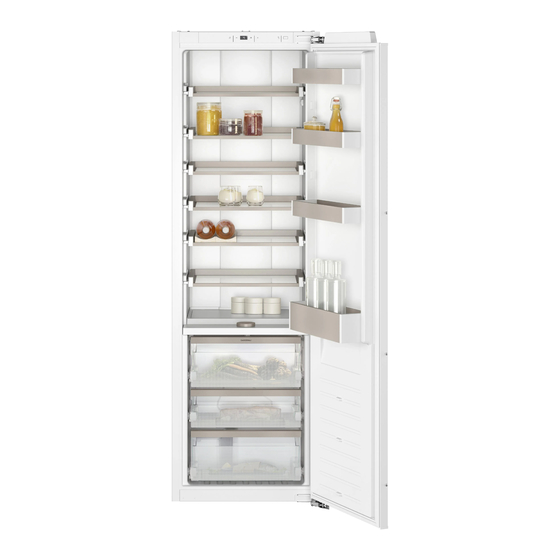
Installation and connection en Remove the protective foil and transit bolts, e.g. remove the ad- hesive strips and carton. Clean the appliance for the first time. → Page 21 4.5 Connecting the appliance to the electricity supply Insert the mains plug of the appli- ance's power cable in a socket nearby. - Page 12 en Familiarising yourself with your appliance Familiarising yourself with your appliance 5 Familiarising yourself with your appliance Familiarising yourself with your appliance 5.1 Appliance You can find an overview of the parts of your appliance here. Refrigerator compartment Control panel → Page 13 → Page 19 Extendable shelf → Page 14 Cool-fresh compartment → Page 20 Partition with humidity control-...
-
Page 13: Familiarising Yourself With
Familiarising yourself with your appliance en Fruit and vegetable container Door storage compartment → Page 14 for large bottles → Page 14 Cool-fresh container Note: Deviations between your appli- → Page 14 ance and the diagrams may differ with regard to their features and size. Rating plate → Page 27 5.2 Control panel You can use the control panel to configure all functions of your appliance and to obtain information about the operating status. -
Page 14: Features
en Features Condensation may form in the fruit Features 6 Features and vegetable container depending on the food and quantity stored. The features of your appliance de- Features Remove the condensation with a dry pend on the model. cloth and adjust the air humidity us- ing the humidity controller. -
Page 15: Basic Operation
Basic operation en 7.3 Switching off the appli- ance Press ▶ 7.4 Setting the temperature Setting the refrigerator compartment temperature Press repeatedly until the ▶ temperature display shows the re- quired temperature. Tip: You can use up to five bottle The recommended temperature in trays on an extendable shelf. the refrigerator compartment is 4 °C. -
Page 16: Additional Functions
en Additional functions Additional functions Home Connect 8 Additional functions 10 Home Connect This appliance is network-capable. Additional functions Home Connect 8.1 Fast cooling Connect your appliance to a mobile device to control its functions via the With Fast cooling, the refrigerator Home Connect app. compartment cools so that it as cold The Home Connect services are not as possible. -
Page 17: Home Connect
Home Connect en Operating the appliance on the ap- ¡ 10.2 Connecting the appli- pliance itself always takes priority. ance to a WLAN home During this time it is not possible network (Wi-Fi) without to operate the appliance using the Home Connect app. WPS function If your router does not have a WPS 10.1 Connecting the appli-... -
Page 18: Connecting The Appliance To The Home Connect App
en Home Connect Repeat the process. 10.4 Installing updates for the ‒ Home Connect software 10.3 Connecting the appli- The appliance searches for updates ance to the Home Con- to the Home Connect software at reg- nect app ular intervals. If you have automatically connected Note: If updates are available, the your appliance to your WLAN home temperature display shows network (Wi-Fi), you can connect... -
Page 19: Data Protection
Refrigerator compartment en Press Refrigerator compartment 11 Refrigerator compart- The temperature display shows an ment animation for 15 seconds. The temperature display then You can keep dairy products, eggs, Refrigerator compartment shows prepared meals, pastries, open pre- The Home Connect settings have serves and hard cheese in the refri- been reset. -
Page 20: Cool-Fresh Compartment
en Cool-fresh compartment Warmest zone Food Storage time The warmest zone is at the very top of the door. Soft cheese, yoghurt, up to quark, buttermilk, cauli- 30 days Tip: Store food that does not spoil flower easily in the warmest zone, e.g. hard cheese and butter. -
Page 21: Cleaning The Appliance
Cleaning and servicing en Place ice packs (if available) onto Insert the fittings and install the ap- the food. pliance components. If there is a layer of hoarfrost, allow Electrically connect the appliance. this to defrost. Switch on the appliance. Remove all fittings from the appli- → Page 15 ance. -
Page 22: Removing Appliance Components
en Cleaning and servicing Removing the partition Removing the fruit and vegetable Remove the glass plate from the container partition. Tilt the fruit and vegetable con- ▶ tainer forwards and remove it . Remove the fruit and vegetable container. Removing the cool-fresh Press the lever on the underside on both sides and pull the parti-... - Page 23 Cleaning and servicing en Insert the partition. Push in the telescopic rail. Push the telescopic rail backwards above the rear pin and disen- gage . Place the glass plate on the parti- tion. Telescopic rails Installing telescopic rails You can remove the telescopic rails Place the extended telescopic rail in order to clean them thoroughly.
-
Page 24: Troubleshooting
en Troubleshooting Troubleshooting 15 Troubleshooting You can rectify minor faults on your appliance yourself. Read the troubleshoot- Troubleshooting ing information before contacting after-sales service. This will avoid unneces- sary costs. WARNING Risk of electric shock! Incorrect repairs are dangerous. Repairs to the appliance should only be carried out by trained specialist ▶... - Page 25 Troubleshooting en Fault Cause and troubleshooting The temperature dif- Different causes are possible. fers greatly from the Switch off the appliance. → Page 15 setting. Switch the appliance back on after five minutes. → Page 15 If the temperature is too warm, check the temper- ‒ ature again after a couple of hours.
-
Page 26: Storage And Disposal
en Storage and disposal To guarantee the ventilation inside 15.1 Conducting an appliance the appliance, leave the appliance self-test open. Switch off the appliance. 16.2 Disposing of old appli- → Page 15 Switch the appliance back on after ance approx. five minutes. → Page 15 Valuable raw materials can be re- Within the first 10 seconds after used by recycling. -
Page 27: Customer Service
Customer Service en If you contact Customer Service, you tronic appliances (waste will require the product number (E- electrical and electronic Nr.) and the production number (FD) equipment - WEEE). of your appliance. The guideline determ- The contact details for Customer Ser- ines the framework for vice can be found in the enclosed the return and recycling... -
Page 28: Declaration Of Conformity
Directive 2014/53/EU. formity A detailed RED Declaration of Con- formity can be found online at Gaggenau Hausgeräte GmbH hereby Declaration of Conformity www.gaggenau.com among the addi- declares that the appliance with tional documents on the product Home Connect functionality meets page for your appliance. - Page 32 Gaggenau Hausgeräte GmbH Valid within Great Britain: Carl-Wery-Straße 34 Imported to Great Britain by 81739 München BSH Home Appliances Ltd. GERMANY Grand Union House www.gaggenau.com Old Wolverton Road Wolverton, Milton Keynes MK12 5PT United Kingdom...
Need help?
Do you have a question about the RC289300 and is the answer not in the manual?
Questions and answers