Table of Contents
Advertisement
Quick Links
Advertisement
Table of Contents

Related Manuals for MBM PHRIKE


Summary of Contents for MBM PHRIKE
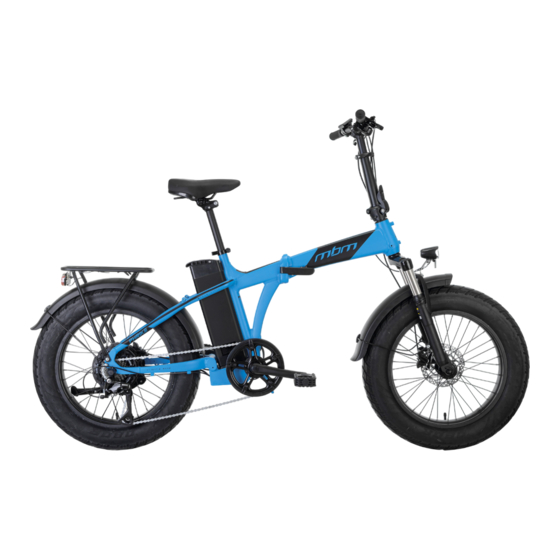
- Page 1 P H RI K E U S E R M A N U A L...
-
Page 2: Table Of Contents
I N D E X 7. CONDITIONS OF USE AND INTENDED ENVIRONMENTS 1. PREFACE 1.1 Assistance 7.1 Expected use 1.2 Graphic form of safety warning 7.2 Environment of use 7.3 Improper use and contraindications 2. SAFETY WARNING 2.1 General safety rules 8. -
Page 3: Preface
1. PREFACE This manual constitutes an integral and essential part of the PHRIKE model bicycle. Before commissioning, it is essential that users read, understand and scrupulously follow the following provisions. The manufacturer is not liable for damage caused to people and/or things or to the pedal-assisted bicycle if it is used incorrectly with respect to the instructions indicated. -
Page 4: Safety Warning
2. SAFETY WARNINGS USE OF THE PEDAL-ASSISTED BICYCLE Every user must have first read the instruction manual, in particular the chapter on safety instructions. ATTENTION RISKS CONNECTED WITH THE USE OF THE PEDAL-ASSISTED BICYCLE • Despite the application of safety devices, for safe use of the pedal-assisted bicycle you must take note of all the prescriptions relating to the prevention of accidents reported in this manual. -
Page 5: Warnings For Users
2.3 Warnings for users 1. It can only be used by experienced adults and children; 2. Do not take alcohol or drugs before riding the pedal-assisted bicycle; 3. These pedal-assisted bicycle models are designed and built to be used outdoors, on roads and in private and public environments; 4. -
Page 6: Unpacking And Setting-Up
3. UNPACKING AND SETTING UP The pedal-assisted bicycle is delivered fully assembled and functional. Before each use, the driver must ensure the safety status of the pedal-assisted bicycle. It is strictly forbidden to use the bicycle without having correctly fixed all the parts and used the adjustments to assume a comfortable and safe riding position. -
Page 7: Handlaber Adjustment
3.2 Handlebar adjustment For a comfortable posture on the bicycle, which does not cause neck or back pain, we recommend adjusting the handlebar post height. Adjust the height of the handlebar column by activating the quick release mechanism (Ref. C – Figure 2). Check that the mechanism is tightened before using the vehicle. -
Page 8: Brake Adjustment
3.3 Brake adjustment The brake levers (Ref. F – Fig. 4) are located on the handlebar near the grips (Ref. G – Fig. 4). These systems allow the braking system to be activated. The braking action is proportional to the force applied on the levers. The right brake lever activates the rear brake while the left brake lever activates the front brake. -
Page 9: Pedals Assembly
3.4 Pedals assembly Right pedal: it is identified by the letter “R” marked on its pin. To mount the pedal, screw by turning the pin clockwise (Fig. 5). Left pedal: it is identified by the letter “L” marked on its pin. To mount the pedal, screw by turning the pin counterclockwise. ASSEMBLy For correct tightening of the pedals it is necessary to use a 15 wrench. -
Page 10: Battery Charging
3.5 Battery charging Before using the bicycle for the first time, the battery must be charged for at least 8 hours, using the battery charger supplied. The pedal-assisted bicycle is equipped with an electric motor powered by a lithium ion battery. The charging operation can be carried out in a well-ventilated box with the battery installed on the bicycle. -
Page 11: Description Of The Bicylce
4. DESCRIPTION OF THE BICYCLE The pedal-assisted bicycle is designed and built to be used outdoors, on roads and in private or public environments. In particular, the components and the type of pedal-assisted bicycle allow you to tackle routes with asphalted surfaces or with simi- lar characteristics without particular roughness. -
Page 12: Data Sheet
COMMAND BRAKES SHIMANO MT 200 HYDRAULIC DISKS SHIMANO RT 26 160 F / 160 R TIRES 20X4.0 SEDDLE MBM COMFORT PEDALS NON-SLIP POLYMER MATERIAL LIGHTS SPANNINGA 70 LUX MOTOR ETROTEK 48V 250W, 50NM BATTERY ANT POWER 48V, 17.5 AH, 840 WH... -
Page 13: Speed Change
4.2 Speed change The pedal-assisted bicycle has a 7-speed gearbox integrated into the rear wheel hub. The gears can be selected by rotating the lever positioned on the right handlebar grip. The indicator (Ref.L - Fig. 7) allows you to view the selected ratio. FIG. -
Page 14: Display
5. DISPLAY 5.1 Characteristics of the Etrotek System To use the ETROTEK propulsion system the following prerequisites must be met: • The battery must be sufficiently charged. • The speed sensor must be correctly connected and the magnet positioned correctly. Once the speed of 25 km/h is reached, the propulsion system automatically deactivates. -
Page 15: Description Of Commands
5.3 Description of Commands To navigate within the software, there are 3 buttons that can be used with a short press or with a press longer than 2 seconds. BUTTON SHORT PRESSION (< 1 sec) LONG PRESSION (> 2 sec) Allows you to scroll through the Home screen from Allows you to turn the display on or off. - Page 16 SCREEN 1 – DISTANCE In addition to the information listed above, on this screen you can view the distance traveled (in kilometers) since the last reset. SCREEN 2 – TOTAL DISTANCE On this screen you can view the total distance (in kilometers) traveled by the bicycle. This value cannot be reset SCREEN 3 –...
-
Page 17: Assistance Levels
SCREEN 6 – MAXIMUM SPEED On the last screen it is possible to view the value of the maximum speed reached during the journey expressed in kilometers per hour (km/h). 5.5 ASSISTANCE LEVEL Da From any screen in the Home section it is possible to change the assistance level by pressing the + button to increase it and - to decrease it. -
Page 18: Setting
5.7 Settings From any Home screen you can access the Settings menu by pressing the + and - buttons simultaneously for 2 seconds. RESET TRIP The Reset Trip (TC) item allows you to reset the data relating to the distance traveled (but not to reset the data of the total distance traveled by the e-bike). -
Page 19: Error Code
5.8 Error code When the system detects an error, the error code and its icon When the system detects an error, the error code and its icon: ERROR PROBLEM The system has detected an electrical voltage anomaly. The system has detected an anomaly in the speed sensor. Torque signal not detected. -
Page 20: Battery
6. BATTERY The bicycle provides pedal assistance via a battery-powered electric motor. The battery comes into operation after turning the key to ON mode (Fig. 10), it is also possible to view the battery charge status via the display located on the top of the battery (Fig. 10.1) Disply with charge level indocations Handle Charging socket... -
Page 21: Battery Removal/ Installation
6.1 Battery removal/ installation To remove the battery make sure the assistance system is turned off and proceed as follows: 1. Rotate the saddle by pressing the lever located at its base. 2. Rotate the key counterclockwise to “PUSH” then press and rotate it again to “UNLOCK” to unlock the battery 3. - Page 22 To install the battery proceed as follows (this procedure must be performed without the release key, remove it if inserted): 1. Align the battery by first matching the electrical connector and insert it all the way. 2. Check that the lock returns to OFF (to ON if you intend to use the bicycle immediately) 3.
-
Page 23: Battery Charging
6.2 Battery charging Recharging the battery can be carried out by connecting the appropriate battery charger to the connector on the battery itself (Fig. 10). Connect the battery charger to a power socket (230 V / 50 Hz) and charge the battery for the necessary time. FIG. -
Page 24: Conditions Of Use And Intended Environments
7. CONDITIONS OF USE AND INTENDED ENVIRONMENTS 7.1 Expected use The pedal-assisted bicycle is designed and built to be used outdoors, on roads and in private or public environments. In particular, the components and the type of pedal-assisted bicycle allow you to tackle routes with asphalted surfaces, or with similar characteristics, without particular roughness. -
Page 25: Improper Use And Contraindications
7.3 Improper uses and contraindications The actions described below, which obviously cannot cover the entire range of potential possibilities of “misuse” of the pedal- assisted bicycle, are to be considered absolutely prohibited. PROHIBITED OPERATIONS • Performing prohibited operations invalidates the warranty; •... -
Page 26: Transport And Storage
8.2 Transport and storage To ensure transport safety it is necessary to prevent the bicycle from moving. This is achieved by binding it with anchoring bands or cables in good condition. In this regard, the attachment devices must be installed so as not to damage the frame and other parts of the bicycle. -
Page 27: Use Of The Bicycle
9. USE OF THE BICYCLE The pedal-assisted bicycle was designed and built for use in open places, with asphalt or similar surfaces, for amateur use. • It can only be used by expert adults and children; • The use of a pedal-assisted bicycle is not recommended for pregnant women; •... -
Page 28: Parcking Of The Bicycle
9.1 Parcking of the bicycle The bicycle is equipped with a stand for lateral support, therefore, before leaving the bicycle, check that the stand is fully extended and resting on stable ground. The bicycle must be parked in the designated parking areas and, in any case, without obstructing the passageways, emergency exits, electrical panels and fire stations. -
Page 29: Checking Brake Operation
10.1.3 Check brake operation The brakes must be adjusted to ensure effective braking and, at the same time, the control levers must have adequate travel to be able to modulate braking: in other words the brakes must be neither too slow nor too tight. Brake adjustment must only be carried out by authorized personnel. -
Page 30: Maintenance And Monthly Checks
10.3 Monthly Maintenance and Inspections 10.3.1 Checking electrical circuits and components Check the condition and fastening of the battery cables: the sheaths of the electrical cables must be in good condition and the terminals must be well tightened, not corroded and, if necessary, covered with specific protective and insulating grease. Check that all bulbs and warning lights come on correctly. -
Page 31: Warehouse Storage
12. WAREHOUSE STORAGE If the pedal-assisted bicycle is to be stored and conserved for long periods of inactivity, the following operations must be carried out: • Repair it in a dry and ventilated place; • Carry out a general cleaning of the pedal-assisted bicycle; •... -
Page 32: Warrenty Rules
14. WARRANTY RULES MBM S.r.l. Unipersonale guarantees that its bicycles are free from any manufacturing or workmanship defects. This warranty covers the repair or replacement of any part recognized as defective, subject to the following conditions. TERMS AND CONDITIONS • Warranty period: the pedal-assisted bicycle is guaranteed for 24 months on the mechanical and electrical parts, except for the batteries and all components subject to wear. -
Page 33: Compliance
The removal or modification of parts, or the use of non-original equipment as spare parts, may make the bike no longer compliant with applicable standards and laws. To guarantee safety, quality and reliability, use only original parts or authorized MBM... - Page 34 M.B.M. S.r.l. Unipersonale Via Emilia Levante, 1671/73/75 | 47521 Cesena (FC) Tel.: + 39 0547 -300364 Fax: +39 0547-304326 Email: info@mbmbike.it...
Need help?
Do you have a question about the PHRIKE and is the answer not in the manual?
Questions and answers