
Related Manuals for MBM PULSE 28 MAN


Summary of Contents for MBM PULSE 28 MAN
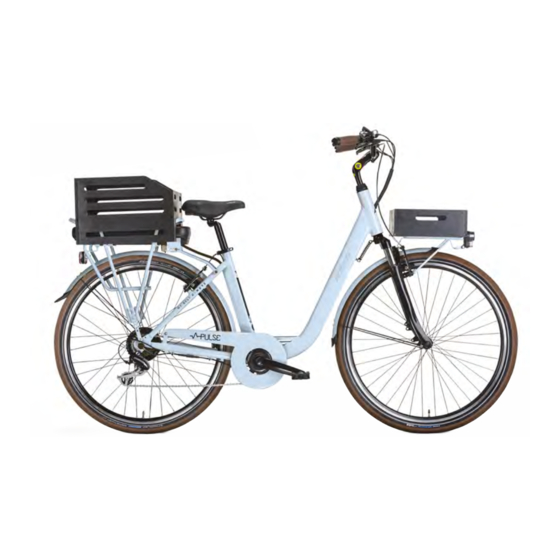
- Page 1 P U L S E P U L S E 2 8 ” M A N U S E R M A N U A L P U L S E 2 6 ” / 2 8 ” U N I S E X...
-
Page 2: Table Of Contents
I N D E X 1. FOREWORD 5. LIFTING AND TRANSPORT 1.1 General 5.1 Lifting 1.2 Assistance 5.2 Transportation 1.3 Graphic form of safety warnings 6. COMMISSIONING 2. SAFETY WARNINGS 6.1 Charging the battery 2.1 General safety rules 6.2 Preliminary functional checks 2.2 Liability 6.2.1 Control devices 2.3 Warnings for users... -
Page 3: Foreword
1. FOREWORD General This manual is an integral and essential part of the E - PULSE UNISEX 26 “/ 28” and E-PULSE MAN 28 “models with pedal assistance. Before putting into operation it is essential that users read, understand and strictly follow the following pro- visions. -
Page 4: Safety Warnings
2. SAFETY WARNINGS USE OF THE ASSISTED BICYCLE Each user must first have read the instruction manual, in particular the chapter on safety information. ATTENTION RISKS RELATED TO THE USE OF THE ASSISTED BICYCLE • Despite the application of safety devices, for safe use of the pedal assisted bicycle, you must take note of all the provisions relating to the prevention of accidents contained in this manual. -
Page 5: Warnings For Users
UNAUTHORIZED MODIFICATIONS If you hear unusual noises, or feel something strange, stop the pedal-assisted bicycle immediately. Then carry out a check and, if necessary, contact the authorized dealer. ATTENTION For any data not included or not deductible from this manual, it is recommended to consult the authorized reseller directly. 2.3 Users warnings 1. -
Page 6: Other Provisions
2.5 OTHERS DISPOSITIONS The first thing to do when starting use is to check the presence and integrity of the protections and the operation of the safety devices. If you find any defects, do not use the pedal assisted bicycle! It is therefore strictly forbidden to modify or remove the guards, controls, labels and information plates. -
Page 7: Handlebar Adjustment
2.6.2 Handlebar adjustment For a comfortable posture on the bicycle, which causes neither neck nor back pain, we recommend the handlebar stem height and handlebar rotation adjustments. To adjust the height of the handlebar column, remove the protective rubber cap and loosen the screw, without removing it completely, using the appropriate Allen key. -
Page 8: Pedal Assembly
2.6.3 Pedal mounting Right Pedal: it is identified by the letter R marked on its pin. To assemble the pedal, screw it by turning the pin clockwise. (Figure 4) Left Pedal: it is identified by the letter L marked on its pin. To assemble the pedal, screw it by turning the pin counter- clockwise. -
Page 9: Description Of The Bicycle
3. DESCRIPTION OF THE BICYCLE 3.1 General description The pedal assisted bicycle is designed and built to be used outdoors, on roads and private or public environments. In par- ticular, the components and the type of pedal assisted bicycle allow you to tackle routes with asphalted surfaces or with similar characteristics without particular roughness. -
Page 10: Data Sheet
3.2 Technical sheet 1. HANDLEBARS AND CONTROLS 2. MOTOR 3. SADDLE 4. BATTERY 5. PEDALS 6. FORK 7. FRONT LIGHT CODE E826 / E828L / E828M FRAME ALLUMINIUM FORK SUSPENSION WITH ADJUSTEMENT CRANK SET 42 TEETH REAR DERAILLEUR ACERA SHIFTERS 7 SPEEDS BRAKES V-BRAKE... -
Page 11: Brake Levers
3.3 Brake The brake levers (Ref. F - Figure 5) are located on the handlebar of the pedal assisted bicycle, near the knobs (Ref. G-Fig- ure 5). These systems allow the braking system to be activated by controlling the movement of the pads until they come into contact with the wheel rim. -
Page 12: Assistance System Management
3.5 System assistance management 3.5.1 Commands To manage the assistance system there is a controller on the left side of the handlebar. This device allows you to vary the level of assistance of the system, to view information regarding the route and the status of the battery. 3.5.2 Assistance levels To know the exact intensity of assistance, based on the selected value, see below. -
Page 13: Walk Assistance Mode
3.7 Pedal assisted methods The pedal assisted bicycle is equipped with the walking assistance function. This function allows you to move the bicycle more easily during manual movement in case you face small climbs. On flat routes it is useful for starting pedaling, up to a maximum speed of 6 km / h. To activate the aforementioned mode, turn on the assistance system using the appropriate “M”... -
Page 14: State Of Charge
To remove the battery, proceed as follows: 1. Insert the battery release key in the slot in the left front part of the luggage rack (Ref. 1 in Figure 8) and turn it counter- clockwise until the release click occurs; 2. -
Page 15: Battery Charging
3.8.3 Battery charging Recharging the battery of the pedal assisted bicycle can be carried out with the battery assembled on the vehicle or re- moved from it. In particular, proceed as follows: 1- Turn off the assistance system of the pedal-assisted bicycle using the appropriate button “M” (Ref. L - Figure 6); 2- Re- move the battery in case you want to charge the battery separately;... -
Page 16: Front And Rear Light
3.9 Headlight and rear To ensure visibility both during the day and at night, two headlights are installed, one front (Figure 11) and one rear (Figure 12). These devices are activated by means of an on / off button (Ref.Q - Figures 11-12). To replace the batteries, remove the screw (Ref. -
Page 17: Suspensions
3.10 Front suspensions The pedal assisted bicycle is equipped with a front suspension system that allows to dampen the stresses caused by the roughness of the path while using the vehicle. Depending on the path and the load on the vehicle, it is possible to vary its stiffness by rotating the preload lever (Ref. S - Figure 15). -
Page 18: Terms Of Use And Environment Foreseen
4. CONDITIONS OF USE AND INTENDED ENVIRONMENTS 4.1 Intended use The pedal assisted bicycle is designed and built to be used outdoors, on roads and private or public environments. In par- ticular, the components and the type of pedal assisted bicycle allow you to tackle routes with asphalted surfaces or with similar characteristics without particular roughness. -
Page 19: Environment Of Use
4.3 Improper uses and contraindications The actions described below, which obviously cannot cover the entire range of potential possibilities of “misuse” of the pedal assisted bicycle, are to be considered absolutely prohibited. PROHIBITED OPERATIONS • The performance of prohibited operations invalidates the warranty. •... -
Page 20: Lifting And Transport
5. LIFTING AND TRANSPORT 5.1 Lifting The weight of the E - PULSE model assisted pedal bicycle is such that it can be lifted and transported by one person, also due to its overall dimensions. The optimal solution for carrying out the movement is to grab a handlebar grip and the rear part of the saddle. CRUSHING AND IMPACT •... -
Page 21: Commissioning
6. COMMISSIONING 6.1 Battery charging Before using the bicycle for the first time, the battery must be charged for at least 24 hours, using the special battery charger, supplied. The pedal assisted bicycle, model E - PULSE, is equipped with an electric motor powered by a 37-inch lithium-ion battery. V. -
Page 22: Preliminary Functional Checks
6.2 Preliminary verifications Before each use, the driver must check the safety status of the pedal assisted bicycle. Therefore, perform the following inspections before riding the pedal-assisted bicycle. 6.2.1 Control devices Check the efficiency and state of charge of the battery. Use in a very cold environment quickly degrades the efficiency of the battery. -
Page 23: Frame, Handlebar And Seat Position
6.2.4 Frame, handlebar and saddle position Check that the frame, saddle and handlebars are properly secured and positioned in the most comfortable configuration for the rider for complete control of the bike. If this is not the case, before setting off, act on the adjustment systems for the position and the saddle and handlebars. -
Page 24: Suspension Adjustment
6.2.5 Brakes regulation Adjust the brake lever to ensure a firm grip on the handlebar even when braking. To apply maximum braking power to the lever, the following adjustments can be made: - Rotate the brake lever using the tightening screw (Ref. U - Figure 16) until reaching a comfortable hand position. - Vary the stroke of the brake lever by acting on the adjuster (Ref. -
Page 25: Lights Operation
REGULATIONS It is strictly forbidden to adjust the bicycle devices unless you are an expert and trained person to do so. Incorrect adjustment can cause serious injuries. Therefore, if you are unable to adjust these functions, contact specialized personnel. DANGER The manufacturer is not liable for accidents resulting from incorrect adjustment of the pedal assisted bicycle devices. -
Page 26: Use Of The Bicycle
7. USE OF BICYCLE The pedal assisted bicycle was designed and built for use in open places, with asphalt surfaces or the like, for amateur use. • It is forbidden to load a passenger other than the driver. • Can only be used by experienced adults and children. •... -
Page 27: Braking
7.1 Use of the bicycle Before using the pedal assisted bicycle in places open to traffic, it is advisable to familiarize yourself with the behavior of the vehicle. The first uses must be made in private environments away from traffic, other cyclists or obstacles of any kind. The driver must adapt the travel speed of the pedal assisted bicycle to the conditions of the route and the presence of other vehicles or pedestrians. -
Page 28: Maintenance
8. MAINTENANCE 8.1 General DANGER OF ACCIDENTS During all maintenance work, follow the appropriate safety measures. In this regard, refer to the information on p. 10. All maintenance operations must be carried out with the battery disconnected from the pedal assisted bicycle and from the bat- tery charger and the bicycle resting in a stable manner, making use of special support elements. -
Page 29: Maintenance And Weekly Checks
8.3 Monthly maintenance and checks 8.3.1 Washing and cleaning Cleaning the pedal assisted bicycle is not only a matter of decorum, but also allows you to immediately detect any defect in it. In order not to damage or compromise the functioning of the various components, especially the electrical parts, cleaning must be carried out taking certain precautions. -
Page 30: Maintenance And Monthly Checks
8.4 Monthly maintenance and checks 8.4.1 Checking the circuits and electrical components Check the condition and fastening of the battery cables: the sheaths of the electric cables must be in good condition and the terminals must be well tightened, not corroded and covered with insulating grease. Check that all bulbs and warning lights are switched on correctly. -
Page 31: Technical Assistance And Spare Parts
9. ASSISTANCE AND SPARE PARTS If you need technical assistance, contact your authorized dealer. If non-original parts are fitted, the guarantee becomes invalid! ORIGINAL REPLACEMENTS The manufacturer disclaims any liability for damage of any nature, generated by the use of non-original spare parts. -
Page 32: Disposal Of Components And Materials
11. DISPOSAL OF COMPONENTS AND MATERIALS DISPOSAL OF MATERIALS The disposal of packaging, waste and vacuumed dust, the replaced parts, the pedal assisted bicycle as a whole at the end of its expected life, must be carried out in respect of the environment; avoiding to pollute the soil, water and air, respecting in any case the national and local legislation in force on the subject. -
Page 33: Warranty Rules
12. WARRANTY MBM srl guarantees that its bicycles are free from any manufacturing or invoice defect. This warranty covers the repair or replacement of any part which is found to be defective, subject to the following conditions. TERMS AND CONDITIONS •... -
Page 34: Compliance
• Transportation fee. Except as provided in this warranty and remaining subject to all other warranties, MBM and its employees and agents will not be liable for loss or damage of any kind (including incidental and consequential losses or damage caused by negli- gence or failure) originating from or relating to any MBM bicycle. - Page 35 M.B.M. Srl Via Emilia Levante, 1671/73/75 | 47521 Cesena (FC) Tel.: + 39 0547 -300364 Fax: +39 0547-304326 Email: info@ciclimbm.it...
Need help?
Do you have a question about the PULSE 28 MAN and is the answer not in the manual?
Questions and answers