
Related Manuals for DTF STATION Aries 113


Summary of Contents for DTF STATION Aries 113
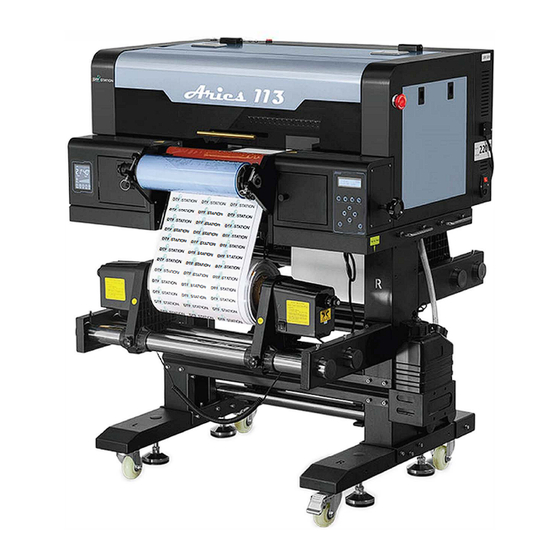
- Page 1 08FEB2024 Aries113 DTF STATION Operation Manual - ." � fl'' � - � °'" """"""' orr � ,,,, cm-""'°"' ""S.W.o,,, � ,,,, .,.,,.,, , .,,., 6� For Maintenance & Other Important Troubleshooting Videos Materials �...
-
Page 2: Table Of Contents
INDEX Contents Install DigRip Unzip Hosonsoft Install the Bracket Unlock the Cartridge and Load Ink Storage and Maintenance... -
Page 3: Install Digrip
INSTALL DIGIRIP Step 1: DO NOT connect your printer yet, download and install the DigiRip Raster image processing (RIP) software first Use the link below. The RIP is what allows the printer to print white in the correct order. Once installed, run DigiRip. https://drive.google.com/drive/folders/1X7ake2gzAA5KzR90-aaKCauKN6QxtMEg?usp=drive_link Step 2: Click on the Icon to open... - Page 4 Step 4: Full install and select the folder Step 5: Wait for downloading...
- Page 5 Step 6: Wait for downloading First time setup Enter the activation code, finish the registration...
- Page 6 Step 7: Select Devices-->Manage Devices to add your printer Search and Select Aries 113 UV DTF Continue -->...
- Page 7 Select TCP/IP and Set the IP address to 127.0.0.1...
- Page 8 The Queue is added successfully...
-
Page 9: Unzip Hosonsoft
UNZIP HOSONSOFT Step 1: Copy the file in the USB disk to your PC, locate “PrintExp_X64” Unzip PrintExp_X64 Open the file and find PrintExp_X64.exe Please refer to the video instruction avaliable in Quick Start Quide to properly install Printexp. Before clicking on the button, you need to install the printer and have the printer turned on. - Page 10 INSTALL THE PRINTER Step 1: Tools needed: hexagonal screws, machine accessories, Phillips screwdriver, blade, tape, hexagonal screwdriver...
- Page 11 Step 2: Install the Base Note that the screws should be fix tightly, and the direction of Left and Right bracket (L & R sign is marked on the brackets)
- Page 12 Step 3: Install the fixing bar Turn around and install the second bar. Make sure to align with the holes in red circle Make sure to tighten the screws...
-
Page 13: Install The Bracket
Step 4: Install the bracket for media holder, as shown below, make sure to align the holes on both sides. Tighten the screws. Do the same for the other side. Install the bar and the take-up system. - Page 14 Note the direction of the take-up system Install the fixing plate on the left, then tighten the screws to fix the bar Step 5: Install the take-up system, Install the bracket for the crossing bar...
- Page 15 Install the bar and the take-up system Tighten the screws to fix the take-up system on both sides...
- Page 16 Step 6: Install the bracket for bar in the front Tighten the screws Install the bar and take-up system in the front...
- Page 17 Tighten the screws to fix the bar Step 7: Install the printer with base. Turn the bracket to the front(note that the side with L&R sign is the front). Lift up the printer. Make sure the align the holes...
- Page 18 Tighten the fixing screws on both sides Step 8: Connect the power cord of the front take-up system Install the waste ink bottle bracket Connect the waste ink tube...
- Page 19 Take out the accessories Trim the waste ink hose to match the height of the waste ink bottle. Turn on the waste ink level alarm. Put the waste ink tubes(the small one) into the waste ink hose Put the side cover back, connect the power cord of the back take- up system.
-
Page 20: Unlock The Cartridge And Load Ink
UNLOCK THE CARTRIDGE AND LOAD INK Step 1: Connect the printer, Before turning on the power, take away the iron plate that fixes the cartridge, cut off the label, then turn it on, and connect the network cable (Note: it must be connected to the Gigabit Ethernet port of the computer, otherwise the software is unable to connect with the printer) - Page 21 Step 2: Shake the ink bottle for at least 1 minute to make sure the ink won’t dilute because of precipitation, then pour the ink according to the colors Install the B film remove the bolts on both sides Take out the bracket of B film, Remove the holder from one side, Put in the B film and fix it with screws...
- Page 22 Put the bracket with B film to the printer Put back the bolts Install the front core Install the A film Install the A film, tighten the knobs when center the A film with B film. Cross the bar as shown below...
- Page 23 Lift up the pinch roller Put the A film through the pinch roller and fix it by turning the knob Install the back core and tighten the screws Use a cutter to cut on the surface on the A film, then detach the protective film and the glued film...
- Page 24 Use a tape to connect the film to the back take-up system, then turn it on Laminate the A film with B film After the initialization, press DOWN on the control panel, use a tape to connect the film and the core Turn on the front take-up system...
- Page 25 Step 3: In setting interface, click on Load lnk, choose “2 Head All”. Noted that the time for loading ink should stay within 30 seconds each time to prevent excessive pressure to damage the heads. After 2-3 times loading, the ink is ready. After loading ink, select “Clean”--”2 Head-All”--”Clean Strong”...
- Page 26 Perform nozzle pattern check When the nozzle patterns are good, we could start to print. Good nozzle patterns example as below:...
-
Page 27: Storage And Maintenance
STORAGE AND MAINTENANCE If you’re not going to use the printer for 5 days or more, you must follow the steps below to prevent damage to the print head, ink pump and ink pipes. STEP 1: Clean and maintenance STEP 2: Keep the main power on STEP 3: The printer will automatically clean once... - Page 28 Electrical Diagram Encoder signal Communication Control input interface Interface Signal Input Y-axis Power & Driver Interface motor Encoding disk power supply 42V power 42V power 24V power supply supply supply output output output power power current current current supply supply should meet should meet should meet...
- Page 29 Limited Warranty on Aries 113 UV DTF Printer DTF Station is pleased to offer a limited warranty on the Aries 113 UV DTF Printer, subject to the terms and conditions outlined herein. Please read this warranty policy carefully to understand your rights and obligations.
- Page 30 Please note: Warranty will be effective from the time of submission of the Training Checklist & Warranty Disclosure Form, or, if not submitted within 60 days of receiving the equipment, from the shipment date of the Aries 113 UV DTF Printer. Limited warranty coverage: Customers who elect not to complete On-Site Training will receive limited warranty coverage, which excludes any conditional warranty coverage, for 90 days from the warranty’s effective date.
- Page 31 60 days of receiving the equipment, the warranty will be effective from the shipment date of the Aries 113 UV DTF Printer. In addition to signing the Training Checklist & Warranty Disclosure Form, please visit the following URL to register your equipment warranty: https://dtfstation.com/pages/please-register-your-printer-before-using.
- Page 32 ● Use of Non-DTF Station Ink, Film, Powder Please note that the use of non-DTF Station ink and film with your Aries 113 UV DTF Printer will void any warranty offered for the printer. To maintain warranty coverage, it is essential to use only DTF Station-approved ink and film.
- Page 33 Aries 113 UV printer. Subject to an additional service fee. ● Replacement Aries 113 UV Printer: If your Aries 113 UV printer fails to turn on or function correctly from the time of opening, DTF Station may elect to provide a replacement Aries 113 UV printer.
- Page 34 IP Claim. 2. Initial Dispute Resolution: Before initiating arbitration proceedings as outlined in Section F, you and DTF Station commit to attempting to resolve any Dispute informally for 60 days. If no resolution is reached during this time, either party may proceed with arbitration as per Section F(6).
- Page 35 7. 30-Day Opt-out Right: You have the option to exclude yourself from the mandatory, binding individual arbitration and class action waiver specified in Section F by sending a written letter to the DTF Station address in Section F(2) within 30 days of agreeing to this Agreement. This letter must contain your name, mailing address, and the request to be excluded from the arbitration and class action waiver in Section F.
- Page 36 DTF Station product, regardless of whether based on breach of warranty or any other legal theory. In no event shall DTF Station or its affiliates' liability exceed the...
- Page 37 original retail purchase price of the product. Some states do not permit the exclusion or limitation of incidental or consequential damages, so these limitations may not apply to you. J. Other Provisions Other Rights You May Have: This limited warranty grants specific legal rights, and you may possess additional rights that vary by jurisdiction.
Need help?
Do you have a question about the Aries 113 and is the answer not in the manual?
Questions and answers